【原理篇】四、自定义starter
文章目录
- 1、案例分析
- 2、业务功能的实现
- 3、中途调试
- 4、开启定时任务打印报表
- 5、引入属性配置类,写活业务参数配置
- 6、拦截器
- 7、开启yml提示功能
做一个记录系统访客独立IP访问次数的功能,并把它自定义成一个starter,实现:在现有项目中引入这个starter后,则这个项目就有了访客IP统计功能,且通过配置可以去改这个功能。

1、案例分析
功能:记录系统访客独立IP访问次数
问题一:数据记录位置,数据为key-value形式,可考虑:
- Map
- Redis
问题二:功能触发位置的:每次web请求,用拦截器,实现步骤:
- ① 步骤一:降低难度,主动调用,仅统计单一操作访问次数(例如查询)
- ② 步骤二:开发拦截器
问题三:给哪些业务参数(用户的可配置项)
- ① 输出频度,默认10秒
- ② 数据特征:累计数据 / 阶段数据,默认累计数据
- ③ 输出格式:详细模式 / 极简模式
下面新建一个新模块来做这个starter,起名ip_spring_boot_starter(注意命名规范,非Spring官方做的,名称在前,starter单词在后),删掉不用的东西,比如单测坐标、打包插件等。
2、业务功能的实现
主要功能的大体实现:
public class IpCountService {//计数集合private Map<String,Integer> ipCountMap = new HashMap<String,Integer>();//当前的HttpRequest对象的注入工作由使用这个starter的工程去自动装配@Autowiredprivate HttpServletRequest request;public void count(){String ipAddress = request.getRemoteAddr();if(ipCountMap.containsKey(ipAddress)){ipCountMap.put(ipAddress,ipCountMap.get(ipAddress) + 1);}else{ipCountMap.put(ipAddress,1);}}
}
写自动配置类:
public class IpAutoConfiguration {@Beanpublic IpCountService ipCountService(){return new IpCountService();}
}
也可以用@Import
@Import(IpCountService.class)
public class IpAutoConfiguration {}
再写spring.factories文件
org.springframework.boot.autoconfigure.EnableAutoConfiguration=\
com.llg.ip.autoconfigure.IpAutoConfiguration
此时开发者引入starter后,服务启动,加载我这个spring.factories文件,进而到自动配置类IpAutoConfiguration,而我自动配置类中@Import或者@Bean了干活儿的业务类。
3、中途调试
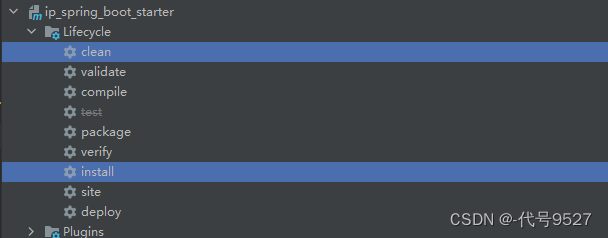
starter的大体结构出来了,clean后install到这个starter到本地Maven仓库。
在另一个模块中引入下这个starter:
<dependency><groupId>cn.llg</groupId><artifactId>ip_spring_boot_starter</artifactId><version>0.01-SNAPSHOT</version>
</dependency>
@RestController
public cLass CodeController{@Resourceprivate IpCountService ipCountService;@GetMapping("/test")public String getStr(){//暂时代码调用,实际开发要么对自己的用AOP,对别人的用拦截器ipCountService.count();return "success";}
4、开启定时任务打印报表
需要的效果是每隔固定时间就打印一个表格,使用定时任务去操作上一步count方法得到的ipCountMap集合就行。先开启定时任务功能:
@EnableScheduling
@Import(IpCountService.class)
public class IpAutoConfiguration {}
在IpCountService类中继续写定时任务:
@Slf4j
public class IpCountService {//计数集合private Map<String,Integer> ipCountMap = new HashMap<String,Integer>();//...@Scheduled(cron = "0/10 * * * * ?")public void print(){log.info(" IP访问监控");log.info("+-----ip-address-----+--num--+");for(Map.Entry<String,Integer> info :ipCountMap.entrySet()){String key = info.getKey();Integer count = info.getValue();//String.format修改下对齐缩进,搞一个好看的排版String lineInfo = String.format("|%18s |%6d |",key,count);log.info(lineInfo);}log.info("+--------------------+-------+");}
}
5、引入属性配置类,写活业务参数配置
@ConfigurationProperties(prefix = "tools.ip")
public class IpProperties {/** 日志显示周期 */private long cycle = 10L;/** 是否周期内重置数据 */private Boolean cycleReset = false;/** 日志输出模式 detail:明细模式 simple:极简模式 */private String model = LogModel.DETAIL.value;public enum LogModel {DETAIL("detail"),SIMPLE("simple");private String value;private LogModel(String value) { this.value = value; }public String getValue() { return value; }}
}
设置加载Properties类为Bean:
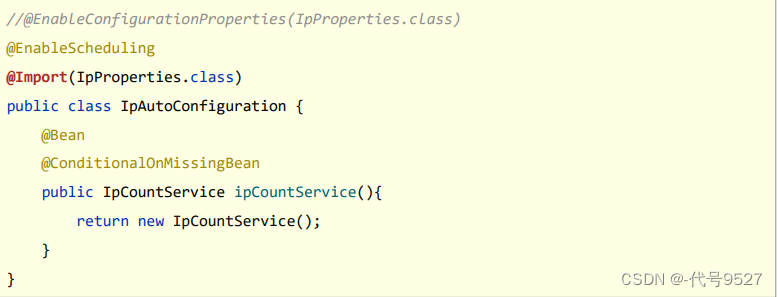
@EnableConfigurationProperties(IpProperties.class)
@EnableScheduling
@Import(IpCountService.class)
public class IpAutoConfiguration {}
根据配置来灵活实现报表打印:
public class IpCountService {@Autowiredprivate IpProperties ipProperties;@Scheduled(cron = "0/10 * * * * ?")   //注意这里,显示周期还没处理,仍然是写死的public void print(){//模式切换if(ipProperties.getMode().equals(IpProperties.LogModel.DETAIL.getValue())){//明细模式}else if(ipProperties.getMode().equals(IpProperties.LogModel.SIMPLE.getValue())){//极简模式}//周期内重置数据(若重置,则先打印,再清空)if(ipProperties.getCycleReset()){ipCountMap.clear();}}
}
明细报表的打印和简略模式报表的打印代码如下:
//明细模式
log.info(" IP访问监控");
log.info("+-----ip-address-----+--num--+");
for(Map.Entry<String,Integer> info :ipCountMap.entrySet()){String lineInfo = String.format("|%18s |%6d |", info.getKey(), info.getValue());log.info(lineInfo);}
log.info("+--------------------+-------+");
//极简模式
log.info(" IP访问监控");
log.info("+-----ip-address-----+");
for(Map.Entry<String,Integer> info :ipCountMap.entrySet()){String lineInfo = String.format("|%18s |", info.getKey());log.info(lineInfo);}
log.info("+--------------------+");此时,开发者引入starter后,在对应的服务配置文件中写配置即可:
tools:ip:cycle-reset: falsemode: detail此时,打印周期参数写在cron表达式里,想写活,第一个想到的写法应该是dollar大括号${}
@Scheduled(cron = "/${tools.ip.cycle:5} * * * * ?")
但这时候,相当于属性类里定义的cycle这个属性就没发挥作用,我自己去yaml取值了。因此,使用#{beanName.属性名}来取:
//注意这个Bean的命名,getBeans找找也行
@Scheduled(cron = "0/#{tools.ip-cn.llg.properties.IpProperties.cycle} * * * * ?")
还有坑,#{beanName.属性名}前面的beanName会被当作tools,太烦,直接手动控制Bean的名称:

放弃配置属性创建bean方式,改为手工控制:
继续用#{beanName.属性名}
@Scheduled(cron = "0/#{ipProperties.cycle} * * * * ?")
public void print(){//...
}
6、拦截器
前面直接在原来的业务代码里一个个加的方式肯定不行,这里继续在starter里自定义个拦截器:
public class IpInterceptor implements HandlerInterceptor {@Autowiredprivate IpCountService ipCountService;@Overridepublic boolean preHandle( HttpServletRequest request, HttpServletResponse response, Object handler) throws Exception {//拦截,执行业务代码前先计数ipCountService.count();return true;}
}
定义配置类,把拦截器加入拦截器链中:
@Configuration
public class SpringMvcConfig implements WebMvcConfigurer {@Beanpublic IpInterceptor ipInterceptor(){return new IpInterceptor();  //必须要保证这里创建出来的拦截器对象是唯一对象,因此加@Configuration,其默认属性值proxyBeanMethod=true即可解决这个问题。}@Overridepublic void addInterceptors(InterceptorRegistry registry) {//新增拦截器与拦截对象registry.addInterceptor(ipInterceptor()).addPathPatterns("/**");}
}
到此,starter功能开发完成。
7、开启yml提示功能
和官方starter相比,这个自定义starter被引入后,书写yml配置时不会有提示,继续修改starter,补一个提示功能。starter中引入配置处理器坐标:
<dependency><groupId>org.springframework.boot</groupId><artifactId>spring-boot-configuration-processor</artifactId><optional>true</optional>
</dependency>
此时,重新clean后install这个starter,可以看到target的META-INF目录下多了个spring-configuration-metadata.json文件,这就是写配置给提示的关键。将这个文件复制到resource/META-INF下:
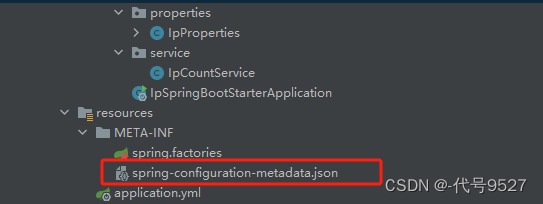
然后注释掉starter的pom里的配置处理器坐标,再重新clean后install,否则target和resource下都有spring-configuration-metadata.json文件,就会有两遍提示:
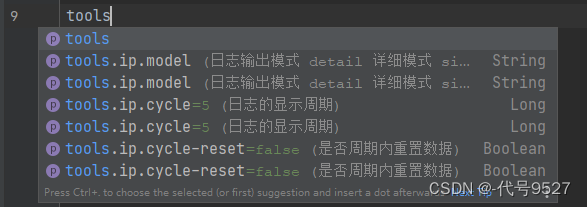
注释后重新clear+install,在引入starter的项目里可看到提示了:

最后,对于配置项的可选值,还缺少一个提示,修改spring-configuration-metadata.json文件的hits
"hints": [{"name": "tools.ip.model","values": [{"value": "detail","description": "明细模式."},{"value": "simple","description": "极简模式."}]}
]
重新clean后install:
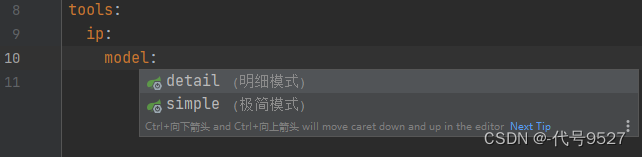
starter制作完成,开发者只需引入坐标,其对应的模块就有了统计功能。当然,还可以继续优化,比如拦截的资源,也可改成活的,让用户自己配置。