SSD1306 oled显示屏的驱动SPI接口
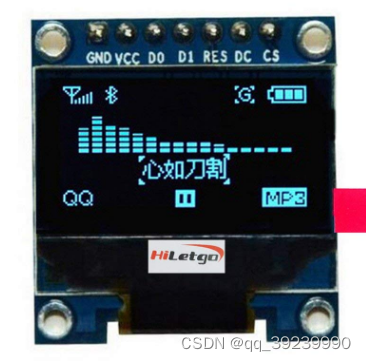
有IIC接口 和SPI接口 还有8080,6080接口等
arduino SPI接口

直接使用u8g2库实现

//U8G2_SSD1306_128X64_NONAME_F_4W_SW_SPI u8g2(U8G2_R0, /* clock=*/ 13, /* data=*/ 11, /* cs=*/ 10, /* dc=*/ 9, /* reset=*/ 8);
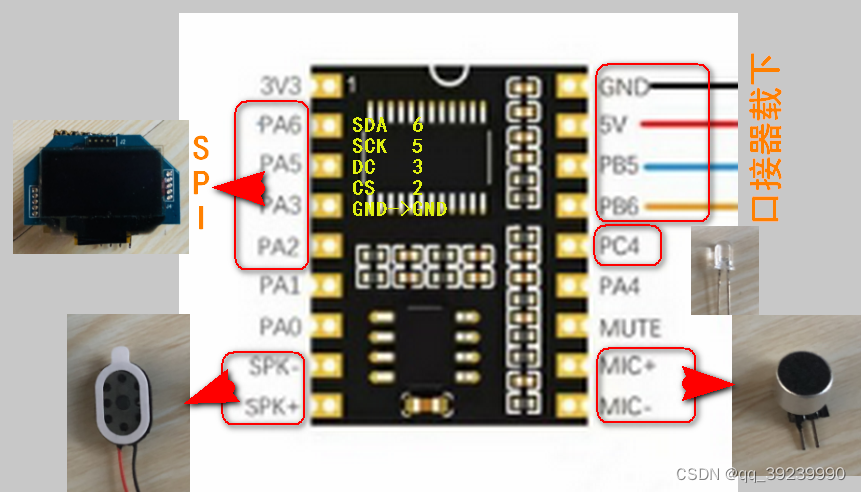
asrpro(SPI接口按下方修改,IIC接口官方有驱动)
1.下载U8g2库文件 GitHub - olikraus/u8g2: U8glib library for monochrome displays, version 2在D:\天问Block\asrpro\asr_pro_sdk\下新建 U8G2目录 将csrc目录下的所有文件复制到 U8G2目录下
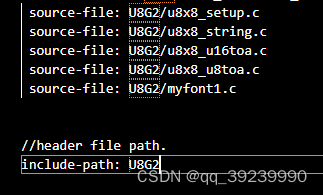
2.将U8G2源文件与头文件添加到 d:\天问Block\asrpro\asr_pro_sdk\projects\offline_asr_sample\project_file\source_file.prj
使用source-file:U8G2/xx.c 添加U8G2下的所有c文件
include-path:U8G2 //添加头文件
3.示例代码:
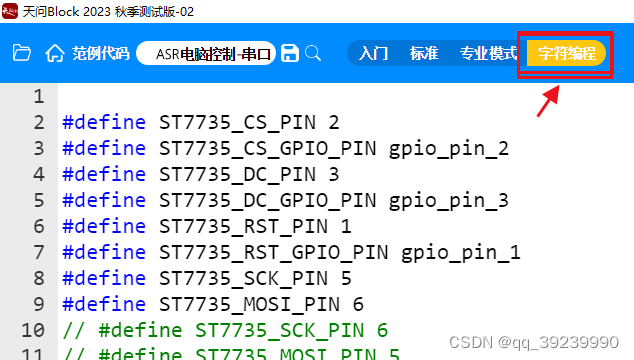
//接线引脚  MOSI PA5    SCK PA6     DC PA3    CS PA2#define CS_PIN 2
#define CS_GPIO_PIN gpio_pin_2
#define DC_PIN 3
#define DC_GPIO_PIN gpio_pin_3
#define RST_PIN 1
#define RST_GPIO_PIN gpio_pin_1
// #define SCK_PIN 5
// #define MOSI_PIN 6
#define SCK_PIN 6
#define MOSI_PIN 5//#define SCK_GPIO_PIN gpio_pin_5
//#define MOSI_GPIO_PIN gpio_pin_6/* 宏定义 --------------------------------------------------------------------*/#define MOSI  MOSI_PIN
#define SCK SCK_PIN
#define DC DC_PIN
#define CS CS_PIN#include "asr.h"
extern "C"{ void * __dso_handle = 0 ;}
#include "setup.h"
#include "myLib/luxiaoban.h"
#include "HardwareSerial.h"
#include "../U8G2/u8g2.h"void hardware_init();
void emo_class();
void weather_class();//u8g2_t u8g2;/my initvoid ssd1306_spi_init(){pinMode(CS,output);pinMode(DC,output);//pinMode(RST_PIN,output);pinMode(SCK,output);pinMode(MOSI,output);}uint8_t u8x8_avr_gpio_and_delay(u8x8_t *u8x8, uint8_t msg, uint8_t arg_int, void *arg_ptr){// Re-use library for delaysswitch(msg){//mscase U8X8_MSG_DELAY_MILLI:delay(1);break;//10 uscase U8X8_MSG_DELAY_10MICRO:delay10us();break;//1 nscase U8X8_MSG_DELAY_NANO:delay1us();break;case U8X8_MSG_DELAY_100NANO:delay1us();break;case U8X8_MSG_GPIO_AND_DELAY_INIT:  // called once during init phase of u8g2/u8x8ssd1306_spi_init();break;              // can be used to setup pinscase U8X8_MSG_GPIO_SPI_CLOCK:        // Clock pin: Output level in arg_intif(arg_int)digitalWrite(SCK,1);elsedigitalWrite(SCK,0);break;case U8X8_MSG_GPIO_SPI_DATA:        // MOSI pin: Output level in arg_intif(arg_int)digitalWrite(MOSI,1);elsedigitalWrite(MOSI,0);break;case U8X8_MSG_GPIO_CS:        // CS (chip select) pin: Output level in arg_intif(arg_int)digitalWrite(CS,1);elsedigitalWrite(CS,0);break;case U8X8_MSG_GPIO_DC:        // DC (data/cmd, A0, register select) pin: Output level in arg_intif(arg_int)digitalWrite(DC,1);elsedigitalWrite(DC,0);break;case U8X8_MSG_GPIO_RESET:     // Reset pin: Output level in arg_intdefault:break;}return 1;
}void u8g2Init(u8g2_t *u8g2)
{u8g2_Setup_ssd1306_128x64_noname_f(u8g2, U8G2_R0, u8x8_byte_4wire_sw_spi, u8x8_avr_gpio_and_delay);u8g2_InitDisplay(u8g2);u8g2_SetPowerSave(u8g2, 0);u8g2_ClearBuffer(u8g2);
}class u8g2_class
{public:u8g2_t u8g2;void u8g2_init(){u8g2_Setup_ssd1306_128x64_noname_f(&u8g2, U8G2_R0, u8x8_byte_4wire_sw_spi, u8x8_avr_gpio_and_delay);u8g2_InitDisplay(&u8g2);u8g2_SetPowerSave(&u8g2, 0);u8g2_ClearBuffer(&u8g2);}void sendBuffer(void) { u8g2_SendBuffer(&u8g2); }void clearBuffer(void) { u8g2_ClearBuffer(&u8g2); }   u8g2_uint_t drawGlyph(u8g2_uint_t x, u8g2_uint_t y, uint16_t encoding) { return u8g2_DrawGlyph(&u8g2, x, y, encoding); }   u8g2_uint_t drawGlyphX2(u8g2_uint_t x, u8g2_uint_t y, uint16_t encoding) { return u8g2_DrawGlyphX2(&u8g2, x, y, encoding); }   void setColorIndex(uint8_t color_index) { u8g2_SetDrawColor(&u8g2, color_index); }void setFont(const uint8_t  *font) {u8g2_SetFont(&u8g2, font); }void setFontMode(uint8_t  is_transparent) {u8g2_SetFontMode(&u8g2, is_transparent); }void setBitmapMode(uint8_t is_transparent){ u8g2_SetBitmapMode(&u8g2, is_transparent); }void drawBitmap(u8g2_uint_t x, u8g2_uint_t y, u8g2_uint_t cnt, u8g2_uint_t h, const uint8_t *bitmap){ u8g2_DrawBitmap(&u8g2, x, y, cnt, h, bitmap); }void drawXBM(u8g2_uint_t x, u8g2_uint_t y, u8g2_uint_t w, u8g2_uint_t h, const uint8_t *bitmap){ u8g2_DrawXBM(&u8g2, x, y, w, h, bitmap); }void drawXBMP(u8g2_uint_t x, u8g2_uint_t y, u8g2_uint_t w, u8g2_uint_t h, const uint8_t *bitmap){ u8g2_DrawXBMP(&u8g2, x, y, w, h, bitmap); }};
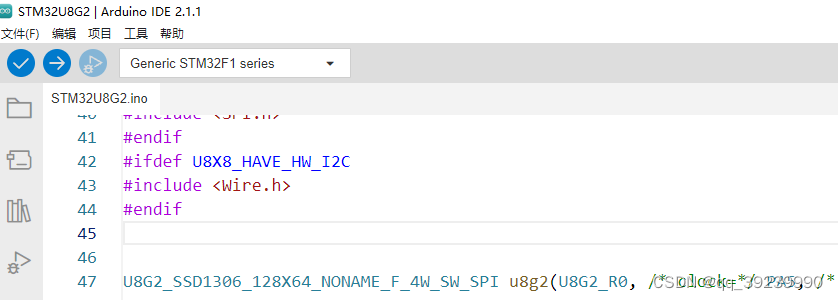
stm32arduino
stm32f103xx系列 arduino 下直接使用u8g2示列,不需设置引脚与时钟
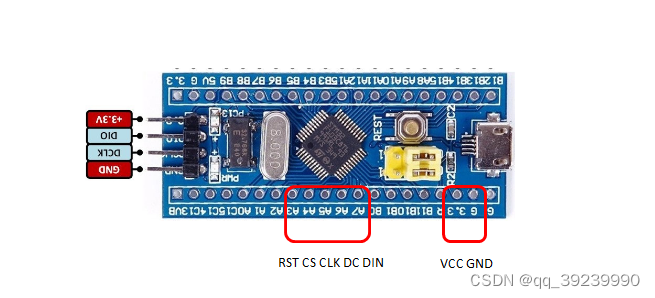
添加:U8X8_SSD1306_128X64_NONAME_4W_SW_SPI u8x8(/* clock=*/ PA5, /* data=*/ PA7, /* cs=*/ PA4, /* dc=*/ PA6, /* reset=*/ PA3);
ESP32
未试验,应是同的
树莓派

使用luma.oled 库或是adafruit_ssd1306(python) adafruit_circuitpython_ssd1306
u8g2在树莓派中支持并不好,不推荐使用(暂时无办法)
https://github.com/rm-hull/luma.oled oled驱动程序
https://github.com/rm-hull/luma.examples 示列
详细介绍在文件目录下的README.rst中
执行以下命令进行安装
1.$ sudo usermod -a -G i2c,spi,gpio pi //【好像没什么用】
2.$ sudo apt install python3-dev python3-pip python3-numpy libfreetype6-dev libjpeg-dev build-essential //【安装依赖包,树莓派中好像已经有了】
3.$ sudo apt install libsdl2-dev libsdl2-image-dev libsdl2-mixer-dev libsdl2-ttf-dev libportmidi-dev //【安装依赖包,树莓派中好像已经有了】
4.Log out and in again and clone this repository:: //【退出,重新进入】
5.$ git clone https://github.com/rm-hull/luma.examples.git //【在树莓中下载代码包】
6.$ cd luma.examples
7.$ sudo -H pip install -e . //【上述步骤完成后,执行些程序(跳过上面步骤直接执行此好像也可以,会出现下载错误,多次执行(注意 -e . 后面的点)】
运行方式: 进入luma.examples目录下 执行选择下列进行执行
使用SPI接口
python3 animated_gif.py --interface spi 或 -i spi
使用I2C 接口
python3 animated_gif.py --interface i2c 或 -i i2c
使用pygame 在桌面上显示
python3 tv_snow.py -d pygame
示列:
python3 3d_box.py -d pygame
luckfox
官方有驱动程序,使用oled示列修改