2 k-近邻算法
0 问题引入
想一想:下面图片中有三种豆,其中三颗豆品种未知,如何判断他们类型?

1 KNN概述
1.1 KNN场景
电影可以按照题材分类,那么如何区分 动作片 和 爱情片 呢?
- 动作片:打斗次数更多
- 爱情片:亲吻次数更多

基于电影中的亲吻、打斗出现的次数,使用 k-近邻算法构造程序,就可以自动划分电影的题材类型。
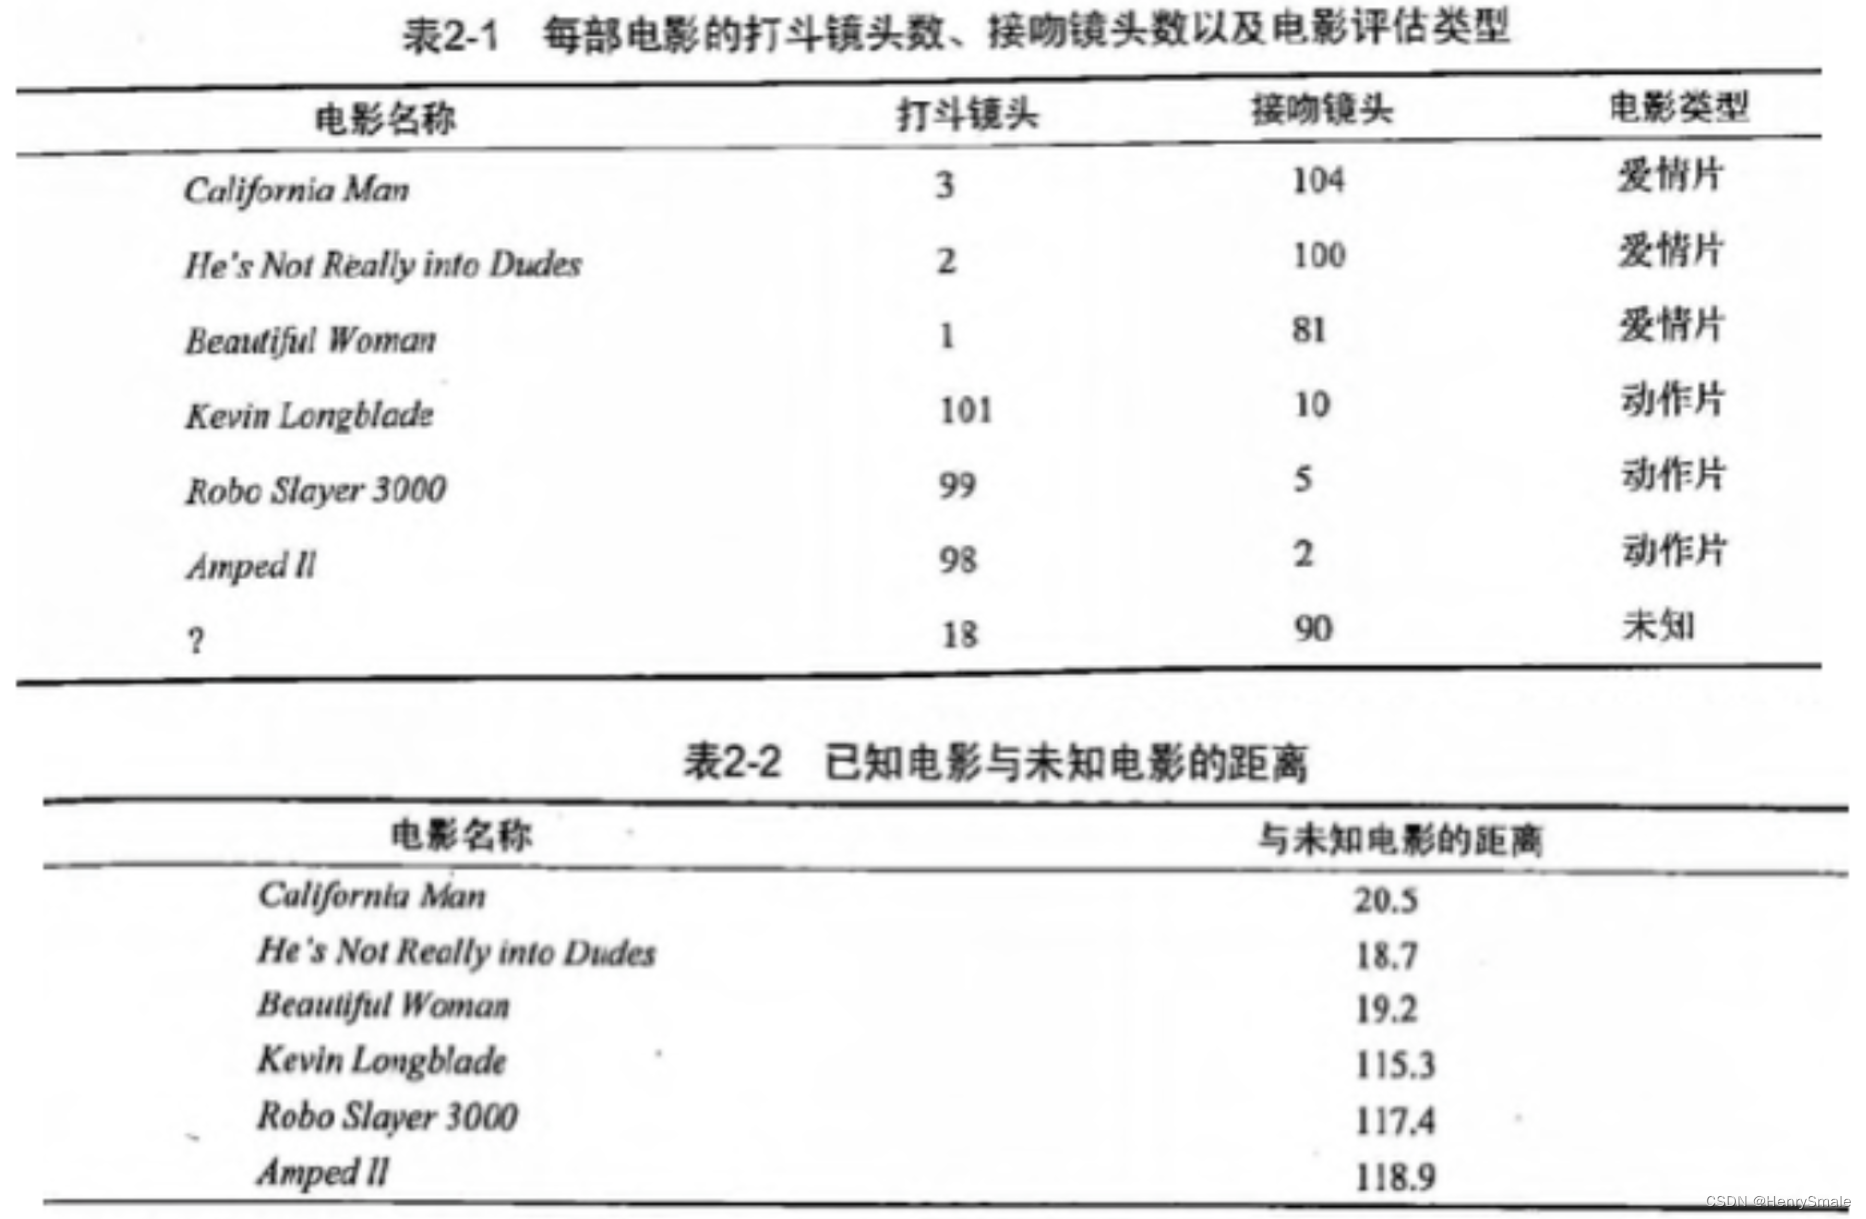
现在根据上面我们得到的样本集中所有电影与未知电影的距离,按照距离递增排序,可以找到 k 个距离最近的电影。
假定 k=3,则三个最靠近的电影依次是, California Man, He’s Not Really into Dudes 和 Beautiful Woman 。
KNN 算法按照距离最近的三部电影的类型,决定未知电影的类型,而这三部电影全是爱情片,因此我们判定未知电影是爱情片。
1.2 KNN工作原理
k-近邻(kNN, k-NearestNeighbor)算法是一种基本分类与回归方法,我们这里只讨论分类问题中的 k-近邻算法。
一句话总结:近朱者赤近墨者黑!
输入为实例的特征向量,对应于特征空间的点;
输出为实例的类别
k 近邻算法假设给定一个训练数据集,其中的实例类别已定。
分类时,对新的实例,根据其 k 个最近邻的训练实例的类别,通过多数表决等方式进行预测。因此,k近邻算法不具有显式的学习过程。
k 近邻算法实际上利用训练数据集对特征向量空间进行划分,并作为其分类的“模型”。
k近邻算法、三个基本要素:
- k值的选择;
- 距离度量;
- 分类决策规则。
2 KNN案例
2.1 项目概述
- 海伦使用约会网站寻找约会对象。经过一段时间之后,她发现曾交往过三种类型的人:
- 不喜欢的人
- 魅力一般的人
- 极具魅力的人
- 她希望:
- 工作日与魅力一般的人约会
- 周末与极具魅力的人约会
- 不喜欢的人则直接排除掉
- 现在她收集到了一些约会网站未曾记录的数据信息,这更有助于匹配对象的归类。
2.2 开发流程
- 收集数据:提供文本文件
- 准备数据:使用 Python 解析文本文件
- 分析数据:使用 Matplotlib 画二维散点图
- 训练算法:此步骤不适用于 k-近邻算法
- 测试算法:使用海伦提供的部分数据作为测试样本。
测试样本和非测试样本的区别在于: 测试样本是已经完成分类的数据,如果预测分类与实际类别不同,则标记为一个错误。 - 使用算法:产生简单的命令行程序,然后海伦可以输入一些特征数据以判断对方是否为自己喜欢的类型。
收集数据:提供文本文件
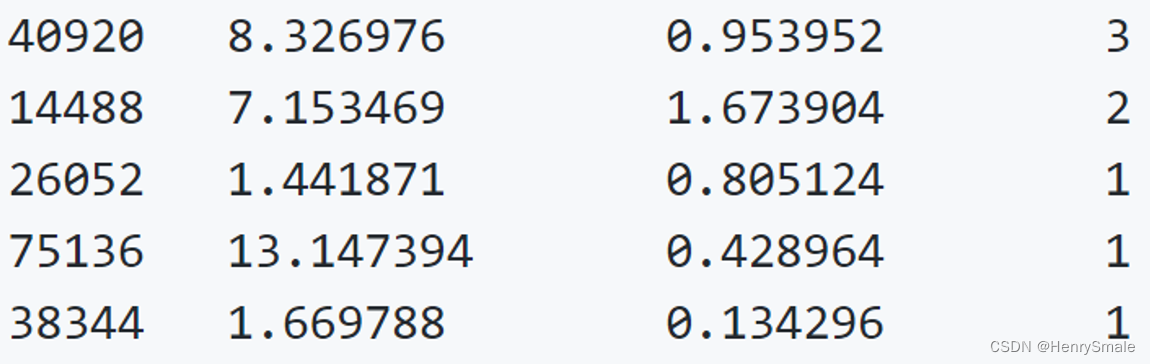
海伦把这些约会对象的数据存放在文本文件 datingTestSet2.txt 中,总共有 1000 行。海伦约会的对象主要包含以下 3 种特征:
- 每年获得的飞行常客里程数
- 玩视频游戏所耗时间百分比
- 每周消费的冰淇淋公升数
归一化就是要把你需要处理的数据经过处理后(通过某种算法)限制在你需要的一定范围内。首先归一化是为了后面数据处理的方便,其次是保证程序运行时收敛加快。
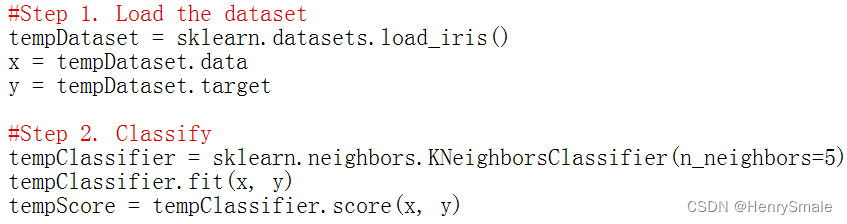
2.3 代码(以iris数据集为例)
方案1:调包侠
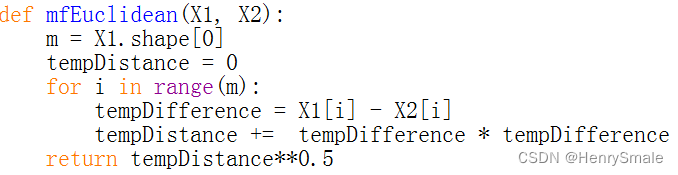
方案2:自己写底层代码
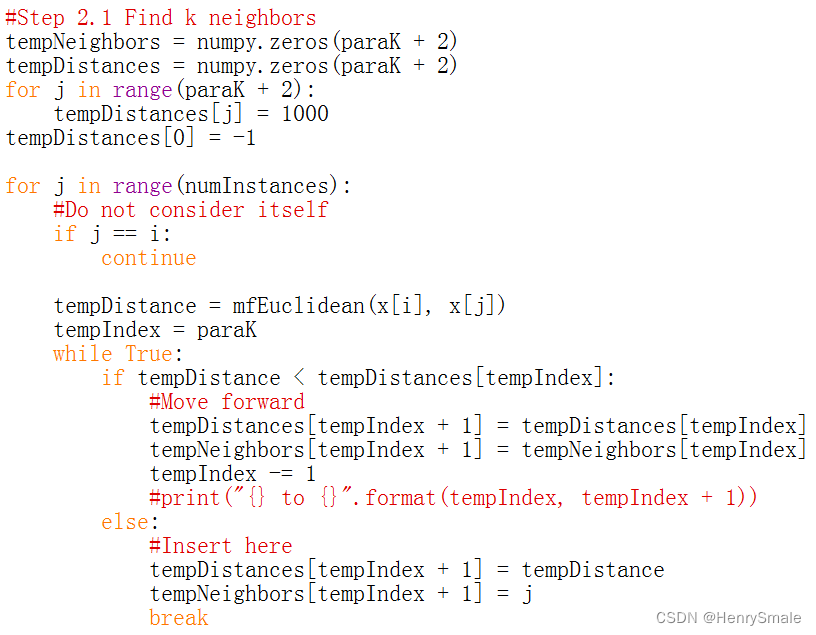
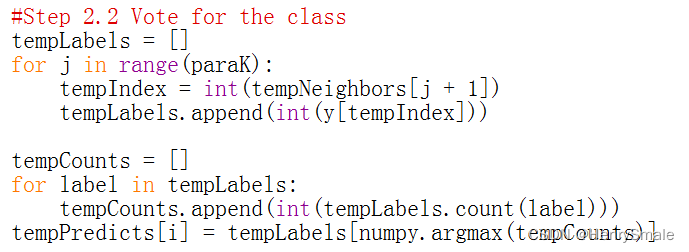
import sklearn.datasets, sklearn.neighbors, sklearn.model_selection
import numpydef sklearnKnnTest():#Step 1. Load the datasettempDataset = sklearn.datasets.load_iris()x = tempDataset.datay = tempDataset.target#print("x = ", x)#print("y = ", y)#Step 2. Split the dataX1, X2, Y1, Y2 = sklearn.model_selection.train_test_split(x, y, test_size = 0.2)print("X1 = ", X1)print("Y1 = ", Y1)print("X2 = ", X2)print("Y2 = ", Y2)#Step 3. Indicate the training set.tempClassifier = sklearn.neighbors.KNeighborsClassifier(n_neighbors = 5)tempClassifier.fit(X1, Y1)#Step 4. Test.tempScore = tempClassifier.score(X2, Y2)print("The score is: ", tempScore)def euclideanDistance(x1, x2):tempDistance = 0for i in range(x1.shape[0]):difference = x1[i] - x2[i]tempDistance += difference * differencetempDistance = tempDistance ** 0.5return tempDistancedef mfKnnTest(k = 3):#Step 1. Load the datasettempDataset = sklearn.datasets.load_iris()x = tempDataset.datay = tempDataset.target#print("x = ", x)#print("y = ", y)#Step 2. Split the dataX1, X2, Y1, Y2 = sklearn.model_selection.train_test_split(x, y, test_size = 0.2)print("X1 = ", X1)print("Y1 = ", Y1)print("X2 = ", X2)print("Y2 = ", Y2)#Step 3. Classifypredicts = numpy.zeros(Y2.shape[0])for i in range(X2.shape[0]):#Step 3.1 Find k neigbhors#InitializetempNeighbors = numpy.zeros(k + 2)tempDistances = numpy.zeros(k + 2)for j in range(k + 2):tempDistances[j] = 1000tempDistances[0] = -1for j in range(X1.shape[0]):tempDistance = euclideanDistance(X2[i], X1[j])tempIndex = kwhile True:if tempDistance < tempDistances[tempIndex]:#Move forwardprint("tempDistance = {} and tempDistances[{}] = {}".format(tempDistance, tempIndex, tempDistances[tempIndex]))tempNeighbors[tempIndex + 1] = tempNeighbors[tempIndex]tempDistances[tempIndex + 1] = tempDistances[tempIndex]tempIndex -= 1else:#Insert heretempNeighbors[tempIndex + 1] = jtempDistances[tempIndex + 1] = tempDistanceprint("Insert to {}.".format(tempIndex))break#print("Classifying ", X2[i])print("tempNeighbors = ", tempNeighbors)#Step 3.2 Vote#Step 2.2 Vote for the classtempLabels = []for j in range(k):tempIndex = int(tempNeighbors[j + 1])tempLabels.append(int(Y2[tempIndex]))tempCounts = []for label in tempLabels:#print("count = ", tempLabels.count(label))tempCounts.append(int(tempLabels.count(label)))tempPredicts[i] = tempLabels[numpy.argmax(tempCounts)]print("The predictions are: ", tempPredicts)print("The true labels are: ", Y2)def main():#sklearnKnnTest()#print("Life is short, so I study python.")mfKnnTest()main()