Qt之显示PDF文件
之前使用过mupdf库,能够成功显示pdf,但是我用着有BUG,不太理解它的代码,搞了好久都不行。后面又试了其他库,如pdfium、popler、下载了很多例程,都跑不起来!后面偶然得知xpdf库,看起来应该容易编译,因此这里主要是针对xpdf库的编译。
目前状态:终于成功了!2023-10-06(直接看章节3即可)
一、官网
Download Xpdf and XpdfReader
官网有大致的介绍,以及最新版本的xpdf源码的下载链接。但是没有具体讲怎么移植xpdf。
二、windows下的xpdf的编译
2.1、准备windows下的编译环境
我的编译环境
win10操作系统
vs2015社区版
qt版本:qt5.9.5
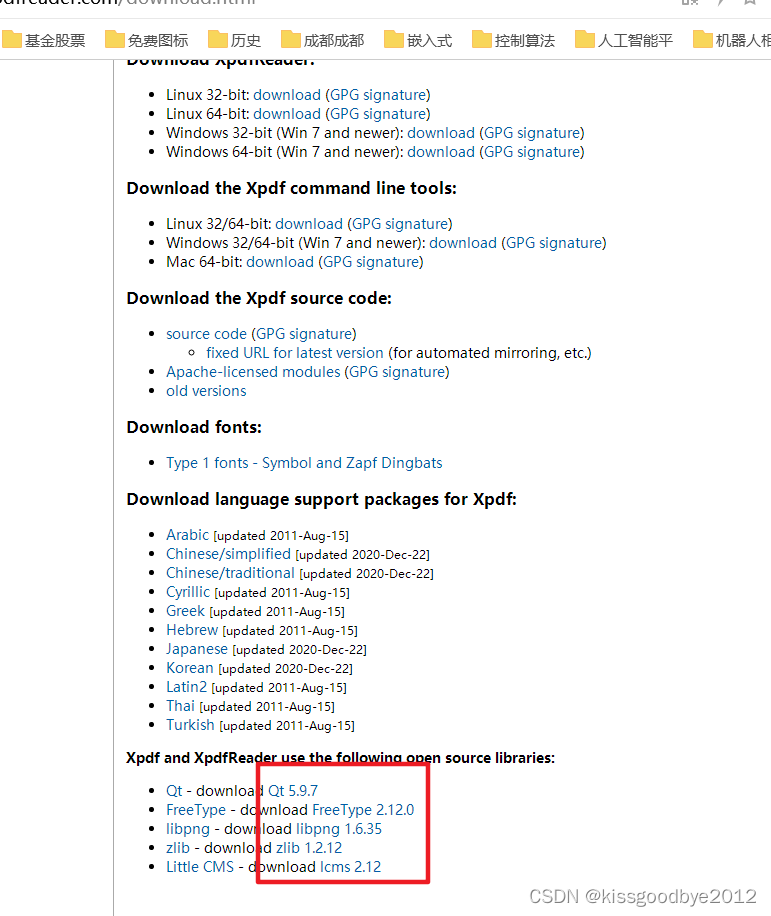
在官网下载工具链。如下图红色框中所示,点击后即可下载。这个压缩包是linux下的格式,解压需要费点功夫。
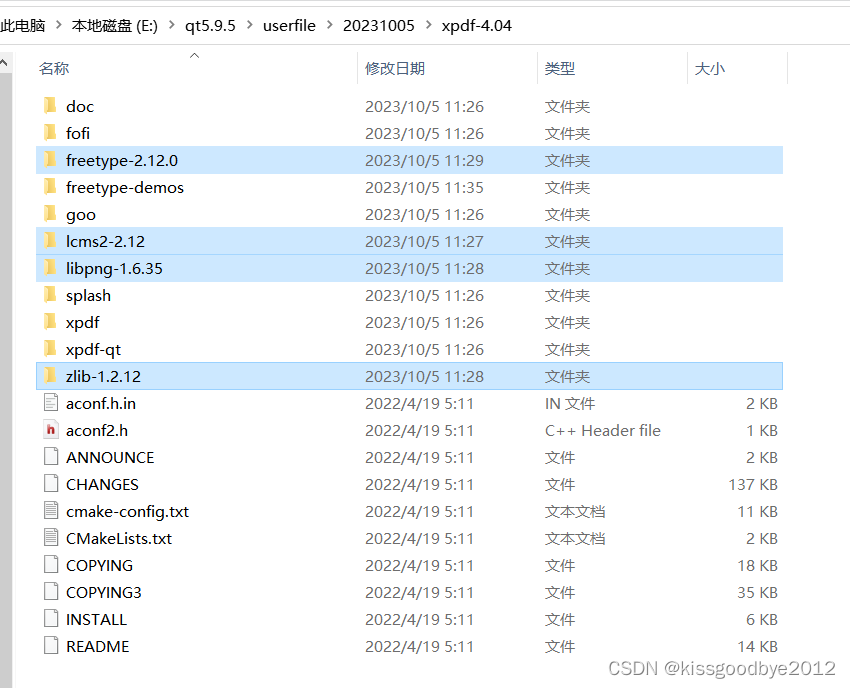
下载并解压后放在xpdf源码目录下,如下图所示。
2.2、编译freetype
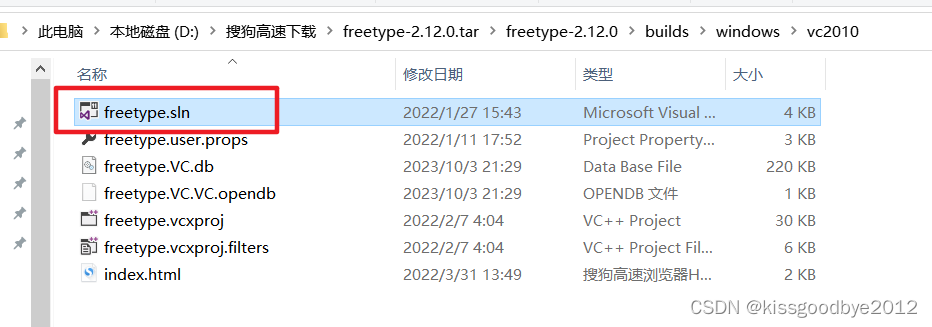
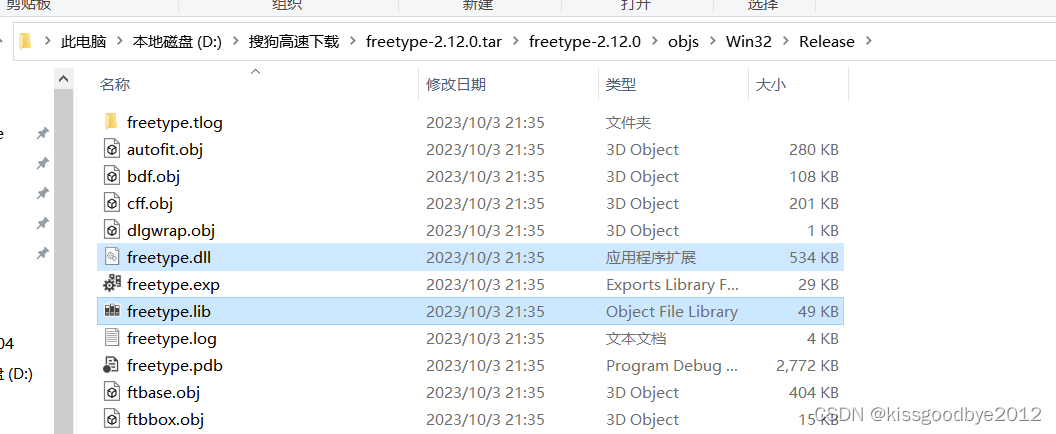
在如下图的路径,双击使用VS打开freetype.sln(我的VS是vs2015社区版),选择Release和win32后,点击运行进行编译,编程出dll文件。(由于dll不能直接运行,因此会报如下的错误,忽略即可)。
编译完成在 如下的路径下即可看到dll和lib文件。
工程路径:\freetype-2.12.0\builds\windows\vc2010
编译结构路径:\freetype-2.12.0\objs

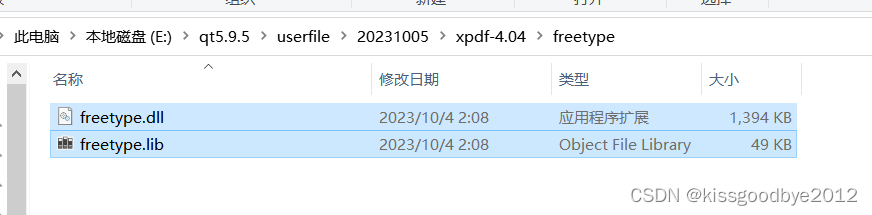
在xpdf源码目录新建文件夹freetype,将刚才生成的lib和dll文件拷贝到该文件夹中,就完成了freetype的编译。
2.3、编译lcms
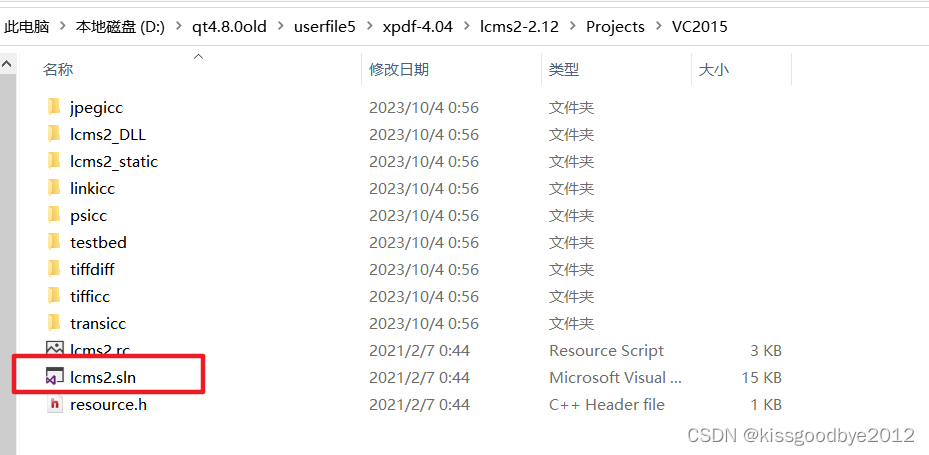
在如下图路径打开lcms的工程,右键点击lcms2_DLL将其设为启动项目,选择Release和win32后,点击运行进行编译,编程出dll文件。
工程路径:\lcms2-2.12\Projects\VC2015
编译结构路径:\lcms2-2.12\bin

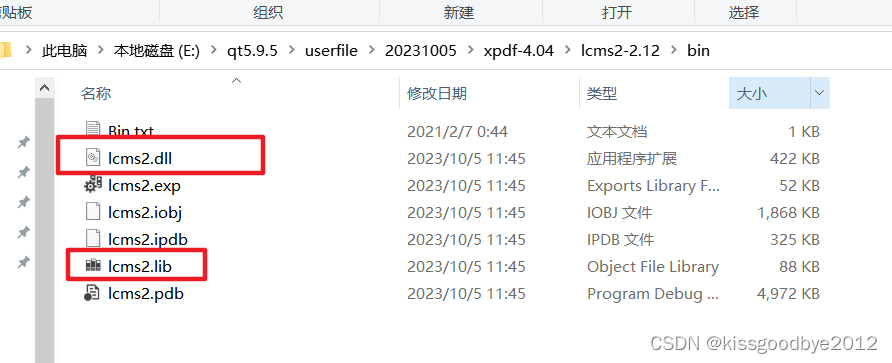
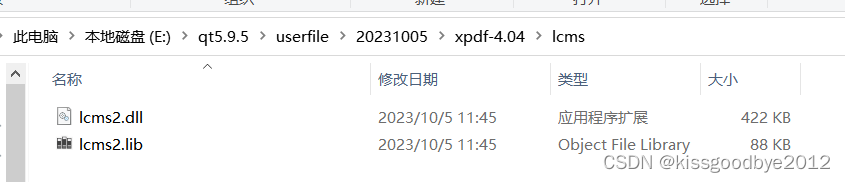
在xpdf源码目录新建文件夹lcms,将刚才生成的lib和dll文件拷贝到该文件夹中,就完成了lcms的编译。
2.4、编译zlib
zlib-1.2.12版本有点bug,需要先处理一下。
1、拷贝zlib-1.2.11(去网上下载一个)中的masmx76到contrib目录下;
2、修改代码
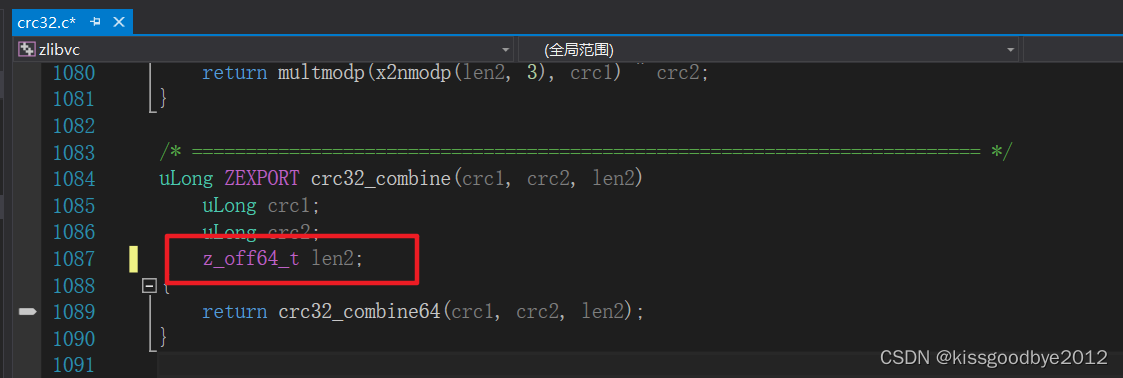
(1)修改函数uLong ZEXPORT crc32_combine(crc1, crc2, len2)
z_off_t len2改为z_off64_t len2;
(2)修改函数:uLong ZEXPORT crc32_combine_gen(len2)
z_off_t len2改为z_off64_t len2

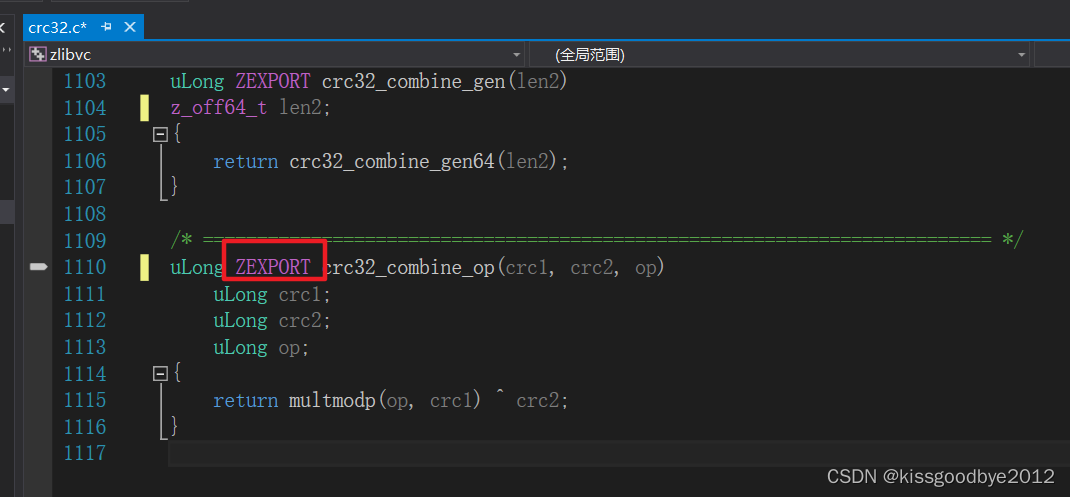
(3)修改函数:uLong crc32_combine_op(crc1, crc2, op)
改为uLong ZEXPORT crc32_combine_op(crc1, crc2, op)
3、右键zlibvc,设置 SAFESEH 映像是不安全的异常处理程序关闭

完成 后开始正式的编译。
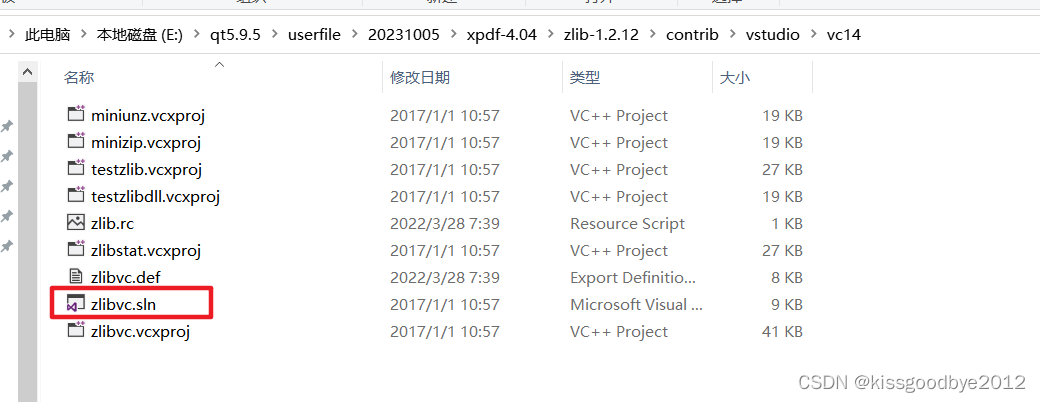
在如下图路径打开zlib的工程,选择Release和win32后,点击运行进行编译,编程出dll文件。
工程路径:\zlib-1.2.12\contrib\vstudio\vc14
编译结构路径:\zlib-1.2.12\contrib\vstudio\vc14\x86\ZlibDllRelease


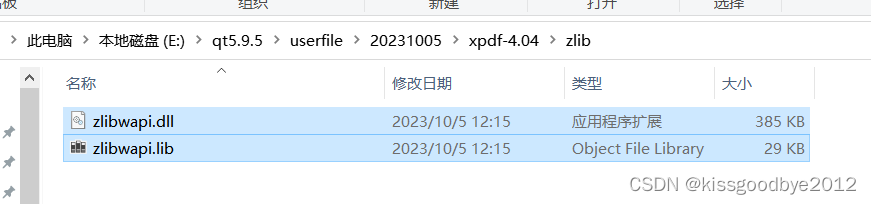
在xpdf源码目录新建文件夹zlib,将刚才生成的lib和dll文件拷贝到该文件夹中,就完成了zlib的编译。
如果出现异常情况:
问题1.没有bld_ml32.bat
编译器报错详情:

问题解决:查看contrib目录下,确实没有masmx86,拷贝zlib-1.2.11中的masmx86和masmx64到contrib目录下,问题解决。
问题2.实参的字节长度不同于以前的调用或引用
编译器报错详情如下:

问题解决:在crc32.c中修改如下内容
1.修改函数uLong ZEXPORT crc32_combine(crc1, crc2, len2)
uLong crc1;
uLong crc2;
z_off_t len2;为z_off64_t len2;
2.修改函数:1.uLong ZEXPORT crc32_combine_gen(len2)
z_off_t len2;为z_off64_t len2
3.修改:
uLong crc32_combine_op(crc1, crc2, op)为
uLong ZEXPORT crc32_combine_op(crc1, crc2, op)
问题3:模块对于 SAFESEH 映像是不安全的。
使用Release编译,忽略其他编译警告,编译通过。
2.5、编译libpng
libpng的编译以来zlib,因此需要将zlib的源码放在libpng源码的同级目录(前面已经放过了)
打开zlib.props文件,修改zlib的路径和版本(放在同级目录就不需要修改路径,修改版本就行)

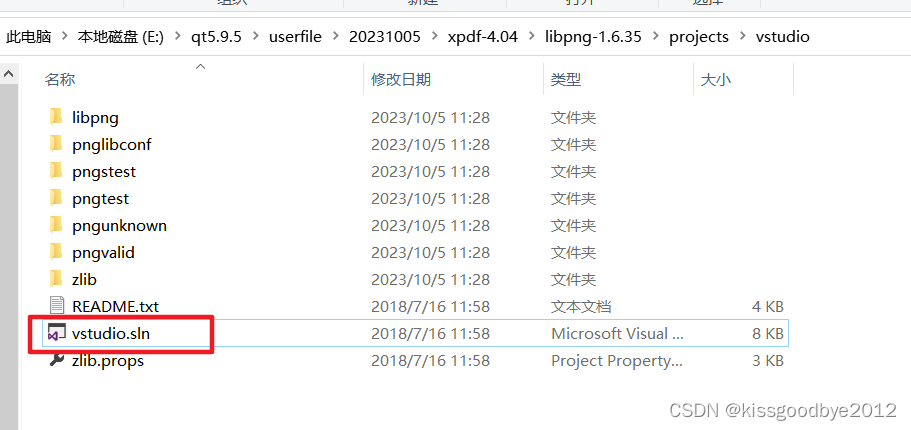
在如下图路径打开libpng的工程,右键点击libpng将其设为启动项目,选择Release和win32后,点击运行进行编译,编程出dll文件。
工程路径:\libpng-1.6.35\projects\vstudio
编译结构路径:\libpng-1.6.35\projects\vstudio\Release
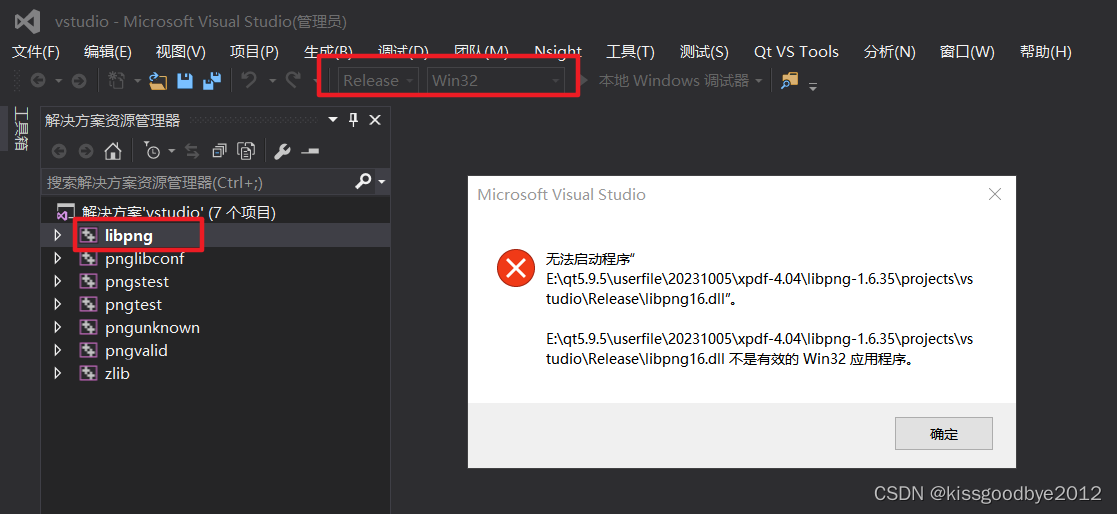

在xpdf源码目录新建文件夹libpng,将刚才生成的lib和dll文件拷贝到该文件夹中,就完成了libpng的编译。
2.6、编译xpdf
2.6.1 设置编译参数
(1) 在xpdf源码目录下新建bulid文件夹,
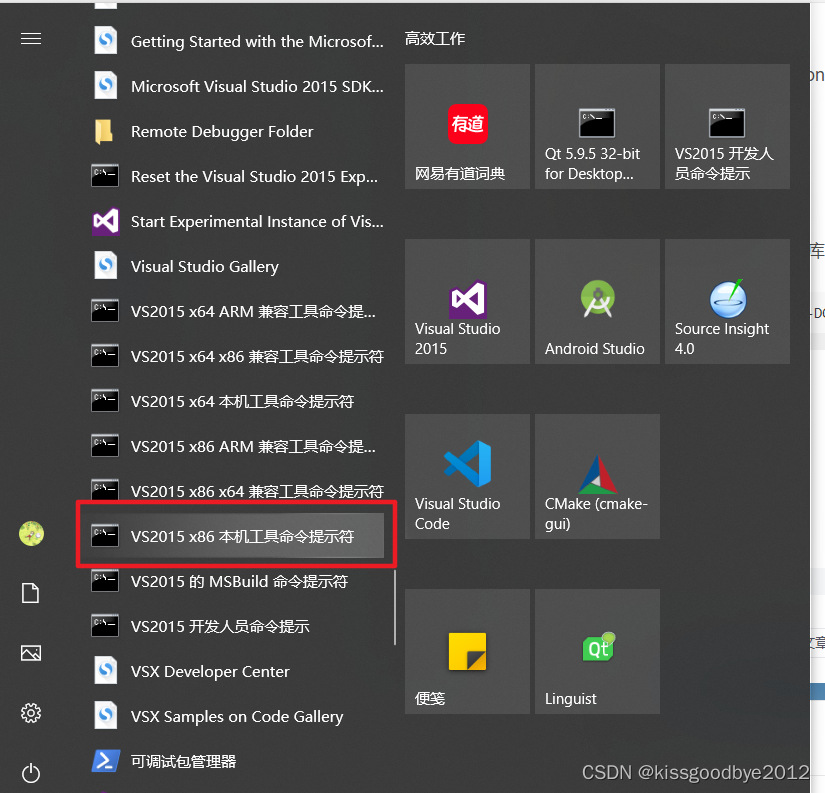
(2) 打开vs2015的命令提示符工具(看你的vs版本),并进入build路径(ctrl+c后在命令框右键即可粘贴)

输入如下命令,设置各个库的包含路径和动态库的路径
cmake -G "NMake Makefiles" -DCMAKE_BUILD_TYPE=Release -DFREETYPE_LIBRARY="E:/qt5.9.5/userfile/20231005/xpdf-4.04/freetype/freetype.dll" -DFREETYPE_DIR="E:/qt5.9.5/userfile/20231005/xpdf-4.04/freetype-2.12.0" -DPNG_PNG_INCLUDE_DIR="E:/qt5.9.5/userfile/20231005/xpdf-4.04/libpng-1.6.35" -DPNG_LIBRARY="E:/qt5.9.5/userfile/20231005/xpdf-4.04/libpng/libpng16.dll" -DZLIB_LIBRARY="E:/qt5.9.5/userfile/20231005/xpdf-4.04/zlib/zlibwapi.dll" -DZLIB_INCLUDE_DIR="E:/qt5.9.5/userfile/20231005/xpdf-4.04/zlib" ..
我的结果如下:
E:\qt5.9.5\userfile\20231005\xpdf-4.04\build>cmake -G "NMake Makefiles" -DCMAKE_BUILD_TYPE=Release -DFREETYPE_LIBRARY="E:/qt5.9.5/userfile/20231005/xpdf-4.04/freetype/freetype.dll" -DFREETYPE_DIR="E:/qt5.9.5/userfile/20231005/xpdf-4.04/freetype-2.12.0" -DPNG_PNG_INCLUDE_DIR="E:/qt5.9.5/userfile/20231005/xpdf-4.04/libpng-1.6.35" -DPNG_LIBRARY="E:/qt5.9.5/userfile/20231005/xpdf-4.04/libpng/libpng16.dll" -DZLIB_LIBRARY="E:/qt5.9.5/userfile/20231005/xpdf-4.04/zlib/zlibwapi.dll" -DZLIB_INCLUDE_DIR="E:/qt5.9.5/userfile/20231005/xpdf-4.04/zlib" ..
-- The C compiler identification is MSVC 19.0.24215.1
-- The CXX compiler identification is MSVC 19.0.24215.1
-- Check for working C compiler: F:/vs2015/VC/bin/cl.exe
-- Check for working C compiler: F:/vs2015/VC/bin/cl.exe -- works
-- Detecting C compiler ABI info
-- Detecting C compiler ABI info - done
-- Detecting C compile features
-- Detecting C compile features - done
-- Check for working CXX compiler: F:/vs2015/VC/bin/cl.exe
-- Check for working CXX compiler: F:/vs2015/VC/bin/cl.exe -- works
-- Detecting CXX compiler ABI info
-- Detecting CXX compiler ABI info - done
-- Detecting CXX compile features
-- Detecting CXX compile features - done
-- Looking for mkstemp
-- Looking for mkstemp - not found
-- Looking for mkstemps
-- Looking for mkstemps - not found
-- Looking for popen
-- Looking for popen - not found
-- Performing Test HAVE_STD_SORT
-- Performing Test HAVE_STD_SORT - Success
-- Looking for fseeko
-- Looking for fseeko - not found
-- Looking for fseek64
-- Looking for fseek64 - not found
-- Looking for _fseeki64
-- Looking for _fseeki64 - found
-- Found FreeType (old-style includes): E:/qt5.9.5/userfile/20231005/xpdf-4.04/freetype/freetype.dll
-- Found ZLIB: E:/qt5.9.5/userfile/20231005/xpdf-4.04/zlib/zlibwapi.dll
-- Found PNG: E:/qt5.9.5/userfile/20231005/xpdf-4.04/libpng/libpng16.dll (found version "1.6.35")
-- Qt5 found
-- Looking for pthread.h
-- Looking for pthread.h - not found
-- Found Threads: TRUE
-- Configuring done
-- Generating done
-- Build files have been written to: E:/qt5.9.5/userfile/20231005/xpdf-4.04/build
2.6.2 开始编译
在命令框输入:
nmake我失败在如下这一步(2023-10-05)

三、xpdf库在windows上新建QT工程
如需源码,请上闲鱼,搜索:科技代码小卖部
3.1 新建一个新工程
在qtcreator下新建工程,如下图XPDFDemo20231006New4_04
3.2 拷贝头文件
(1)拷贝freetype库的头文件到新工程目录下
在freetype库的源码下,拷贝整个include文件夹到新工程目录。

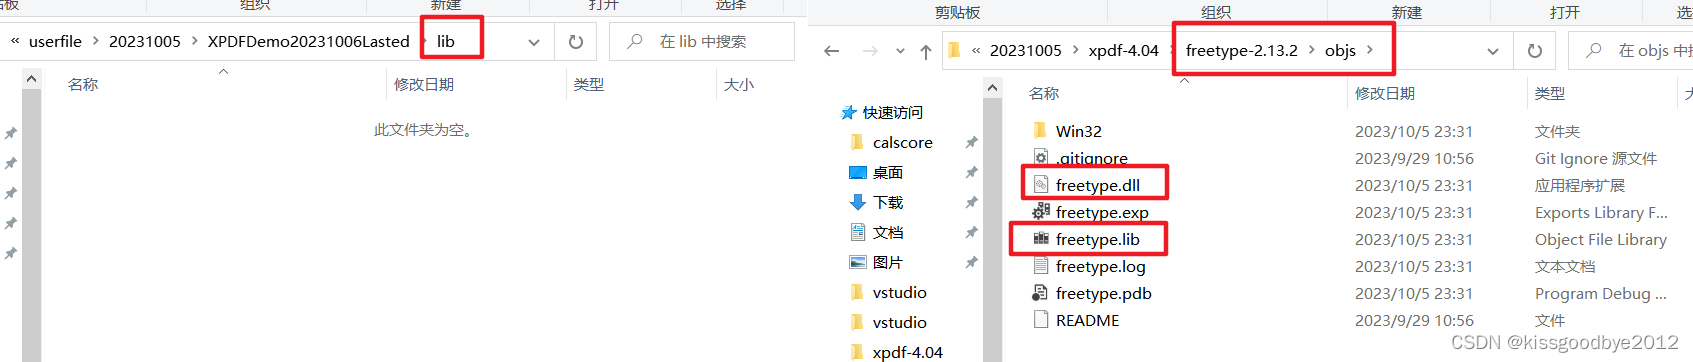
(2)拷贝freetype库的库文件(lib和dll)到新工程目录下
在新工程目录下新建lib文件夹,拷贝编译后的freetype库文件到该路径下(编译方法见前面的2.2小节)
(3)拷贝xpdf的头文件到新工程目录下
将xpdf库源码中的相关头文件拷贝到新工程目录下,新建一个aconf.h文件,将下面的代码拷贝到里面(源码里只有aconf.h.in,需要编译才能生成aconf.h,如想自行编译,见2.6小节,在build文件夹下编译后会生成aconf.h文件)

/** aconf.h** This file is modified by cmake.** Copyright 2002-2015 Glyph & Cog, LLC*/#ifndef ACONF_H
#define ACONF_H#include <aconf2.h>/** Use A4 paper size instead of Letter for PostScript output.*/
#define A4_PAPER 1/** Do not allow text selection.*/
#define NO_TEXT_SELECT 0/** Include support for OPI comments.*/
#define OPI_SUPPORT 1/** Enable multithreading support.*/
#define MULTITHREADED 0/** Enable C++ exceptions.*/
#define USE_EXCEPTIONS 1/** Use fixed point (instead of floating point) arithmetic.*/
#define USE_FIXEDPOINT 1/** Enable support for CMYK output.*/
#define SPLASH_CMYK 1/** Enable support for DeviceN output.*/
#define SPLASH_DEVICEN 1/** Enable support for highlighted regions.*/
#define HIGHLIGHTED_REGIONS 1/** Full path for the system-wide xpdfrc file.*/
//@SYSTEM_XPDFRC_DEFINE@/** Directory to use for the ${DATADIR} variable in the xpdfrc config* file.*/
//@XPDFRC_DATADIR_DEFINE@/** Various include files and functions.*/
#define HAVE_MKSTEMP 1
#define HAVE_MKSTEMPS 1
#define HAVE_POPEN 1
#define HAVE_STD_SORT 1
#define HAVE_FSEEKO 0
#define HAVE_FSEEK64 0
#define HAVE_FSEEKI64 1
#define _FILE_OFFSET_BITS 64
#define _LARGE_FILES 1
#define _LARGEFILE_SOURCE 1/** This is defined if using FreeType 2.*/
#define HAVE_FREETYPE_H 1/** This is defined if using D-Type 4.*/
#define HAVE_DTYPE4_H 0/** This is defined if using libpaper.*/
#define HAVE_PAPER_H 0/** This is defined if using libfontconfig.*/
#define HAVE_FONTCONFIG 0/** Defined if the Splash library is avaiable.*/
#define HAVE_SPLASH 0/** Defined if using lcms2.*/
#define HAVE_LCMS 0/** Defined for evaluation mode.*/
#define EVAL_MODE 1/** Defined when building the closed source XpdfReader binary.*/
#define BUILDING_XPDFREADER 0#endif
(4)拷贝xpdf例程到新工程中
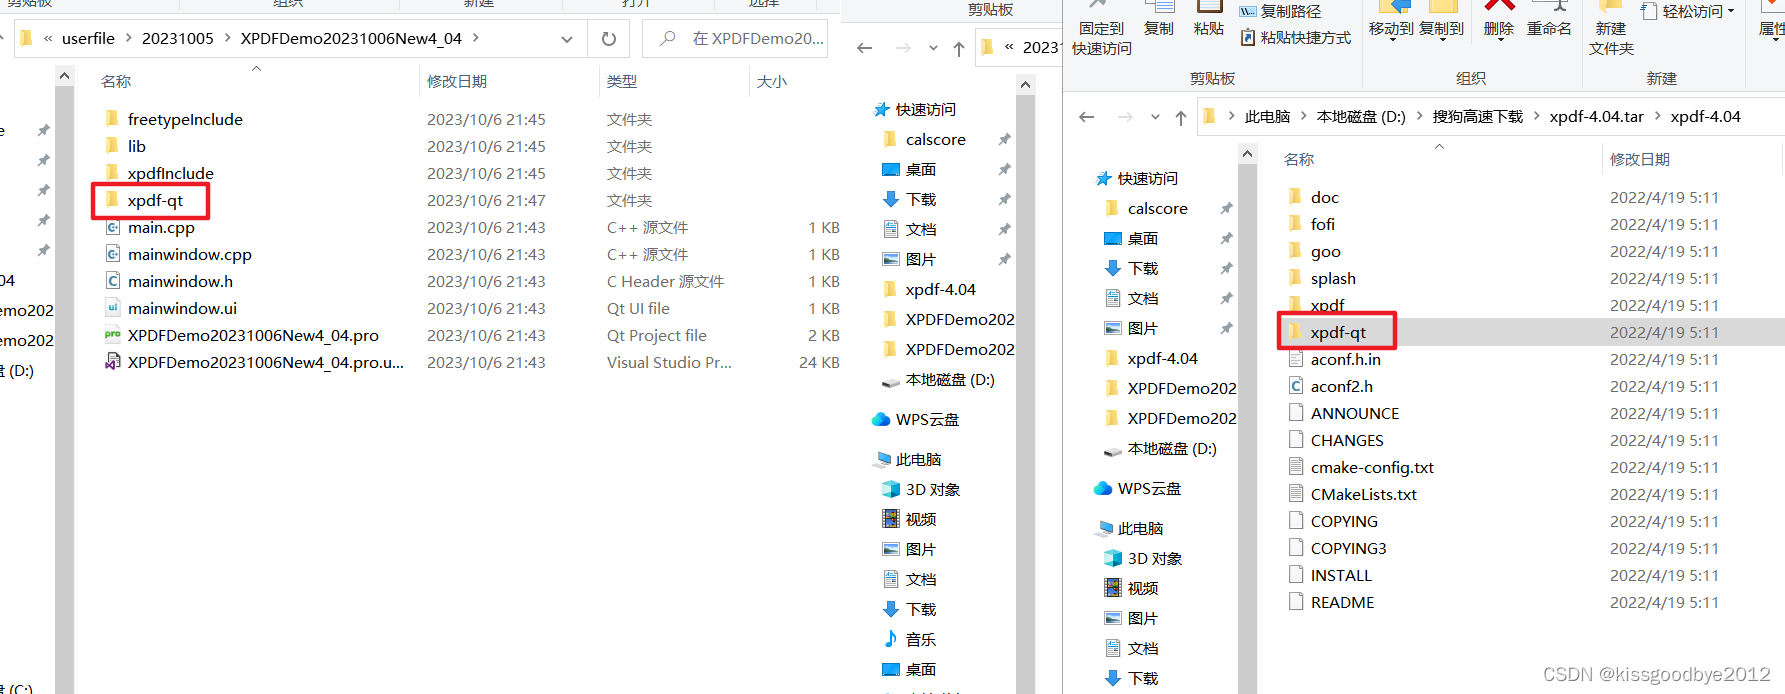
将xpdf库源码中的xpdf-qt文件夹拷贝到新工程目录下。
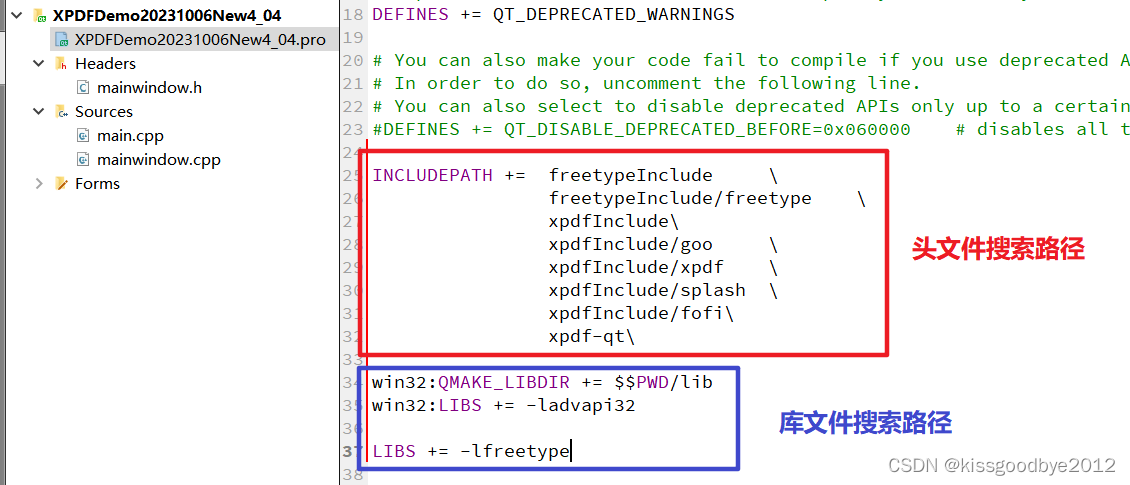
3.3 配置pro文件
删除core和gui模块,添加QT库network,printsupport和axcontainer。如下图所示

添加头文件和库文件的检索路径
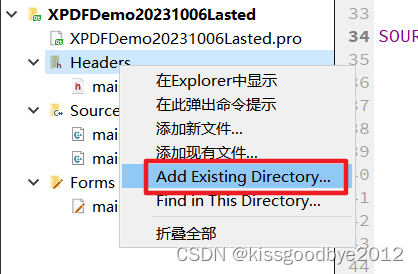
3.4 添加已有文件到新工程
在Header上右键,选择Add Existing Directory,勾选所有需要导入的文件,批量完成导入。
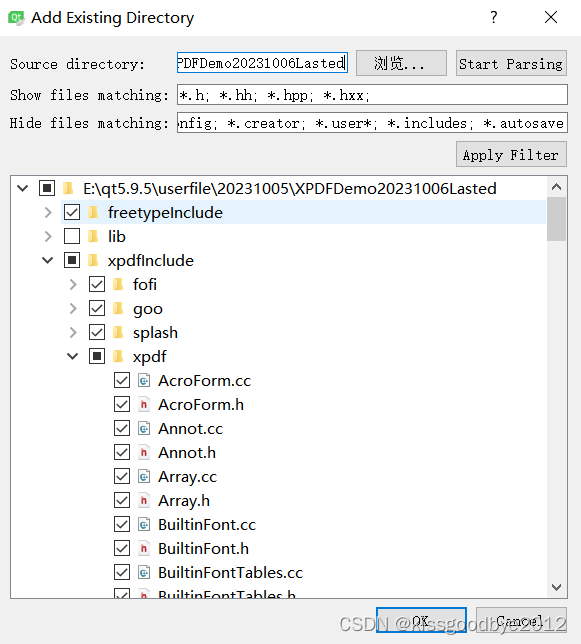
在默认的基础上,把2个rc资源文件也勾选上,如下图所示。

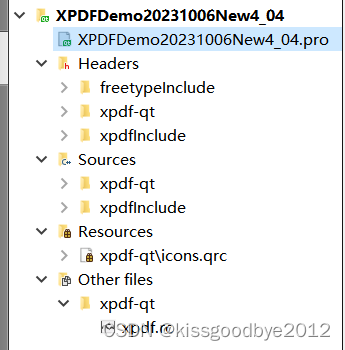
3.5 删除多余文件
由于例程没有用qt界面编辑器,且自带main函数,因此需要将原新建工程的以下文件删除:
main.cpp
mainwindow.h
mainwindow.cpp
mainwindow.ui
删除后的工程结构如下图所示。
3.6 修改源码
源码还有点错误,需要修改。先点击运行进行编译,会报如下的错误。

(1)修改XpdfViewer.cc
打开XpdfViewer.cc文件,添加头文件
#include <time.h>

(2)修改XpdfApp.cc
由于字符集的问题,需要将XpdfApp.cc中的void XpdfApp::readPagesFile() 函数整个换为下方的代码,进行字符转换。
char * wchar2char(const wchar_t* szUnicodeString)
{UINT nCodePage = 936; //GB2312int nLength=WideCharToMultiByte(nCodePage,0,szUnicodeString,-1,NULL,0,NULL,NULL);char* pBuffer=new char[nLength+1];WideCharToMultiByte(nCodePage,0,szUnicodeString,-1,pBuffer,nLength,NULL,NULL);pBuffer[nLength]=0;return pBuffer;}wchar_t * char2wchar(const char* cchar)
{wchar_t *m_wchar;int len = MultiByteToWideChar( CP_ACP ,0,cchar ,strlen( cchar), NULL,0);m_wchar= new wchar_t[len+1];MultiByteToWideChar( CP_ACP ,0,cchar,strlen( cchar),m_wchar,len);m_wchar[len]= '\0' ;return m_wchar;
}void XpdfApp::readPagesFile() {// construct the file name (first time only)if (savedPagesFileName.isEmpty()) {
#ifdef _WIN32 wchar_t wpath[MAX_PATH];// char path[MAX_PATH];if (SHGetFolderPath(NULL, CSIDL_APPDATA, NULL,SHGFP_TYPE_CURRENT, wpath) != S_OK) {return;}//char path[MAX_PATH];char* path=wchar2char(wpath);savedPagesFileName = QString::fromLocal8Bit(path);savedPagesFileName.append("/xpdf");CreateDirectory(char2wchar(savedPagesFileName.toLocal8Bit().constData()), NULL);savedPagesFileName.append("/xpdf.pages");// char path[MAX_PATH];
// if (SHGetFolderPath(NULL, CSIDL_APPDATA, NULL,
// SHGFP_TYPE_CURRENT, path) != S_OK) {
// return;
// }
// savedPagesFileName = QString::fromLocal8Bit(path);
// savedPagesFileName.append("/xpdf");
// CreateDirectory(savedPagesFileName.toLocal8Bit().constData(), NULL);
// savedPagesFileName.append("/xpdf.pages");
#elseGString *path = getHomeDir();savedPagesFileName = QString::fromUtf8(path->getCString());delete path;savedPagesFileName.append("/.xpdf.pages");
#endif}// no change since last read, so no need to re-readif (savedPagesFileTimestamp.isValid() &&QFileInfo(savedPagesFileName).lastModified() == savedPagesFileTimestamp) {return;}// mark all entries invalidfor (int i = 0; i < maxSavedPageNumbers; ++i) {savedPageNumbers[i].fileName.clear();savedPageNumbers[i].pageNumber = 1;}// read the fileFILE *f = openFile(savedPagesFileName.toUtf8().constData(), "rb");if (!f) {return;}char buf[1024];if (!fgets(buf, sizeof(buf), f) ||strcmp(buf, "xpdf.pages-1\n") != 0) {fclose(f);return;}int i = 0;while (i < maxSavedPageNumbers && fgets(buf, sizeof(buf), f)) {int n = (int)strlen(buf);if (n > 0 && buf[n-1] == '\n') {buf[n-1] = '\0';}char *p = buf;while (*p != ' ' && *p) {++p;}if (!*p) {continue;}*p++ = '\0';savedPageNumbers[i].pageNumber = atoi(buf);savedPageNumbers[i].fileName = QString::fromUtf8(p);++i;}fclose(f);// save the timestampsavedPagesFileTimestamp = QFileInfo(savedPagesFileName).lastModified();
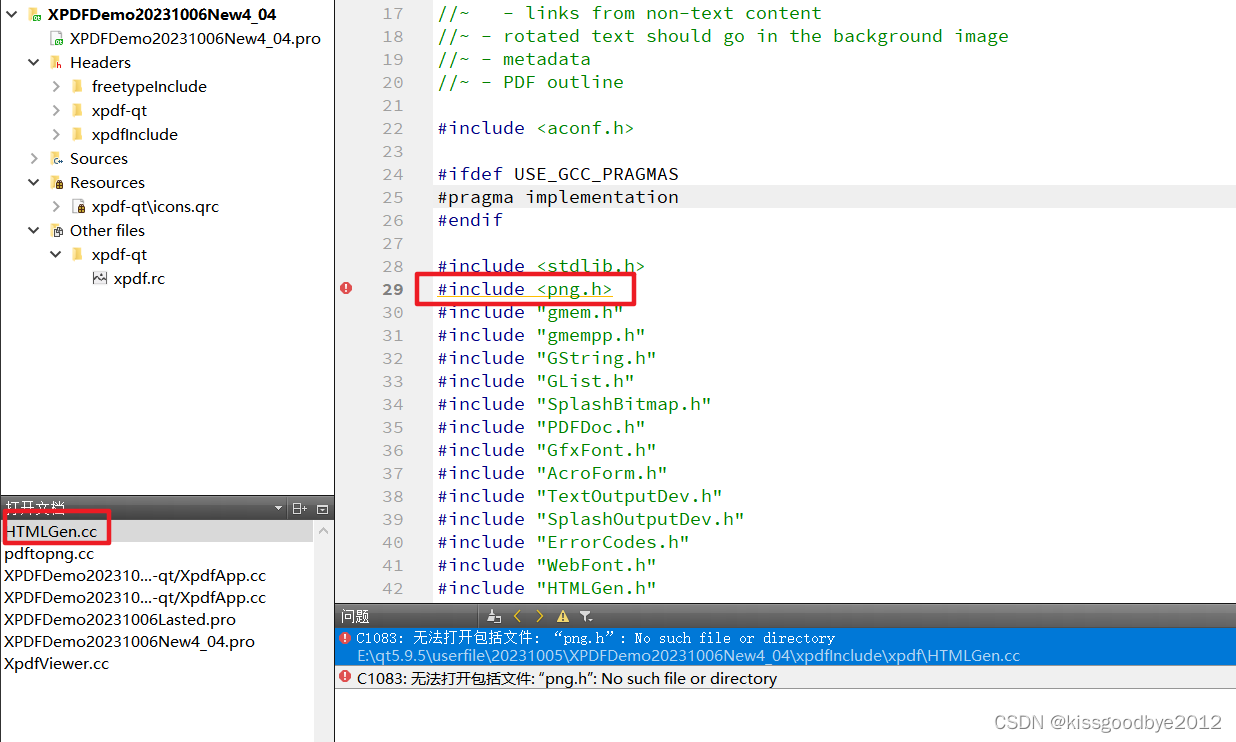
}(3)完成后又会报如下图的错误
png.h是libpng库里的头文件,如果不需要pdf转html,转txt等功能,将把对应的.cc文件删掉。如果需要,就要编译libpng库,并导入对应的头文件。(我这里不需要这些高级的功能,就直接删掉了),需要删掉的文件如下:
HTMLGen.cc
pdftopng.cc
删除后重新执行qmake命令,然后点击运行。
(4)完成后又会报如下图的错误
这是因为前面说的的高级功能,每个都有main函数并能生成各自的exe文件,从而导致main函数重复了。把他们都删除掉,需要删除的文件如下:
pdfdetach.cc
pdffonts.cc
pdfimages.cc
pdfinfo.cc
pdftohtml.cc
pdftoppm.cc
pdftops.cc
pdftotext.cc
同样,完成后重新执行qmake命令,然后点击运行。

3.6 xpdf库的使用
前面设置好,xpdf库的配置就已经完成了,已经可以开始使用了。点击运行即弹出程序。(ENJOY!!!!!)

四、xpdf库的自用
如需源码,请上闲鱼,搜索:科技代码小卖部