【2023-2-23】FastDeploy 安装教程
【2023-2-22】FastDeploy 安装编译教程
该测试 FastDeploy CPU版本。
1. fastDeploy库编译
1.1 官方预编译库下载
预编译库下载安装
1.2 自定义CPU版本库编译
- 官方编译FastDeploy教程
CMakeGUI + VS 2019 IDE编译FastDeploy
- 本人编译教程
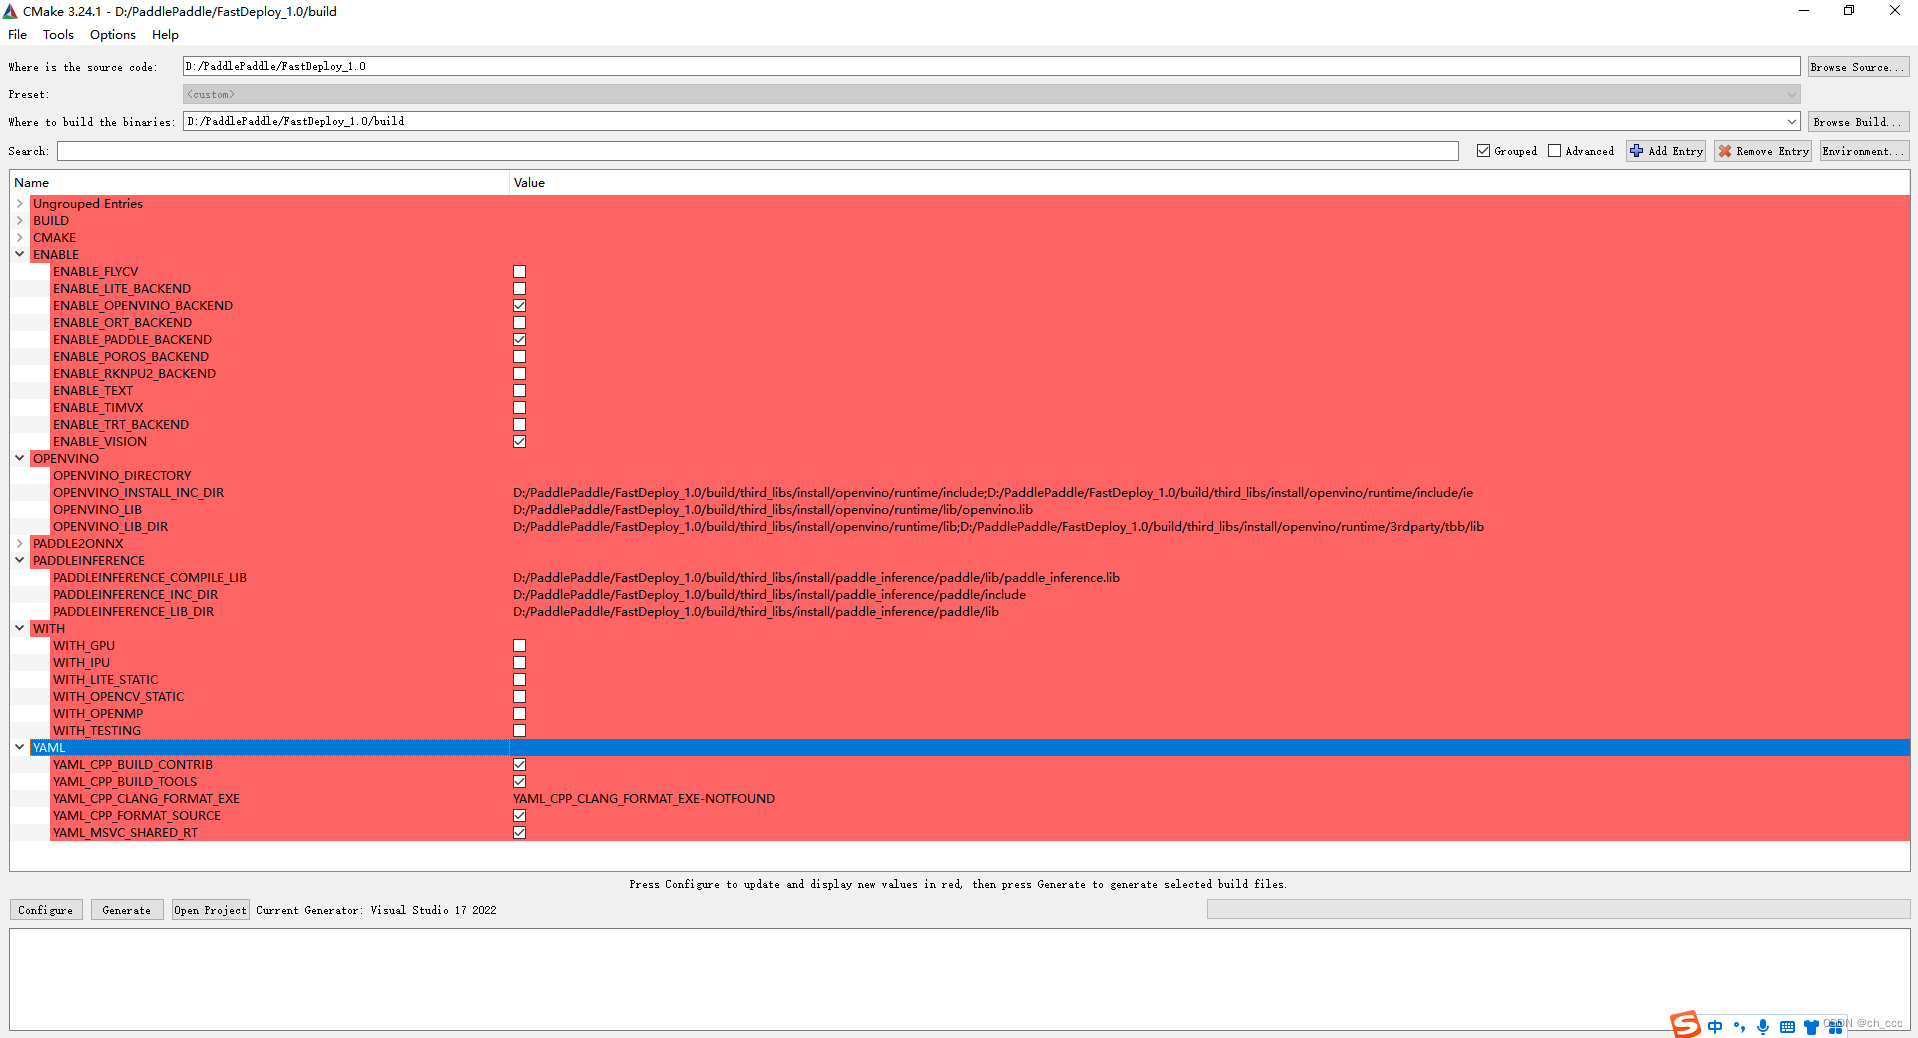
-
CMAKE_CONFIGURATION_TYPES属性设置为Release -
请不要勾选
WITH_GPU和ENABLE_TRT_BACKEND -
开启
ENABLE_PADDLE_BACKENDENABLE_OPENVINO_BACKENDENABLE_VISION -
指定
CMAKE_INSTALL_PREFIX安装路径 -
生成
fastdeploy.sln解决方案文件选择Release版本,生成编译,点击"INSTALL"->右键点击"生成"将编译好的SDK安装到先前指定的目录步骤⑤。
1.3 自定义GPU版本库编译
- 官方编译FastDeploy教程
CMakeGUI + VS 2019 IDE编译FastDeploy
- 本人编译教程
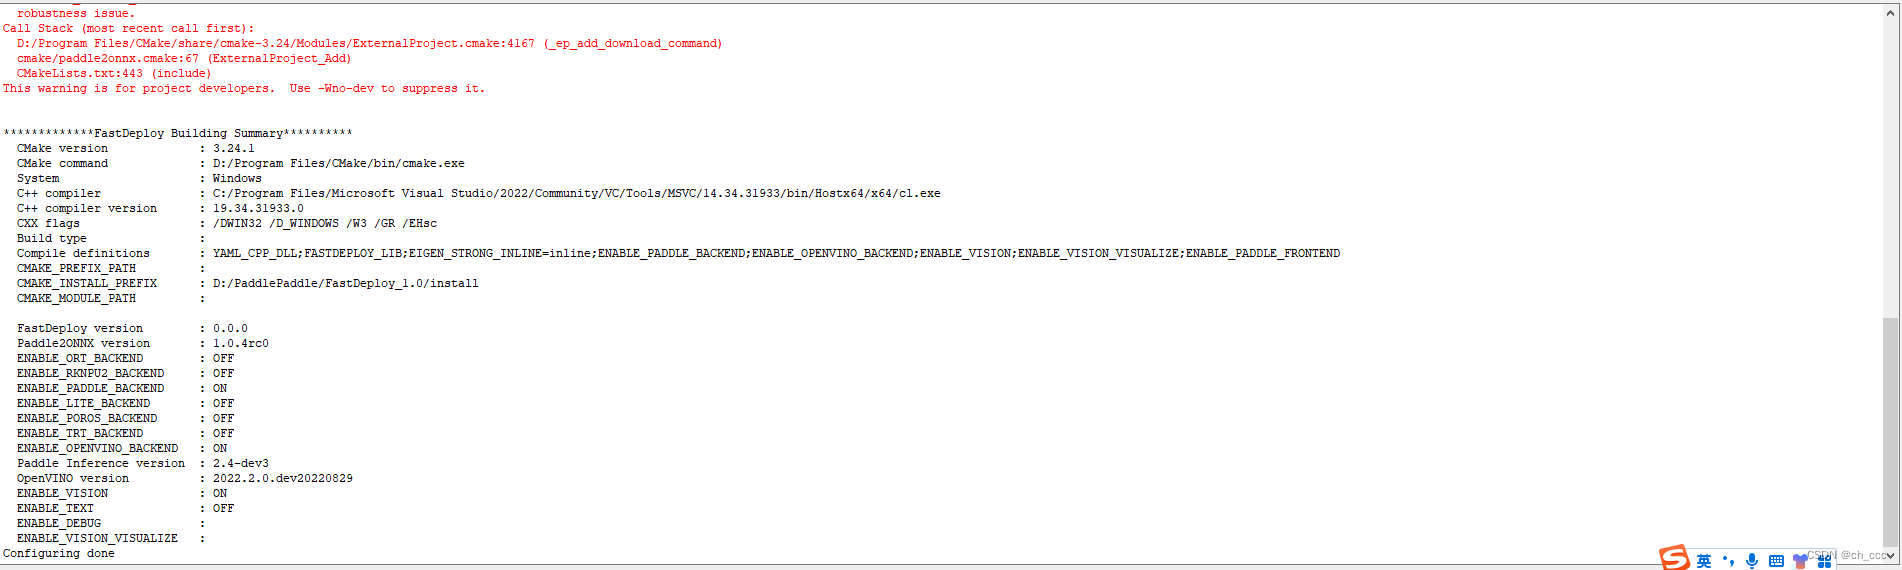
-
CMAKE_CONFIGURATION_TYPES属性设置为Release -
勾选
WITH_GPU和ENABLE_TRT_BACKEND -
开启
ENABLE_ORT_BACKENDENABLE_PADDLE_BACKENDENABLE_TRT_BACKENDENABLE_OPENVINO_BACKENDENABLE_VISIONENABLE_TEXT -
设置
CUDATensorRT路径
CUDA_DIRECTORY            : C:/Program Files/NVIDIA GPU Computing Toolkit/CUDA/v11.2
TRT_DRECTORY              : D:/Program Files/TensorRT-8.4.3.1
-
指定
CMAKE_INSTALL_PREFIX安装路径 -
生成
fastdeploy.sln解决方案文件选择Release版本,生成编译,点击"INSTALL"->右键点击"生成"将编译好的SDK安装到先前指定的目录步骤⑤。

1.4 样例测试
picodet_l_320_coco_lcnet 模型下载
/** @Description: * @Version: 0.0.1* @Author: chccc* @Date: 2023-02-19 00:19:22* @LastEditors: chccc* @LastEditTime: 2023-02-20 17:23:21* @FilePath: \cpp\infer.cpp*/
#include <iostream>
#include "fastdeploy/vision.h"void PicoDetGpuInfer(const std::string& model_dir, const std::string& image_file)
{std::string model_file = "picodet_l_320_coco_lcnet/model.pdmodel";std::string params_file ="picodet_l_320_coco_lcnet/model.pdiparams";std::string config_file ="picodet_l_320_coco_lcnet/infer_cfg.yml";;auto option = fastdeploy::RuntimeOption();option.UseGpu(0);fastdeploy::vision::detection::PicoDet model = fastdeploy::vision::detection::PicoDet(model_file, params_file, config_file, option);std::cout<<typeid(model).name()<<std::endl;if (!model.Initialized()) {printf("[%s][%d] Error: fastdeploy::vision::detection::PicoDet initialized failed !\n", __func__, __LINE__);return;}auto im = cv::imread(image_file);auto im_bak = im.clone();auto start = std::chrono::system_clock::now();fastdeploy::vision::DetectionResult result;if (!model.Predict(&im, &result)) {printf("[%s][%d] Error: Failed to predict !\n", __func__, __LINE__);return;}//std::cout << res.Str() << std::endl;auto end = std::chrono::system_clock::now();auto duration = std::chrono::duration_cast<std::chrono::microseconds>(end - start);double costTime = double(duration.count()) * std::chrono::microseconds::period::num / std::chrono::microseconds::period::den;//printf("[%s][%d] model.Predict success, cost time: %lf s \n", __func__, __LINE__, costTime);std::cout << "==========================================================================" << std::endl;float score_thereshold = 0.8;int line_size = 2;float font_size = 1;auto vis_image = fastdeploy::vision::Visualize::VisDetection(im_bak, result, score_thereshold, line_size, font_size);std::string vis_image_path = "./images/vis_result.jpg";cv::imwrite(vis_image_path, vis_image);printf("[%s][%d] Visualized result saved in %s !\n", __func__, __LINE__, vis_image_path.c_str());
}int main()
{std::cout << "=============== TEST ===============" << std::endl;std::string model_dir = "./models/";;std::string image_file = "./images/1.jpg";//计时auto start = std::chrono::system_clock::now();PicoDetGpuInfer(model_dir, image_file);//计时auto end = std::chrono::system_clock::now();auto duration = std::chrono::duration_cast<std::chrono::microseconds>(end - start);double costTime = double(duration.count()) * std::chrono::microseconds::period::num / std::chrono::microseconds::period::den;printf("[%s][%d] Model infer success, cost time: %lf s \n", __func__, __LINE__, costTime);std::cout << "=============== Finished ===============" << std::endl;
}