Docker安装部署Nexus3作为内网镜像代理缓存容器镜像
Docker安装部署Nexus3作为内网镜像代理
一、背景描述
基础镜像比较小,仓库使用阿里云或者腾讯云拉取速度挺快,但是时光飞逝几年时间过去,再加上AI加持的情况下,有些镜像的大小已经接近20G!
这种情况下不管是测试环境还是开发环境拉取镜像都会占用公司宽带流量,因此需要在测试环境搭建一台容器代理,用于缓存镜像!
二、搭建Nexus3作为镜像代理缓存阿里云、腾讯仓库私有镜像
2.1、Docker部署Nexus3
#数据持久化目录
mkdir -p /data/nexus3
#授权
chmod 777 -R /data/nexus3
#创建nexus3容器。
docker run -tid \--privileged=true\--network=host \--restart=always \-v /data/nexus3:/nexus-data \--name nexus3 \sonatype/nexus3#查看默认密码
cat /data/nexus3/admin.password
2.2、登录nexus3并修改默认密码
修改默认密码,设置来宾用户访问
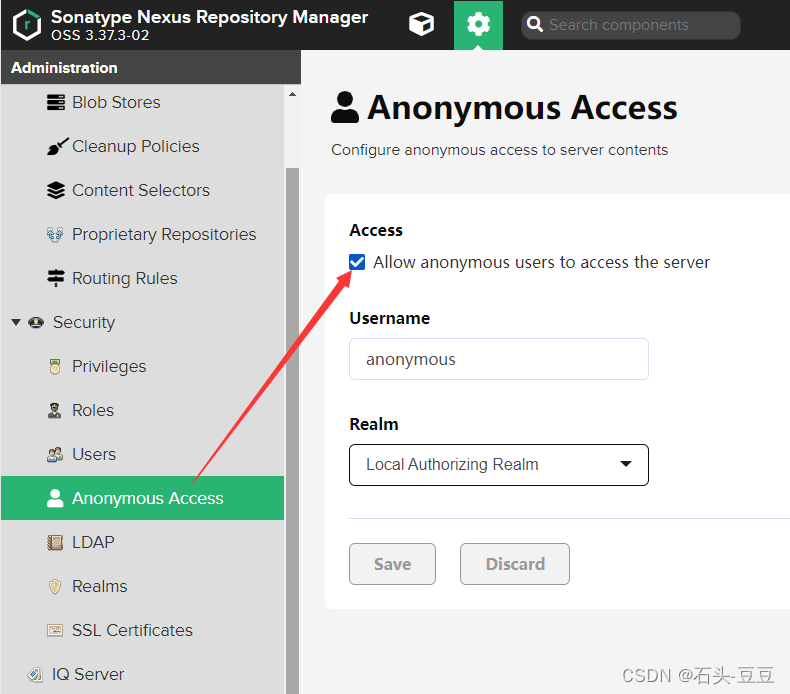
否则拉取镜像时会有如下报错:
[root@localhost certs.d]# crictl pull nginx
FATA[0002] pulling image failed: rpc error: code = NotFound desc = failed to pull and unpack image "docker.io/library/nginx:latest": failed to unpack image on snapshotter overlayfs: unexpected media type text/html for sha256:b6a78ff088000afc609fcbc701d18704ddb944e867af0dadd520d4bf0e5af328: not found
三、配置Nexus3代理阿里云、腾讯云私有镜像仓库
3.0 备注
这里会创建三个代理
1、阿里云镜像加速
2、阿里云私有镜像仓库(内含公开镜像)
3、腾讯云私有镜像仓库
私有镜像仓库需要配置认证账号密码
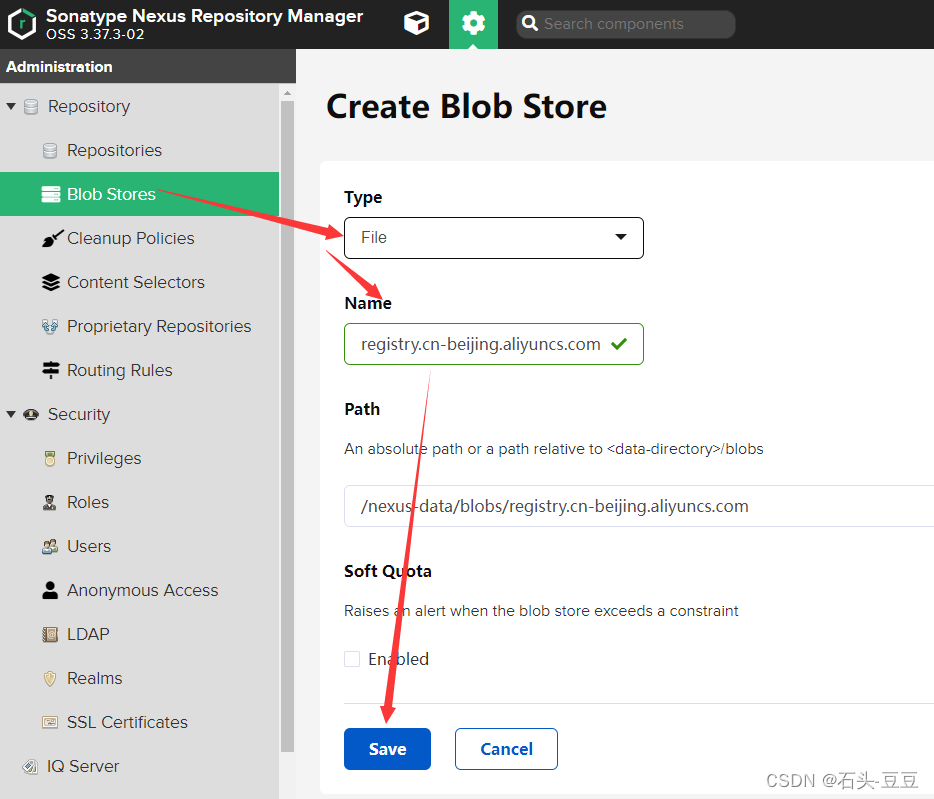
3.1、创建Blob Store
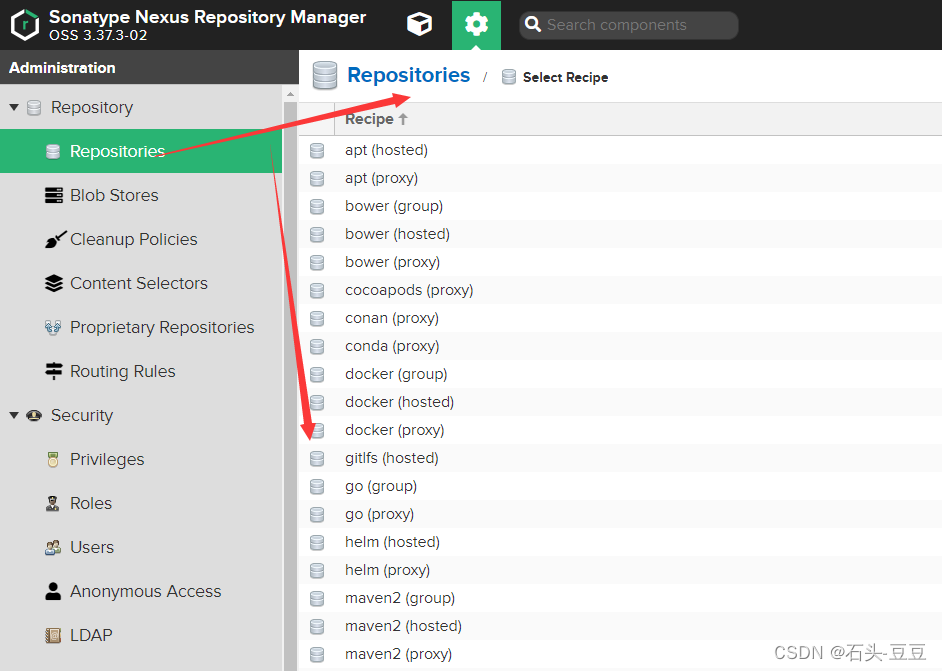
3.2、创建阿里云私有镜像仓库代理
设置代理信息
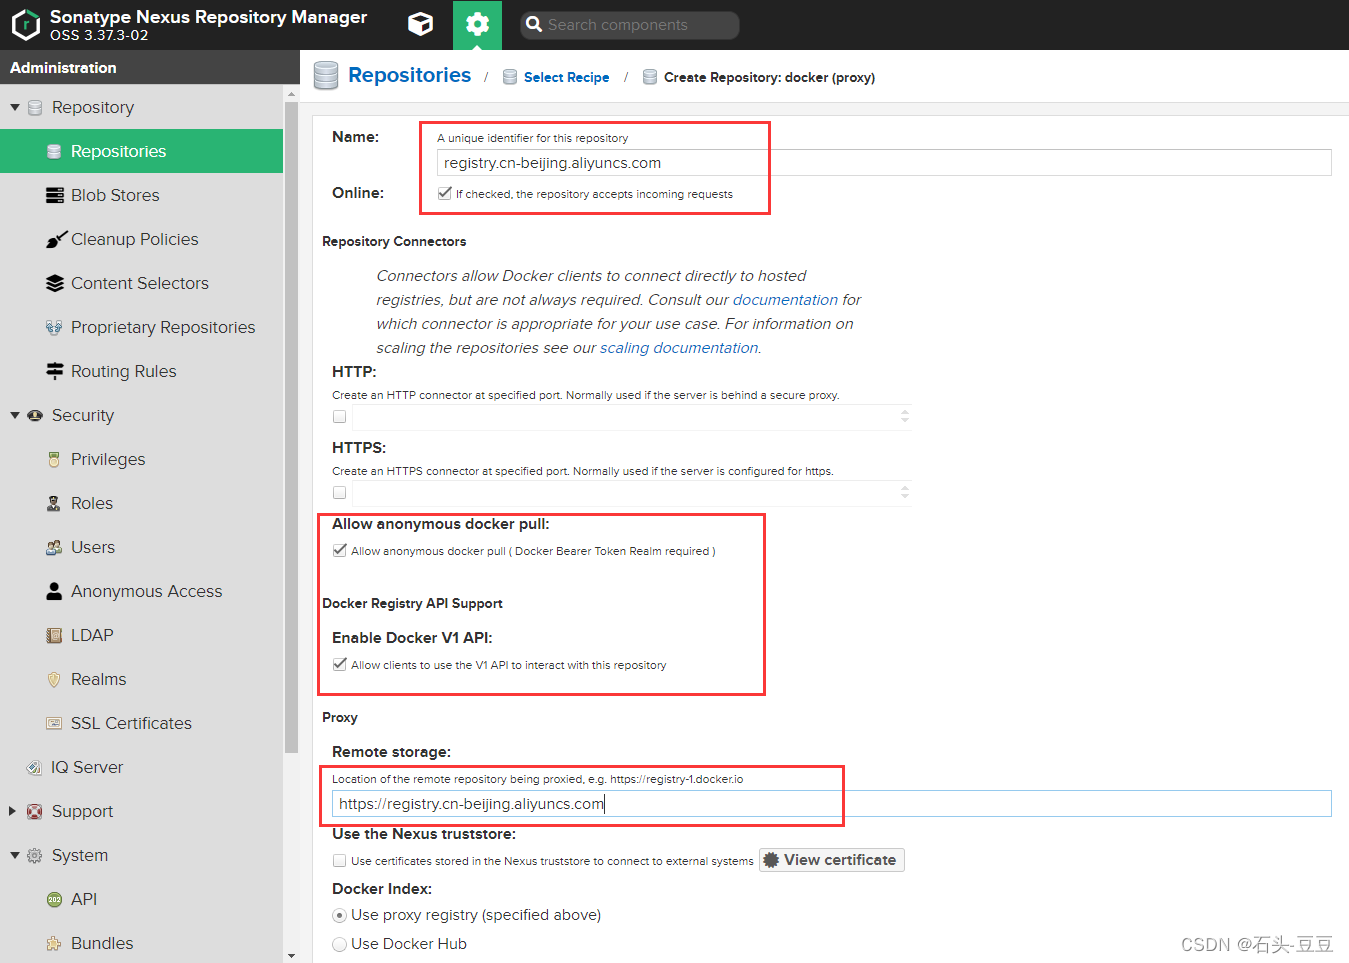
勾选缓存镜像layer,选择创建的Blob store
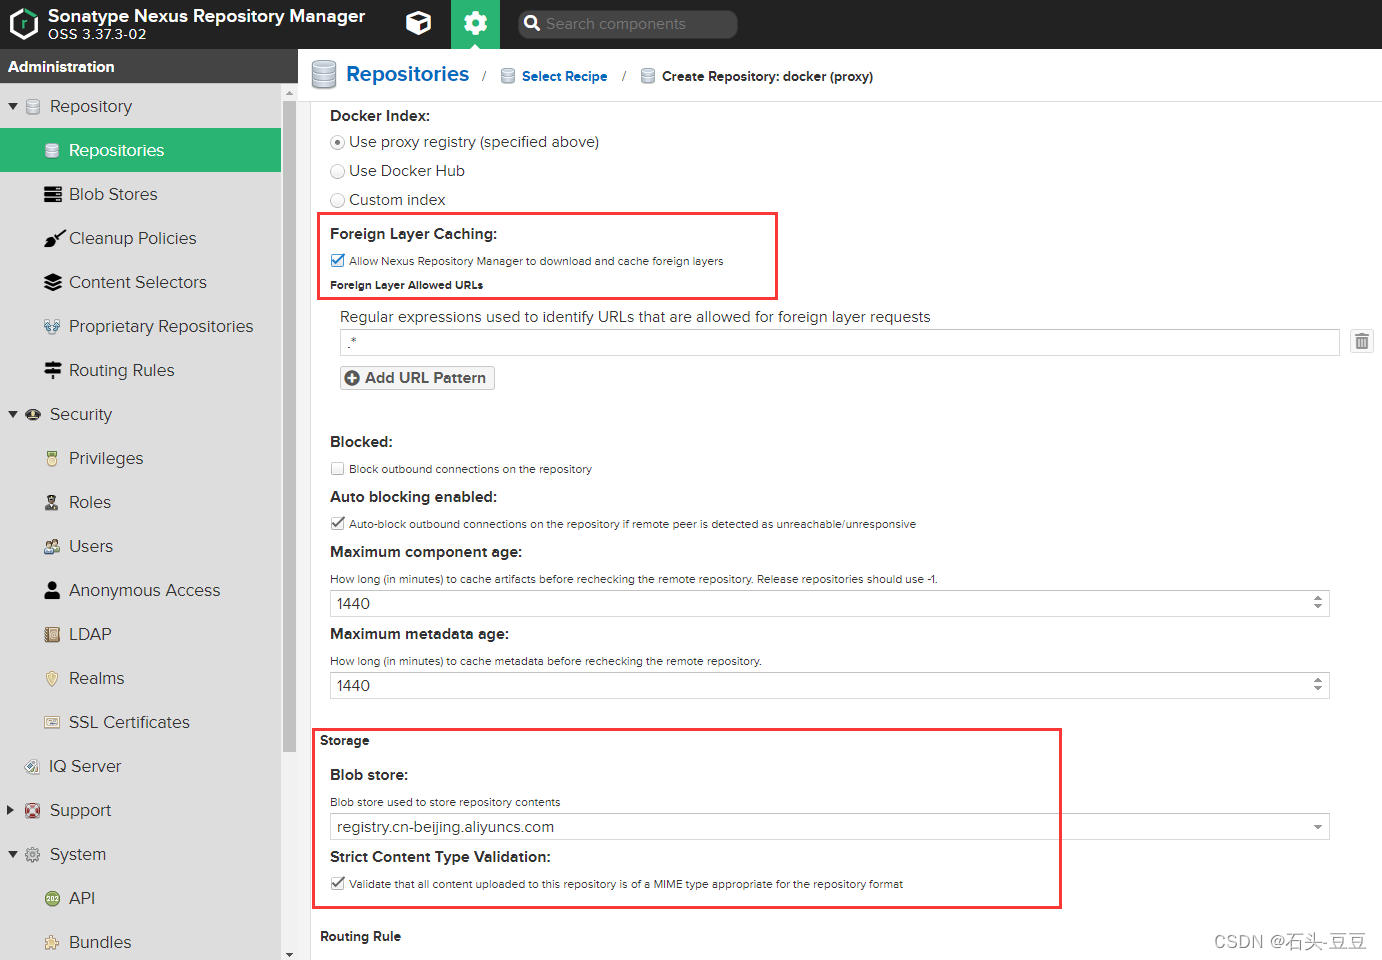
因为使用的阿里云北京区的镜像仓库,所以这里填入北京区地址,如果是腾讯云仓库替换即可。
填入阿里云私有仓库认证账号密码
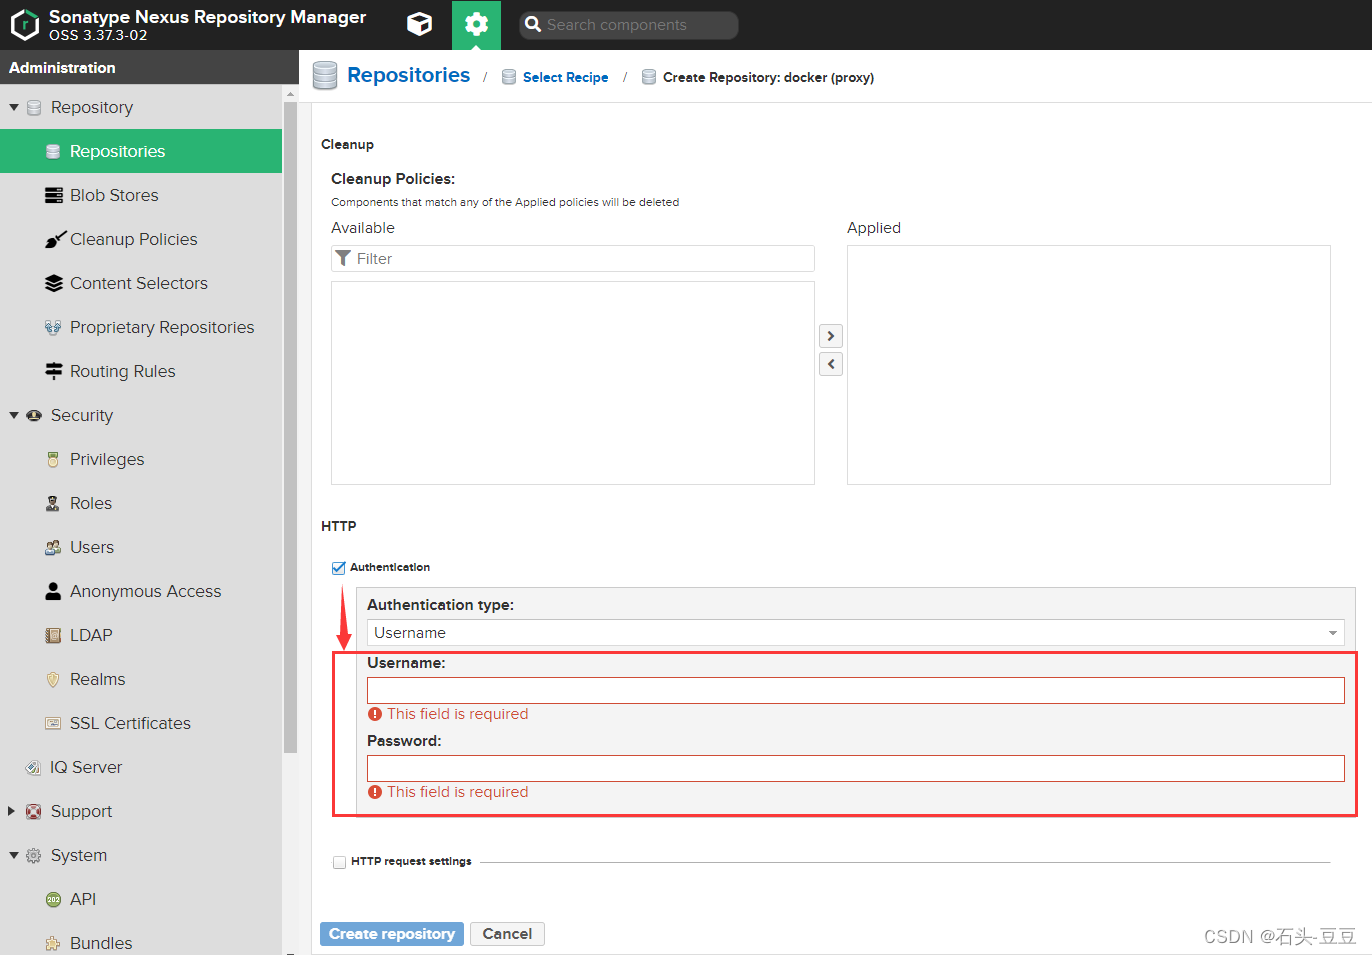
信息填完后点击Create repositories 完成创建。
3.3、重复3.2步骤创建好腾讯私有镜像仓库代理!
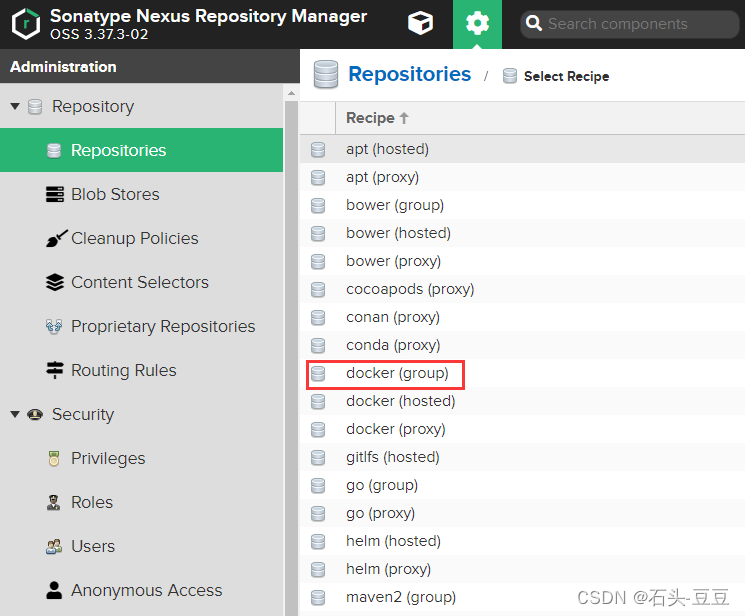
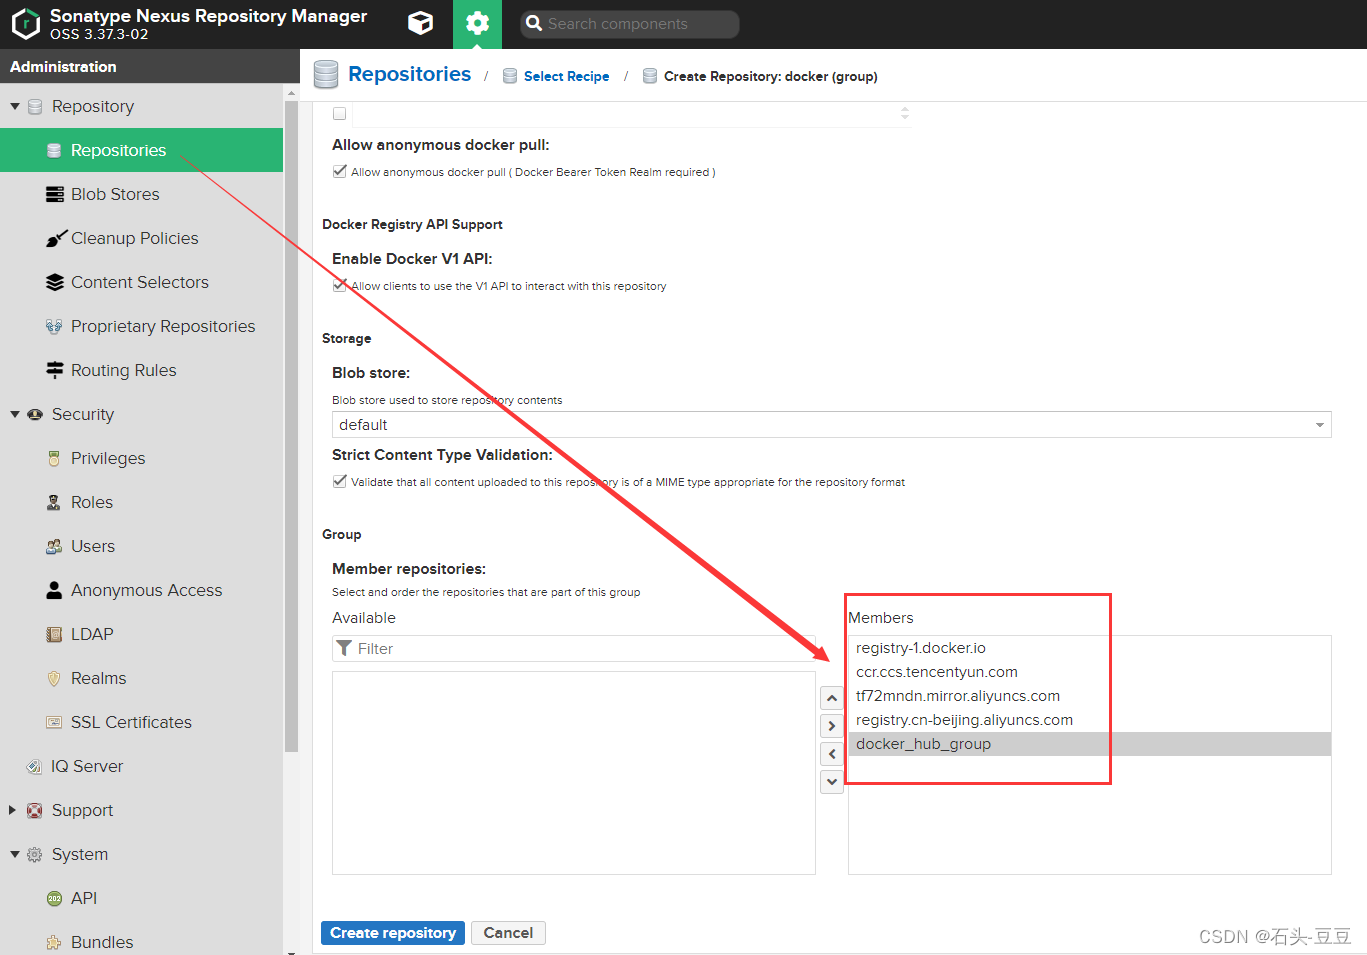
3.4、创建Docker-Group
选择docker(group类型)
红框需要设置或勾选信息
通过8888端口对外提供代理服务
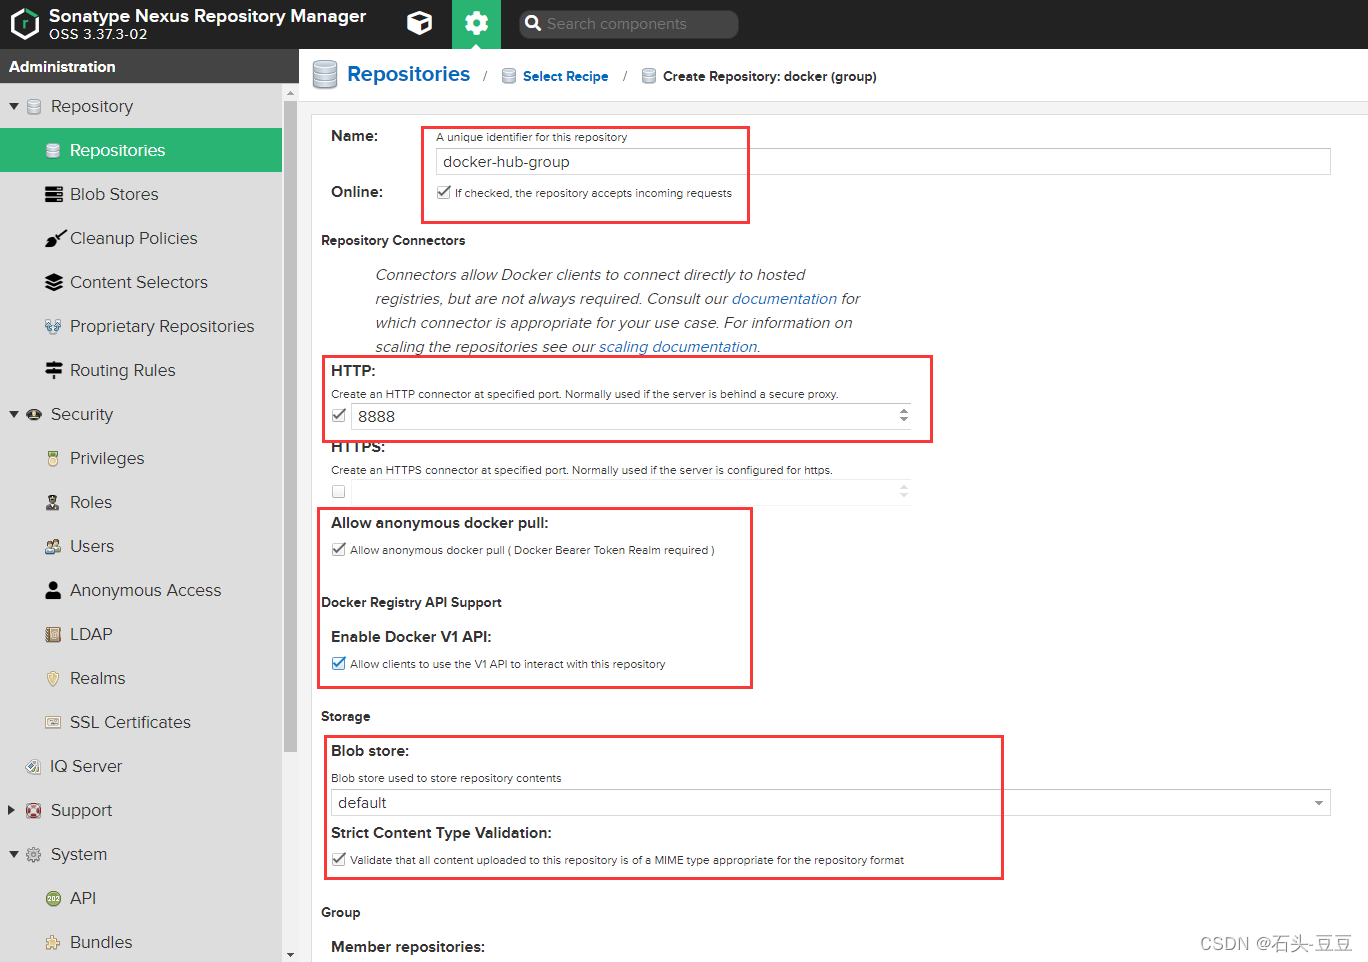
把刚创建的docker代理加入到群组中
四、配置Containerd通过Nexus3镜像仓库下载镜像
4.0、Containerd 版本:
[root@localhost src]# ctr version
Client:Version:  v1.6.21Revision: 3dce8eb055cbb6872793272b4f20ed16117344f8Go version: go1.19.9Server:Version:  v1.6.21Revision: 3dce8eb055cbb6872793272b4f20ed16117344f8UUID: 01b66c6f-637c-4a15-a5db-fb0f75f1fe60
4.1、containerd默认配置
[root@localhost src]# cat /etc/containerd/config.toml
version = 2
root = "/var/lib/containerd"
state = "/run/containerd"
oom_score = 0[grpc]address = "/run/containerd/containerd.sock"uid = 0gid = 0max_recv_message_size = 16777216max_send_message_size = 16777216[debug]address = "/run/containerd/containerd-debug.sock"uid = 0gid = 0level = "warn"[timeouts]"io.containerd.timeout.shim.cleanup" = "5s""io.containerd.timeout.shim.load" = "5s""io.containerd.timeout.shim.shutdown" = "3s""io.containerd.timeout.task.state" = "2s"[plugins][plugins."io.containerd.grpc.v1.cri"]sandbox_image = "sealos.hub:5000/pause:3.2"max_container_log_line_size = -1max_concurrent_downloads = 20disable_apparmor = true[plugins."io.containerd.grpc.v1.cri".containerd]snapshotter = "overlayfs"default_runtime_name = "runc"[plugins."io.containerd.grpc.v1.cri".containerd.runtimes][plugins."io.containerd.grpc.v1.cri".containerd.runtimes.runc]runtime_type = "io.containerd.runc.v2"runtime_engine = ""runtime_root = ""[plugins."io.containerd.grpc.v1.cri".containerd.runtimes.runc.options]SystemdCgroup = true[plugins."io.containerd.grpc.v1.cri".registry]config_path = "/etc/containerd/certs.d"[plugins."io.containerd.grpc.v1.cri".registry.configs][plugins."io.containerd.grpc.v1.cri".registry.configs."sealos.hub:5000".auth]username = "admin"password = "passw0rd"
4.3、添加nexus3代理镜像
在config_path = “/etc/containerd/certs.d” 路径下创建需要经过nexus3的仓库文件夹
/etc/containerd/certs.d
[root@localhost certs.d]# ls -l
总用量 0
drwxr-xr-x 2 root root 24 9月   9 00:30 ccr.ccs.tencentyun.com
drwxr-xr-x 2 root root 24 9月   8 23:50 docker.io
drwxr-xr-x 2 root root 24 9月   8 23:50 registry.cn-beijing.aliyuncs.com
drwxr-xr-x 2 root root 24 9月   8 23:14 sealos.hub:5000
drwxr-xr-x 2 root root 24 9月   8 23:50 tf72mndn.mirror.aliyuncs.com
[root@localhost certs.d]#
配置信息:
[root@localhost certs.d]# cat registry.cn-beijing.aliyuncs.com/hosts.toml
server = "https://registry.cn-beijing.aliyuncs.com"[host."http://172.27.100.251:8888"]capabilities = ["pull", "resolve", "push"]skip_verify = true
4.4、重启Containerd并拉取镜像验证
[root@localhost certs.d]# systemctl restart containerd
[root@localhost certs.d]# crictl pull nginx
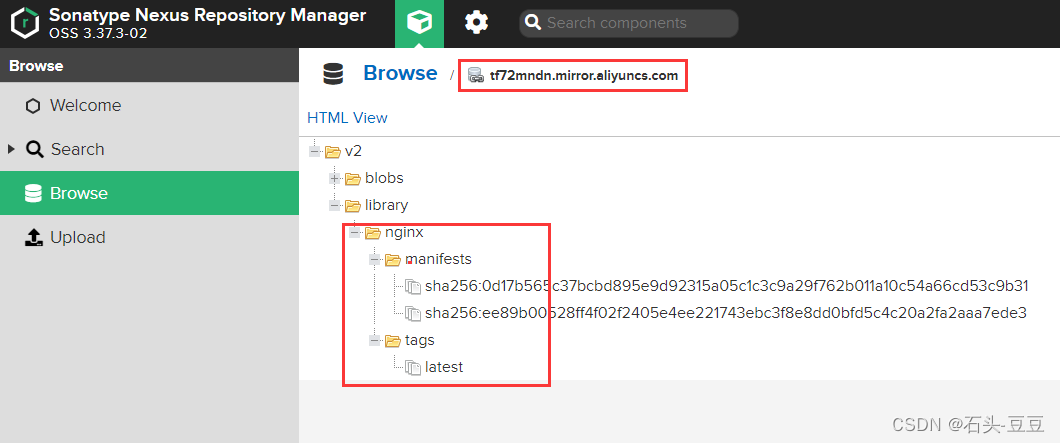
如上图所示,镜像已缓存!
五、Docker通过Nexus代理下载镜像
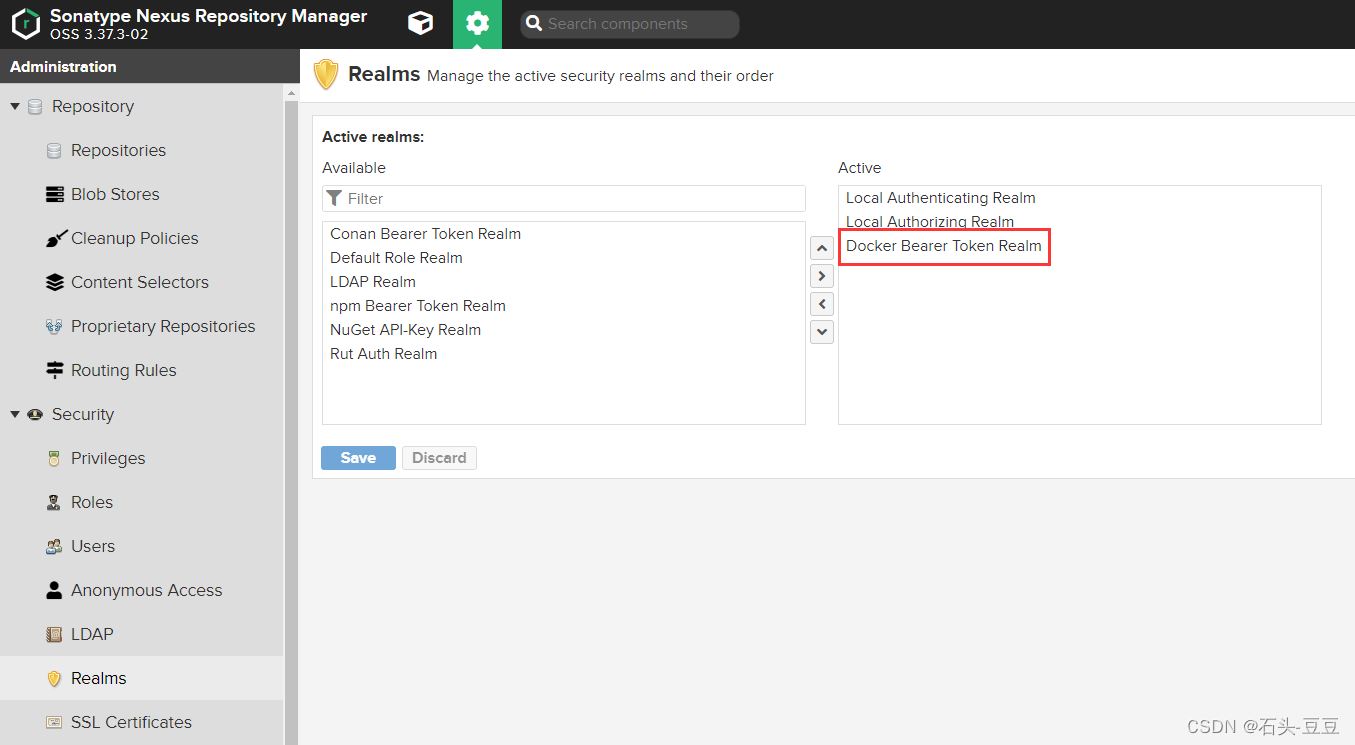
5.1、配置Nexus–Security–Realms
5.2、修改docker daemon.json配置
[root@localhost ~]# cat /etc/docker/daemon.json
{"insecure-registries": ["172.27.100.251:8888"],"registry-mirrors": ["http://172.27.100.251:8888"],"exec-opts": ["native.cgroupdriver=systemd"],"log-opts": {"max-file": "3","max-size": "500m"}
}
docker info
Insecure Registries:172.27.100.251:8888127.0.0.0/8Registry Mirrors:http://172.27.100.251:8888/Live Restore Enabled: false
拉取镜像测试
参考:https://blog.csdn.net/qq_30051761/article/details/131139204