Beats:安装及配置 Metricbeat (二)- 8.x
这篇文章是继文章 “Beats:安装及配置 Metricbeat (一)- 8.x” 的续篇。你可以先阅读之前的那篇文章再继续阅读这篇文章。我们在这篇文章中继续之前的探讨。
使用 fingerprint 来代替证书
在实际的使用中,我们需要从 Elasticsearch 的安装目录中拷贝证书来配置 metricbeat。这样有时觉得并不是很方便。相反,我们可以直接使用 fingerprint 来对 metricbeat 的证书来进行配置。我们可以参考文章 “Beats:使用 fingerprint 来连接 Beats/Logstash 和 Elasticsearch”。我们对 metricbeat.yml 进行如下的修改:
/etc/metricbeat/metricbeat.yml
output.elasticsearch:# Array of hosts to connect to.hosts: ["192.168.0.3:9200"]# Protocol - either `http` (default) or `https`.protocol: "https"# Authentication credentials - either API key or username/password.#api_key: "id:api_key"username: "${ES_USER}"password: "${ES_PASSWORD}"# ssl.certificate_authorities: ["/etc/metricbeat/http_ca.crt"]ssl.ca_trusted_fingerprint: "633bf7f6e4bf264e6a05d488af3c686b858fa63592dc83999a0d77f7e9fe5940"在上面,我们使用 ssl.ca_trusted_fingerprint 的配置来代替 ssl.certificate_authorities 的配置。显然这个比较方便,因为我们不需要拷贝证书,而且配置是不需要含有证书路径。
等修改完上面的配置后,我们重新运行如下的命令来测试这个输出是否已经成功:
metricbeat test outputoot@ubuntu2004:/etc/metricbeat# metricbeat test output
elasticsearch: https://192.168.0.3:9200...parse url... OKconnection...parse host... OKdns lookup... OKaddresses: 192.168.0.3dial up... OKTLS...security: server's certificate chain verification is enabledhandshake... OKTLS version: TLSv1.3dial up... OKtalk to server... OKversion: 8.9.0从输出的结果中来可能,我们的证书配置是成功的。
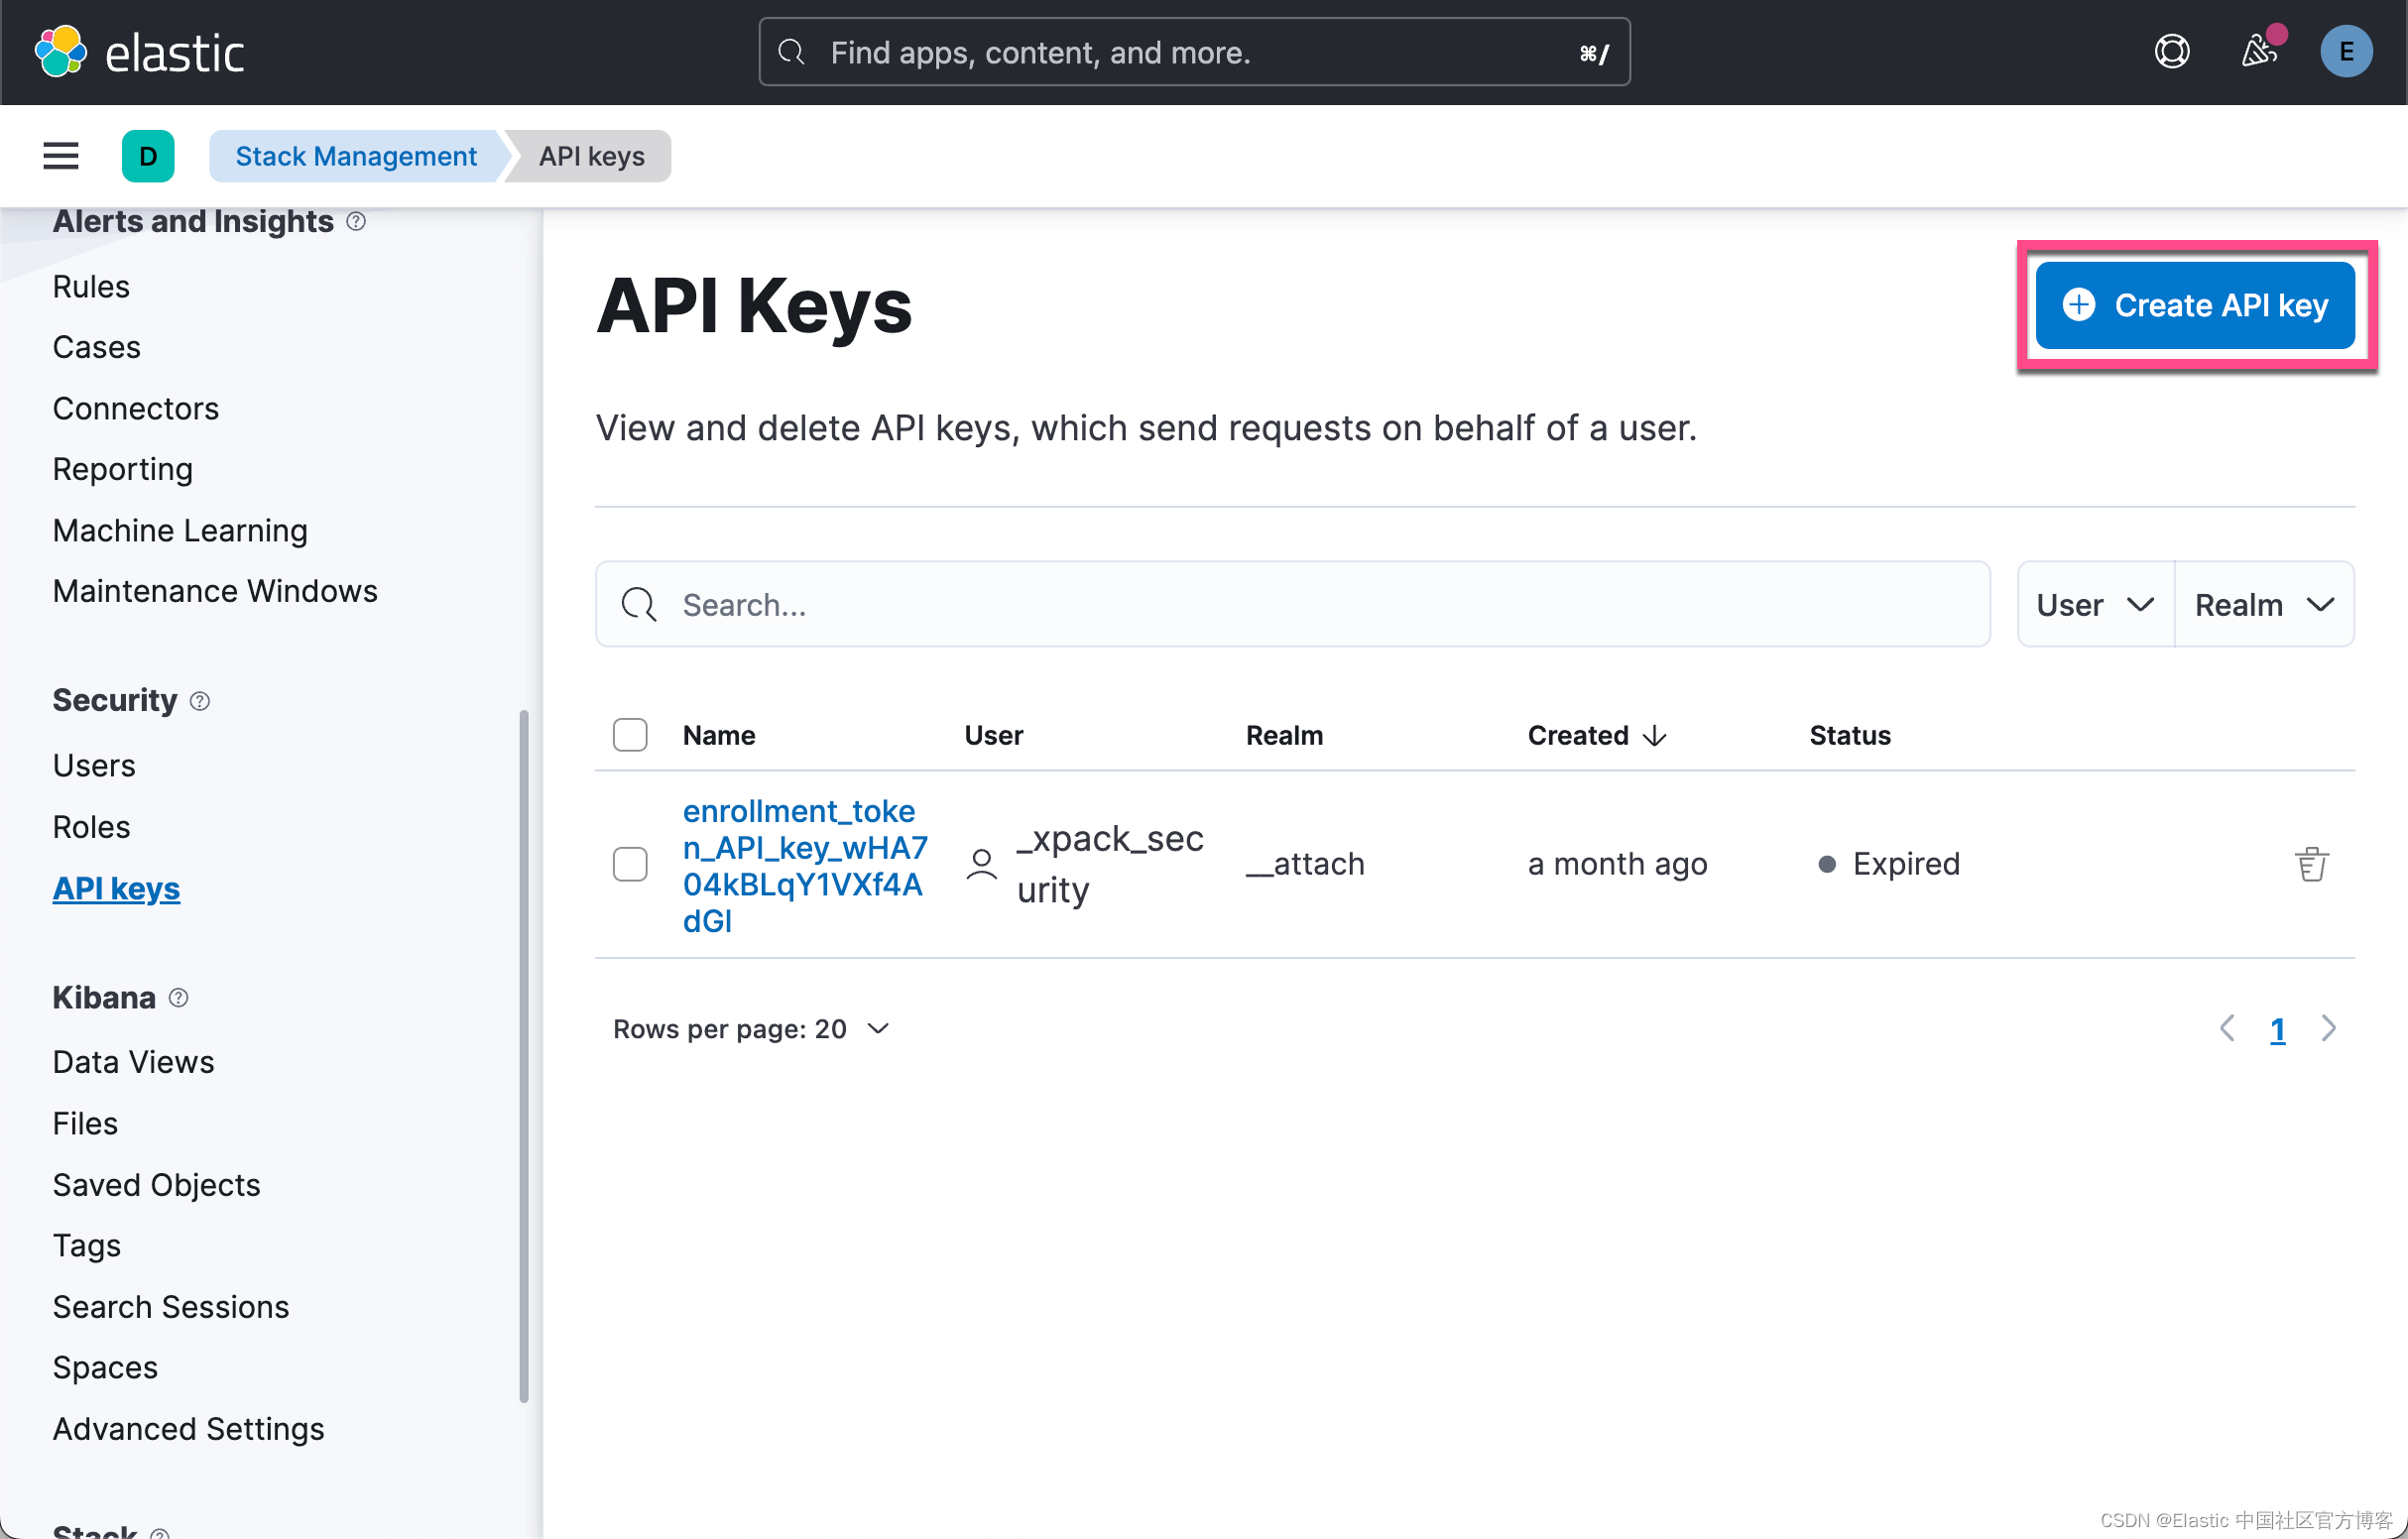
使用 API key 来代替用户名及密码
在很多的情况下,我们并不希望使用 elastic 这个超级用户来对 Beats 进行配置。我们可以使用 API key 来进行配置。使用 API 可以的好处是它可以定义 API key 的使用时效,比如1一个月。当然它也可以定义相应的权限。在下面我们来展示如何创建 API key:


我们拷贝上面的 API key,并在 metricbeat.yml 中进行配置:
/etc/metricbeat/metricbeat.yml
output.elasticsearch:# Array of hosts to connect to.hosts: ["192.168.0.3:9200"]# Protocol - either `http` (default) or `https`.protocol: "https"# Authentication credentials - either API key or username/password.#api_key: "id:api_key"# username: "${ES_USER}"# password: "${ES_PASSWORD}"api_key: sFizXYoBxPLM4LwrKywe:NMOjRbUvT7ykunWDsVG4uQ# ssl.certificate_authorities: ["/etc/metricbeat/http_ca.crt"]ssl.ca_trusted_fingerprint: "633bf7f6e4bf264e6a05d488af3c686b858fa63592dc83999a0d77f7e9fe5940"在上面,我们使用 api_key 来代替 username/password 的配置。我们使用如下的命令来测试配置是否成功:
metricbeat test outputroot@ubuntu2004:/etc/metricbeat# metricbeat test output
elasticsearch: https://192.168.0.3:9200...parse url... OKconnection...parse host... OKdns lookup... OKaddresses: 192.168.0.3dial up... OKTLS...security: server's certificate chain verification is enabledhandshake... OKTLS version: TLSv1.3dial up... OKtalk to server... OKversion: 8.9.0上面显示我们的配置是成功的。
创建新用户并使用新用户信息来进行配置
在上面,我们已经说明了使用 elastic 超级用户是非常不好的一个习惯,因为一旦 elastic 这个超级用户的信息被泄露,那么它可能造成灾难性的后果。在实际的使用中,我们尽量避免使用 elastic 这个超级用户。我们可以参考之前的文章 “Beats:最佳实践” 来创建一个针对 Beats 数据采集的用户。这个用户有较少的权限。即便泄露也可能不会造成特别大的损失。更多信息,可以参阅官方文档 Grant privileges and roles needed for publishing | Filebeat Reference [8.9] | Elastic
我们参考之前的文章 “Elasticsearch:用户安全设置” 来创建用户及 roles。


我们接下来创建用户:


如上所示,我创建了一个叫做 user 的用户,而它的密码为 password。

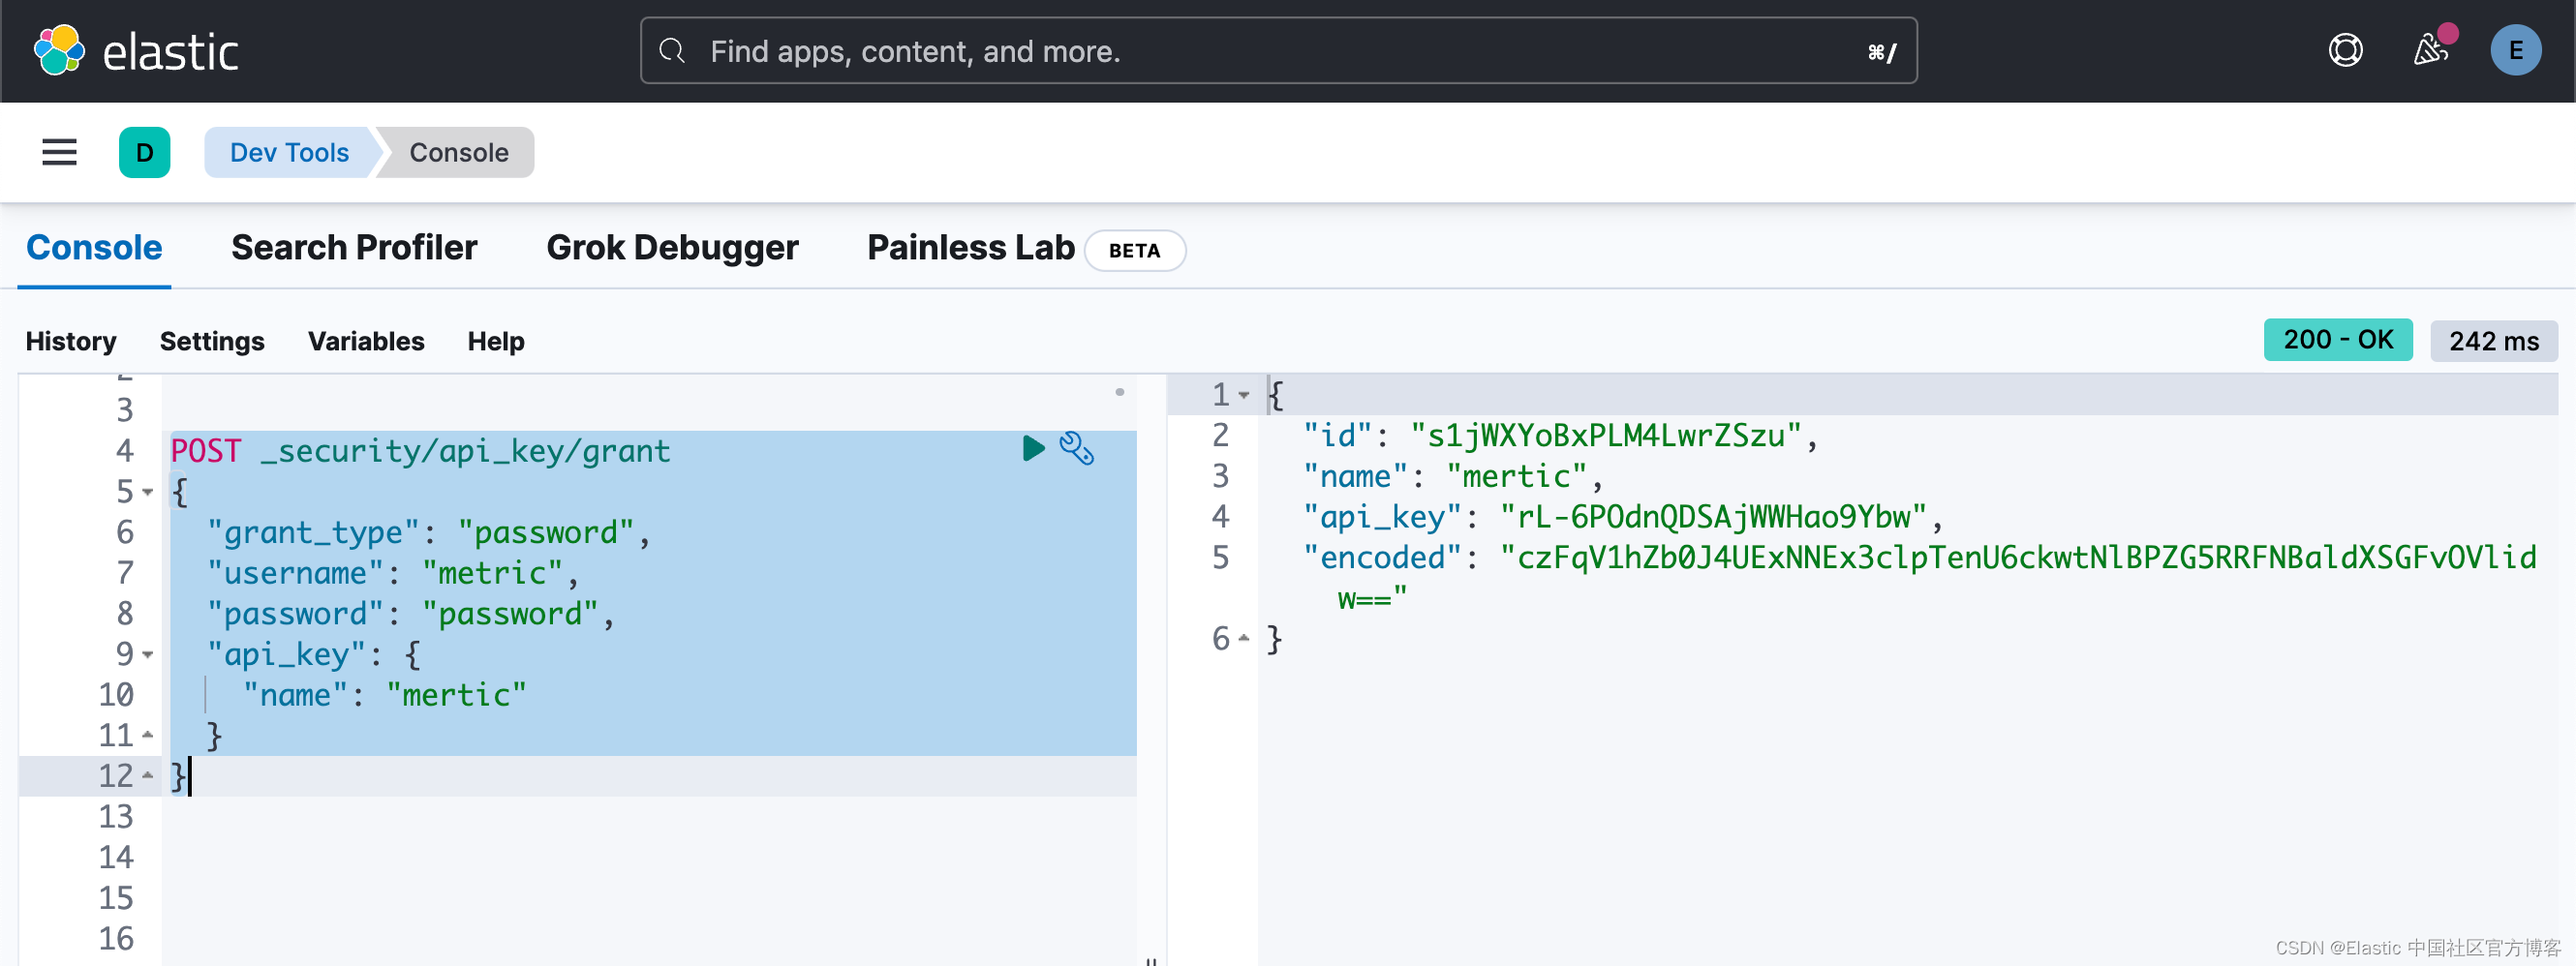
接下来,我们使用如下的命令来创建一个属于 mertic 用户的 API key:
POST _security/api_key/grant
{"grant_type": "password","username": "metric","password": "password","api_key": {"name": "mertic"}
}
我们可以使用如下的方法来对 Metricbeat 进行配置:
api_key: "id:api_key"/etc/metricbeat/metricbeat.yml
output.elasticsearch:# Array of hosts to connect to.hosts: ["192.168.0.3:9200"]# Protocol - either `http` (default) or `https`.protocol: "https"# Authentication credentials - either API key or username/password.api_key: "s1jWXYoBxPLM4LwrZSzu:rL-6POdnQDSAjWWHao9Ybw"# username: "${ES_USER}"# password: "${ES_PASSWORD}"# ssl.certificate_authorities: ["/etc/metricbeat/http_ca.crt"]ssl.ca_trusted_fingerprint: "633bf7f6e4bf264e6a05d488af3c686b858fa63592dc83999a0d77f7e9fe5940"配置完毕后,我们再进行如下的测试:
metricbeat test outputroot@ubuntu2004:/etc/metricbeat# metricbeat test output
elasticsearch: https://192.168.0.3:9200...parse url... OKconnection...parse host... OKdns lookup... OKaddresses: 192.168.0.3dial up... OKTLS...security: server's certificate chain verification is enabledhandshake... OKTLS version: TLSv1.3dial up... OKtalk to server... OKversion: 8.9.0很显然我们的配置是成功的。我们可以使用和之前文章 “Beats:安装及配置 Metricbeat (一)- 8.x” 中所述的 keystore 来保存这些信息。
/etc/mertricbeat/metrcibeat.yml
# ---------------------------- Elasticsearch Output ----------------------------
output.elasticsearch:# Array of hosts to connect to.hosts: ["192.168.0.3:9200"]# Protocol - either `http` (default) or `https`.protocol: "https"# Authentication credentials - either API key or username/password.api_key: "${ES_API_KEY}"# username: "${ES_USER}"# password: "${ES_PASSWORD}"# ssl.certificate_authorities: ["/etc/metricbeat/http_ca.crt"]ssl.ca_trusted_fingerprint: "633bf7f6e4bf264e6a05d488af3c686b858fa63592dc83999a0d77f7e9fe5940"
metricbeat keystore add ES_API_KEYroot@ubuntu2004:/etc/metricbeat# metricbeat keystore add ES_API_KEY
Enter value for ES_API_KEY:
Successfully updated the keystore在上面,我们使用 s1jWXYoBxPLM4LwrZSzu:rL-6POdnQDSAjWWHao9Ybw 作为输入。它就是 id:api_key 的组合。我们再次运行如下的命令来检查配置是否成功:
root@ubuntu2004:/etc/metricbeat# metricbeat test output
elasticsearch: https://192.168.0.3:9200...parse url... OKconnection...parse host... OKdns lookup... OKaddresses: 192.168.0.3dial up... OKTLS...security: server's certificate chain verification is enabledhandshake... OKTLS version: TLSv1.3dial up... OKtalk to server... OKversion: 8.9.0当然针对有些用户喜欢使用 username 及 password 来配置而不使用 API key,你也可以是使用如下的配置:
/etc/metricbeat/metricbeat.yml
output.elasticsearch:# Array of hosts to connect to.hosts: ["192.168.0.3:9200"]# Protocol - either `http` (default) or `https`.protocol: "https"# Authentication credentials - either API key or username/password.# api_key: "${ES_API_KEY}"username: "metric"password: "password"# ssl.certificate_authorities: ["/etc/metricbeat/http_ca.crt"]ssl.ca_trusted_fingerprint: "633bf7f6e4bf264e6a05d488af3c686b858fa63592dc83999a0d77f7e9fe5940"这样我们就完成了这个部分的展示。在接下来的文章中,我将介绍如何使用 Alerts 来对 Metricbeat 进行通知。