【仿牛客论坛java项目】第五章 Kafka,构建TB级异步消息系统:阻塞队列、Kafka入门、Spring整合Kafka、发送系统通知、显示系统通知
这里写自定义目录标题
- 一、阻塞队列
- 简单的阻塞队列测试案例
- 总结
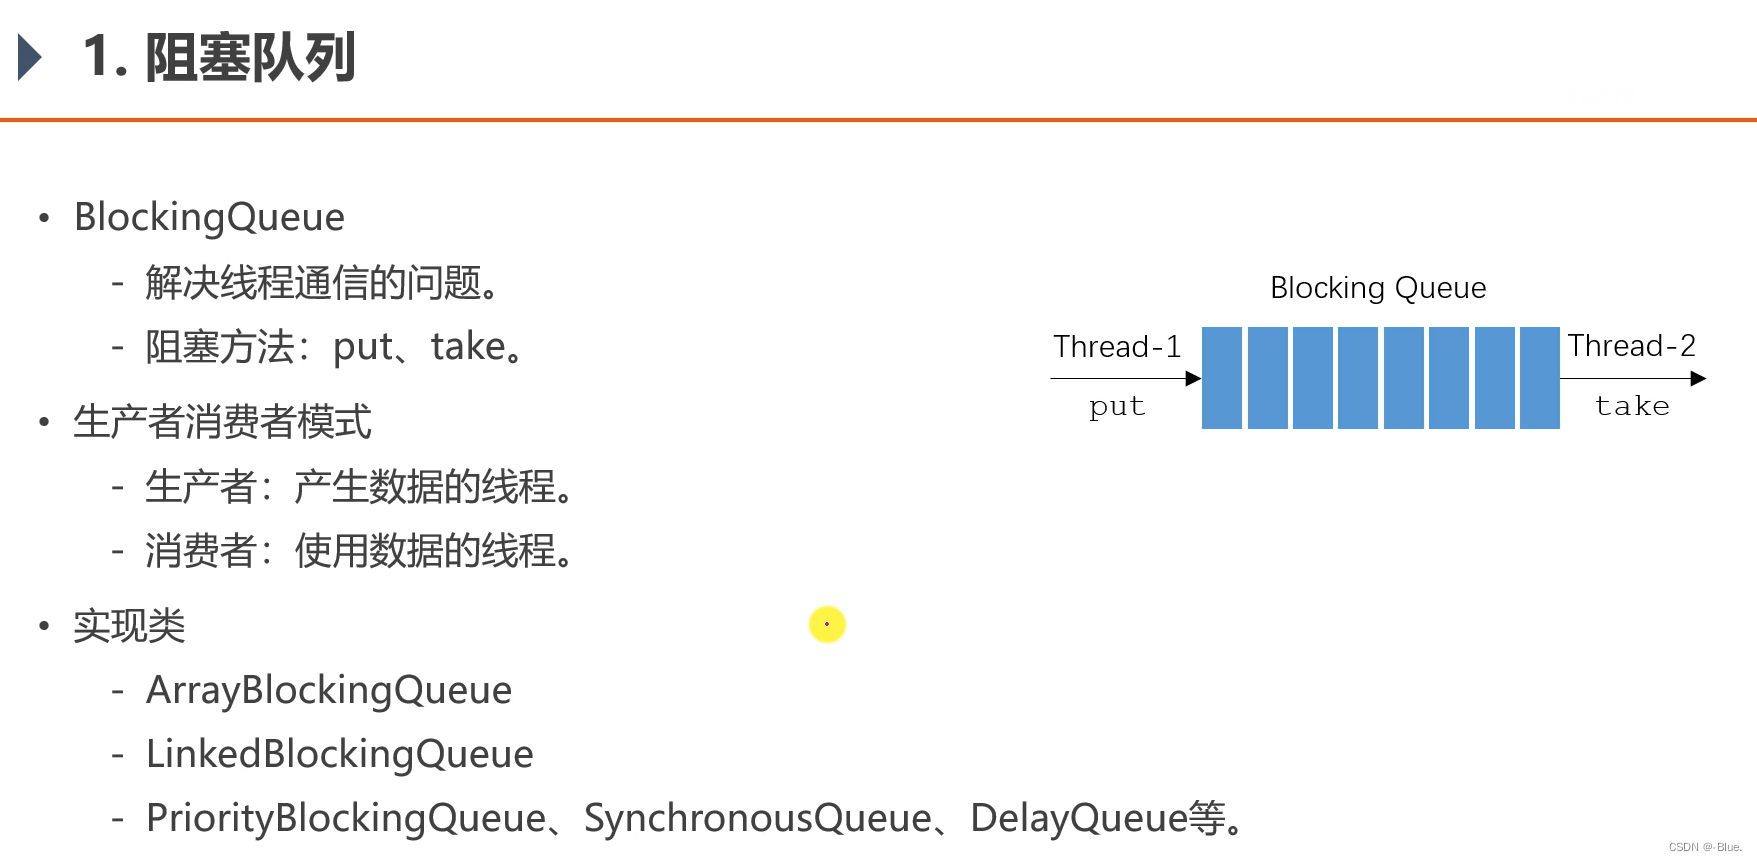
- 阻塞队列
- 二、Kafka入门
- 1、基础知识
- Kafka术语
- 消息队列实现方式两种
- 2、配置
- 3、启动
- 全部命令
- 启动 zookeeper 服务器
- 再启动 kafka 服务器
- 创建Topic
- 关闭
- 4、总结
- Kafka的特点
- Kafka的术语
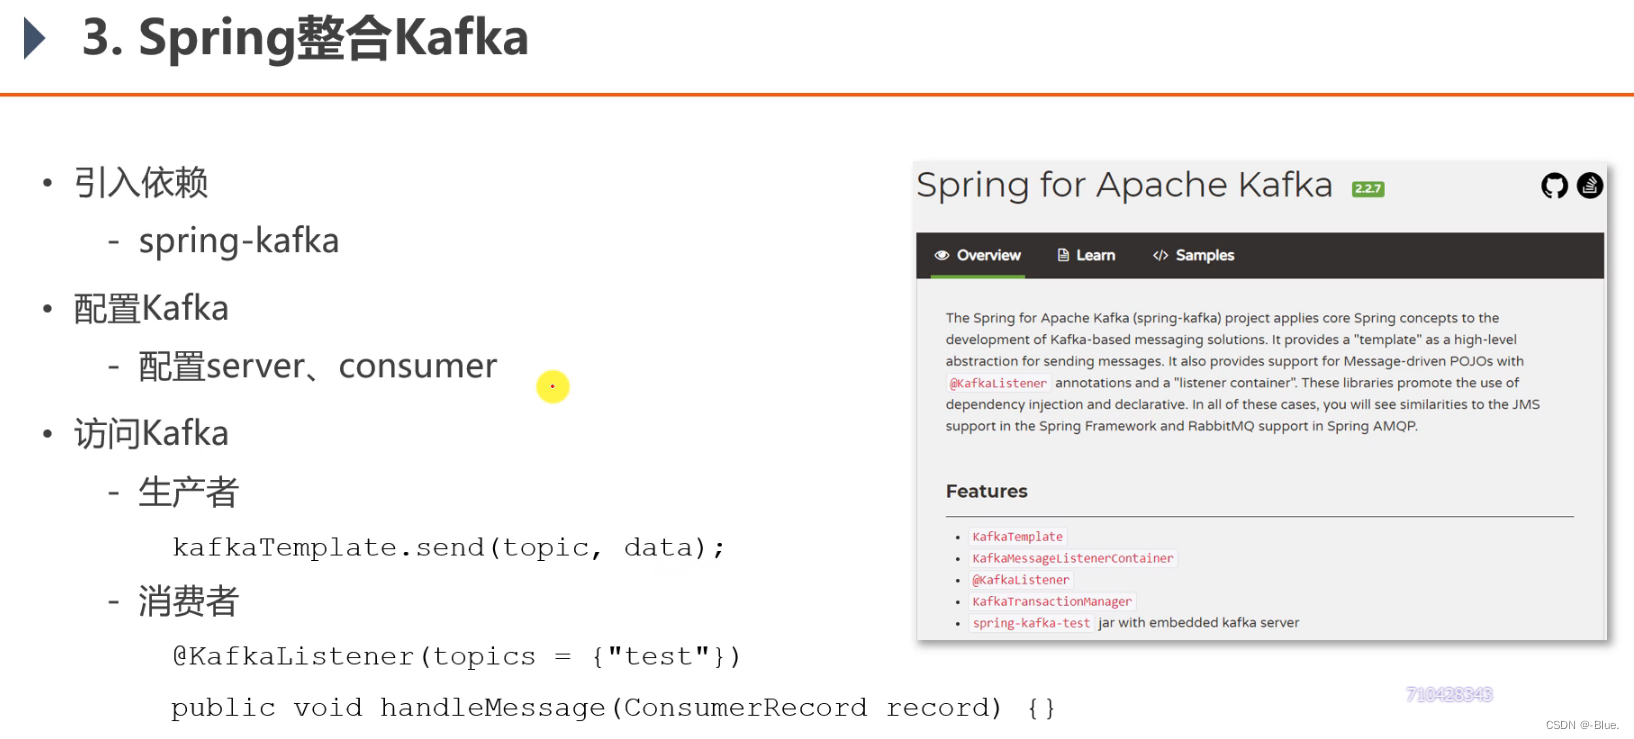
- 三、 Spring整合Kafka
- 导入依赖
- application.properties
- KafkaTests.java
- 测试结果
- 四、发送系统通知
- 事件主体——Event
- 事件的生产者和消费者
- 补充评论mappper方法
- CommentMapper
- comment-mapper.xml
- CommentService
- 视图层评论——CommentController
- 视图层点赞——LikeController
- 视图层关注——FollowController
- 测试结果
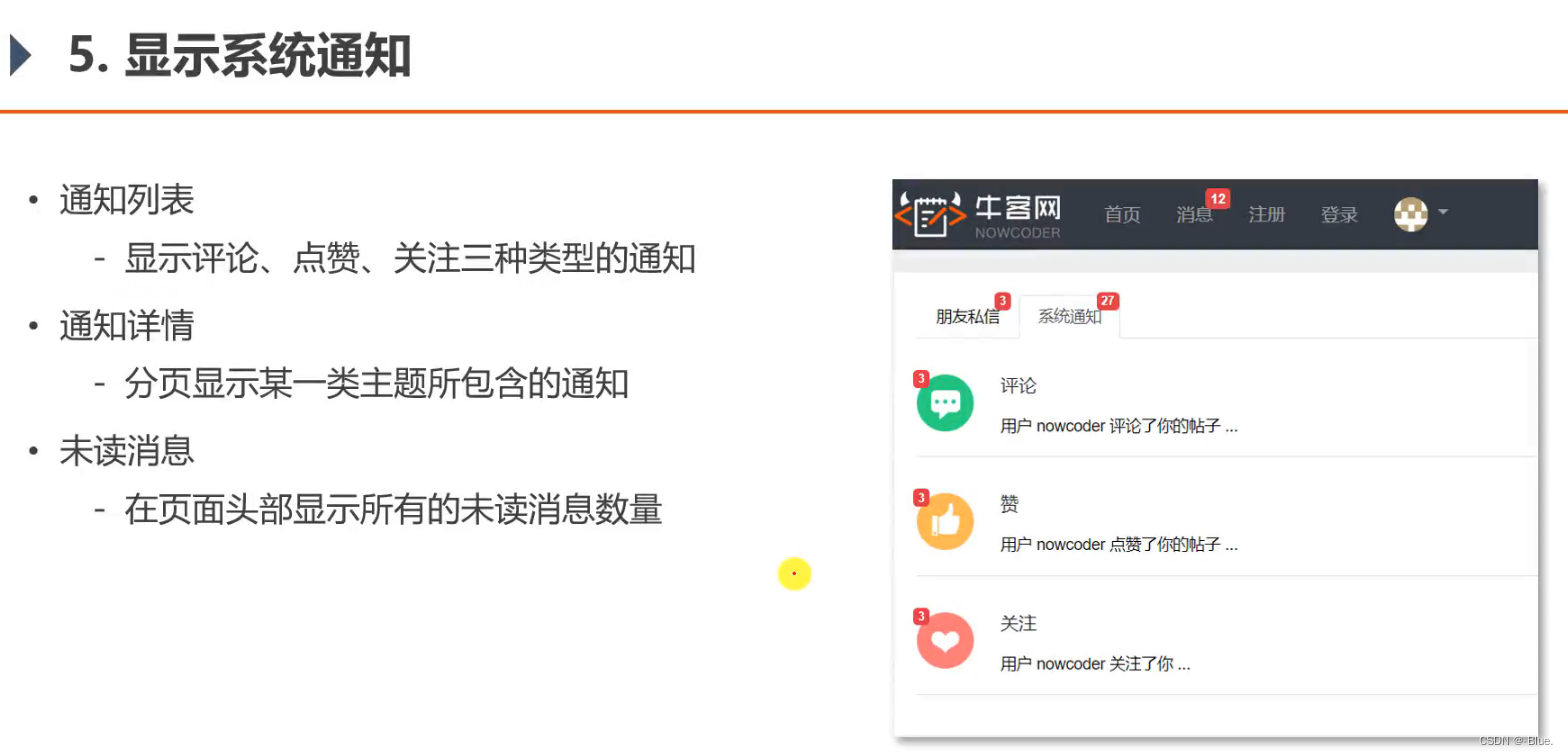
- 五、显示系统通知
- 1、通知列表
- 数据访问层——MessageMapper.java
- 业务层——MessageService
- 视图层——MessageController
- 页面
- letter.html
- notice.html
- 测试
- 2、通知详情
- 数据访问层——MessageMapper.java
- 业务层——MessageService
- 视图层——MessageController
- 页面
- notice.html
- notice-detail.html
- 3、未读消息(总的)
- 拦截器——MessageInterceptor
- 拦截器配置——WebMvcConfig.java
- index.html
性能最好的消息队列
一、阻塞队列
阻塞队列——java自带,接口,BlockingQueue
二倍阻塞——消费者快
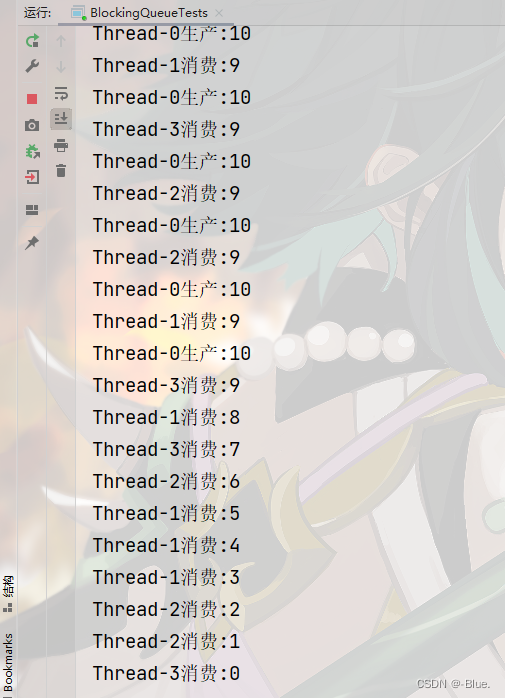
简单的阻塞队列测试案例
BlockingQueueTests
package com.nowcoder.community;import java.util.Random;
import java.util.concurrent.ArrayBlockingQueue;
import java.util.concurrent.BlockingQueue;/*** 阻塞队列测试案例*/
public class BlockingQueueTests {public static void main(String[] args) {BlockingQueue queue = new ArrayBlockingQueue(10);   // 队列容量new Thread(new Producer(queue)).start();new Thread(new Consumer(queue)).start();new Thread(new Consumer(queue)).start();new Thread(new Consumer(queue)).start();}}/*** 生产者线程*/
// 实现接口
class Producer implements Runnable {// 接收传来的阻塞队列private BlockingQueue<Integer> queue;public Producer(BlockingQueue<Integer> queue) {this.queue = queue;}@Overridepublic void run() {try {for (int i = 0; i < 100; i++) { // 生产100数据Thread.sleep(20);   // 间隔时间 20msqueue.put(i);System.out.println(Thread.currentThread().getName() + "生产:" + queue.size());}} catch (Exception e) {e.printStackTrace();}}}/*** 消费者线程*/
class Consumer implements Runnable {private BlockingQueue<Integer> queue;public Consumer(BlockingQueue<Integer> queue) {this.queue = queue;}@Overridepublic void run() {try {while (true) {Thread.sleep(new Random().nextInt(1000));queue.take();System.out.println(Thread.currentThread().getName() + "消费:" + queue.size());}} catch (Exception e) {e.printStackTrace();}}
}
总结
阻塞队列
- 阻塞队列的接口为BlockingQueue,该接口有ArrayBlockingQueue、LinkedBlockingQueue等多个实现类。
- 阻塞队列包含put方法,用于向队列中存入数据,当队列已满时,该方法将阻塞
- 阻塞队列包含take方法,用于从队列中获取数据,当队列已空时,该方法将阻塞
二、Kafka入门
Kafka官网
1、基础知识
- 项目中只用到了- 消息系统的功能
- 将消息存在硬盘上,长久保存
- 硬盘空间大,比内存价格低
- 读取硬盘效率高低取决于对硬盘的使用
- 对硬盘顺序读写性能很高,高于对内存的随机读写
- 高可靠性——分布式服务器,集成部署
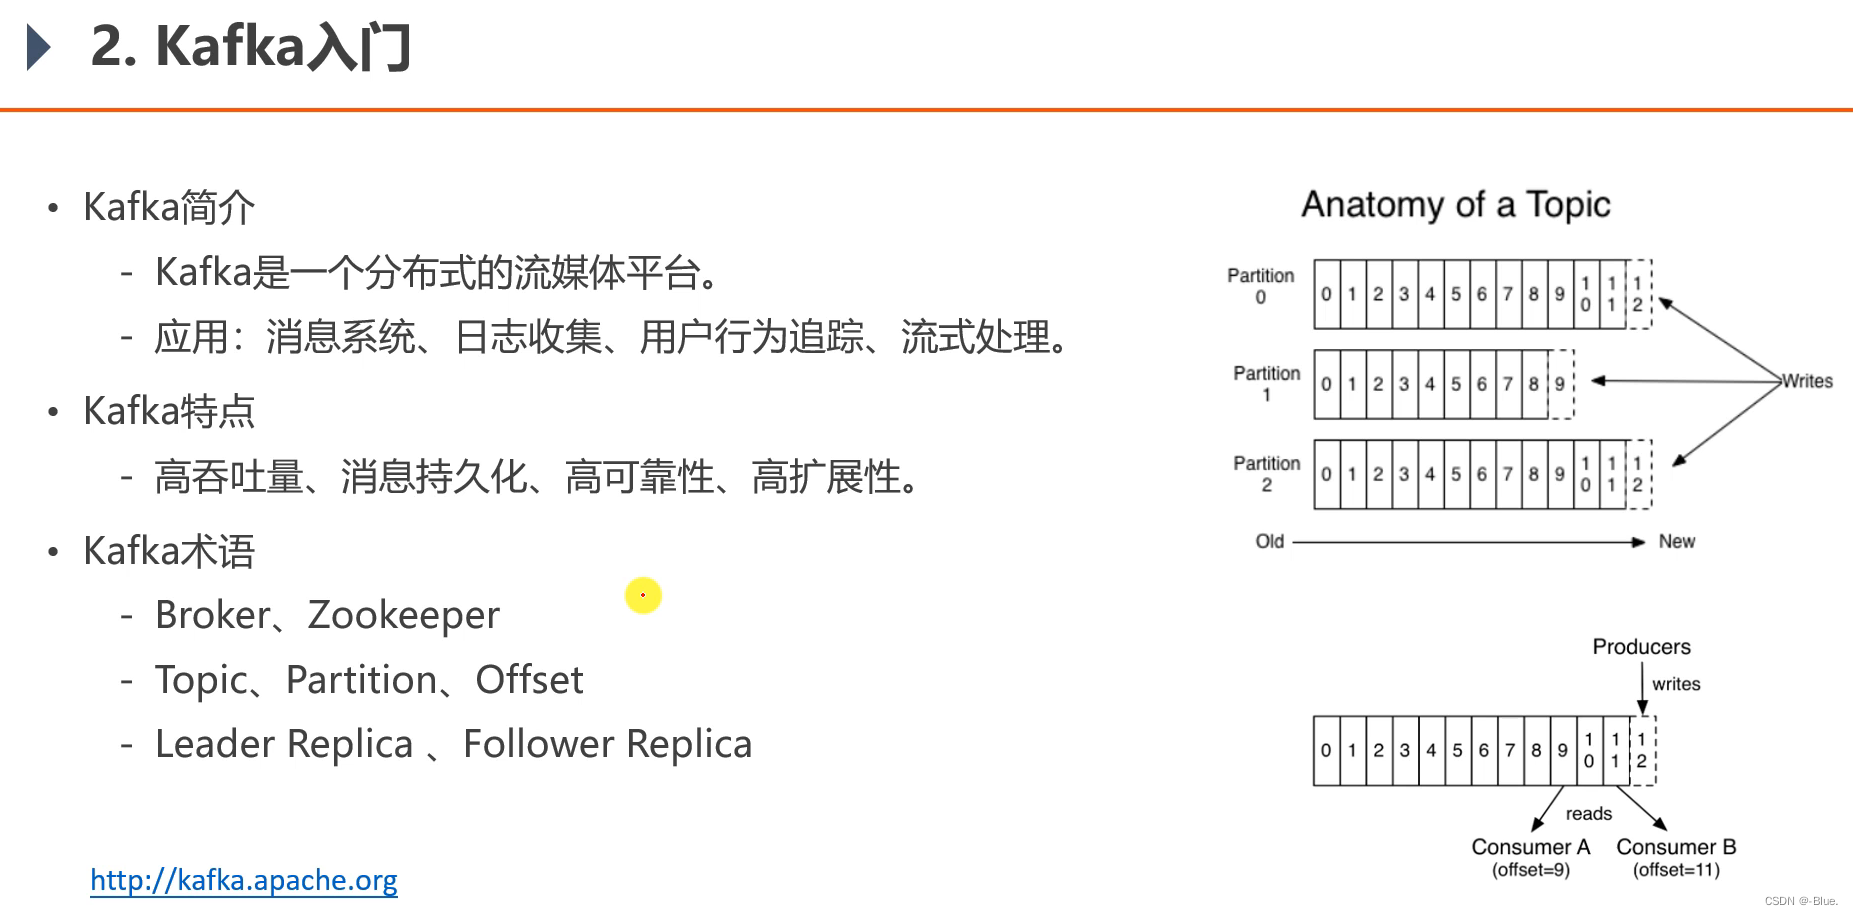
Kafka术语
Broker:服务器Zookeeper:独立软件应用,管理其他集群,Kafka有内置,也可以单独安Topic:发布消息空间,存放消息Partition:分区(看上图)Offset:消息在分区内存在的索引Leader Replica:主副本,数据备份,一个分区有多个副本Follower Replica:从副本
消息队列实现方式两种
- 点对点:BlockingQueue
- 发布订阅模式:很多消费者同时订阅, Kafka
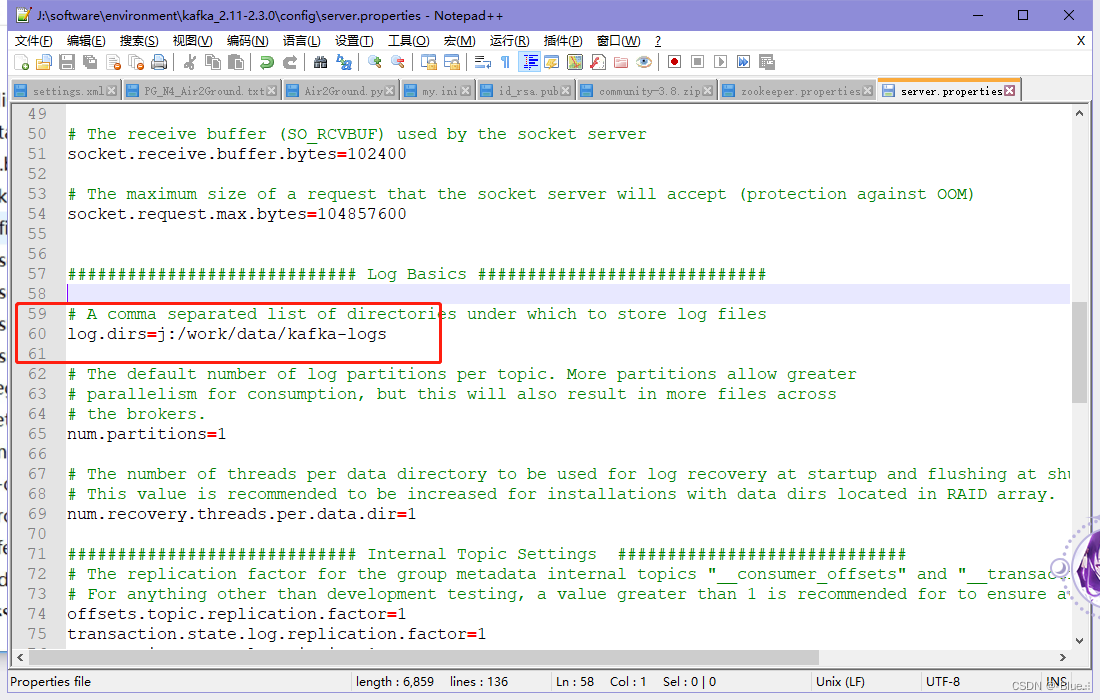
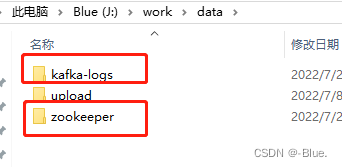
2、配置
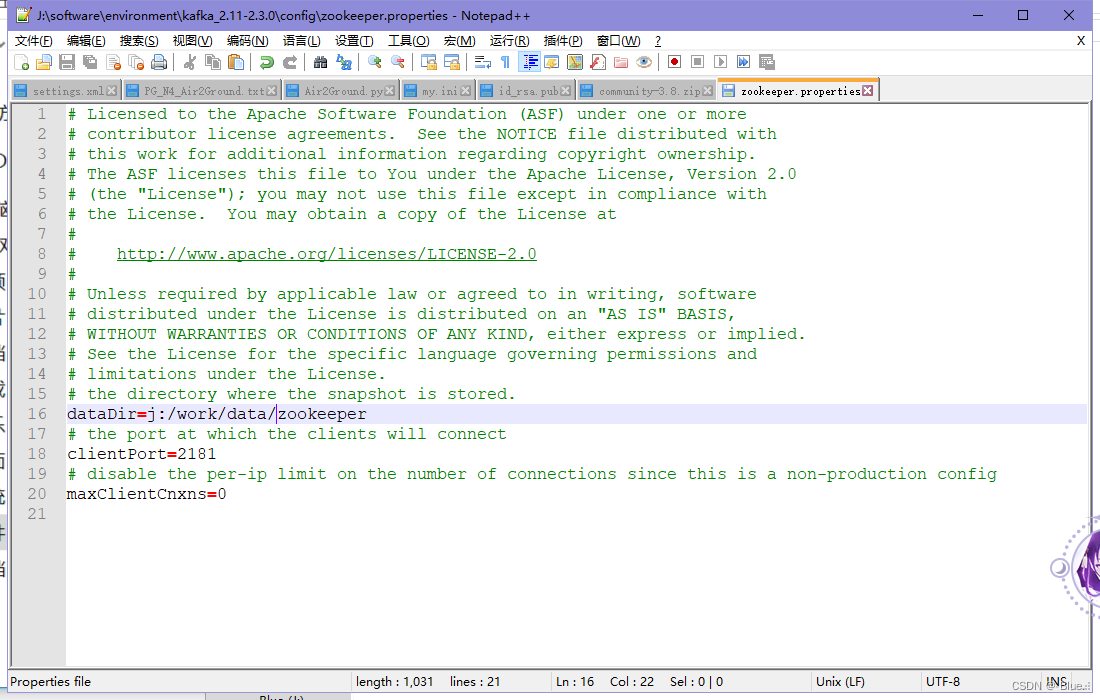
3、启动
全部命令
# 启动zookeeper服务器:C:\Users\dlmu>j:
J:\>cd J:\software\environment\kafka_2.11-2.3.0
# 启动服务器 (先启动zookeeper服务器,再启动kafka) !!!千万不要手动暴力关闭,用下面的命令关闭
J:\software\environment\kafka_2.11-2.3.0>bin\windows\zookeeper-server-start.bat config\zookeeper.properties# 启动kafka服务器:
C:\Users\dlmu>j:
J:\>cd J:\software\environment\kafka_2.11-2.3.0
J:\software\environment\kafka_2.11-2.3.0>bin\windows\kafka-server-start.bat config\server.properties# 创建主题
kafka-topics.bat --create --bootstrap-server localhost:9092 --replication-factor 1 --partitions 1 --topic test# 查看当前服务器的主题
kafka-topics.bat --list --bootstrap-server localhost:9092# 创建生产者,往指定主题上发消息
kafka-console-producer.bat --broker-list localhost:9092 --topic test# 消费者
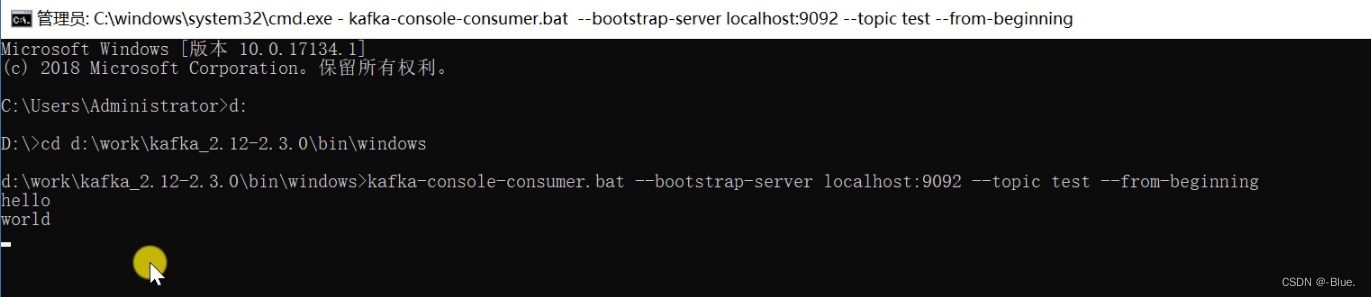
kafka-console-consumer.bat --bootstrap-server localhost:9092 --topic test --from-beginning# 关闭zookeeper服务器
zookeeper-server-stop.bat# 关闭kafka服务器
kafka-server-stop.bat
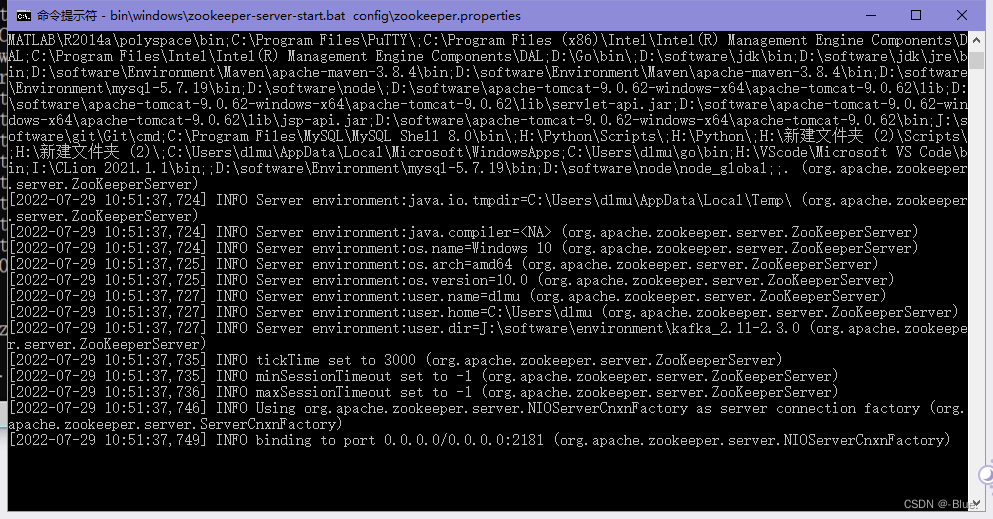
启动 zookeeper 服务器
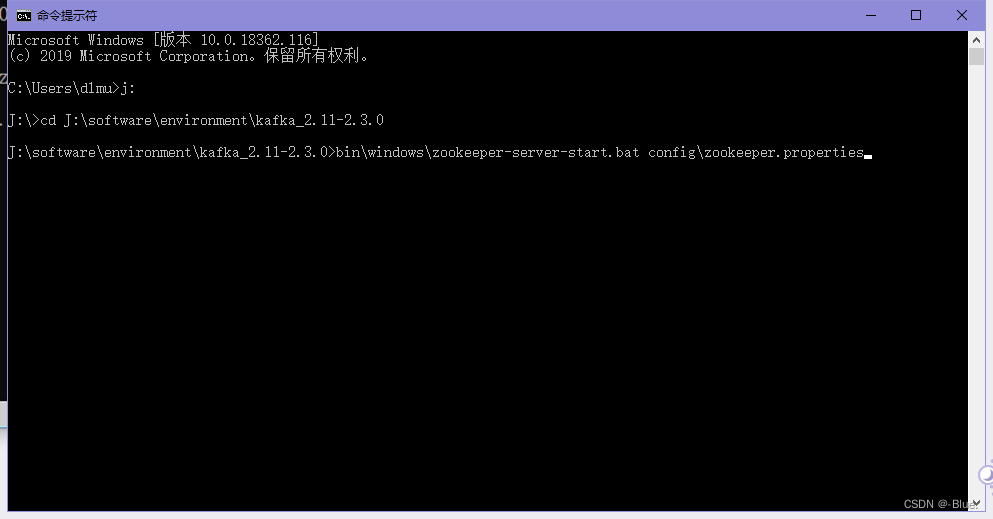
C:\Users\dlmu>j:J:\>cd J:\software\environment\kafka_2.11-2.3.0J:\software\environment\kafka_2.11-2.3.0>bin\windows\zookeeper-server-start.bat config\zookeeper.properties
启动成功
然后不要关闭,再开一个cmd
再启动 kafka 服务器
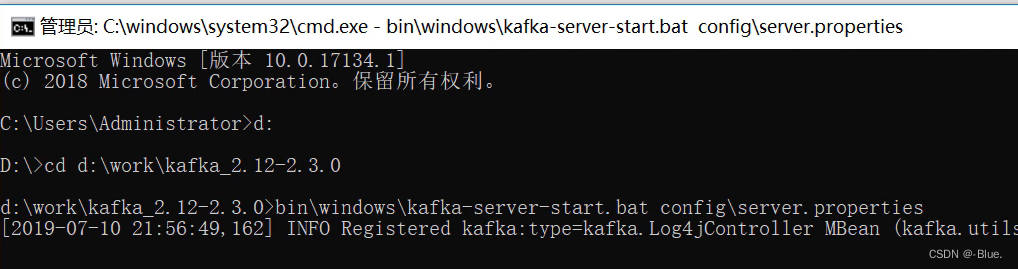
C:\Users\dlmu>j:J:\>cd J:\software\environment\kafka_2.11-2.3.0J:\software\environment\kafka_2.11-2.3.0>bin\windows\kafka-server-start.bat config\server.properties
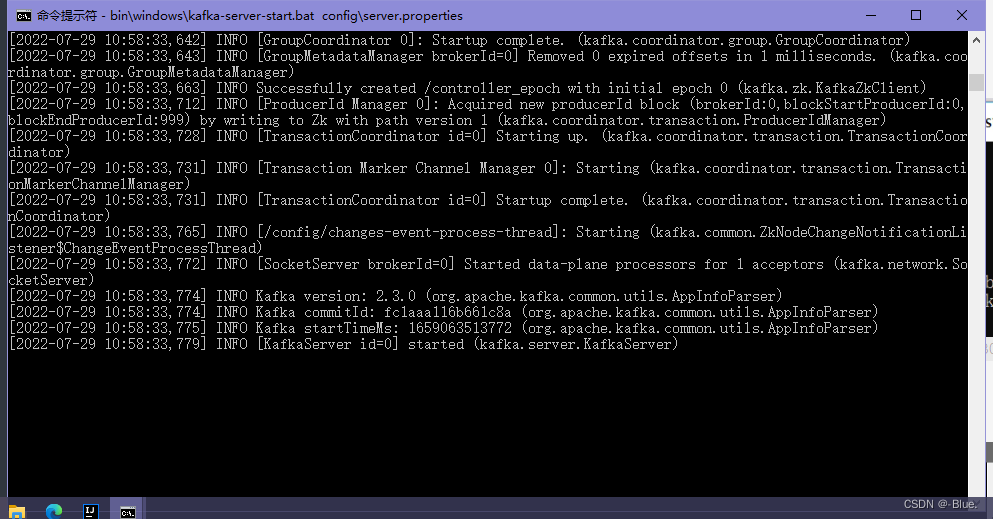
再新启动一个命令
创建Topic
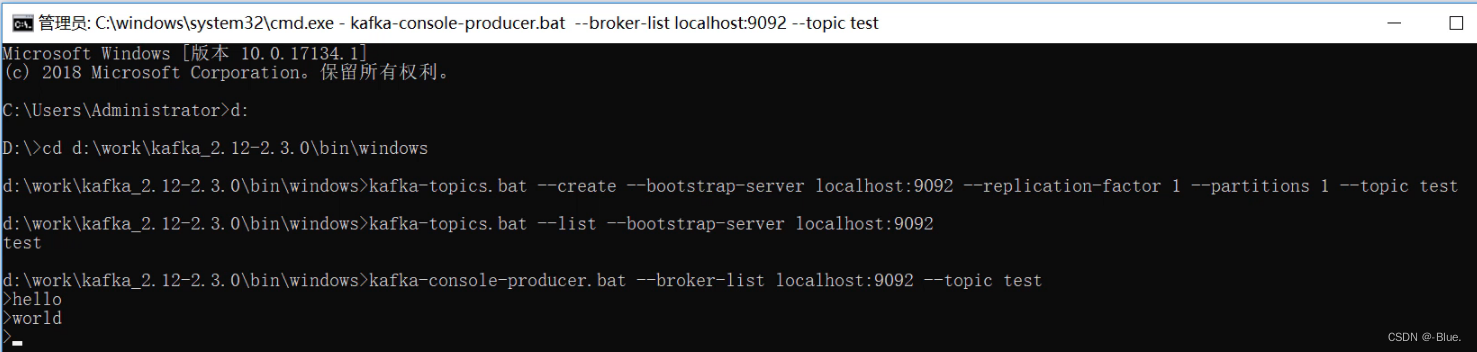
生产者
在启动消费者
关闭
# 关闭zookeeper服务器
zookeeper-server-stop.bat# 关闭kafka服务器
kafka-server-stop.bat
4、总结
Kafka的特点
- Kafka是一个分布式的流媒体平台。
- Kafka可以应用于消息系统、日志收集、用户行为追踪、流式处理等多种场景
- Kafka具有高吞吐量、消息持久化、高可靠性、高扩展性等优点
Kafka的术语
- Kafka集群中的每台服务器叫Broker,整个集群由Zookeeper进行管理
- Kafka采用发布订阅模式,每条消息都要发送到指定的Topic上
- 每个Topic可分为多个Partition,这样可以提高Kafka的并发执行能力
三、 Spring整合Kafka
- 满足生产者消费者模式
导入依赖
<dependency><groupId>org.springframework.kafka</groupId><artifactId>spring-kafka</artifactId>
</dependency>
application.properties
# KafkaProperties
spring.kafka.bootstrap-servers=localhost:9092			kafka 端口
spring.kafka.consumer.group-id=community-consumer-group			消费者组id
spring.kafka.consumer.enable-auto-commit=true  			是否自动提交消费者的偏移量
spring.kafka.consumer.auto-commit-interval=3000    		自动提交频率
消费者读消息按偏移量
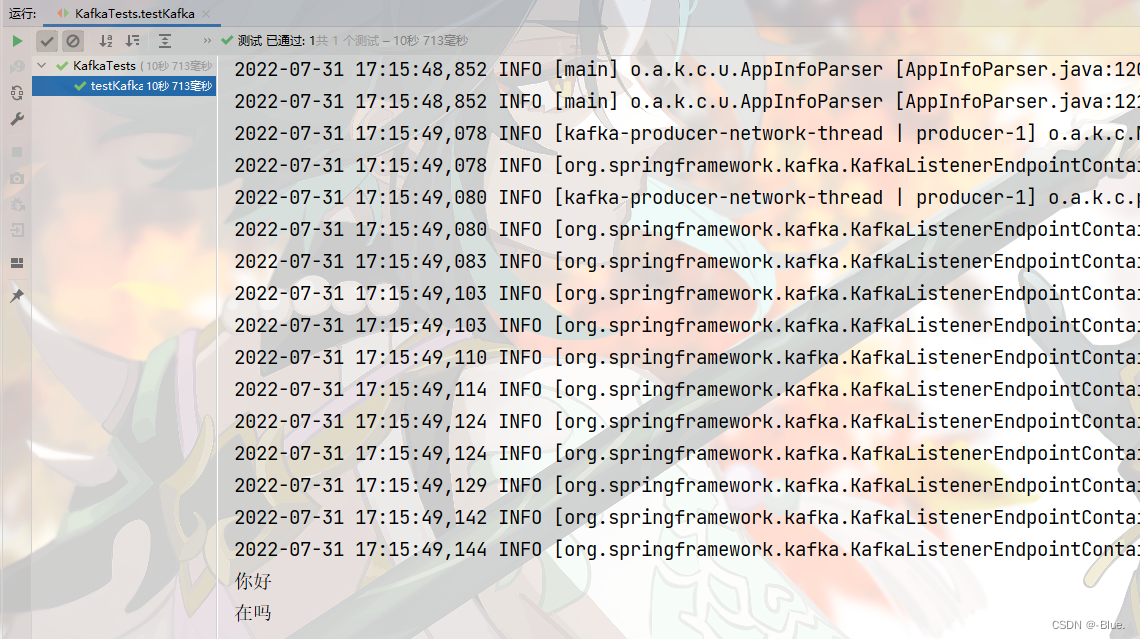
KafkaTests.java
package com.nowcoder.community;@RunWith(SpringRunner.class)
@SpringBootTest
@ContextConfiguration(classes = CommunityApplication.class)
public class KafkaTests {@Autowiredprivate KafkaProducer kafkaProducer;@Testpublic void testKafka() {kafkaProducer.sendMessage("test", "你好");kafkaProducer.sendMessage("test", "在吗");try {Thread.sleep(1000 * 10);} catch (InterruptedException e) {e.printStackTrace();}}}// spring容器管理
@Component
class KafkaProducer {@Autowiredprivate KafkaTemplate kafkaTemplate;/*** 发送消息* @param topic 消息主题* @param content 消息内容*/public void sendMessage(String topic, String content) {kafkaTemplate.send(topic, content);}}@Component
class KafkaConsumer {@KafkaListener(topics = {"test"})public void handleMessage(ConsumerRecord record) {System.out.println(record.value());}}
测试结果
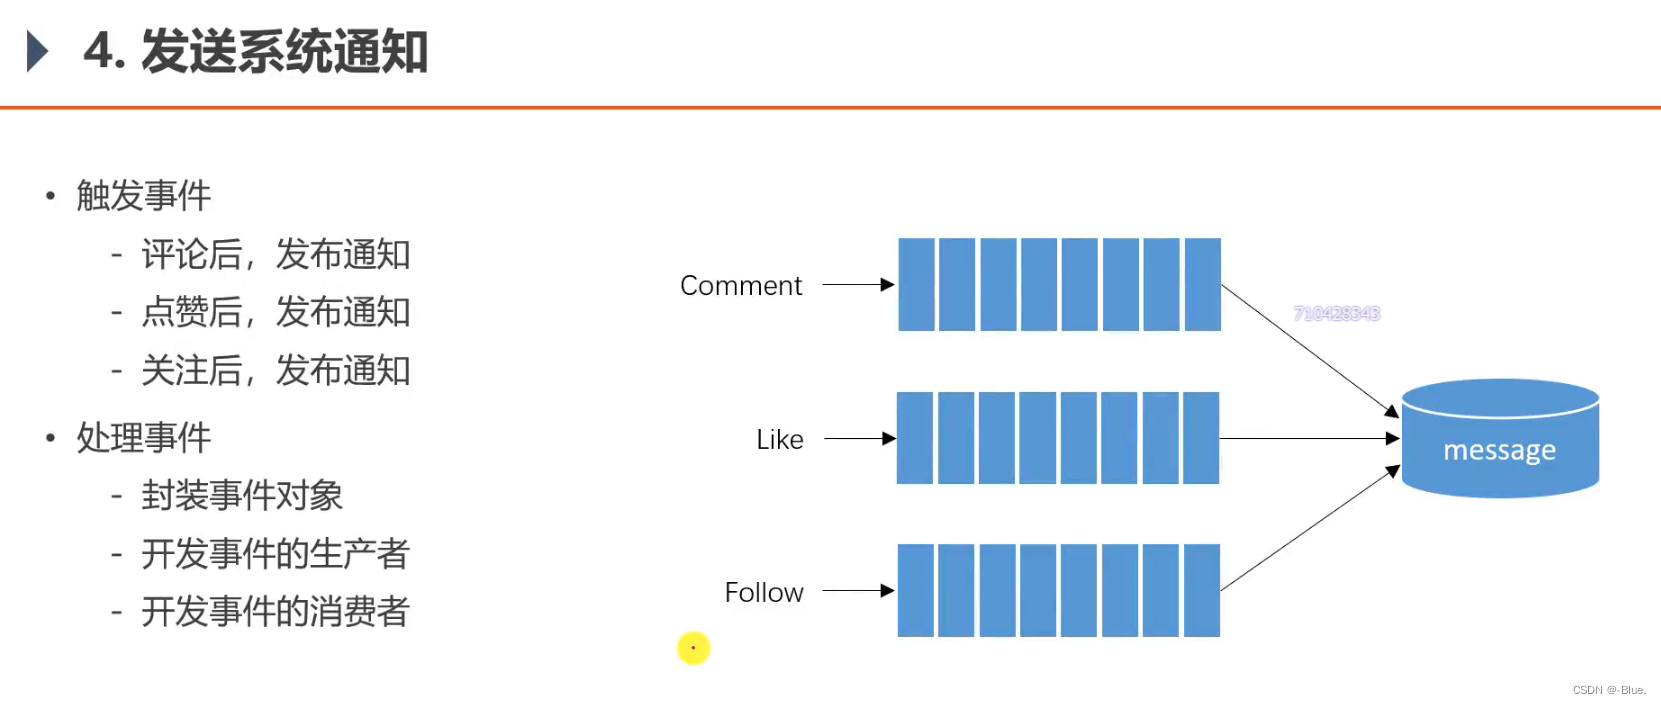
四、发送系统通知
为什么用消息队列?
- 三类不同的事,可定义三类不同主题,事件发生后,将其包装为消息扔到响应队列中,当前线程就可以处理下一个请求,不用管后续业务,后续业务,由消费者处理
- 从技术角度来说,用的是
Kafka消息队列,来解决问题 - 从业务角度来说,解决问题的方式是事件驱动,以事件为目标,为主题。
事件主体——Event
package com.nowcoder.community.entity;import java.util.HashMap;
import java.util.Map;/*** 事件*/
public class Event {private String topic;   // 主题private int userId;     // 事件的人private int entityType;     // 实体类型private int entityId;private int entityUserId;   // 实体的作者(帖子)// 处理其他数据时可能会有需要记录的private Map<String, Object> data = new HashMap<>();public String getTopic() {return topic;}public Event setTopic(String topic) {// 修改,返回此类事件,方便编写this.topic = topic;return this;}public int getUserId() {return userId;}public Event setUserId(int userId) {this.userId = userId;return this;}public int getEntityType() {return entityType;}public Event setEntityType(int entityType) {this.entityType = entityType;return this;}public int getEntityId() {return entityId;}public Event setEntityId(int entityId) {this.entityId = entityId;return this;}public int getEntityUserId() {return entityUserId;}public Event setEntityUserId(int entityUserId) {this.entityUserId = entityUserId;return this;}public Map<String, Object> getData() {return data;}public Event setData(String key, Object value) {// 分成 key ,valuethis.data.put(key, value);return this;}}
事件的生产者和消费者
消息表


红框部分内容是下图通知的内容
补充评论mappper方法
CommentMapper
/*** 根据id查一个评论* @param id* @return*/Comment selectCommentById(int id);
comment-mapper.xml
<select id="selectCommentById" resultType="Comment">select <include refid="selectFields"></include>from commentwhere id = #{id}</select>
CommentService
public Comment findCommentById(int id) {return commentMapper.selectCommentById(id);}视图层评论——CommentController
异步、并发
@RequestMapping(path = "/add/{discussPostId}", method = RequestMethod.POST)public String addComment(@PathVariable("discussPostId") int discussPostId, Comment comment) {comment.setUserId(hostHolder.getUser().getId()); // 当前用户idcomment.setStatus(0);comment.setCreateTime(new Date()); // 当前时间commentService.addComment(comment); // 添加// 触发评论事件Event event = new Event().setTopic(TOPIC_COMMENT).setUserId(hostHolder.getUser().getId()).setEntityType(comment.getEntityType()).setEntityId(comment.getEntityId()).setData("postId", discussPostId);if (comment.getEntityType() == ENTITY_TYPE_POST) {DiscussPost target = discussPostService.findDiscussPostById(comment.getEntityId());event.setEntityUserId(target.getUserId());} else if (comment.getEntityType() == ENTITY_TYPE_COMMENT) {// 查找评论Comment target = commentService.findCommentById(comment.getEntityId());event.setEntityUserId(target.getUserId());}eventProducer.fireEvent(event);// 帖子详情页面 + 帖子idreturn "redirect:/discuss/detail/" + discussPostId;}
视图层点赞——LikeController
/*** 点赞* @param entityType:实体* @param entityId:id* @return*/@RequestMapping(path = "/like", method = RequestMethod.POST)@ResponseBodypublic String like(int entityType, int entityId, int entityUserId, int postId) {User user = hostHolder.getUser(); // 当前用户// 不登录无法访问——拦截器// 点赞likeService.like(user.getId(), entityType, entityId, entityUserId);// 数量long likeCount = likeService.findEntityLikeCount(entityType, entityId);// 状态int likeStatus = likeService.findEntityLikeStatus(user.getId(), entityType, entityId);// 返回的结果 —— 给页面,map封装Map<String, Object> map = new HashMap<>();map.put("likeCount", likeCount);map.put("likeStatus", likeStatus);// 触发点赞事件if (likeStatus == 1) {Event event = new Event().setTopic(TOPIC_LIKE).setUserId(hostHolder.getUser().getId()).setEntityType(entityType).setEntityId(entityId).setEntityUserId(entityUserId).setData("postId", postId);eventProducer.fireEvent(event);}// 返回json格式数据return CommunityUtil.getJSONString(0, null, map);}
视图层关注——FollowController
/*** 关注(异步)* @param entityType* @param entityId* @return*/@RequestMapping(path = "/follow", method = RequestMethod.POST)@ResponseBodypublic String follow(int entityType, int entityId) {User user = hostHolder.getUser();followService.follow(user.getId(), entityType, entityId);// 触发关注事件Event event = new Event().setTopic(TOPIC_FOLLOW).setUserId(hostHolder.getUser().getId()).setEntityType(entityType).setEntityId(entityId).setEntityUserId(entityId);eventProducer.fireEvent(event);// 异步请求return CommunityUtil.getJSONString(0, "已关注!");}
测试结果

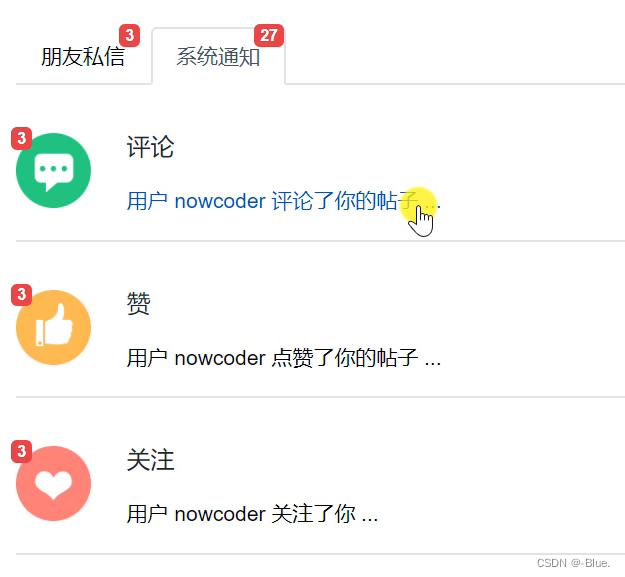
五、显示系统通知
1、通知列表
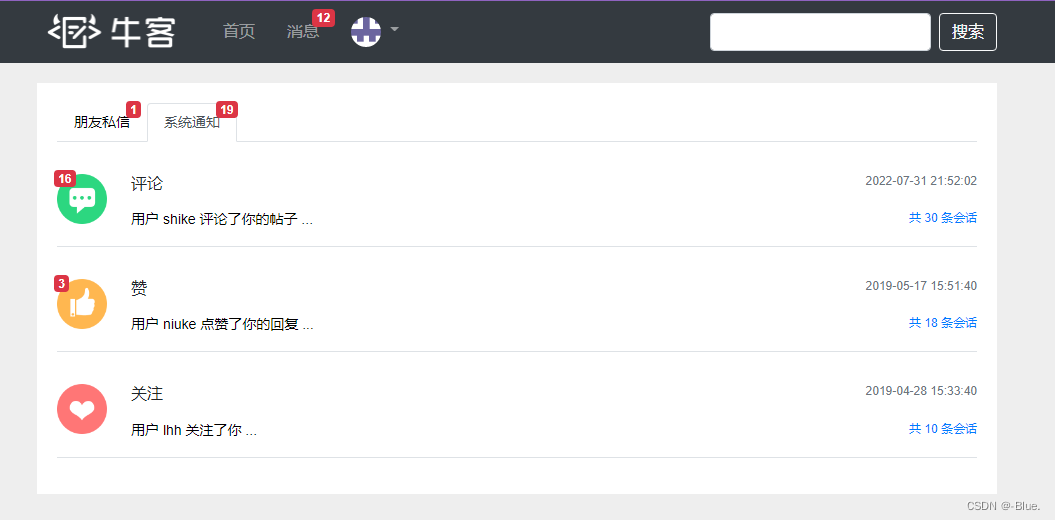
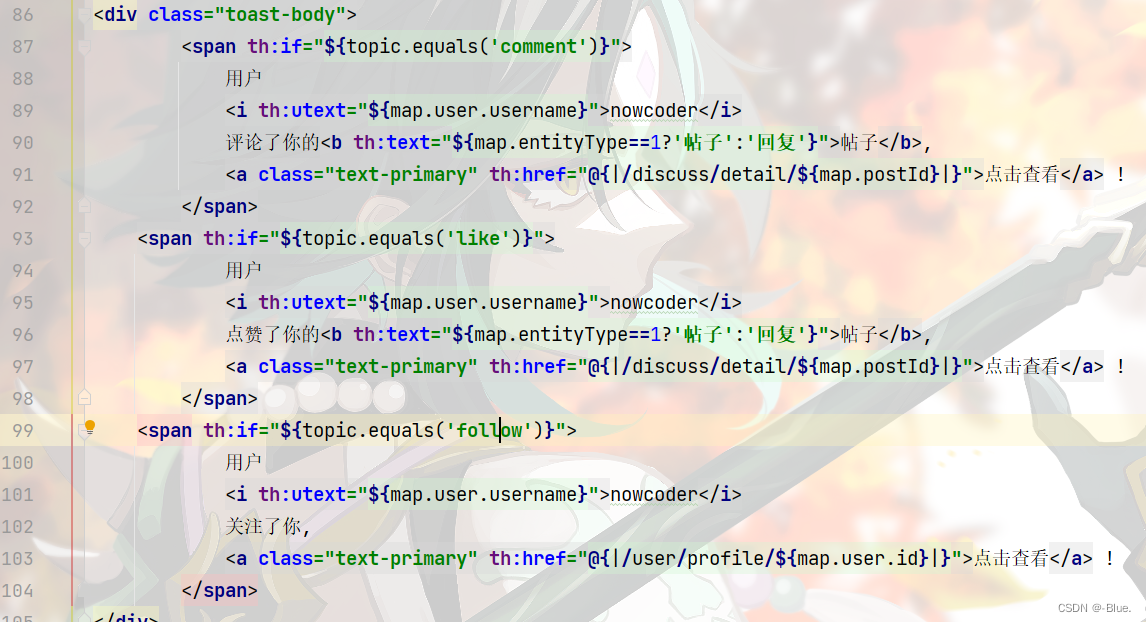
显示评论、点赞、关注三种类型的通知
查询未读消息数量——controller
数据访问层——MessageMapper.java
// 查询某个主题下最新的通知Message selectLatestNotice(int userId, String topic);// 查询某个主题所包含的通知数量int selectNoticeCount(int userId, String topic);// 查询未读的通知的数量int selectNoticeUnreadCount(int userId, String topic);message-mapper.xml
<select id="selectLatestNotice" resultType="Message">select <include refid="selectFields"></include>from messagewhere id in (select max(id) from messagewhere status != 2and from_id = 1and to_id = #{userId}and conversation_id = #{topic})</select><select id="selectNoticeCount" resultType="int">select count(id) from messagewhere status != 2and from_id = 1and to_id = #{userId}and conversation_id = #{topic}</select><select id="selectNoticeUnreadCount" resultType="int">select count(id) from messagewhere status = 0and from_id = 1and to_id = #{userId}<if test="topic!=null">and conversation_id = #{topic}</if></select>业务层——MessageService
public Message findLatestNotice(int userId, String topic) {return messageMapper.selectLatestNotice(userId, topic);}public int findNoticeCount(int userId, String topic) {return messageMapper.selectNoticeCount(userId, topic);}public int findNoticeUnreadCount(int userId, String topic) {return messageMapper.selectNoticeUnreadCount(userId, topic);}
视图层——MessageController
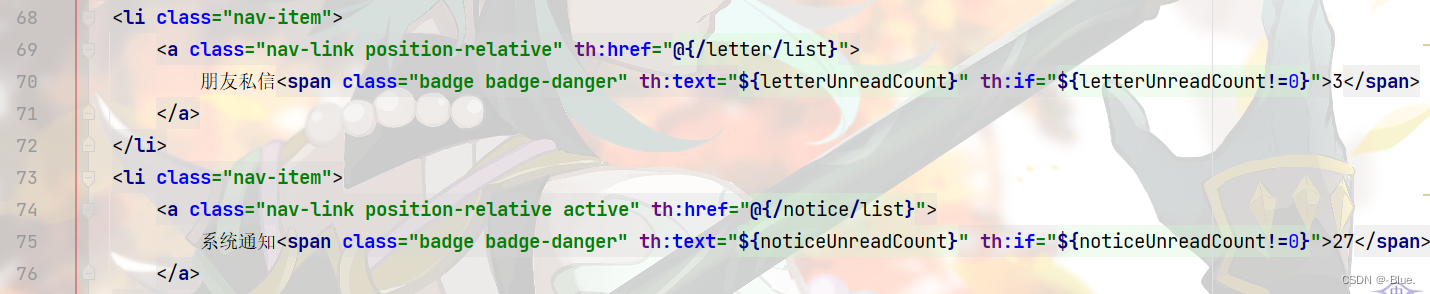
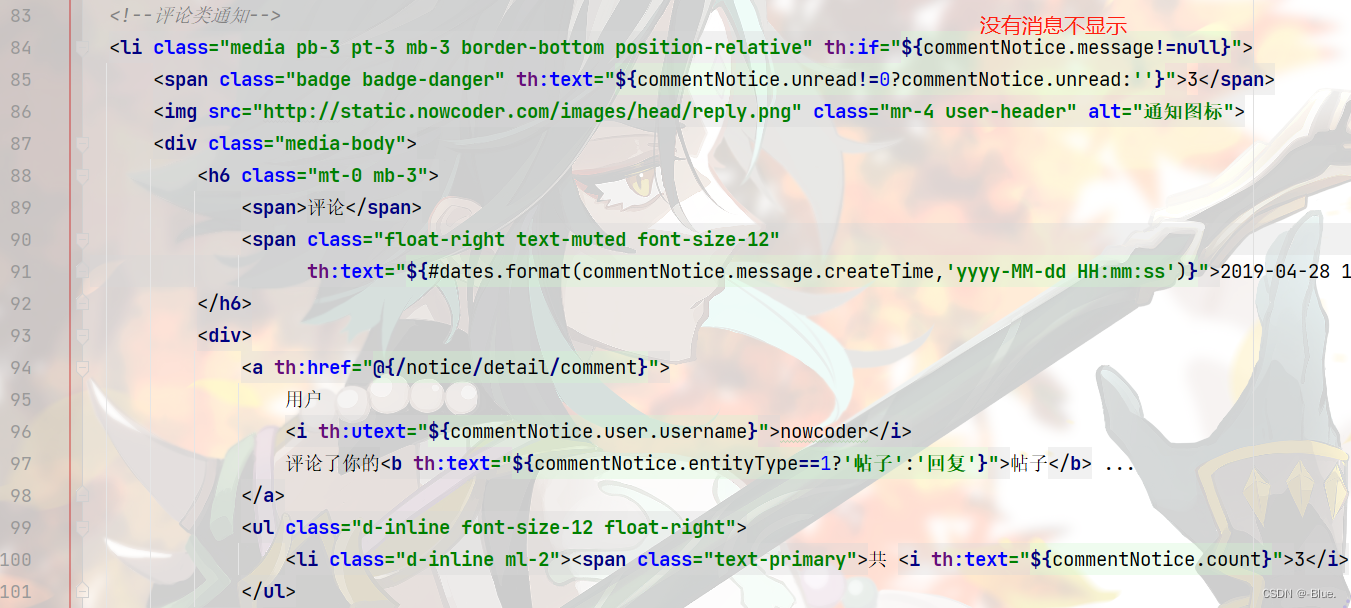
/*** 查询通知* @param model* @return*/@RequestMapping(path = "/notice/list", method = RequestMethod.GET)public String getNoticeList(Model model) {User user = hostHolder.getUser();// 查询评论类通知Message message = messageService.findLatestNotice(user.getId(), TOPIC_COMMENT);if (message != null) {Map<String, Object> messageVO = new HashMap<>();messageVO.put("message", message);// 将JSON 对象还原为String content = HtmlUtils.htmlUnescape(message.getContent());Map<String, Object> data = JSONObject.parseObject(content, HashMap.class);messageVO.put("user", userService.findUserById((Integer) data.get("userId")));messageVO.put("entityType", data.get("entityType"));messageVO.put("entityId", data.get("entityId"));messageVO.put("postId", data.get("postId")); // 帖子idint count = messageService.findNoticeCount(user.getId(), TOPIC_COMMENT);messageVO.put("count", count);int unread = messageService.findNoticeUnreadCount(user.getId(), TOPIC_COMMENT);messageVO.put("unread", unread);model.addAttribute("commentNotice", messageVO);}// 查询点赞类通知message = messageService.findLatestNotice(user.getId(), TOPIC_LIKE);if (message != null) {Map<String, Object> messageVO = new HashMap<>();messageVO.put("message", message);String content = HtmlUtils.htmlUnescape(message.getContent());Map<String, Object> data = JSONObject.parseObject(content, HashMap.class);messageVO.put("user", userService.findUserById((Integer) data.get("userId")));messageVO.put("entityType", data.get("entityType"));messageVO.put("entityId", data.get("entityId"));messageVO.put("postId", data.get("postId"));int count = messageService.findNoticeCount(user.getId(), TOPIC_LIKE);messageVO.put("count", count);int unread = messageService.findNoticeUnreadCount(user.getId(), TOPIC_LIKE);messageVO.put("unread", unread);model.addAttribute("likeNotice", messageVO);}// 查询关注类通知message = messageService.findLatestNotice(user.getId(), TOPIC_FOLLOW);if (message != null) {Map<String, Object> messageVO = new HashMap<>();messageVO.put("message", message);String content = HtmlUtils.htmlUnescape(message.getContent());Map<String, Object> data = JSONObject.parseObject(content, HashMap.class);messageVO.put("user", userService.findUserById((Integer) data.get("userId")));messageVO.put("entityType", data.get("entityType"));messageVO.put("entityId", data.get("entityId"));int count = messageService.findNoticeCount(user.getId(), TOPIC_FOLLOW);messageVO.put("count", count);int unread = messageService.findNoticeUnreadCount(user.getId(), TOPIC_FOLLOW);messageVO.put("unread", unread);model.addAttribute("followNotice", messageVO);}// 查询未读消息数量(未读私信总数量,未读通知总数量)int letterUnreadCount = messageService.findLetterUnreadCount(user.getId(), null);model.addAttribute("letterUnreadCount", letterUnreadCount);int noticeUnreadCount = messageService.findNoticeUnreadCount(user.getId(), null);model.addAttribute("noticeUnreadCount", noticeUnreadCount);return "/site/notice";}前面加上

页面
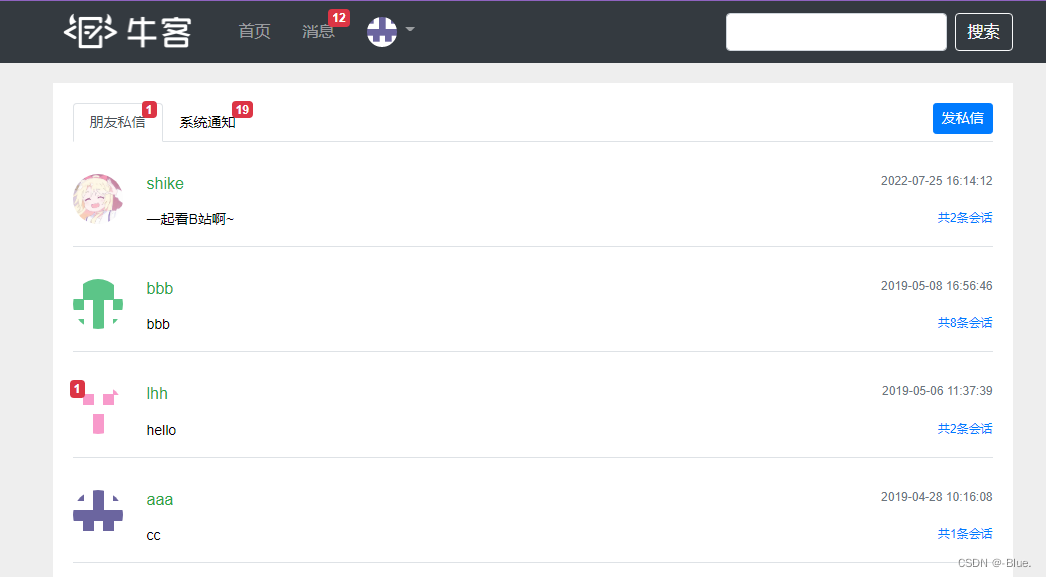
letter.html

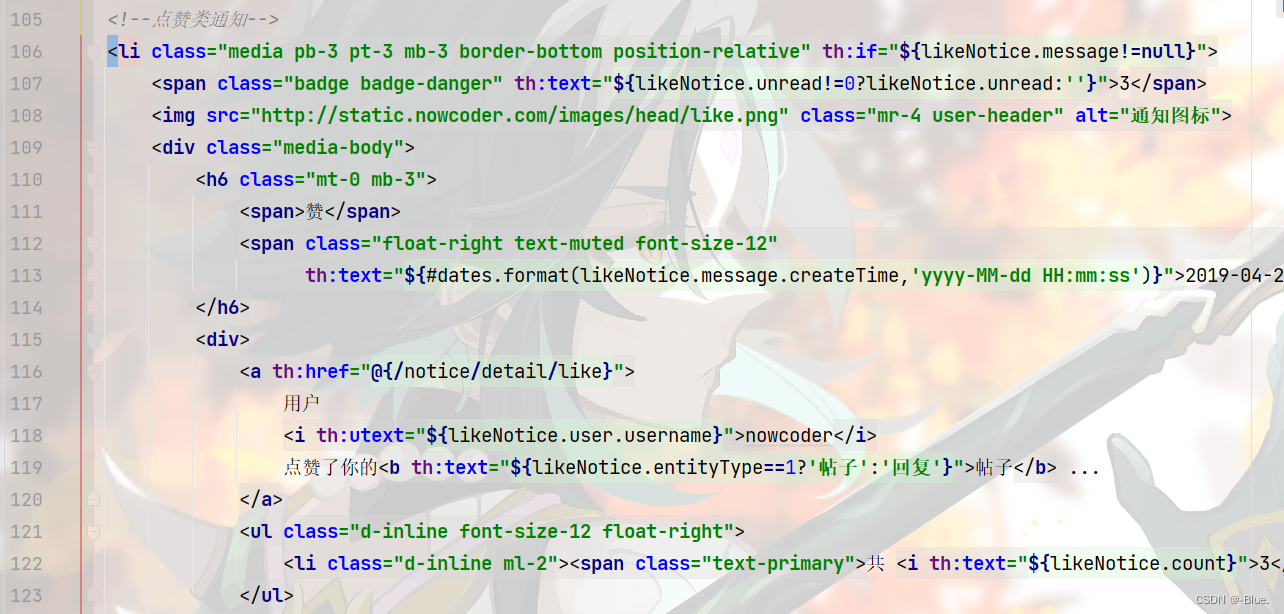
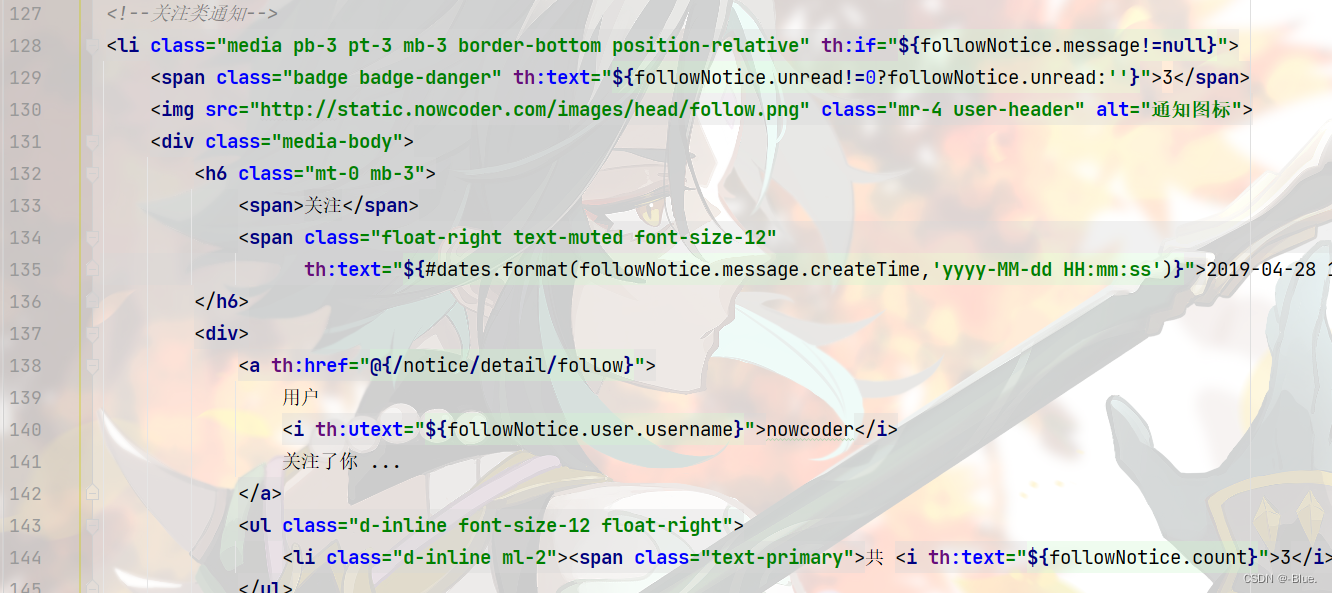
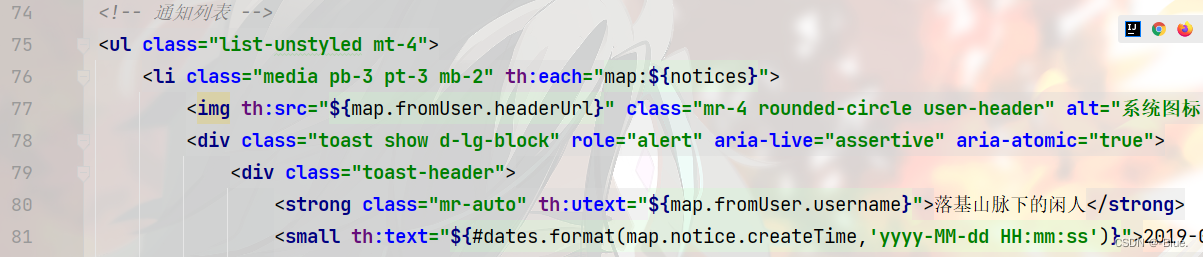
notice.html


测试
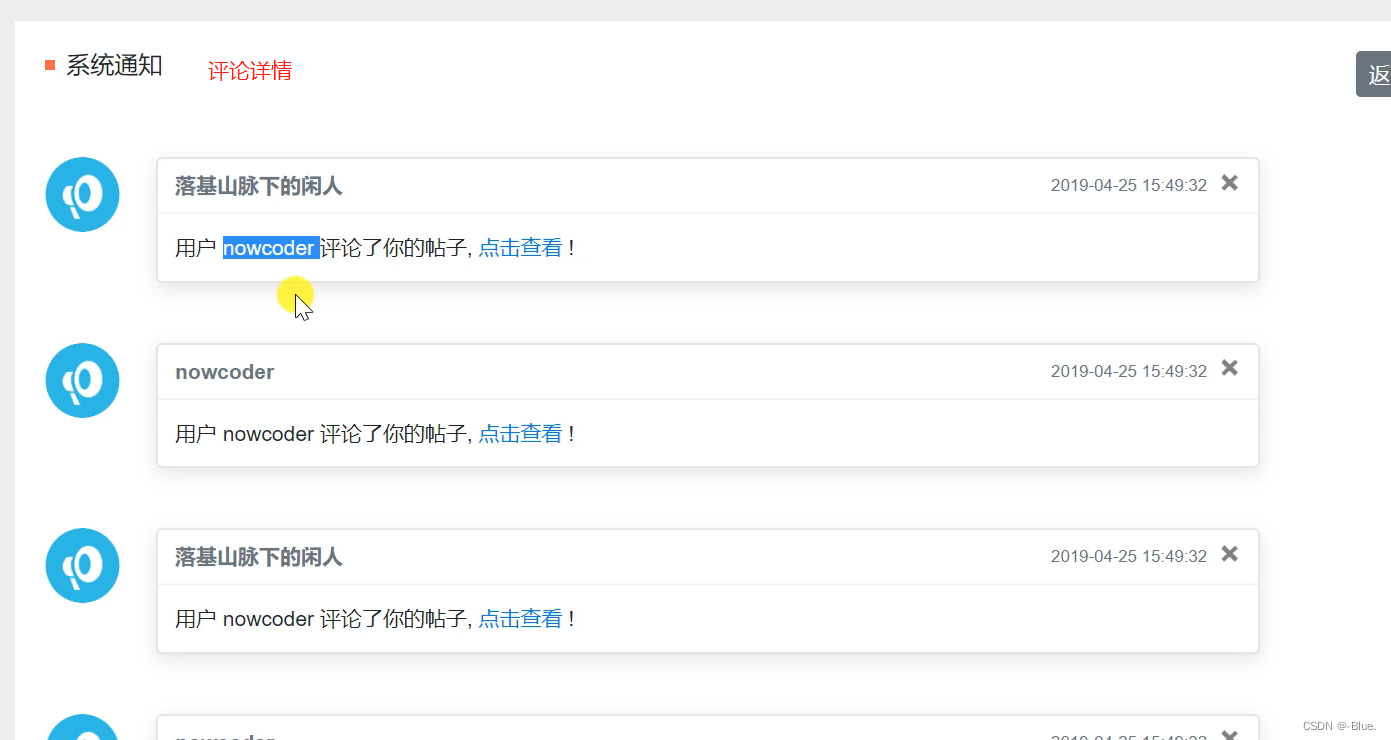
2、通知详情
分页显示某一类主题所包含的通知
数据访问层——MessageMapper.java
/*** 查询某个主题所包含的通知列表* @param userId* @param topic* @param offset* @param limit* @return*/// 查询某个主题所包含的通知列表List<Message> selectNotices(int userId, String topic, int offset, int limit);
<select id="selectNotices" resultType="Message">select <include refid="selectFields"></include>from messagewhere status != 2and from_id = 1and to_id = #{userId}and conversation_id = #{topic}order by create_time desclimit #{offset}, #{limit}</select>业务层——MessageService
/*** 通知列表*/public List<Message> findNotices(int userId, String topic, int offset, int limit) {return messageMapper.selectNotices(userId, topic, offset, limit);}视图层——MessageController
@RequestMapping(path = "/notice/detail/{topic}", method = RequestMethod.GET)public String getNoticeDetail(@PathVariable("topic") String topic, Page page, Model model) {User user = hostHolder.getUser();page.setLimit(5);page.setPath("/notice/detail/" + topic);page.setRows(messageService.findNoticeCount(user.getId(), topic));List<Message> noticeList = messageService.findNotices(user.getId(), topic, page.getOffset(), page.getLimit());List<Map<String, Object>> noticeVoList = new ArrayList<>();if (noticeList != null) {for (Message notice : noticeList) {Map<String, Object> map = new HashMap<>();// 通知map.put("notice", notice);// 内容String content = HtmlUtils.htmlUnescape(notice.getContent());Map<String, Object> data = JSONObject.parseObject(content, HashMap.class);map.put("user", userService.findUserById((Integer) data.get("userId")));map.put("entityType", data.get("entityType"));map.put("entityId", data.get("entityId"));map.put("postId", data.get("postId"));// 通知作者map.put("fromUser", userService.findUserById(notice.getFromId()));noticeVoList.add(map);}}model.addAttribute("notices", noticeVoList);// 设置已读List<Integer> ids = getLetterIds(noticeList);if (!ids.isEmpty()) {messageService.readMessage(ids);}return "/site/notice-detail";}页面
notice.html


notice-detail.html


3、未读消息(总的)
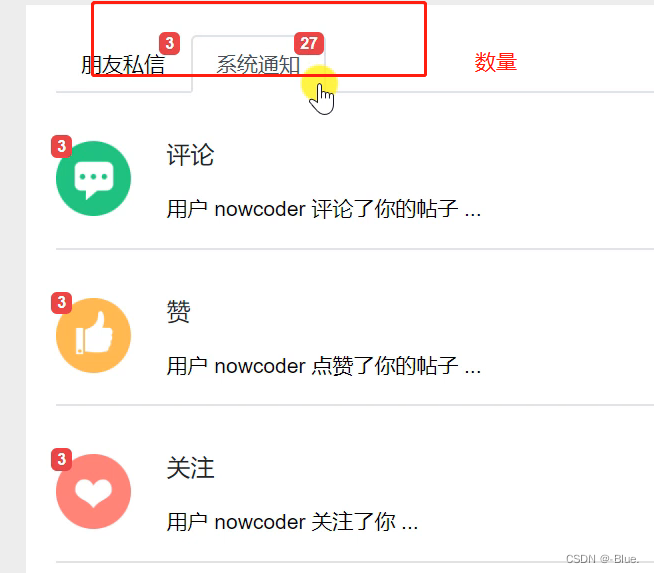
~在页面头部显示所有的未读消息数量
拦截器——MessageInterceptor
package com.nowcoder.community.controller.interceptor;import com.nowcoder.community.entity.User;
import com.nowcoder.community.service.MessageService;
import com.nowcoder.community.util.HostHolder;
import org.springframework.beans.factory.annotation.Autowired;
import org.springframework.stereotype.Component;
import org.springframework.web.servlet.HandlerInterceptor;
import org.springframework.web.servlet.ModelAndView;import javax.servlet.http.HttpServletRequest;
import javax.servlet.http.HttpServletResponse;// 拦截器——总消息数量
@Component
public class MessageInterceptor implements HandlerInterceptor {@Autowiredprivate HostHolder hostHolder;@Autowiredprivate MessageService messageService;@Overridepublic void postHandle(HttpServletRequest request, HttpServletResponse response, Object handler, ModelAndView modelAndView) throws Exception {User user = hostHolder.getUser();// 未读消息数量,两个if (user != null && modelAndView != null) {int letterUnreadCount = messageService.findLetterUnreadCount(user.getId(), null);int noticeUnreadCount = messageService.findNoticeUnreadCount(user.getId(), null);modelAndView.addObject("allUnreadCount", letterUnreadCount + noticeUnreadCount);}}
}
拦截器配置——WebMvcConfig.java
registry.addInterceptor(messageInterceptor).excludePathPatterns("/**/*.css", "/**/*.js", "/**/*.png", "/**/*.jpg", "/**/*.jpeg");
index.html
