利用torchvision库实现目标检测与语义分割
一、介绍
利用torchvision库实现目标检测与语义分割。
二、代码
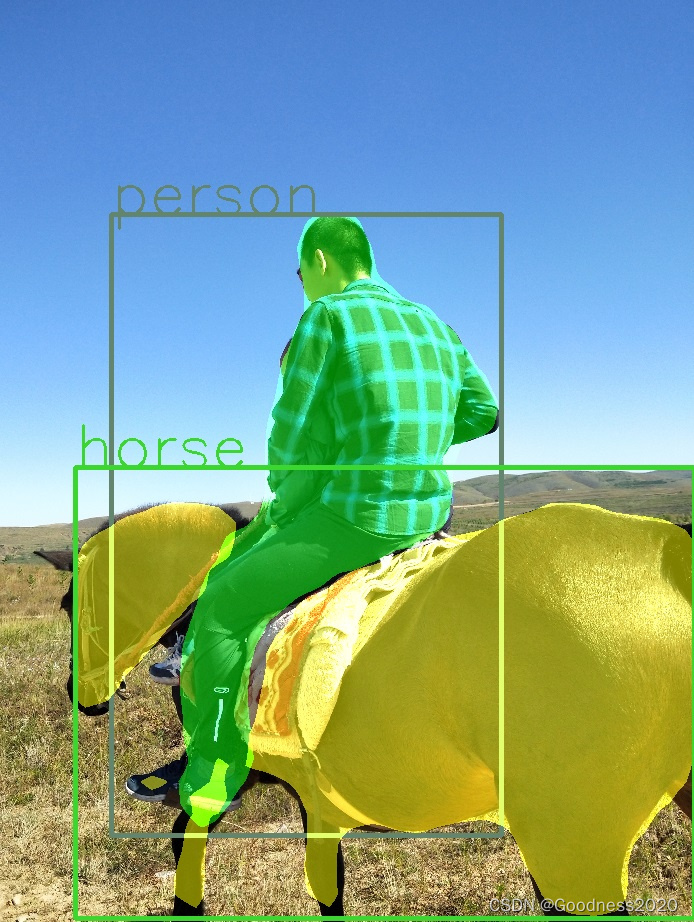
1、目标检测
from PIL import Image
import matplotlib.pyplot as plt
import torchvision.transforms as T
import torchvision
import numpy as np
import cv2
import randomCOCO_INSTANCE_CATEGORY_NAMES = ['__background__', 'person', 'bicycle', 'car', 'motorcycle', 'airplane', 'bus','train', 'truck', 'boat', 'traffic light', 'fire hydrant', 'N/A', 'stop sign','parking meter', 'bench', 'bird', 'cat', 'dog', 'horse', 'sheep', 'cow','elephant', 'bear', 'zebra', 'giraffe', 'N/A', 'backpack', 'umbrella', 'N/A', 'N/A','handbag', 'tie', 'suitcase', 'frisbee', 'skis', 'snowboard', 'sports ball','kite', 'baseball bat', 'baseball glove', 'skateboard', 'surfboard', 'tennis racket','bottle', 'N/A', 'wine glass', 'cup', 'fork', 'knife', 'spoon', 'bowl','banana', 'apple', 'sandwich', 'orange', 'broccoli', 'carrot', 'hot dog', 'pizza','donut', 'cake', 'chair', 'couch', 'potted plant', 'bed', 'N/A', 'dining table','N/A', 'N/A', 'toilet', 'N/A', 'tv', 'laptop', 'mouse', 'remote', 'keyboard', 'cell phone','microwave', 'oven', 'toaster', 'sink', 'refrigerator', 'N/A', 'book','clock', 'vase', 'scissors', 'teddy bear', 'hair drier', 'toothbrush'
]def get_prediction(img_path, threshold):# 加载 mask_r_cnn 模型进行目标检测model = torchvision.models.detection.maskrcnn_resnet50_fpn(pretrained=True)model.eval()img = Image.open(img_path)transform = T.Compose([T.ToTensor()])img = transform(img)pred = model([img])pred_score = list(pred[0]['scores'].detach().numpy())print(pred[0].keys())  # ['boxes', 'labels', 'scores', 'masks']pred_t = [pred_score.index(x) for x in pred_score if x > threshold][-1]  # num of boxespred_masks = (pred[0]['masks'] > 0.5).squeeze().detach().cpu().numpy()pred_boxes = [[(int(i[0]), int(i[1])), (int(i[2]), int(i[3]))] for i in list(pred[0]['boxes'].detach().numpy())]pred_class = [COCO_INSTANCE_CATEGORY_NAMES[i] for i in list(pred[0]['labels'].numpy())]pred_masks = pred_masks[:pred_t + 1]pred_boxes = pred_boxes[:pred_t + 1]pred_class = pred_class[:pred_t + 1]return pred_masks, pred_boxes, pred_classdef random_colour_masks(image):colours = [[0, 255, 0], [0, 0, 255], [255, 0, 0], [0, 255, 255], [255, 255, 0], [255, 0, 255], [80, 70, 180],[250, 80, 190], [245, 145, 50], [70, 150, 250], [50, 190, 190]]r = np.zeros_like(image).astype(np.uint8)g = np.zeros_like(image).astype(np.uint8)b = np.zeros_like(image).astype(np.uint8)r[image == 1], g[image == 1], b[image == 1] = colours[random.randrange(0, 10)]coloured_mask = np.stack([r, g, b], axis=2)return coloured_maskdef instance_segmentation_api(img_path, threshold=0.5, rect_th=3, text_size=2, text_th=2):masks, boxes, cls = get_prediction(img_path, threshold)img = cv2.imread(img_path)img = cv2.cvtColor(img, cv2.COLOR_BGR2RGB)for i in range(len(masks)):rgb_mask = random_colour_masks(masks[i])randcol = (random.randint(0, 255), random.randint(0, 255), random.randint(0, 255))img = cv2.addWeighted(img, 1, rgb_mask, 0.5, 0)cv2.rectangle(img, boxes[i][0], boxes[i][1], color=randcol, thickness=rect_th)cv2.putText(img, cls[i], boxes[i][0], cv2.FONT_HERSHEY_SIMPLEX, text_size, randcol, thickness=text_th)plt.figure(figsize=(20, 30))plt.imshow(img)plt.xticks([])plt.yticks([])plt.show()img = cv2.cvtColor(img, cv2.COLOR_BGR2RGB)cv2.imwrite('result_det.jpg', img)if __name__ == '__main__':instance_segmentation_api('horse.jpg')

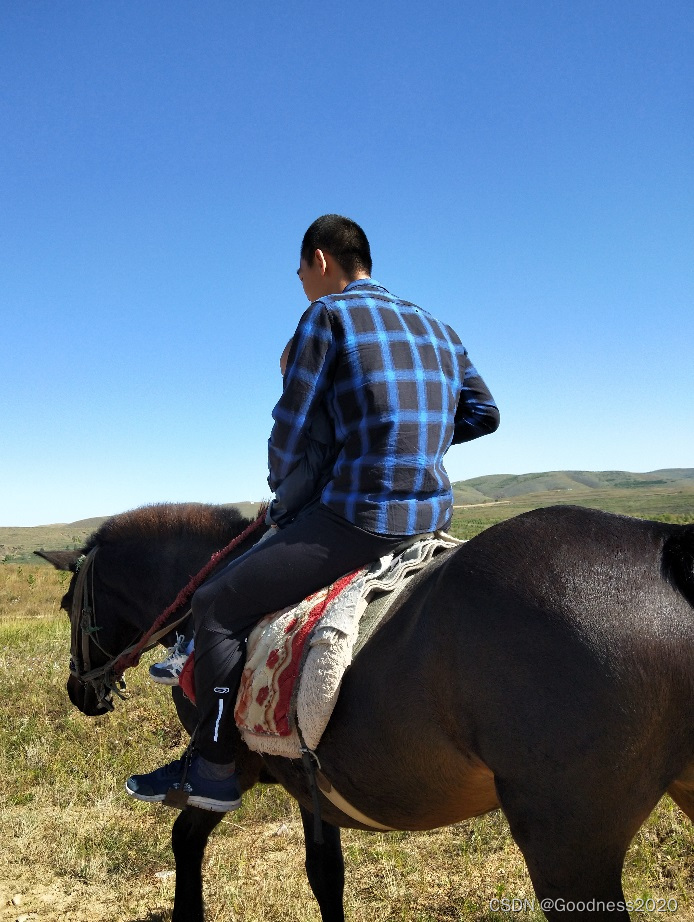
2、语义分割
import torch
import matplotlib.pyplot as plt
from PIL import Image
import numpy as np
from torchvision import models
from torchvision import transformsdef pre_img(img):if img.mode == 'RGBA':a = np.asarray(img)[:, :, :3]img = Image.fromarray(a)return imgdef decode_seg_map(image, nc=21):label_colors = np.array([(0, 0, 0), (128, 0, 0), (0, 128, 0), (128, 128, 0),(0, 0, 128), (128, 0, 128), (0, 128, 128), (128, 128, 128),(64, 0, 0), (192, 0, 0), (64, 128, 0), (192, 128, 0),(64, 0, 128), (192, 0, 128), (64, 128, 128), (192, 128, 128),(0, 64, 0), (128, 64, 0), (0, 192, 0), (128, 192, 0), (0, 64, 128)])r = np.zeros_like(image).astype(np.uint8)g = np.zeros_like(image).astype(np.uint8)b = np.zeros_like(image).astype(np.uint8)for l in range(0, nc):idx = image == lr[idx] = label_colors[l, 0]g[idx] = label_colors[l, 1]b[idx] = label_colors[l, 2]return np.stack([r, g, b], axis=2)if __name__ == '__main__':# 加载 deep_lab_v3 模型进行语义分割model = models.segmentation.deeplabv3_resnet101(pretrained=True)model = model.eval()img = Image.open('horse.jpg')print(img.size)  # (694, 922)plt.imshow(img)plt.axis('off')plt.show()im = pre_img(img)transform = transforms.Compose([transforms.Resize(256),transforms.CenterCrop(224),transforms.ToTensor(),transforms.Normalize(mean=[0.485, 0.456, 0.406], std=[0.229, 0.224, 0.225])])input_img = transform(im).unsqueeze(0)  # resizett = np.transpose(input_img.detach().numpy()[0], (1, 2, 0))  # transposeprint(tt.shape)  # (224, 224, 3)plt.imshow(tt)plt.axis('off')plt.show()output = model(input_img)print(output.keys())  # odict_keys(['out', 'aux'])print(output['out'].shape)  # torch.Size([1, 21, 224, 224])output = torch.argmax(output['out'].squeeze(), dim=0).detach().cpu().numpy()result_class = set(list(output.flat))print(result_class)  # {0, 13, 15}rgb = decode_seg_map(output)print(rgb.shape)  # (224, 224, 3)img = Image.fromarray(rgb)img.save('result_seg.jpg')plt.axis('off')plt.imshow(img)plt.show()

三、参考
Pytorch预训练模型、内置模型实现图像分类、检测和分割