Beats:使用 Filebeat 将 golang 应用程序记录到 Elasticsearch - 8.x
毫无疑问,日志记录是任何应用程序最重要的方面之一。 当事情出错时(而且确实会出错),我们需要知道发生了什么。 为了实现这一目标,我们可以设置 Filebeat 从我们的 golang 应用程序收集日志,然后将它们发送到 Elasticsearch。 最后,使用 Kibana 我们可以可视化这些日志并对它们执行复杂的查询。

安装
如果你还没有安装好自己的 Elasticsearch 及 Kibana,请参考之前文章:
-
如何在 Linux,MacOS 及 Windows 上进行安装 Elasticsearch
-
Kibana:如何在 Linux,MacOS 及 Windows 上安装 Elastic 栈中的 Kibana
我们还需要下载 Filebeat,并进行相应的安装。在本次的展示中,我将使用最新的 Elastic Stack 8.9.0 来进行展示,但是它也适用于其它的 Elastic Stack 8.x 的安装。当然当前的使用的这种方法也适合 7.x de golang 日志记录,只是我们需要做相应的修改。 针对 7.x 的安装,请参考我的另外一篇文章 “Beats:使用 Elastic Stack 记录 Golang 应用日志”。
创建 golang 应用
我们在当前的应用的根目录下创建如下的一个 go.mod 文件:
go.mod
module loggingrequire go.elastic.co/ecszap master$ pwd
/Users/liuxg/go/logging
$ ls
go.mod我们可以使用如下的命令来下载模块:
go env -w GO111MODULE=on
go mod download
go mod tidy
我们需要做如下的配置:
encoderConfig := ecszap.NewDefaultEncoderConfig()
core := ecszap.NewCore(encoderConfig, os.Stdout, zap.DebugLevel)
logger := zap.New(core, zap.AddCaller())
你可以自定义 ECS 记录器。 例如:
encoderConfig := ecszap.EncoderConfig{EncodeName: customNameEncoder,EncodeLevel: zapcore.CapitalLevelEncoder,EncodeDuration: zapcore.MillisDurationEncoder,EncodeCaller: ecszap.FullCallerEncoder,
}
core := ecszap.NewCore(encoderConfig, os.Stdout, zap.DebugLevel)
logger := zap.New(core, zap.AddCaller())
详细例子
在根目录下创建如下的 app.go 文件:
app.go
package mainimport ("errors""math/rand""os""time""go.elastic.co/ecszap""go.uber.org/zap"
)func main() {encoderConfig := ecszap.NewDefaultEncoderConfig()core := ecszap.NewCore(encoderConfig, os.Stdout, zap.DebugLevel)logger := zap.New(core, zap.AddCaller())logger = logger.With(zap.String("app", "myapp")).With(zap.String("environment", "psm"))count := 0for {if rand.Float32() > 0.8 {logger.Error("oops...something is wrong",zap.Int("count", count),zap.Error(errors.New("error details")))} else {logger.Info("everything is fine",zap.Int("count", count))}count++time.Sleep(time.Second * 2)}
}
我们可以以如下的方式来运行上面的代码:
go run app.go > a.json在当前的根目录下,我们可以看见一个叫做 a.json 的文件:

从输出的内容中,我们可以看到 a.json 的文本是一个 JSON 格式的输出。我们在下面来展示如何收集这个日志的信息。
使用 Filebeat 来采集日志并传入到 Elasticsearch 中
我们安装好自己的 FIlebeat,并配置 filebeat.yml 文件:
filebeat.yml
filebeat.inputs:# Each - is an input. Most options can be set at the input level, so
# you can use different inputs for various configurations.
# Below are the input specific configurations.# filestream is an input for collecting log messages from files.
- type: log# Unique ID among all inputs, an ID is required.id: my-filestream-id# Change to true to enable this input configuration.enabled: true# Paths that should be crawled and fetched. Glob based paths.paths:- /Users/liuxg/go/logging/a.json#- c:\programdata\elasticsearch\logs\*parsers:- ndjson:overwrite_keys: true add_error_key: true expand_keys: true
我们需要配置如下的部分:
output.elasticsearch:# Array of hosts to connect to.hosts: ["https://localhost:9200"]# Protocol - either `http` (default) or `https`.# protocol: "https"# Authentication credentials - either API key or username/password.#api_key: "id:api_key"username: "elastic"password: "p1k6cT4a4bF+pFYf37Xx"ssl.certificate_authorities: ["/Users/liuxg/elastic/elasticsearch-8.9.0/config/certs/http_ca.crt"]在上面,我们需根据自己的 Elasticsearch 的配置来填入上面的用户名及密码。我们需要根据自己的证书的位置来配置证书。我们使用如下的命令来查看配置是否有语法错误:
$ pwd
/Users/liuxg/elastic/filebeat-8.9.0-darwin-aarch64
$ ./filebeat test config
Config OK
上面显示我们的配置是没有任何问题的。我们可以使用如下的命令来查看 output 的配置是否成功:
$ ./filebeat test output
elasticsearch: https://localhost:9200...parse url... OKconnection...parse host... OKdns lookup... OKaddresses: 127.0.0.1dial up... OKTLS...security: server's certificate chain verification is enabledhandshake... OKTLS version: TLSv1.3dial up... OKtalk to server... OKversion: 8.9.0
上面显示我们的 Elasticsearch 的配置是成功的。
我们可以使用如下的命令来摄入数据:
./filebeat -e
到 Kibana 中进行查看
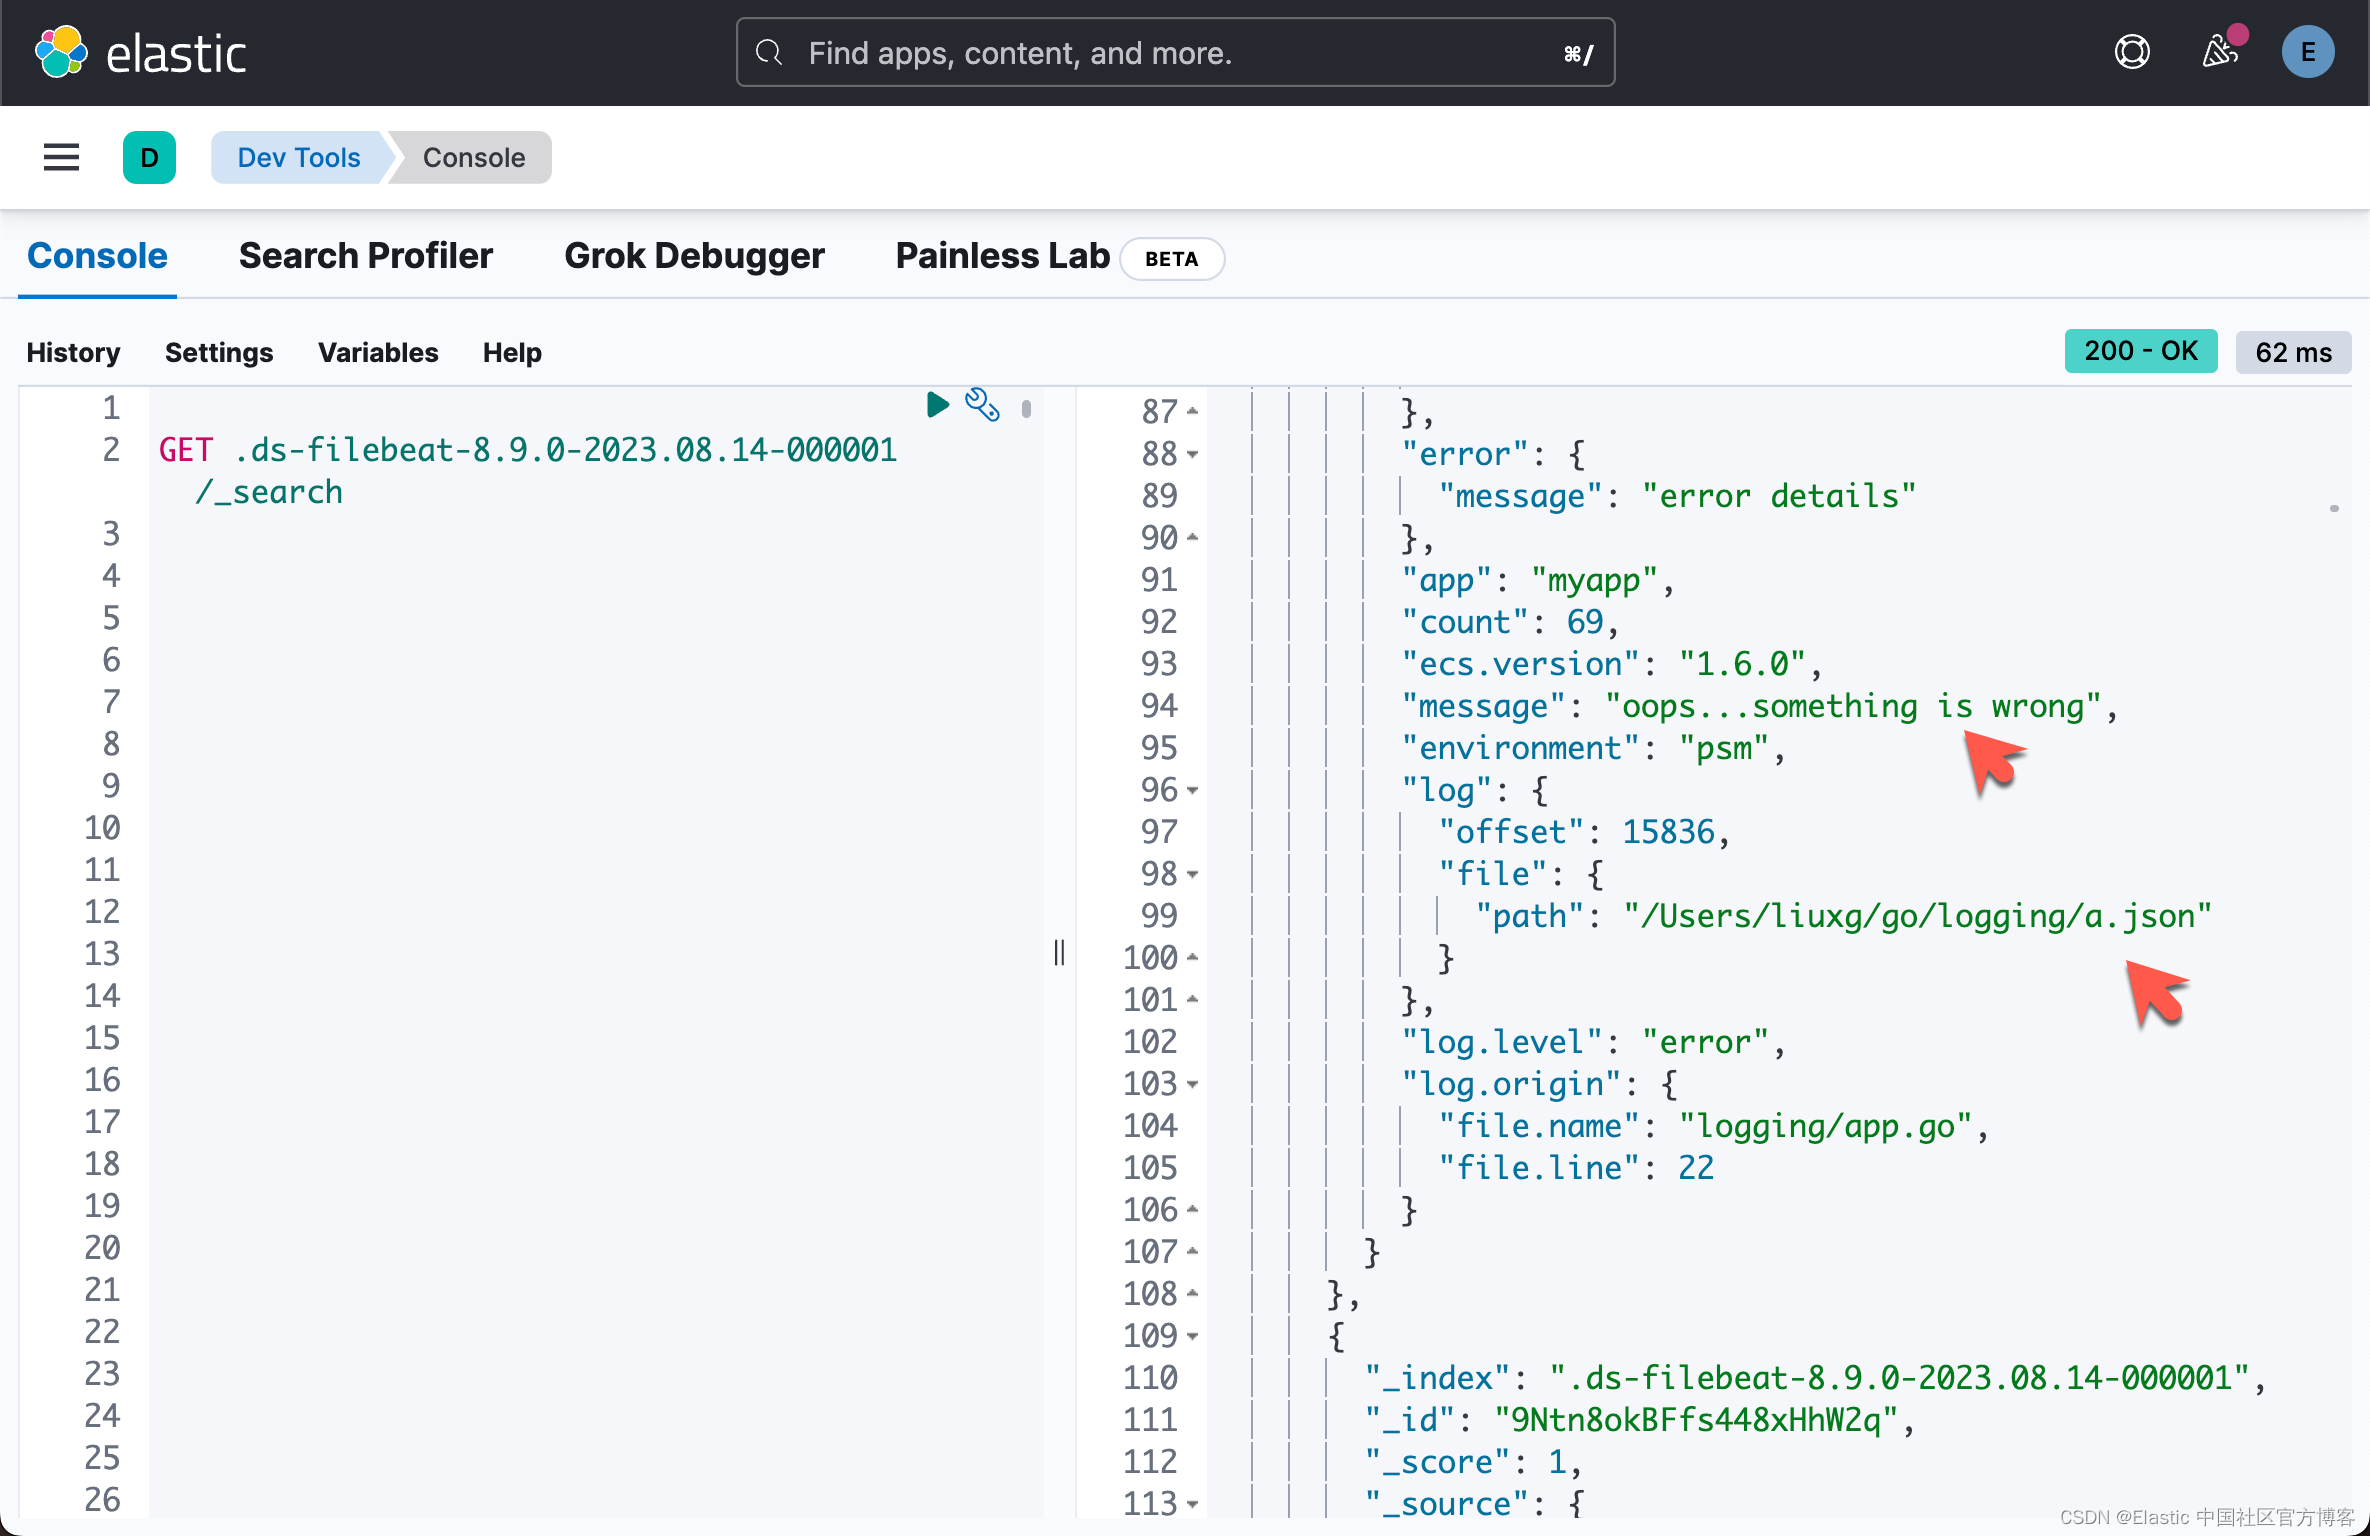
我们可以在 Kibana 中来查看我们收集到的日志信息:

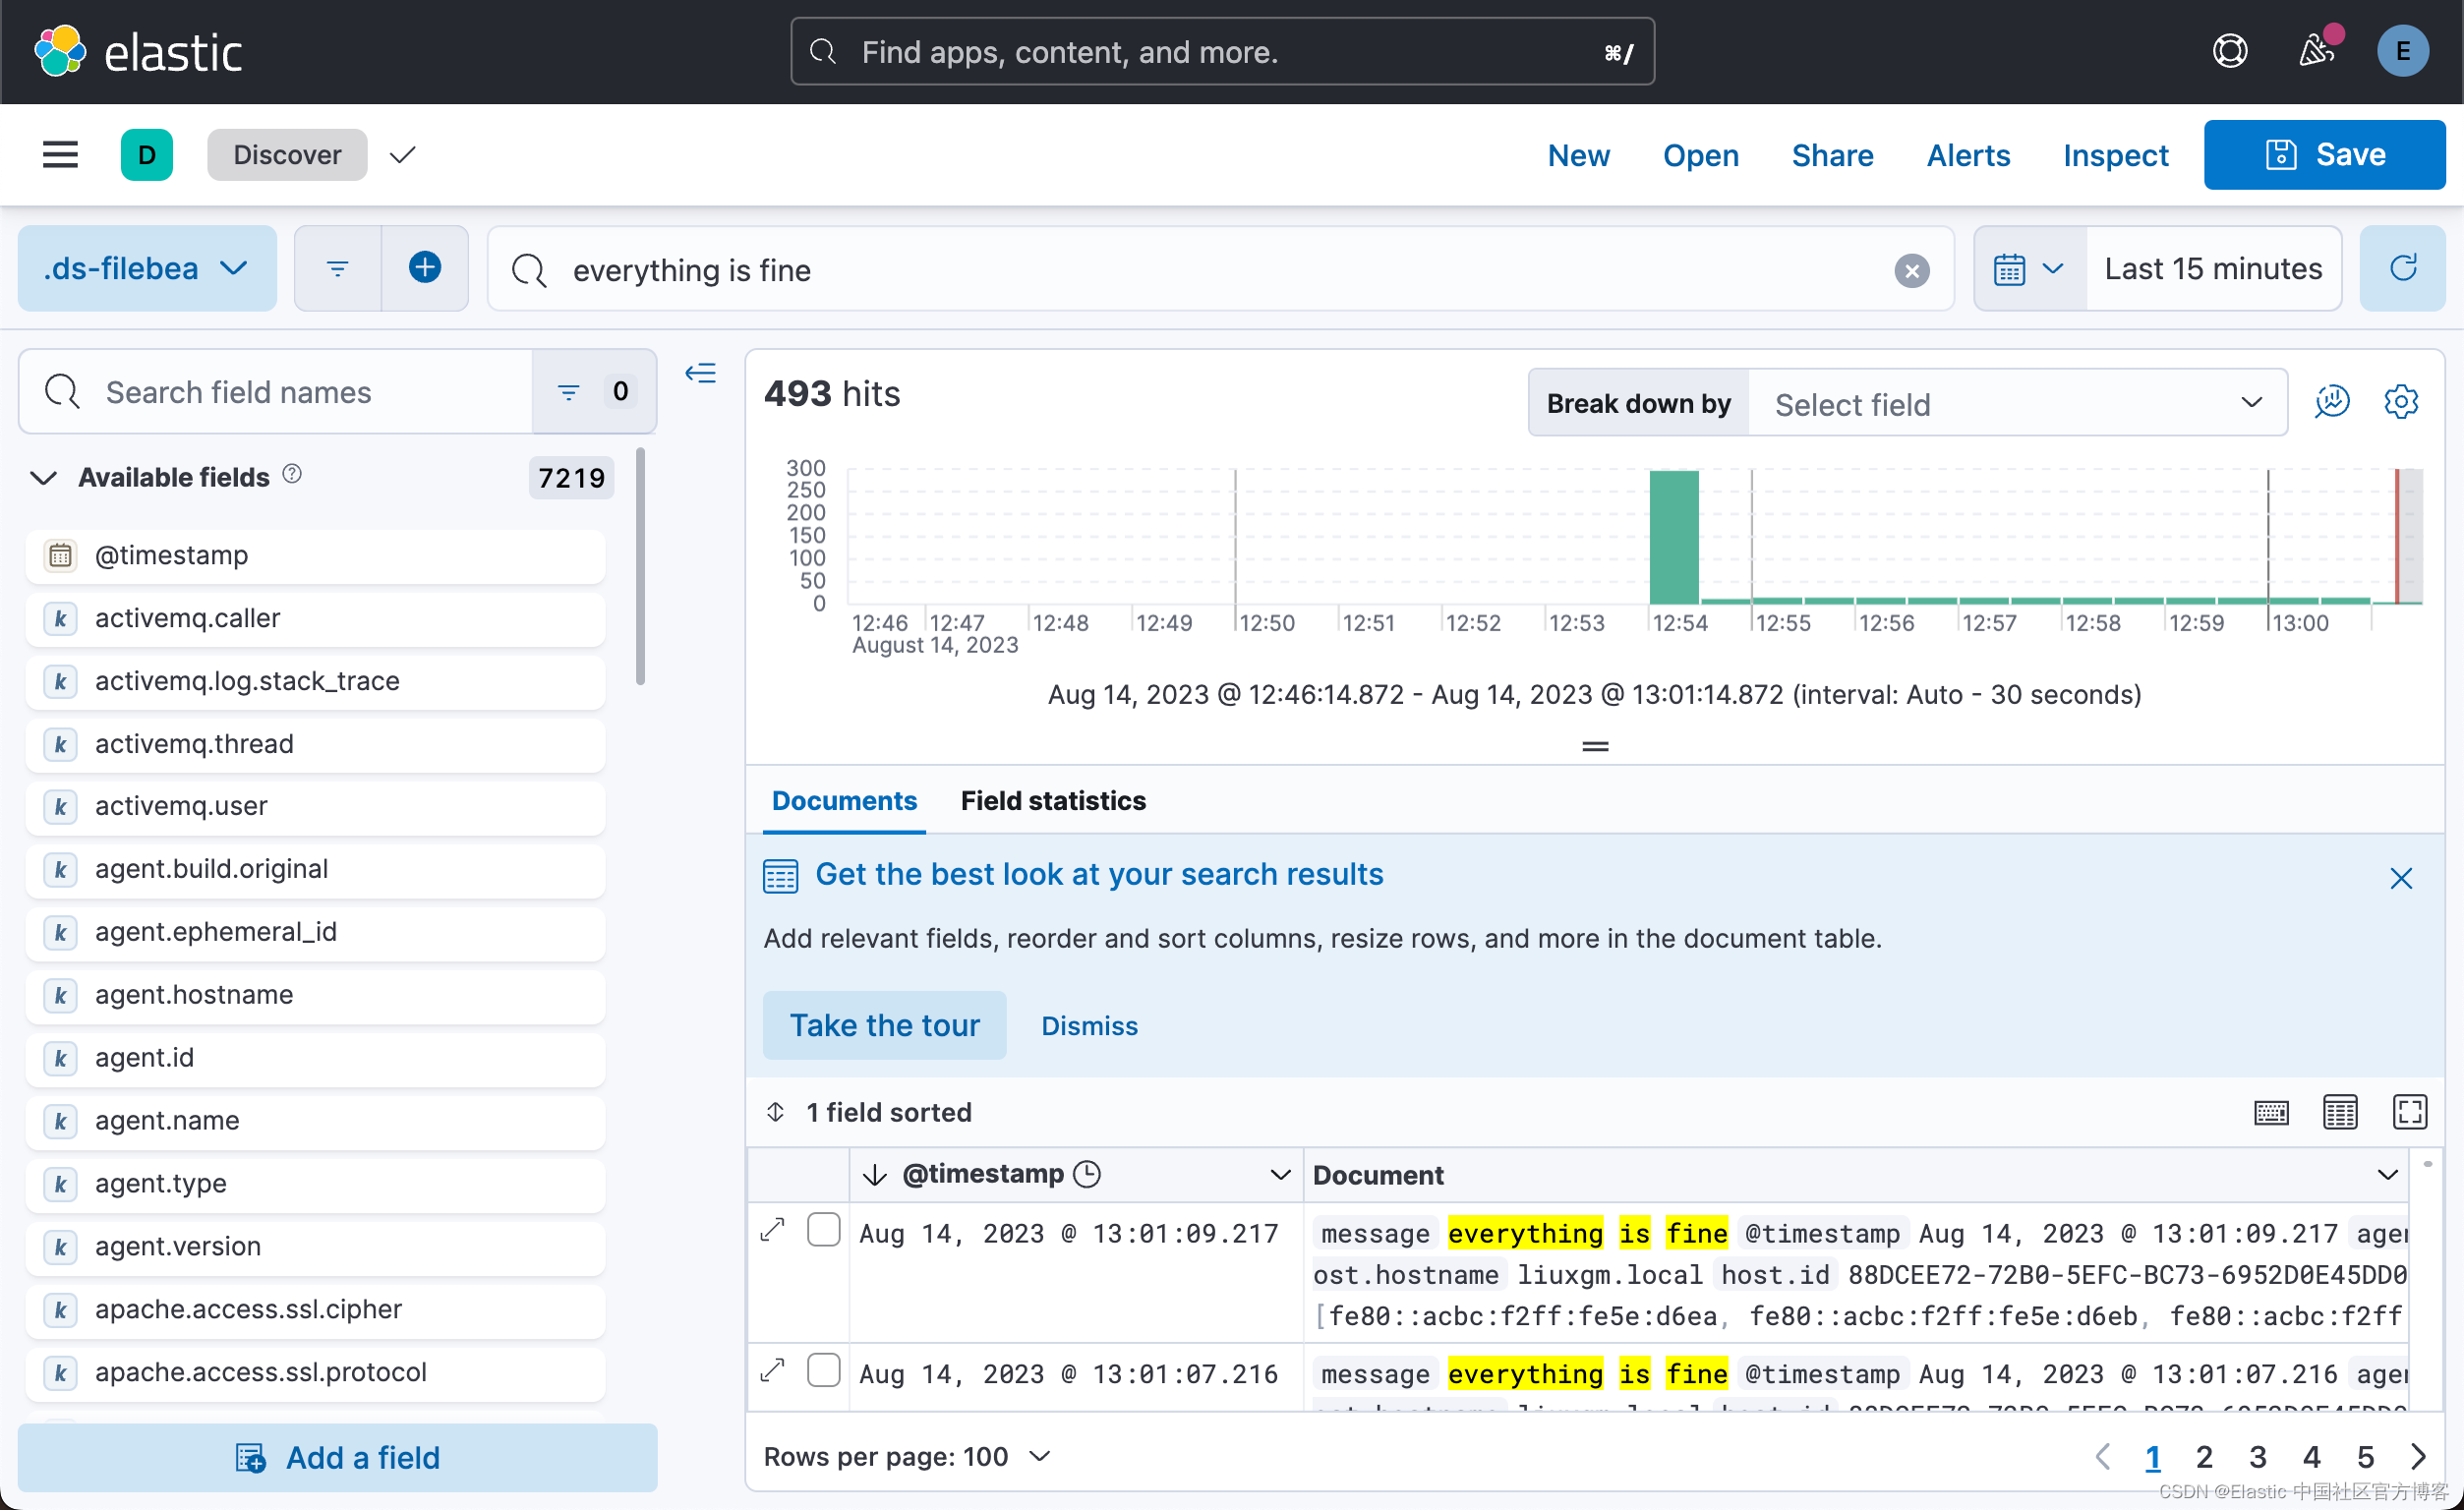
从上面的显示中,可以看出来已经成功地收集了日志信息。当然,我们也可以针对日志进行搜索:

更多参考:Get started | ECS Logging Go (zap) Reference | Elastic
