【Vue-Router】路由元信息
路由元信息(Route Meta Information)是在路由配置中为每个路由定义的一组自定义数据。这些数据可以包含任何你希望在路由中传递和使用的信息,比如权限、页面标题、布局设置等。Vue Router 允许你在路由配置中定义元信息,然后在组件中访问这些信息。
在 Vue Router 中,你可以通过 meta 字段来定义路由的元信息。下面是一个定义title的示例:
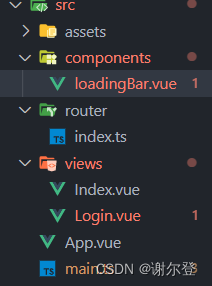
index.ts
import { createRouter, createWebHistory } from 'vue-router'declare module 'vue-router' {interface RouteMeta {title: string}
}export const router = createRouter({// import.meta.env.BASE_URL 应用的基本 URL。基本 URL 是指在你的应用部署到某个域名或子路径时,URL 的起始部分。例如,如果你的应用部署在 https://example.com/myapp/ 这个路径下,那么 import.meta.env.BASE_URL 就会是 /myapp/。history: createWebHistory(import.meta.env.BASE_URL),routes: [{path: '/',component: () => import('@/views/Login.vue'),meta: {title: "登录页",}},{path: '/index',component: () => import('@/views/Index.vue'),meta: {title: "首页",}},],
})
loadingBar.vue
<template><div class="wraps"><div ref="bar" class="bar"></div></div>
</template><script setup lang="ts">
import { ref, onMounted } from 'vue'
let speed = ref<number>(1)
let bar = ref<HTMLElement>()
let timer = ref<number>(0)
const startLoading = () => {speed.value = 1let dom = bar.value as HTMLElementtimer.value = window.requestAnimationFrame(function fn() {if (speed.value < 90) {speed.value += 1;dom.style.width = speed.value + '%'timer.value = window.requestAnimationFrame(fn)} else {speed.value = 1window.cancelAnimationFrame(timer.value)}})
}
const endLoading = () => {let dom = bar.value as HTMLElementsetTimeout(() => {window.requestAnimationFrame(() => {speed.value = 100dom.style.width = speed.value + '%'})}, 500)}defineExpose({ startLoading, endLoading })
</script><style scoped lang="less">
.wraps {width: 100%;position: fixed;height: 10px;top: 0;.bar {height: inherit;width: 0;background-color: #409eff;}
}
</style>
Index.vue
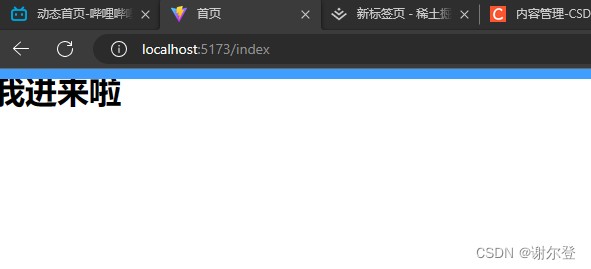
<template><h1>我进来啦</h1>
</template><script setup lang="ts"></script><style scoped></style>
Login.vue
<template><div class="login"><el-card class="box-card"><el-form ref="form" :rules="rules" :model="formInline" class="demo-form-inline"><el-form-item prop="user" label="账号:"><el-input v-model="formInline.user" placeholder="请输入账号" /></el-form-item><el-form-item prop="password" label="密码:"><el-input v-model="formInline.password" placeholder="请输入密码" type="password"></el-input></el-form-item><el-form-item><el-button type="primary" @click="onSubmit">登录</el-button></el-form-item></el-form></el-card></div>
</template><script setup lang="ts">
import { reactive, ref } from 'vue'
import { useRouter } from 'vue-router'
import type { FormItemRule, FormInstance } from 'element-plus';
import { ElMessage } from 'element-plus'const router = useRouter()
type Form = {user: string,password: string
}
type  Rules = {[k in keyof Form]?: Array<FormItemRule>
}
const formInline = reactive<Form>({user: '',password: '',
})
const form = ref<FormInstance>()
const rules = reactive({user: [{required: true,message: '请输入账号',type: 'string',}],password: [{required: true,message: '请输入密码',type: 'string',}]
})const onSubmit = () => {console.log('submit!', form.value)form.value?.validate((validate)=>{if (validate) {router.push('/index')localStorage.setItem('token', '1')} else {ElMessage.error('账号或密码错误')}})}
</script><style scoped lang="less">
.login {height: 100%;display: flex;justify-content: center;align-items: center;
}
</style>
App.vue
<template><router-view></router-view>
</template><script setup lang="ts"></script><style>
/* 注意 style 标签 别加 scoped 不然设置宽高不生效 */
* {margin: 0;padding: 0;
}
html, body, #app {height: 100%;overflow: hidden;
}
</style>
main.ts
import { createApp,createVNode,render } from 'vue'
import App from './App.vue'
import {router} from './router'
// import 引入
import ElementPlus from 'element-plus'
import 'element-plus/dist/index.css'
import loadingBar from './components/loadingBar.vue'const Vnode = createVNode(loadingBar)
render(Vnode,document.body)
const app = createApp(App)
app.use(router)
// use 注入 ElementPlus 插件
app.use(ElementPlus)const whiteList = ['/']// beforeEach 可以定义不止一个,vue会收集所有定义的路由钩子,所以next的作用不应该是跳转,而是使步骤进行到下一个你定义的钩子
router.beforeEach((to, from, next) => {document.title = to.meta.titleVnode.component?.exposed?.startLoading()// token每次都要跟后端校验一下是否过期if(whiteList.includes(to.path) || localStorage.getItem('token')){next()}else{next('/')}
})router.afterEach((to, from) => {Vnode.component?.exposed?.endLoading()
})
app.mount('#app')