用chatGPT从左右眼图片生成点云数据
左右眼图片

需求
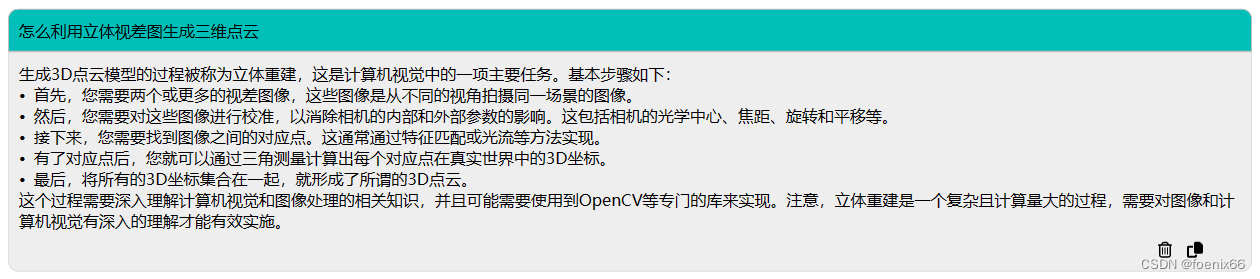
需要将左右眼图像利用视差生成三维点云数据
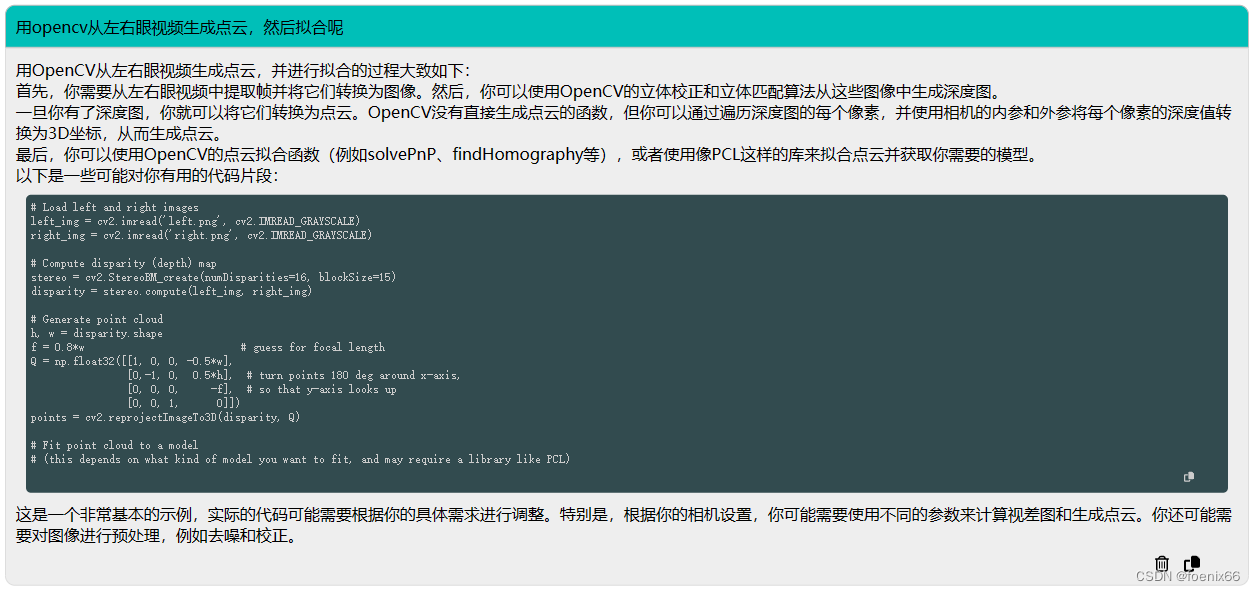
先问问chatGPT相关知识
进一步问有没有现成的软件

chatGPT提到了OpenCV,我们让chatGPT用OpenCV写一个程序来做这个事情
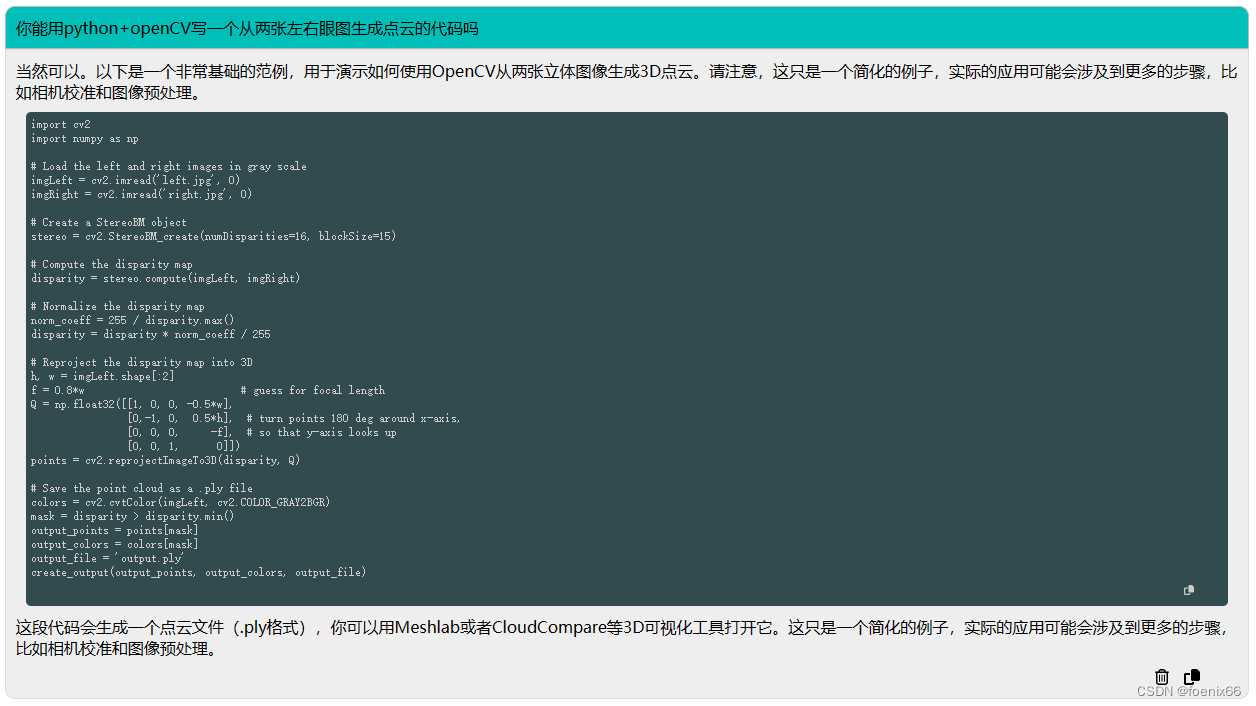
当然,代码里面会有一些错误,chatGPT写的代码并不会做模拟运行测试,所以,实际跑起来是会有一些错误的
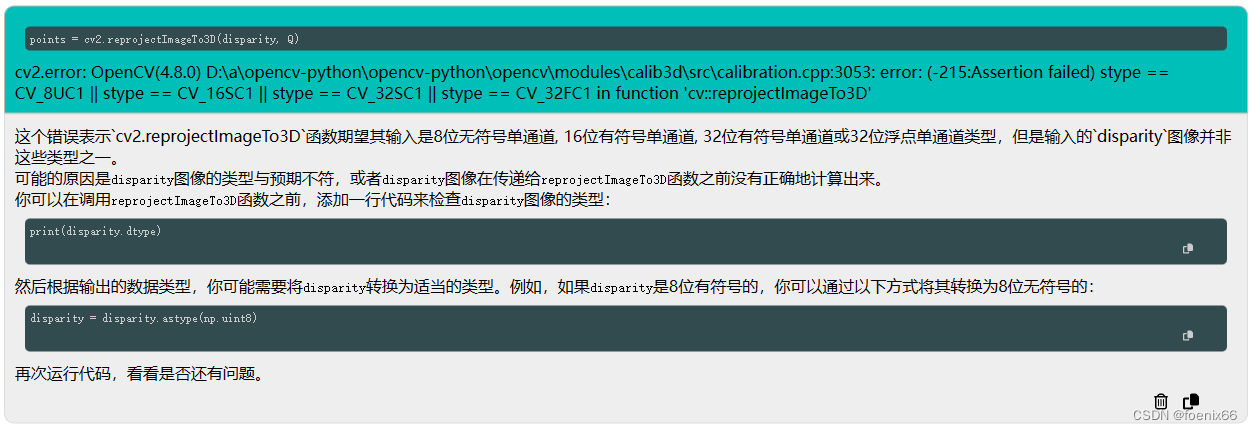
我们打印了一下,是float64的数据类型
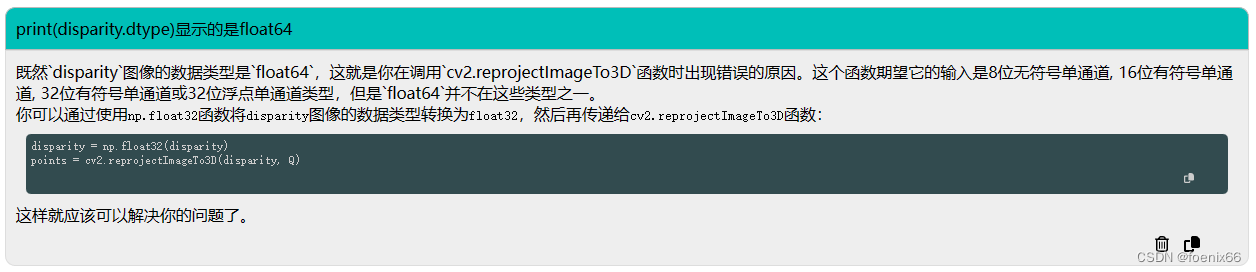
转成float32就可以了,这可能是本地库版本问题造成的,也不能算chatGPT写的代码有错
运行python程序,生成output.ply点云文件,用CloudCompare软件打开看一下生成的点云
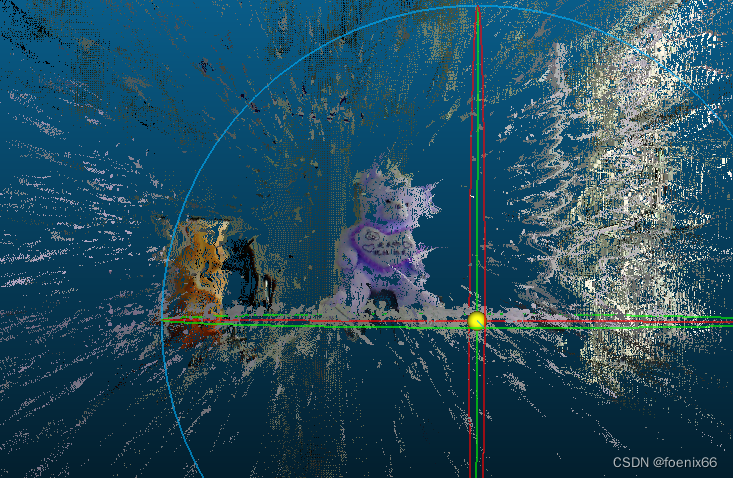
如果只有两张图,生成的点云是有很多缺失的,如果通过左右眼立体视频,也许可以补全很多信息,chatGPT给出一些解决思路
附:完整代码
import cv2
import numpy as npdef create_output(vertices, colors, filename):colors = colors.reshape(-1, 3)vertices = np.hstack([vertices.reshape(-1, 3), colors])ply_header = '''plyformat ascii 1.0element vertex %(vert_num)dproperty float xproperty float yproperty float zproperty uchar redproperty uchar greenproperty uchar blueend_header'''with open(filename, 'w') as f:f.write(ply_header % dict(vert_num=len(vertices)))np.savetxt(f, vertices, '%f %f %f %d %d %d')# Load the left and right images in gray scale
imgLeft = cv2.imread('imL.bmp', cv2.IMREAD_GRAYSCALE)
imgRight = cv2.imread('imR.bmp', cv2.IMREAD_GRAYSCALE)
imgColor = cv2.imread('imL.bmp', cv2.IMREAD_COLOR)# Create a StereoBM object
stereo = cv2.StereoBM_create(numDisparities=16, blockSize=15)# Compute the disparity map
disparity = stereo.compute(imgLeft, imgRight)# Normalize the disparity map
norm_coeff = 255 / disparity.max()
disparity = disparity * norm_coeff / 255# Reproject the disparity map into 3D
h, w = imgLeft.shape[:2]
f = 0.8*w                          # guess for focal length
Q = np.float32([[1, 0, 0, -0.5*w],[0,-1, 0,  0.5*h],  # turn points 180 deg around x-axis,[0, 0, 0,     -f],  # so that y-axis looks up[0, 0, 1,      0]])
print(disparity.dtype)
disparity = np.float32(disparity)points = cv2.reprojectImageTo3D(disparity, Q)# Save the point cloud as a .ply file
colors = imgColor
mask = disparity > disparity.min()
output_points = points[mask]
output_colors = colors[mask]
mask = np.isfinite(output_points).all(axis=1)
output_points = output_points[mask]
output_colors = output_colors[mask]
output_file = 'output.ply'
print(output_points.dtype, output_colors.dtype)
print(output_points.shape, output_colors.shape)
create_output(output_points, output_colors, output_file)