Vue3实现6位验证码输入框,用户可以连续输入和删除
实现代码
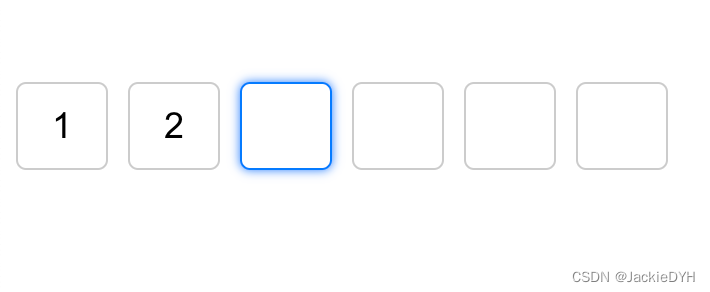
可以随意填写删除
<template><div class="verification-container"><inputv-for="(code, index) in verificationCodes":key="index"v-model="verificationCodes[index]"@input="handleInput(index, $event)"@keydown="handleKeyDown(index, $event)"maxlength="1"class="verification-input"/></div>
</template><script>
import { ref, nextTick } from 'vue';export default {setup() {const verificationCodes = ref(['', '', '', '', '', '']);const handleInput = (index, event) => {const value = event.target.value;verificationCodes.value[index] = value;// 自动跳到下一个输入框if (value && index < verificationCodes.value.length - 1) {const nextInput = event.target.nextElementSibling;if (nextInput) {nextTick(() => {nextInput.focus();});}}};const handleKeyDown = (index, event) => {// 处理删除操作if (event.key === 'Backspace' && !event.target.value && index > 0) {const prevInput = event.target.previousElementSibling;if (prevInput) {nextTick(() => {prevInput.focus();});}}};return {verificationCodes,handleInput,handleKeyDown};}
};
</script><style lang="scss" scoped>
.verification-container {display: flex;
}.verification-input {width: 40px;height: 40px;margin-right: 10px;text-align: center;font-size: 18px;border: 1px solid #ccc;border-radius: 5px;
}.verification-input:focus {outline: none;border-color: #007bff;box-shadow: 0 0 5px #007bff;
}
</style>
在更新后的代码中,我们添加了一个新的handleKeyDown方法来处理键盘按键事件。如果用户按下了 "Backspace" 键并且当前输入框为空,则将焦点设置到前一个输入框。
通过这个更改,当用户输入一半时,按下 "Backspace" 键会自动删除前一个输入框中的内容,并将焦点移动到前一个输入框,以允许用户重新输入。
请注意,我们使用了nextTick函数来确保在下一个DOM更新周期后设置焦点,以避免与Vue的响应式更新冲突。
希望这个更新后的代码能够解决问题,并允许用户在输入一半时删除前面的内容。
必须输入完整才能删除内容
<template><div class="verification-container"><inputv-for="(code, index) in verificationCodes":key="index"v-model="verificationCodes[index]"@input="handleInput(index, $event)"maxlength="1"class="verification-input"/></div>
</template>
<script>
import { ref } from 'vue';export default {setup() {const verificationCodes = ref(['', '', '', '', '', '']);const handleInput = (index, event) => {const value = event.target.value;verificationCodes.value[index] = value;// 自动跳到下一个输入框if (value && index < verificationCodes.value.length - 1) {const nextInput = event.target.nextElementSibling;if (nextInput) {nextInput.focus();}}// 自动删除前面的内容if (!value && index > 0) {const prevInput = event.target.previousElementSibling;if (prevInput) {prevInput.focus();}}};return {verificationCodes,handleInput};}
};
</script>
<style lang="scss" scoped>
.verification-container {display: flex;
}.verification-input {width: 40px;height: 40px;margin-right: 10px;text-align: center;font-size: 18px;border: 1px solid #ccc;border-radius: 5px;
}.verification-input:focus {outline: none;border-color: #007bff;box-shadow: 0 0 5px #007bff;
}
</style>
使用v-for指令生成6个输入框,并将每个输入框的值绑定到verificationCodes数组中的对应索引位置。我们还使用@input事件监听输入框的输入,并调用handleInput方法处理输入事件。
在组件的逻辑部分,定义verificationCodes数组,并实现handleInput方法。
代码中,我们使用ref创建了一个名为verificationCodes的响应式数组,用于保存每个输入框的值。在handleInput方法中,我们更新对应索引位置的值,并根据输入的情况自动跳到下一个输入框或删除前面的内容。我们使用focus()方法将焦点设置到下一个或前一个输入框
残缺版代码
<template><div class="custom-class"><!-- <inputv-for="(item, index) in nums":key="index"v-model="nums[index]"maxlength="1":ref="`input${index}`"@keydown="onKeyDown(index, $event)"@input="handleInput(index)"@focus="onFocus(index)"/> --><inputv-model="nums[0]"maxlength="1"ref="input0"@keydown="onKeyDown(0, $event)"@input="handleInput(0)"@focus="onFocus(0)"/><inputv-model="nums[1]"maxlength="1"ref="input1"@keydown="onKeyDown(1, $event)"@input="handleInput(1)"@focus="onFocus(1)"/><inputv-model="nums[2]"maxlength="1"ref="input2"@keydown="onKeyDown(2, $event)"@input="handleInput(2)"@focus="onFocus(2)"/><inputv-model="nums[3]"maxlength="1"ref="input3"@keydown="onKeyDown(3, $event)"@input="handleInput(3)"@focus="onFocus(3)"/><inputv-model="nums[4]"maxlength="1"ref="input4"@keydown="onKeyDown(4, $event)"@input="handleInput(4)"@focus="onFocus(4)"/><inputv-model="nums[5]"maxlength="1"ref="input5"@keydown="onKeyDown(5, $event)"@input="handleInput(5)"@focus="onFocus(5)"/></div>
</template><script setup>
import {defineProps,getCurrentInstance,reactive,ref,nextTick,watch,computed,
} from "vue";
const internalInstance = getCurrentInstance();defineProps({isShowSecuityDia: Boolean,
});let nums = reactive(["", "", "", "", "", ""]);
// const currentInput = ref(0);
// const input0 = ref(null);
// const input1 = ref(null);
// const input2 = ref(null);
// const input3 = ref(null);
// const input4 = ref(null);
// const input5 = ref(null);// nextTick(() => {
//   // input0.value.focus();
//   currentInput.value++;
//   // console.log(["input" + currentInput.value].value, "123");
//   // console.log(input0.value.value);
// });// watch(
//   nums,
//   () => {
//     console.log(currentInput.value, 888);
//     if (currentInput.value === 1) {
//       currentInput.value += 1;
//       input1.value.focus();
//     } else if (currentInput.value === 2) {
//       currentInput.value += 1;
//       input2.value.focus();
//     } else if (currentInput.value === 3) {
//       currentInput.value += 1;
//       input3.value.focus();
//     } else if (currentInput.value === 4) {
//       currentInput.value += 1;
//       input4.value.focus();
//     } else if (currentInput.value === 5) {
//       currentInput.value += 1;
//       input5.value.focus();
//     }
//   },
//   { deep: true }
// );// const emits = defineEmits(["changeRemDialog"]);
// const confirmSubmit = () => {
//   let code = nums.join("");
//   nums = reactive(["", "", "", "", "", ""]);
//   emits("changeRemDialog", code);
// };let activeIndex = 0;const onKeyDown = (index, e) => {// console.log(index, e, activeIndex, 888);switch (e.keyCode) {case 8: // backspace键e.preventDefault();if (nums[index]) {nums[index] = "";if (index > 0) {activeIndex = index - 1;const prevInput = internalInstance.ctx.$refs[`input${index - 1}`];prevInput.focus();}} else if (index === 0) {activeIndex = 0;}break;default:break;}
};const handleInput = (index) => {// console.log(index, activeIndex, 999);if (nums[index]) {activeIndex = index;if (index < 5) {const nextInput = internalInstance.ctx.$refs[`input${index + 1}`];nextInput.focus();}}
};const onFocus = (index) => {activeIndex = index;
};// const deleteLastNum = () => {
//   if (currentInput.value === 6) {
//     input5.value.focus();
//     currentInput.value + -1;
//   } else if (currentInput.value === 5) {
//     input4.value.focus();
//     currentInput.value + -1;
//   }
// };// 把六个数字拼接成一个变量
const code = computed(() => {return nums.join("");
});
// console.log(code);
</script>
<style lang="scss" scoped>
.custom-class {display: flex;justify-content: space-between;align-items: center;input {width: 75px;height: 75px;background: #ffffff;border: 1px solid #d9d9d9;border-radius: 12px;font-size: 40px;// caret-color: rgba(0, 0, 0, 0);}
}
</style>
以下是一个简单的 Vue3 组件来实现6位验证码输入框的功能,其中用户可以连续输入和删除。
<template><div class="verification-code"><inputv-for="(item, index) in codeList":key="index":ref="`codeInput${index}`"v-model.trim="codeList[index]":class="{ 'code-active': activeIndex === index }"@keydown="onKeyDown(index, $event)"@input="onInput(index)"@focus="onFocus(index)"/></div>
</template><script>
import { defineComponent } from 'vue';export default defineComponent({name: 'VerificationCode',setup(props, { emit }) {const codeList = Array(6).fill('').map((item) => item);let activeIndex = 0;const onKeyDown = (index, e) => {switch (e.keyCode) {case 8: // backspace键e.preventDefault();if (codeList[index]) {codeList[index] = '';if (index > 0) {activeIndex = index - 1;const prevInput = $refs[`codeInput${index - 1}`];prevInput.focus();}} else if (index === 0) {activeIndex = 0;}break;default:break;}};const onInput = (index) => {if (codeList[index]) {activeIndex = index + 1;if (activeIndex < 6) {const nextInput = $refs[`codeInput${activeIndex}`];nextInput.focus();}}};const onFocus = (index) => {activeIndex = index;};return {codeList,activeIndex,onKeyDown,onInput,onFocus};}
});
</script><style scoped>
.verification-code {display: flex;justify-content: center;align-items: center;
}input {width: 4em;height: 4em;margin: 0 0.5em;font-size: 2em;text-align: center;border: 1px solid #ccc;border-radius: 5px;
}input:focus {outline: none;
}.code-active {border-color: #007fff;
}
</style>
使用该组件的示例:
<template><div class="app"><verification-code /></div>
</template><script>
import VerificationCode from './components/VerificationCode.vue';export default {name: 'App',components: {VerificationCode}
};
</script><style>
.app {display: flex;justify-content: center;align-items: center;height: 100vh;
}
</style>
这个组件中,我们使用了
Array的fill方法,来创建一个长度为6、每个元素都为空字符串的数组codeList。然后,我们使用v-for循环这个数组,为每个元素创建一个输入框,并为其绑定v-model实现双向数据绑定。我们还绑定了@keydown事件来监听用户按键操作,以及@input和@focus事件来监听输入和焦点变化。在
onKeyDown函数中,我们首先判断是否按下的是 backspace 键,如果是,我们会阻止默认行为,然后检查当前输入框是否为空字符串。如果不为空,我们会将其置为空字符串,然后检查当前输入框的索引是否大于0。如果是,我们会将activeIndex设置为当前输入框的索引减一,并将光标移动到前一个输入框。如果当前输入框的索引已经是0,我们会将activeIndex设置为0,以确保用户可以从第一个输入框开始删除验证码。在
onInput函数中,我们先检查当前输入框是否已经输入了值。如果是,我们会将activeIndex设置为当前输入框的索引加一,并将光标移到下一个输入框。在
onFocus函数中,我们将activeIndex设置为当前输入框的索引,以确保用户可以通过 tab 键和鼠标点击等操作来移动光标。