devops(前端)
1.前言
前端的打包流程和后端的流程是一样的,只是打包的环境和制作的镜像有所不同,前端需要使用nodejs环境打包,镜像也是使用nginx镜像,因为用的是k8s的pod运行镜像,还需要使用configmap挂载nginx的配置,一套流程还是gitlab+jenkins+harbor+k8s的架构
2.基础环境配置
我们这里就引用之前后端的环境配置,在额外部署一些环境即可
参考:devops(后端)_Apex Predator的博客-CSDN博客
jenkins主机配置
安装nodejs环境
参考:nodejs环境部署_Apex Predator的博客-CSDN博客
gitlab配置
创建前端项目仓库上传代码,我这边是创建了一个nodejs的项目仓库

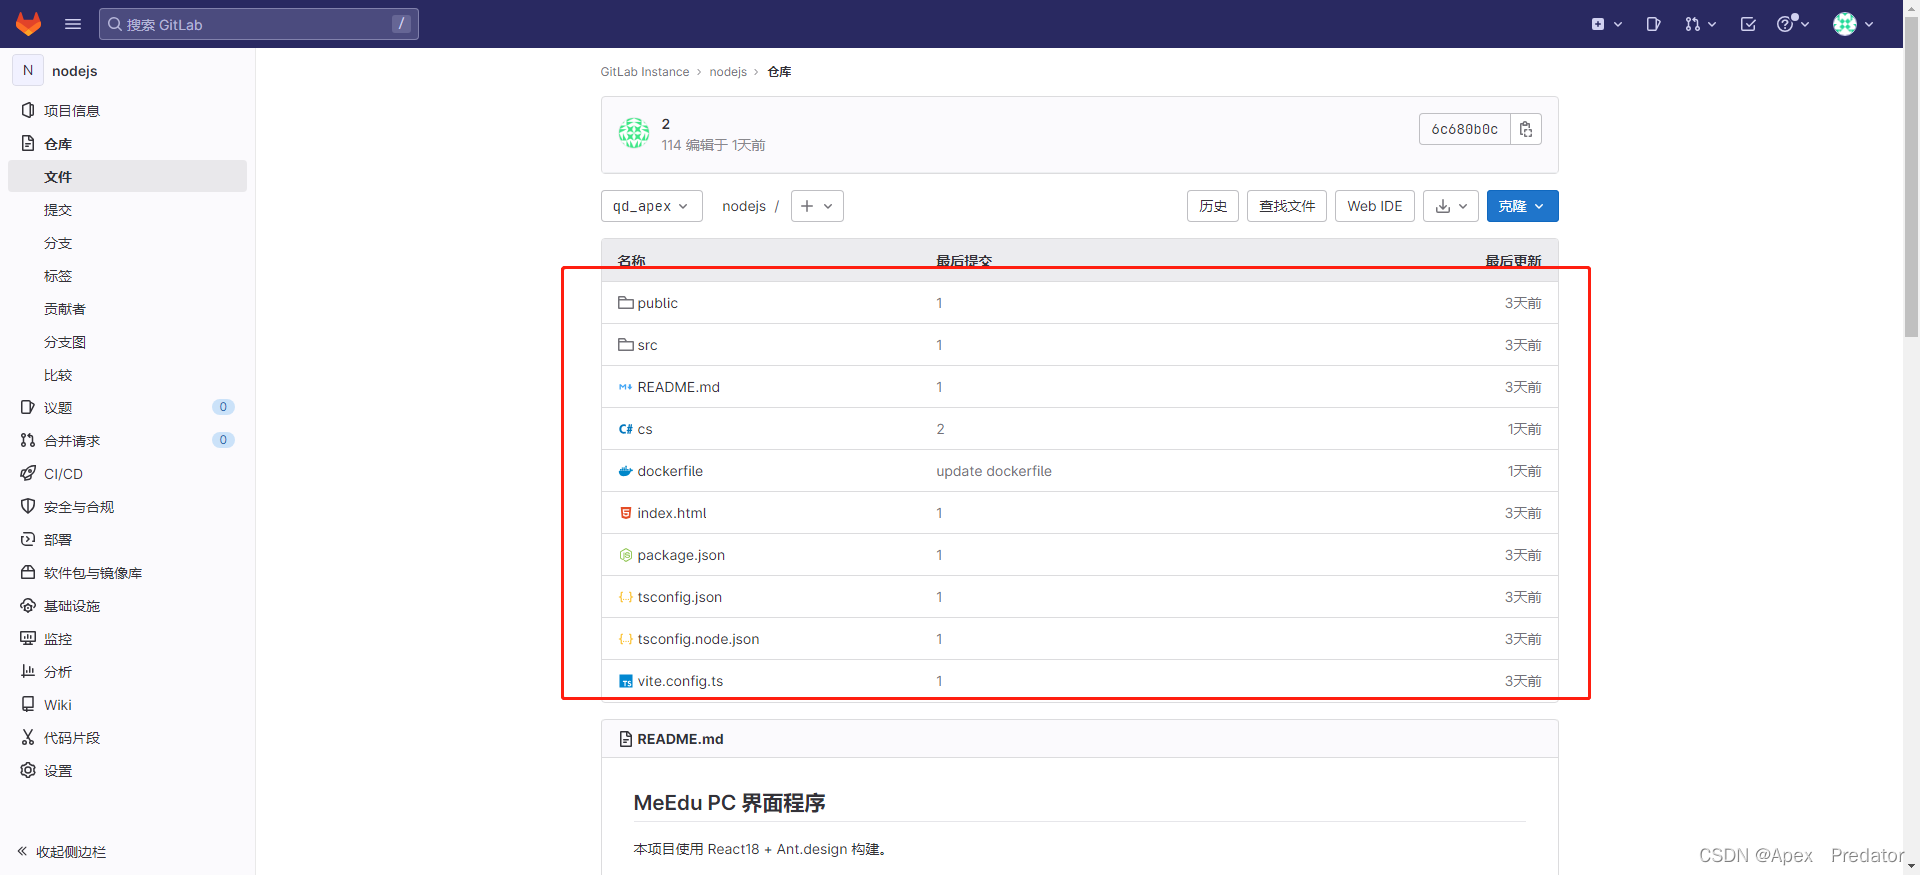
并且上传了前端的代码,需要做实验的可以到以下连接下载项目代码
项目代码:Release v4.9.2 · Meedu/frontend-v3 · GitHub
harbor配置
创建项目镜像仓库

我这里是创建了一个名为nginx的仓库存放前端的镜像,基础镜像依然是存放在之前创建的base_image仓库中
3.配置项目发布
jenkins配置
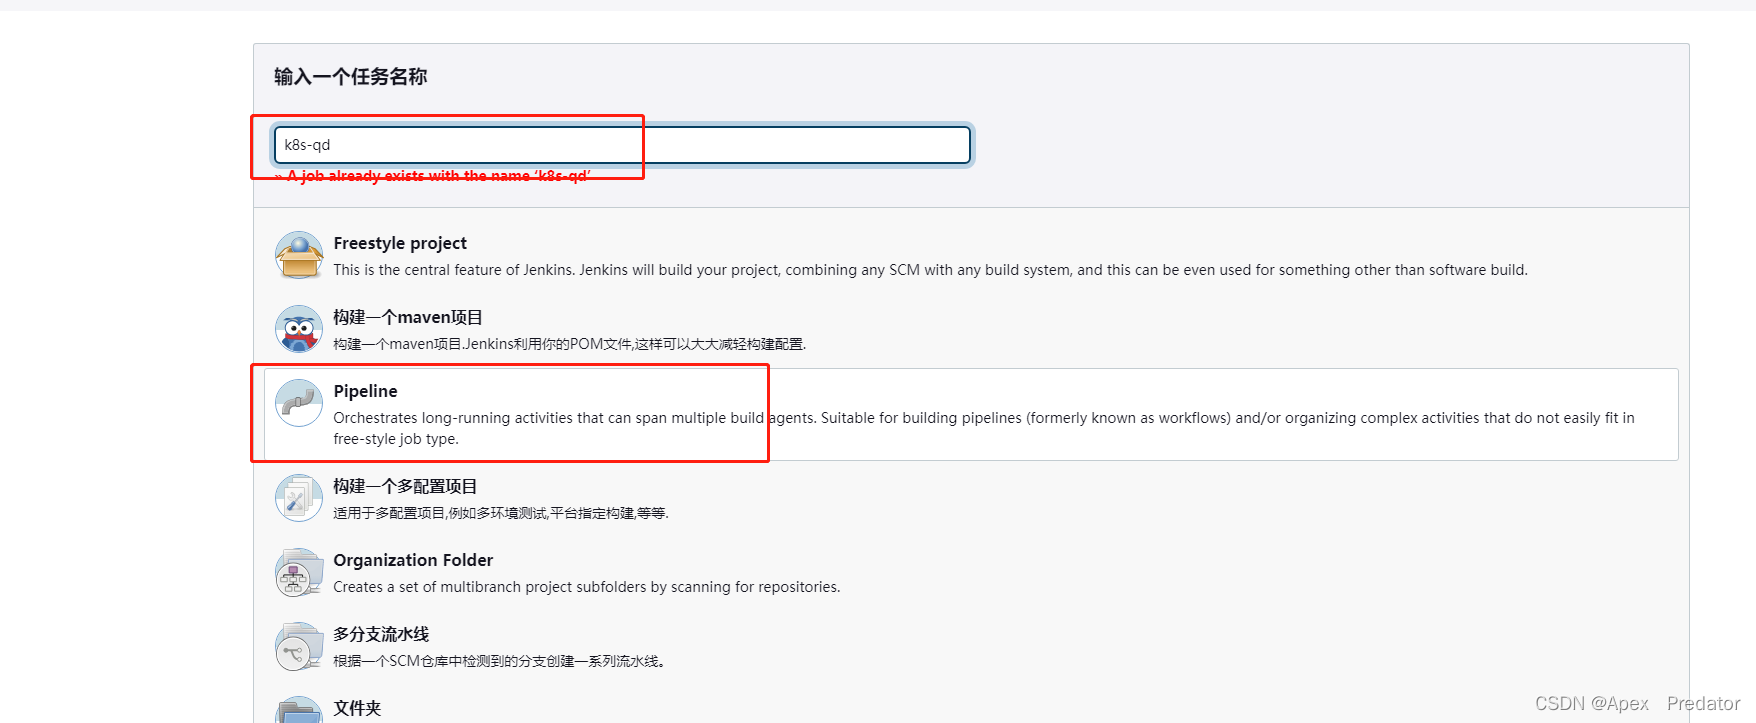
创建前端pipeline项目
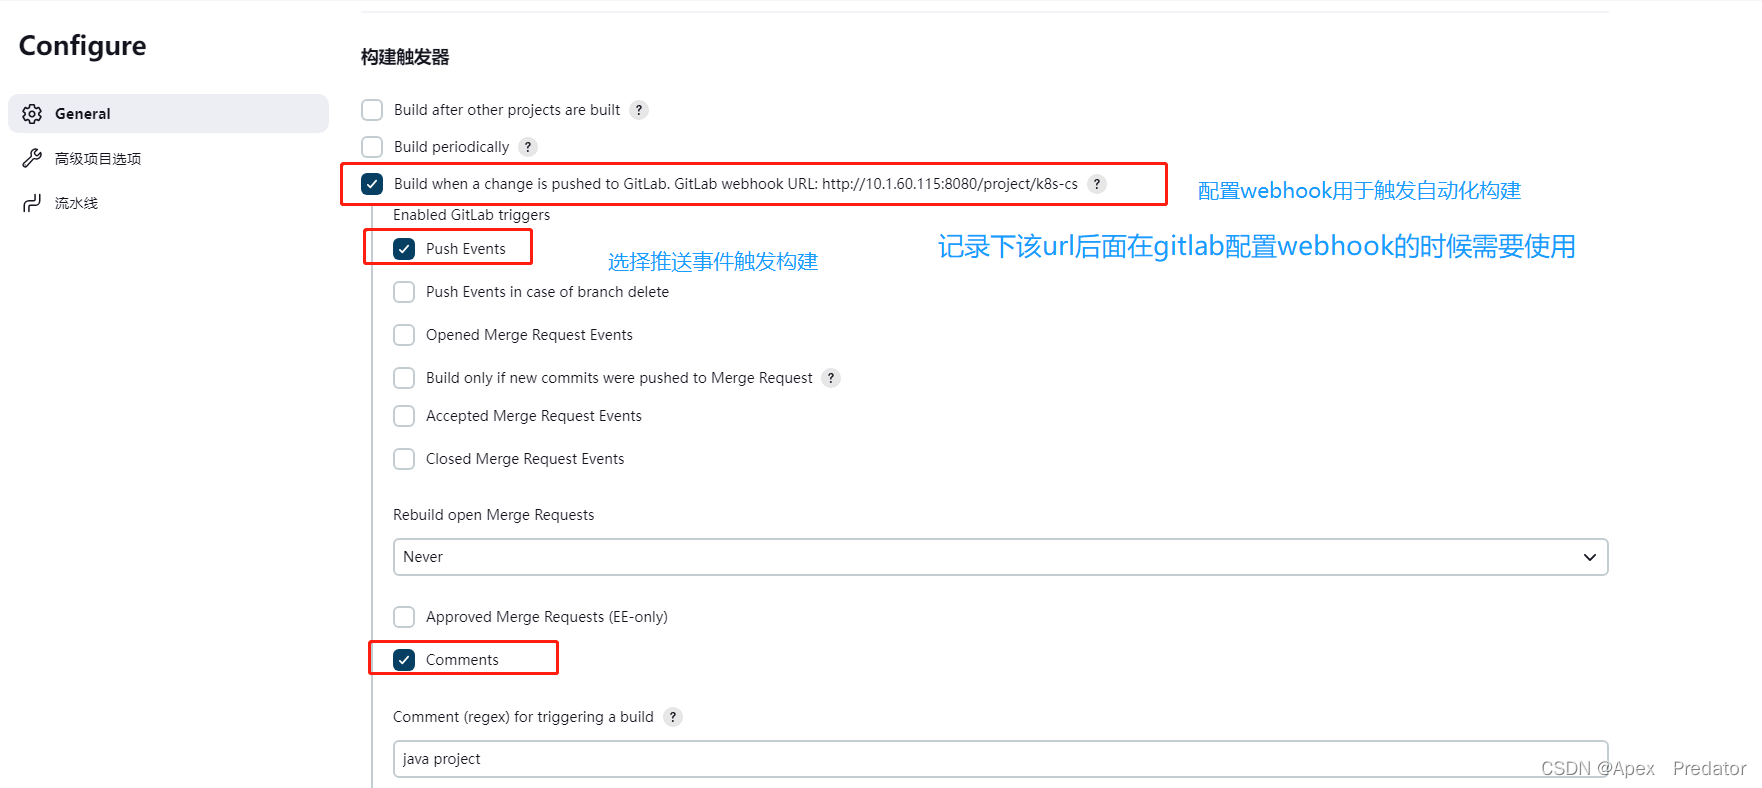
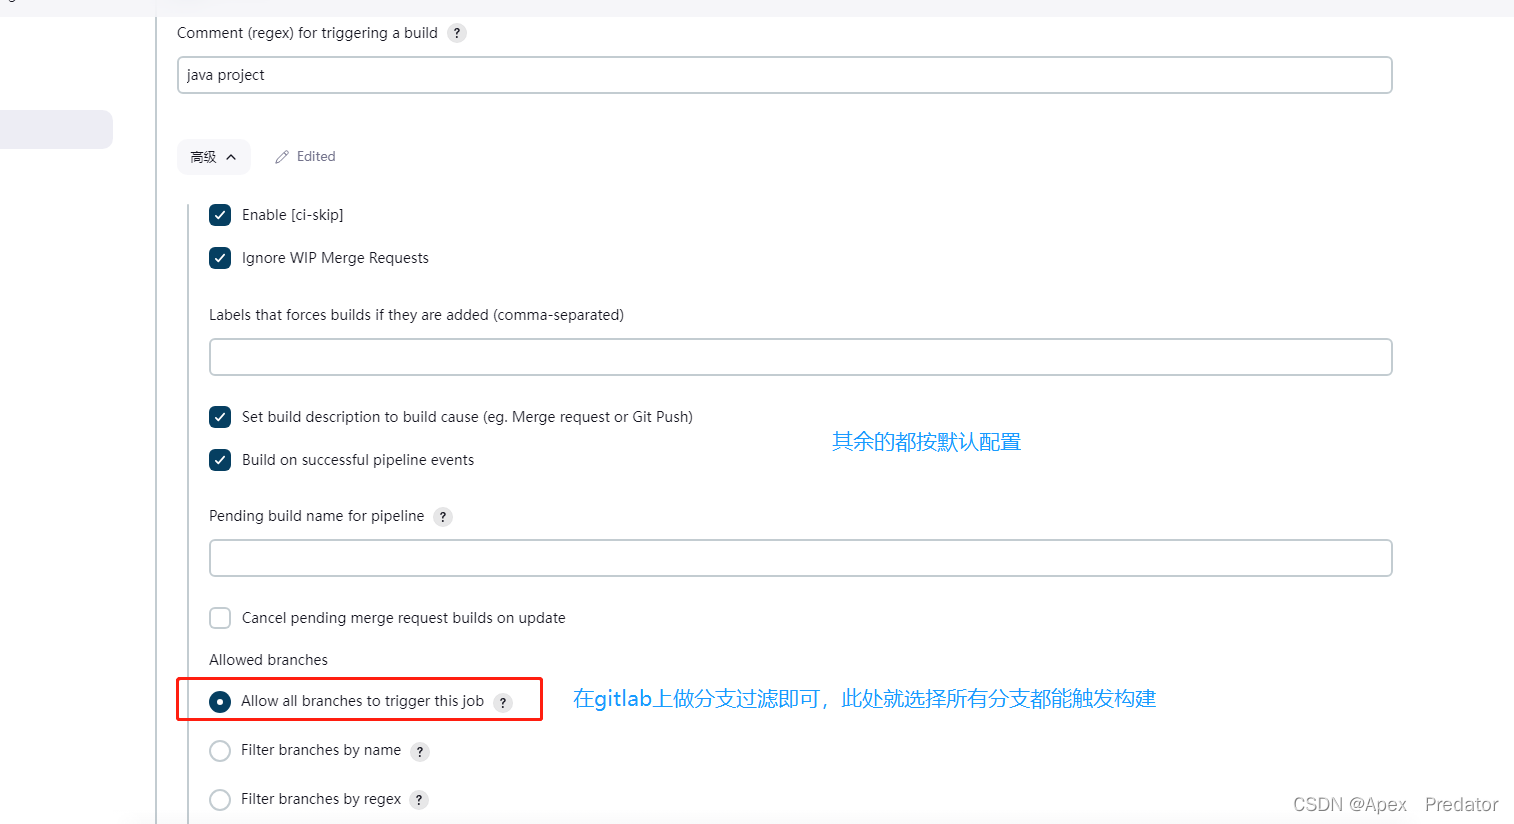
配置构建流程
这里我们就不配置参数化选择,在执行pipeline的时候让它自动生成,不过这样就会导致在第一次执行的时候会出现报错

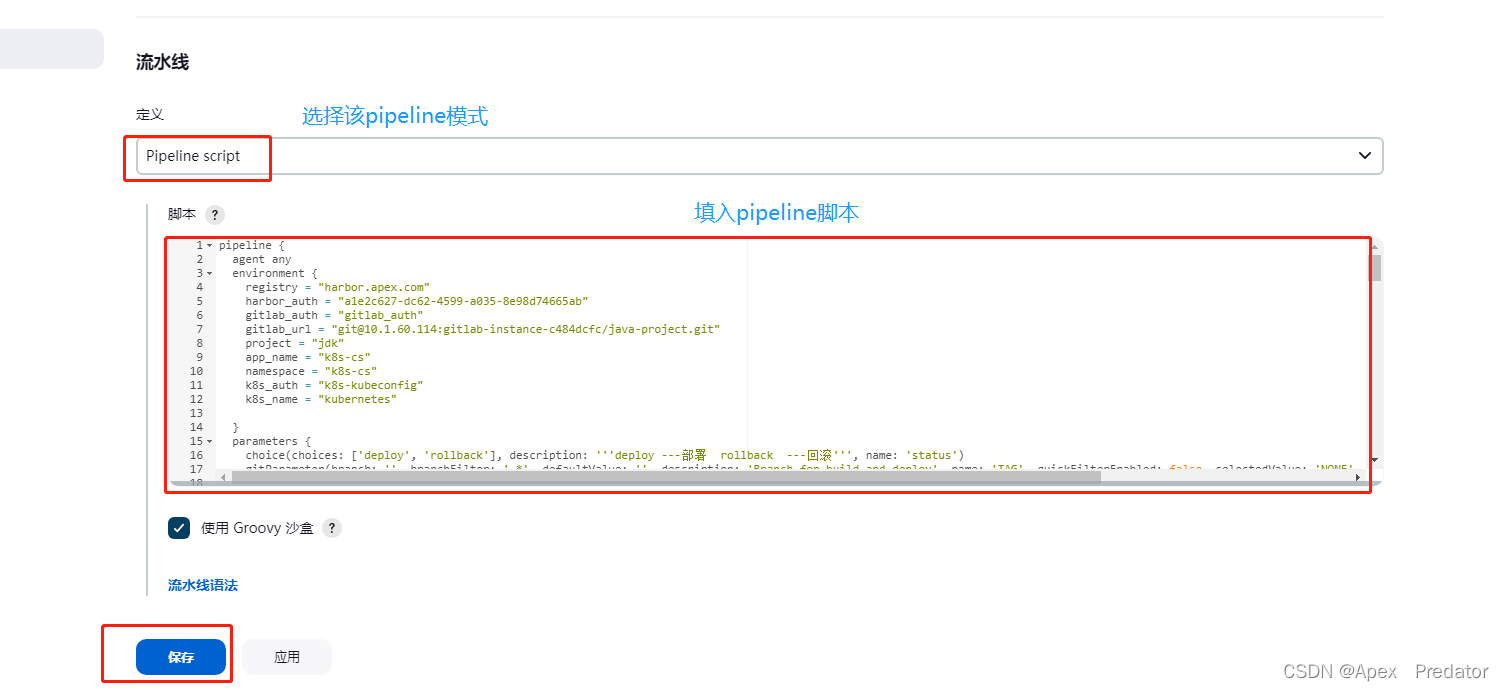
构建脚本如下
pipeline {          #该pipeline和后端发布的pipeline并没有太大区别,只是打包命令和项目的参数改变了agent anyenvironment {        #配置环境变量参数registry = "harbor.apex.com"harbor_auth = "a1e2c627-dc62-4599-a035-8e98d74665ab"project = "nginx"app_name = "k8s-qd"namespace = "k8s-qd"k8s_auth = "k8s-kubeconfig"}parameters {         #配置手动执行时选取的ParametergitParameter(branch: '', branchFilter: '.*', defaultValue: '', description: 'Branch for build and deploy', name: 'branch', quickFilterEnabled: false, selectedValue: 'NONE', sortMode: 'NONE', tagFilter: '*', type: 'PT_BRANCH')choice(choices: ['deploy','rollback'], description: '''deploy ---部署  rollback  ---回滚''', name: 'status')}stages {stage ('checkout code') {parallel {stage ('webhook tigger') {when {expression { params.status == 'deploy' && env.gitlabBranch != null }}steps {checkout([$class: 'GitSCM', branches: [[name: '${env.gitlabBranch}']], extensions: [], userRemoteConfigs: [[credentialsId: 'gitlab_auth', url: 'git@10.1.60.114:gitlab-instance-c484dcfc/nodejs.git']]])sh "git branch"echo "Current branch: ${env.gitlabBranch}"script {commit_id = sh(returnStdout: true, script: "git log -n 1 --pretty=format:'%h'").trim()tag = BUILD_TAG + '-' + commit_id}}}stage ('jenkins scm') {when {expression { params.status == 'deploy' && env.gitlabBranch == null }}steps {checkout([$class: 'GitSCM', branches: [[name: '${branch}']], extensions: [], userRemoteConfigs: [[credentialsId: 'gitlab_auth', url: 'git@10.1.60.114:gitlab-instance-c484dcfc/nodejs.git']]])sh "git branch"echo "Current branch: ${branch}"script {commit_id = sh(returnStdout: true, script: "git log -n 1 --pretty=format:'%h'").trim()tag = BUILD_TAG + '-' + commit_id}}}}}stage ('build dist') {when {expression { params.status == 'deploy' }}steps {         #使用nodejs的打包命令编译前端代码sh """npm install --registry=https://registry.npm.taobao.org   #拉取依赖,并指定源npm run build        #编译构建ls dist          #编译后的前端静态文件都在dist目录下"""}}stage ('docker image build and push') {when {expression { params.status == 'deploy' }}steps {withCredentials([usernamePassword(credentialsId: "${harbor_auth}", passwordVariable: 'password', usernameVariable: 'username')]) {sh """docker build -t ${registry}/${project}/${app_name}:${tag} .docker push ${registry}/${project}/${app_name}:${tag}"""}}}stage ('k8s update image version') {parallel {stage ('to master') {when {expression { params.status == 'deploy' && (env.gitlabBranch == 'master' || params.branch == 'master') }}steps {withCredentials([file(credentialsId: "${k8s_auth}", variable: 'KUBECONFIG')]) {sh "kubectl --kubeconfig ${KUBECONFIG} set image deployment ${app_name} ${app_name}=${registry}/${project}/${app_name}:${tag} -n ${namespace} --record"}}}  stage ('to qd_apex') {when {expression { params.status == 'deploy' && (env.gitlabBranch == 'qd_apex' || params.branch == 'qd_apex')}}steps {withCredentials([file(credentialsId: "${k8s_auth}", variable: 'KUBECONFIG')]) {sh "kubectl --kubeconfig ${KUBECONFIG} set image deployment ${app_name} ${app_name}=${registry}/${project}/${app_name}:${tag} -n ${namespace} --record"}}}}}stage ('rollback version') {parallel {stage ('to  master') {when {expression { params.status == 'rollback' && params.branch == 'master' }}steps {withCredentials([file(credentialsId: "${k8s_auth}", variable: 'KUBECONFIG')]) {sh "kubectl --kubeconfig ${KUBECONFIG} rollout undo deployment ${app_name} -n ${namespace}" }}}stage ('to  qd_apex') {when {expression { params.status == 'rollback' && params.branch == 'qd_apex' }}steps {withCredentials([file(credentialsId: "${k8s_auth}", variable: 'KUBECONFIG')]) {sh "kubectl --kubeconfig ${KUBECONFIG} rollout undo deployment ${app_name} -n ${namespace}" }}}}    }}
}
制作基础镜像
vi dockerfile
FROM alpine:latest   #使用alpine系统作为基础镜像
ENV TZ="Asia/Shanghai"    #配置变量
RUN sed -i 's/dl-cdn.alpinelinux.org/repo.huaweicloud.com/g' /etc/apk/repositories \
&& apk add --upgrade --no-cache nginx tzdata ttf-dejavu fontconfig \  #安装nginx和一些软件
&& cp /usr/share/zoneinfo/${TZ} /etc/localtime \
&& echo ${TZ} > /etc/timezone
使用dockefile生成镜像
docker build -t harbor.apex.com/base_image/nginx:latest .
推送镜像到harbor仓库
docker push harbor.apex.com/base_image/nginx:latest
gitlab配置
在创建的前端代码仓库中配置webhook
参考:gitlab配置webhook_Apex Predator的博客-CSDN博客
在项目中新建dockerfile文件用于制作每次前端发版的新版本镜像
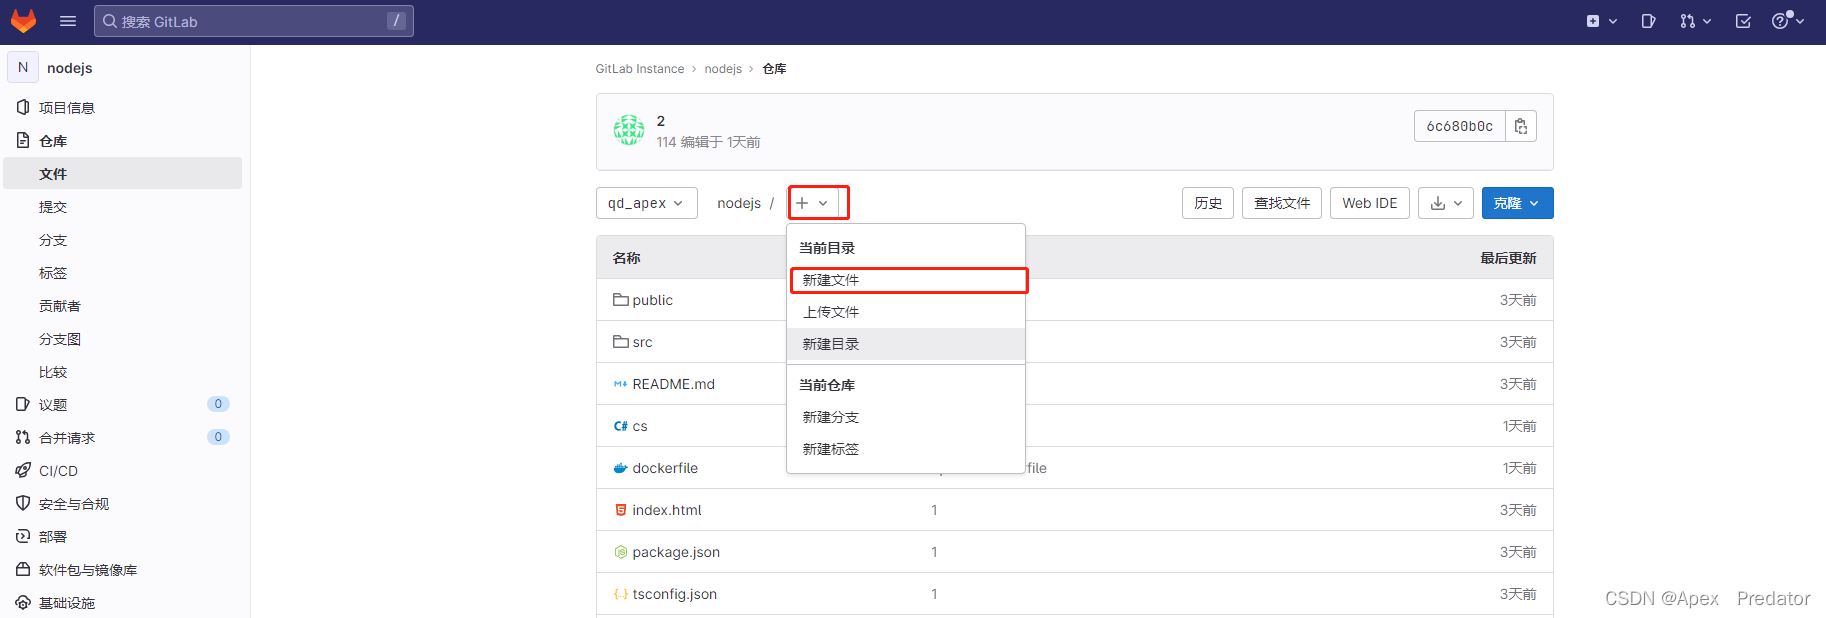

dockerfile内容如下
FROM harbor.apex.com/base_image/nginx:latest  #从harbor仓库获取nginx基础镜像
RUN mkdir -p /opt/web    #新建静态文件目录
WORKDIR /opt/web     #设置该目录为工作目录,即相当于cd进入该目录下
COPY ./dist/ ./      #讲编译构建好的静态文件拷贝到该工作目录下
EXPOSE 80           #暴露端口为80
ENTRYPOINT /usr/sbin/nginx -g "daemon off;"
#启动nginx服务,nginx默认是后台启动的,但是容器是必须要在前台运行服务,不然就视为没有服务在容器中运行,就会导致容器自动关闭,所以使用-g参数使nginx服务在前台运行
k8s集群配置
在master节点上执行
新建命名空间
kubectl create namespace k8s-qd
拷贝nginx配置文件过来,也可以在我这个配置中修改,用于创建configmap服务
vi nginx.conf
# For more information on configuration, see:
#   * Official English Documentation: http://nginx.org/en/docs/
#   * Official Russian Documentation: http://nginx.org/ru/docs/user nginx;
worker_processes auto;
error_log /var/log/nginx/error.log;
pid /run/nginx.pid;# Load dynamic modules. See /usr/share/doc/nginx/README.dynamic.
include /usr/share/nginx/modules/*.conf;events {worker_connections 1024;
}http {log_format  main  '$remote_addr - $remote_user [$time_local] "$request" ''$status $body_bytes_sent "$http_referer" ''"$http_user_agent" "$http_x_forwarded_for"';log_format  log_json '{ "time_local": "$time_local", ''"remote_addr": "$remote_addr", ''"referer": "$http_referer", ''"request": "$request", ''"status": $status, ''"bytes": $body_bytes_sent, ''"agent": "$http_user_agent", ''"x_forwarded": "$http_x_forwarded_for", ''"up_addr": "$upstream_addr", ''"up_host": "$upstream_http_host", ''"up_resp_time": "$upstream_response_time", ''"request_time": "$request_time" }';access_log  /var/log/nginx/access.log  log_json;sendfile            on;tcp_nopush          on;tcp_nodelay         on;keepalive_timeout   65;types_hash_max_size 4096;include             /etc/nginx/mime.types;default_type        application/octet-stream;# Load modular configuration files from the /etc/nginx/conf.d directory.# See http://nginx.org/en/docs/ngx_core_module.html#include# for more information.include /etc/nginx/conf.d/*.conf;server {listen       80;listen       [::]:80;server_name  _;root         /opt/web/;    #配置为存放静态文件的目录# Load configuration files for the default server block.include /etc/nginx/default.d/*.conf;error_page 404 /404.html;location = /404.html {}error_page 500 502 503 504 /50x.html;location = /50x.html {}location / {       #配置访问规则,访问到html页面,因为html中应用的文件路径都是写死的,所以只需要配置了root指定静态目录即可root  /opt/web/;index index.html;}}# Settings for a TLS enabled server.
#
#    server {
#        listen       443 ssl http2;
#        listen       [::]:443 ssl http2;
#        server_name  _;
#        root         /usr/share/nginx/html;
#
#        ssl_certificate "/etc/pki/nginx/server.crt";
#        ssl_certificate_key "/etc/pki/nginx/private/server.key";
#        ssl_session_cache shared:SSL:1m;
#        ssl_session_timeout  10m;
#        ssl_ciphers HIGH:!aNULL:!MD5;
#        ssl_prefer_server_ciphers on;
#
#        # Load configuration files for the default server block.
#        include /etc/nginx/default.d/*.conf;
#
#        error_page 404 /404.html;
#            location = /40x.html {
#        }
#
#        error_page 500 502 503 504 /50x.html;
#            location = /50x.html {
#        }
#    }}
根据以上的nginx配置创建configmap
kubectl create configmap qd-nginx --from-file=/root/nginx.conf -n k8s-qd
kubectl describe configmap qd-nginx -n k8s-qd

可以看到configmap是挂载了nginx配置的
创建secret,用于拉取harbor仓库镜像验证
kubectl create secret docker-registry qd-harbor-secret --namespace=k8s-qd --docker-server=harbor.apex.com --docker-username=admin --docker-password=Harbor12345
新建前端服务的yaml文件
vi k8s-qd.yaml
apiVersion: apps/v1
kind: Deployment
metadata:labels:app: k8s-qdname: k8s-qdnamespace: k8s-qd
spec:replicas: 4progressDeadlineSeconds: 600minReadySeconds: 10strategy:rollingUpdate:maxSurge: 1maxUnavailable: 0type: RollingUpdateselector:matchLabels:app: k8s-qdtemplate:metadata:labels:app: k8s-qdspec:containers:- name: k8s-qdimage: nginximagePullPolicy: IfNotPresentports:- containerPort: 80readinessProbe:httpGet:path: /port: 80scheme: HTTPinitialDelaySeconds: 30periodSeconds: 10timeoutSeconds: 2successThreshold: 1failureThreshold: 2livenessProbe:tcpSocket:port: 80initialDelaySeconds: 30periodSeconds: 10successThreshold: 1timeoutSeconds: 2failureThreshold: 2volumeMounts:       #配置挂载configmap- name: nginx-configmapmountPath: /etc/nginx/nginx.confsubPath: nginx.confvolumes:       #引用configmap挂载- name: nginx-configmapconfigMap:name: qd-nginx     #填入刚刚配置的configmap名称items:- key: nginx.confpath: nginx.confimagePullSecrets:      #使用配置的secret- name: qd-harbor-secretrestartPolicy: Always---
apiVersion: v1
kind: Service
metadata:name: k8s-qdnamespace: k8s-qd
spec:selector:app: k8s-qdtype: NodePortclusterIP:ports:- port: 80targetPort: 80nodePort: 30001protocol: TCP
启动该yaml服务
kubectl apply -f k8s-qd.yaml
4.发布展示
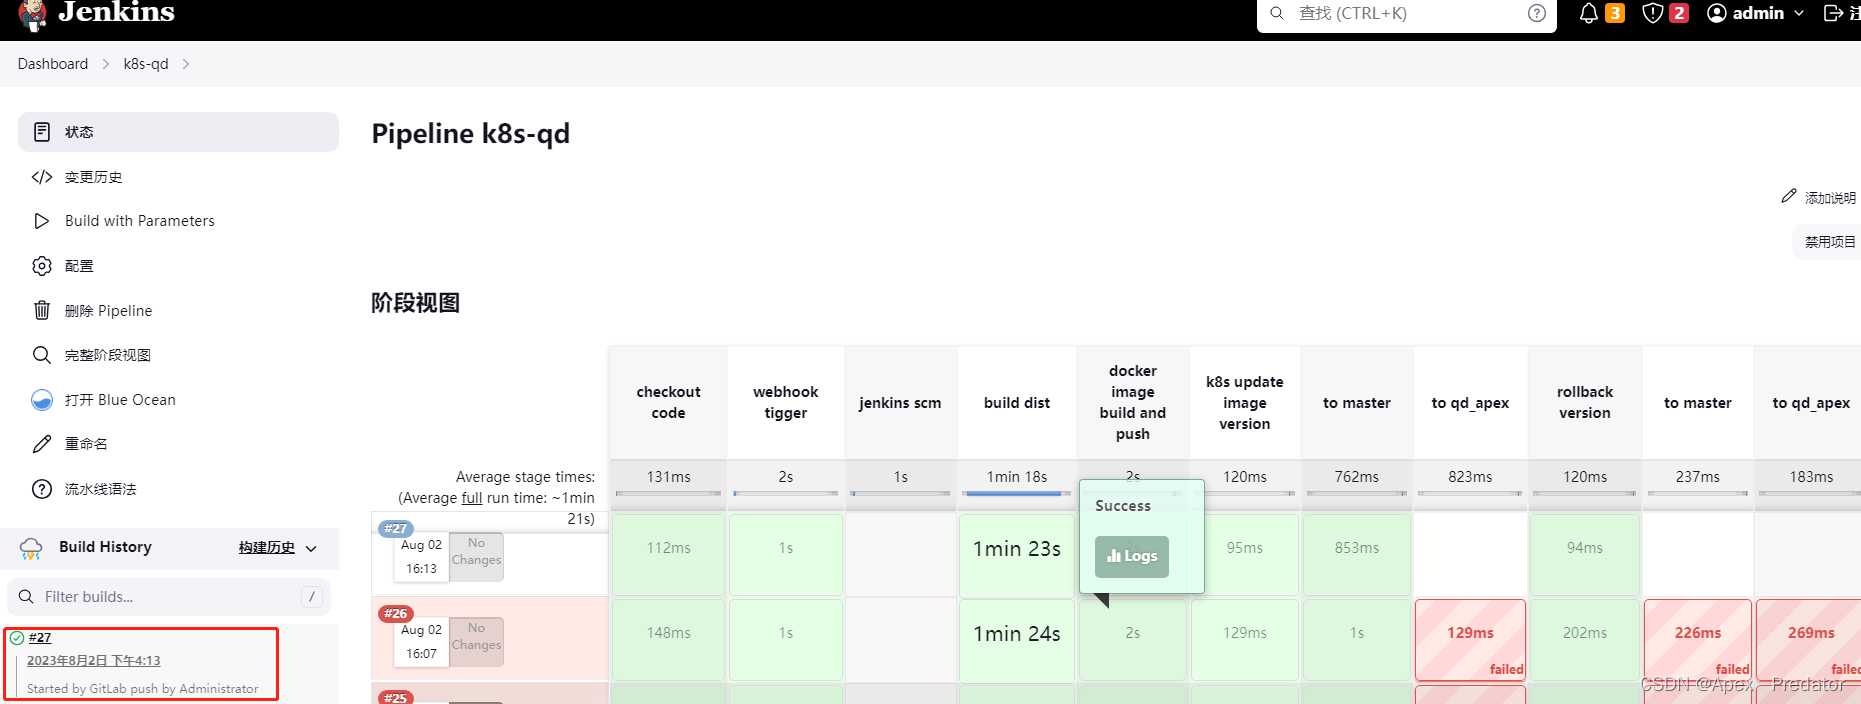
手动构建

可以看到手动构建的时候,git parameter选框会自动去拉取gitlab项目中的所有分支,默认是没有选择的,需要手动选择,status是默认选择deploy为发布

也可以看到第一次构建是失败的,这是因为没有手动配置parameter的原因,在第一次执行时会根据pipeline脚本中的配置自动生成parameter

再次进入配置也可以看到,配置构建流程的时候是没有配置这些参数的,这些都配置在pipeline脚本中,第一次构建的时候会自动生成,但是相应的,第一次构建也会执行失败
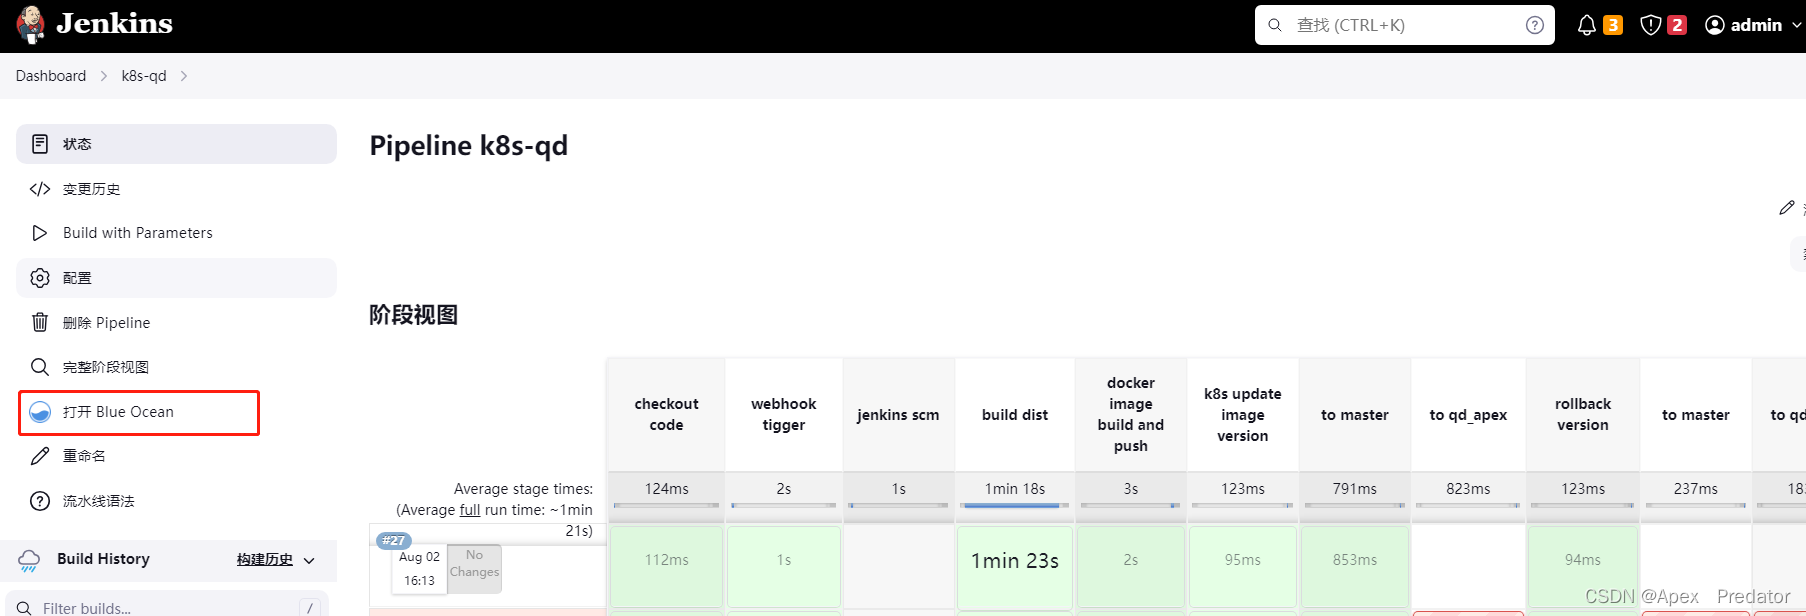
自动化构建
我在gitlab配置了过滤只有推分支合并master的时候才触发构建,现在来合并一下master触发构建
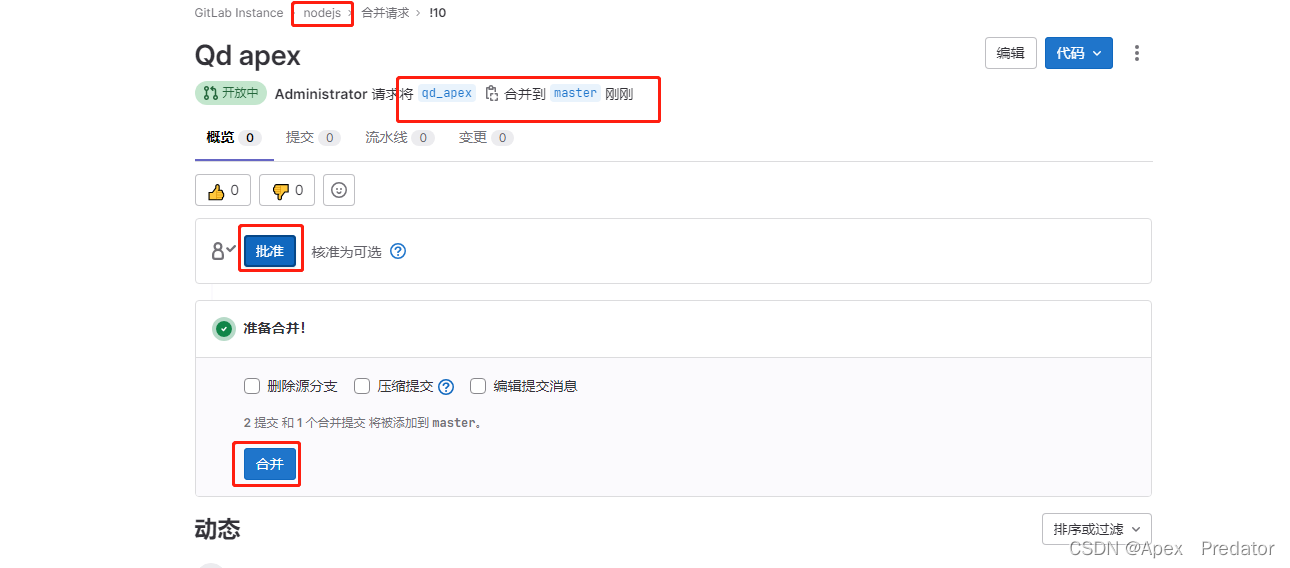
点击批准合并后查看jenkins是否触发构建
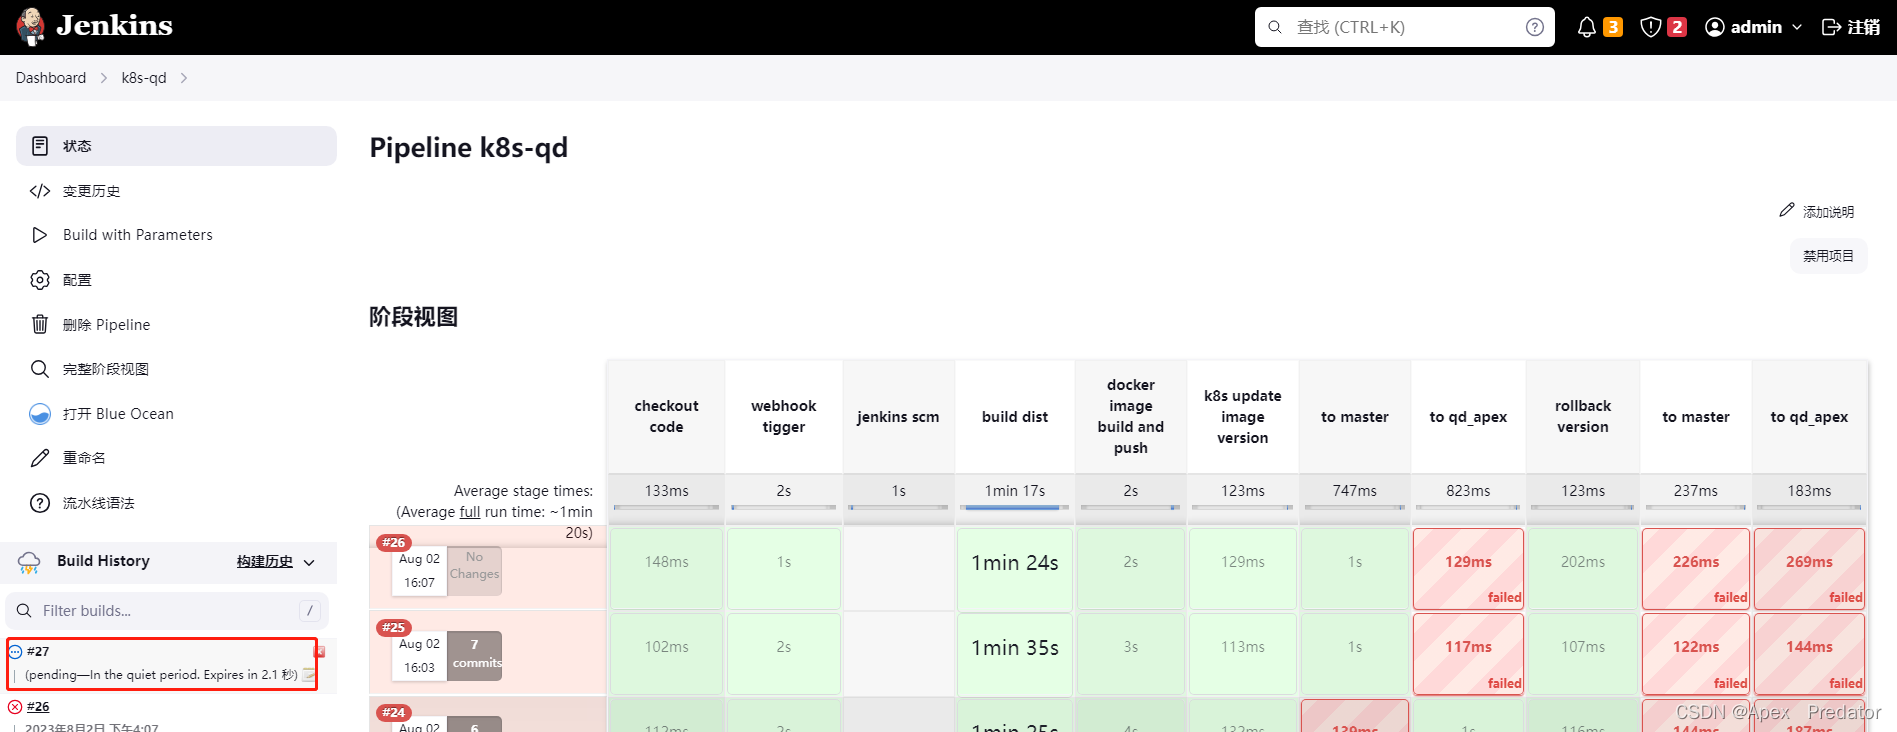
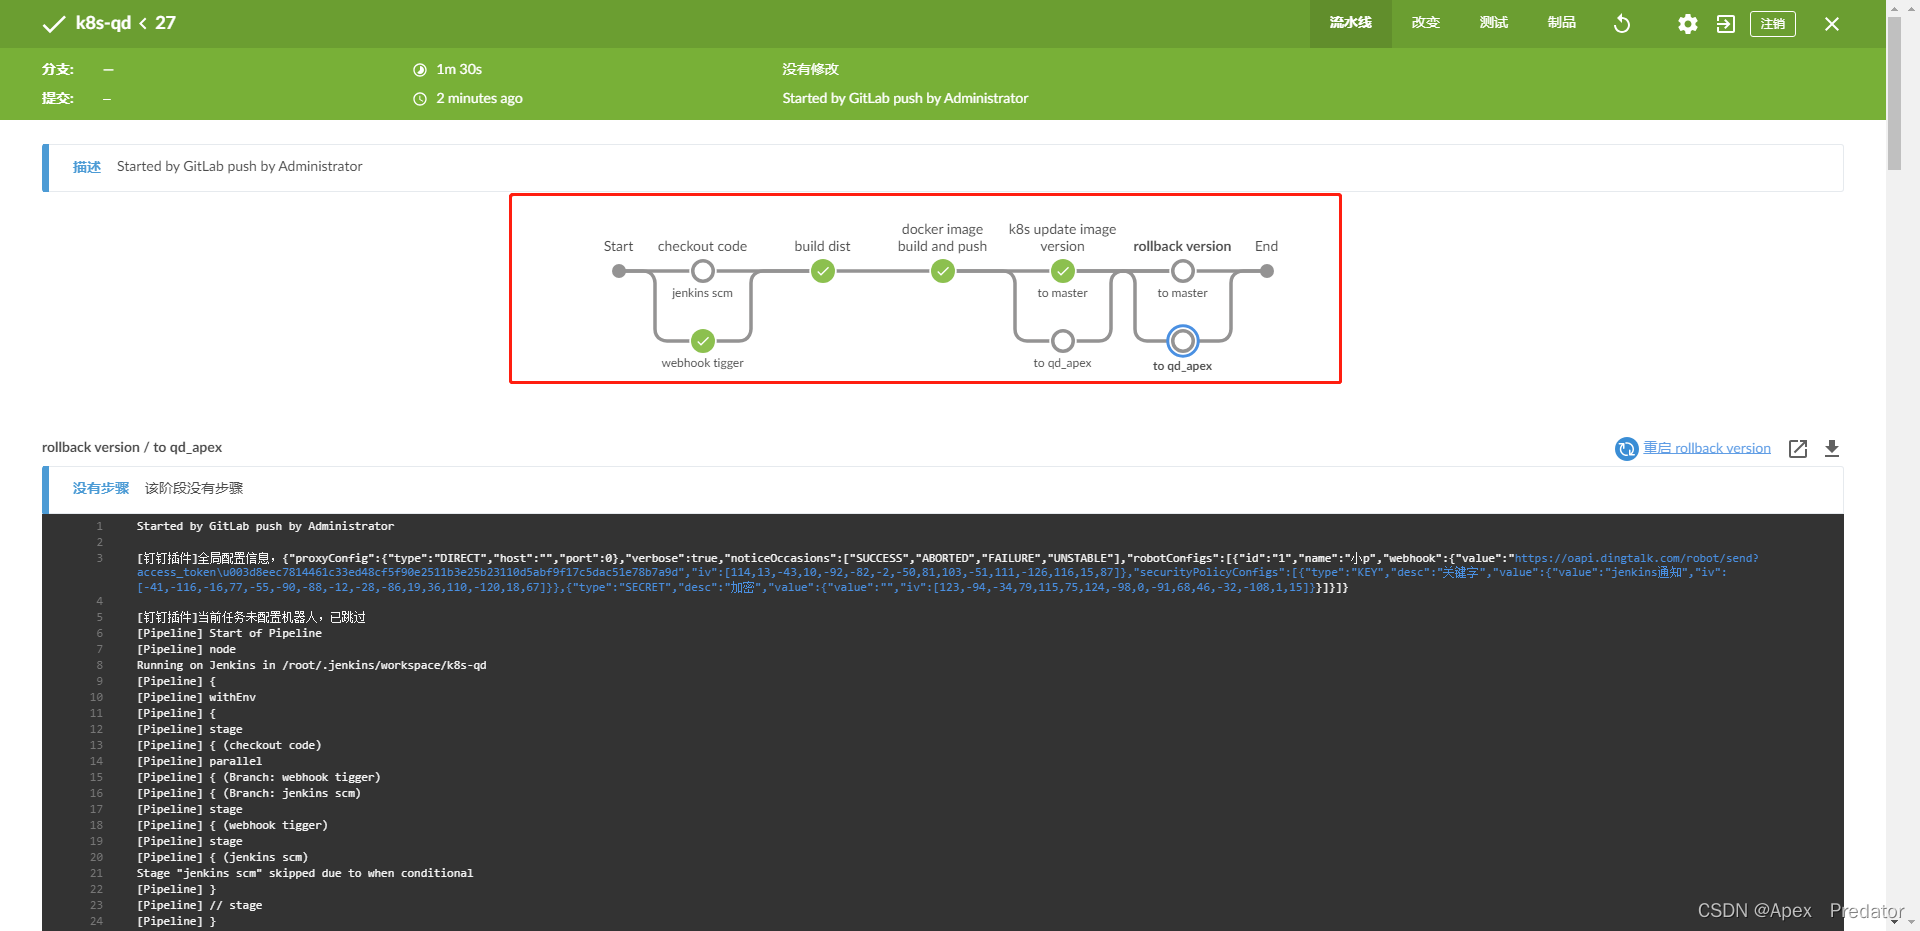
可以看到通过自动触发的构建也是成功完成了发布的
也可以通过blue ocean功能更直观的看到构建流程,blue ocean需要安装插件

至此配置完成