Spring MVC程序开发
目录
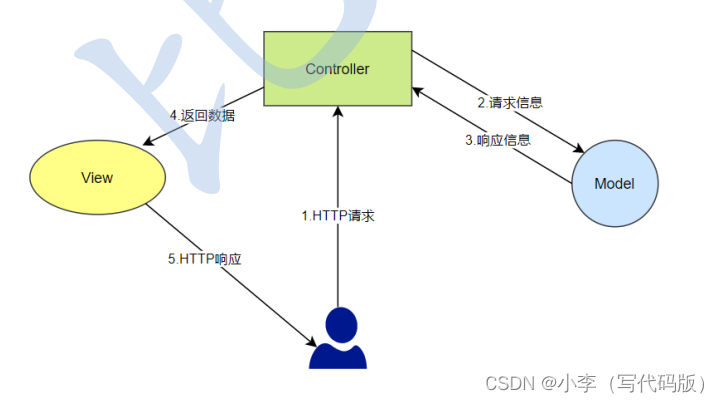
1.什么是Spring MVC?
1.1MVC定义
1.2MVC和Spring MVC的关系
2.为什么要学习Spring MVC?
3.怎么学Spring MVC?
3.1Spring MVC的创建和连接
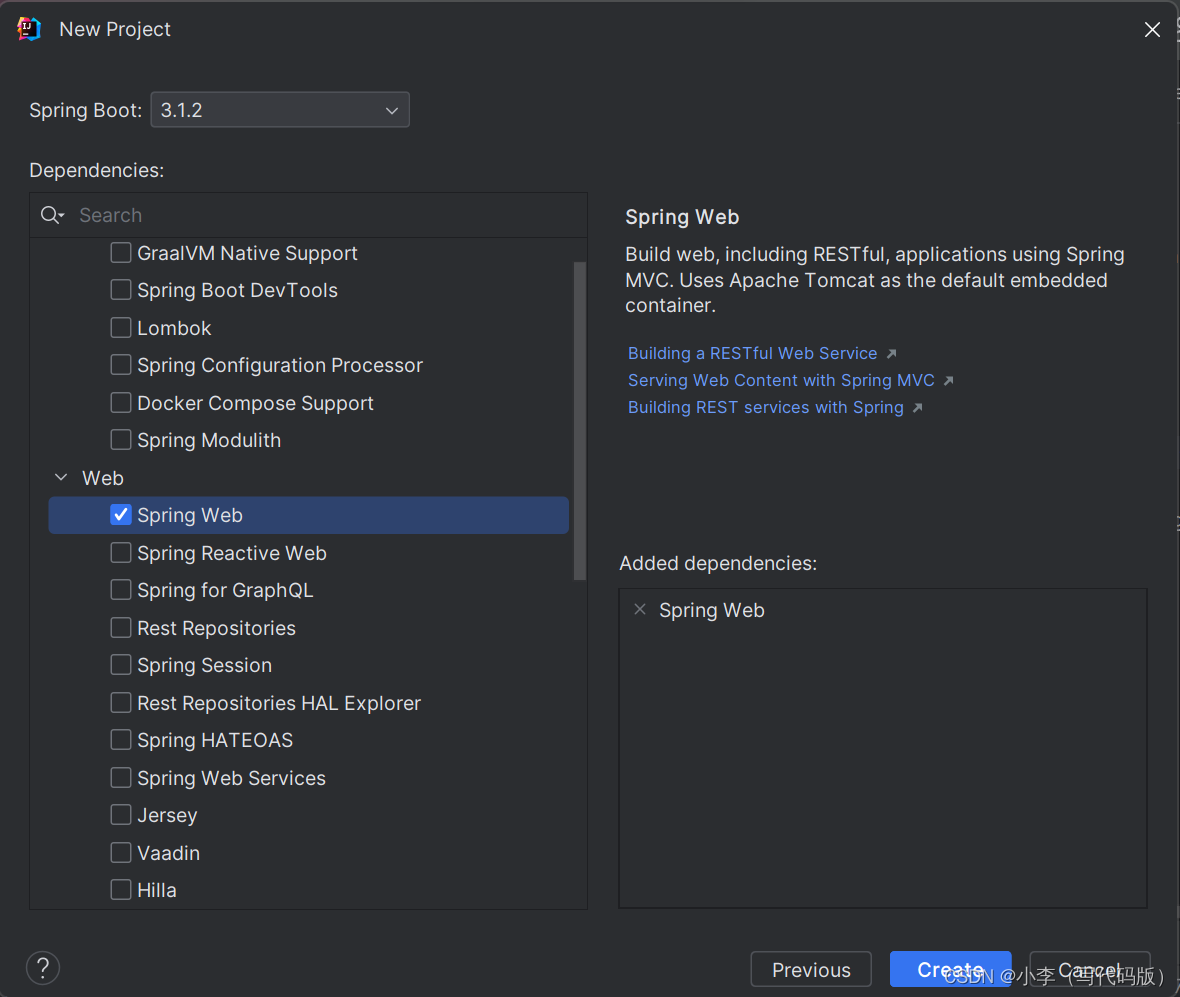
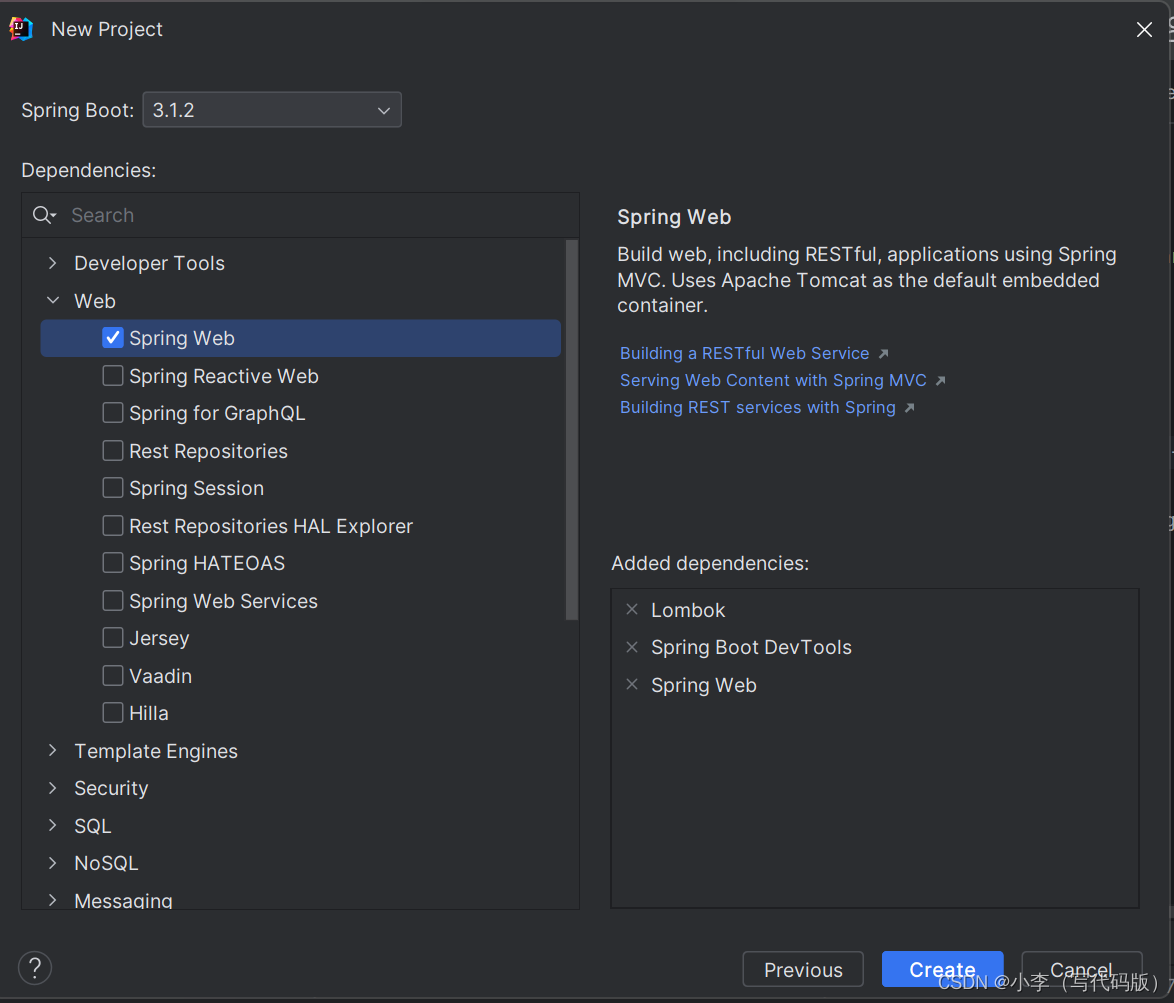
3.1.1创建Spring MVC项目
3.1.2@RequestMapping 注解介绍
3.1.3 @RequestMapping 是 post 还是 get 请求?
编辑 3.1.4 @GetMapping 和 PostMapping
3.2 获取参数
3.2.1 传递单个参数
3.2.2 传递对象
3.2.3 表单参数传递/传递多个参数(⾮对象)
3.2.4 后端参数重命名(后端参数映射)
3.2.5 设置参数必传@RequestParam
3.2.6 @RequestBody 接收JSON对象
3.2.7 获取URL中参数@PathVariable
3.2.8 上传⽂件@RequestPart
3.2.9 获取Cookie/Session/header
编辑 3.2.10返回Jason对象
4.请求转发和请求重定向
1.什么是Spring MVC?
1.1MVC定义
1.2MVC和Spring MVC的关系
2.为什么要学习Spring MVC?
3.怎么学Spring MVC?
3.1Spring MVC的创建和连接
3.1.1创建Spring MVC项目
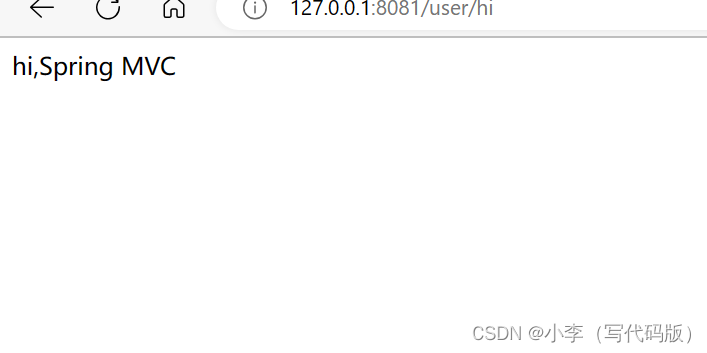
接下来,创建⼀个类,实现⽤户到 Spring 程序的互联互通,具体实现代码如下:
@Controller//让Spring框架启动时加载
@ResponseBody//返回非页面数据
@RequestMapping("/user")//路由器规则注册
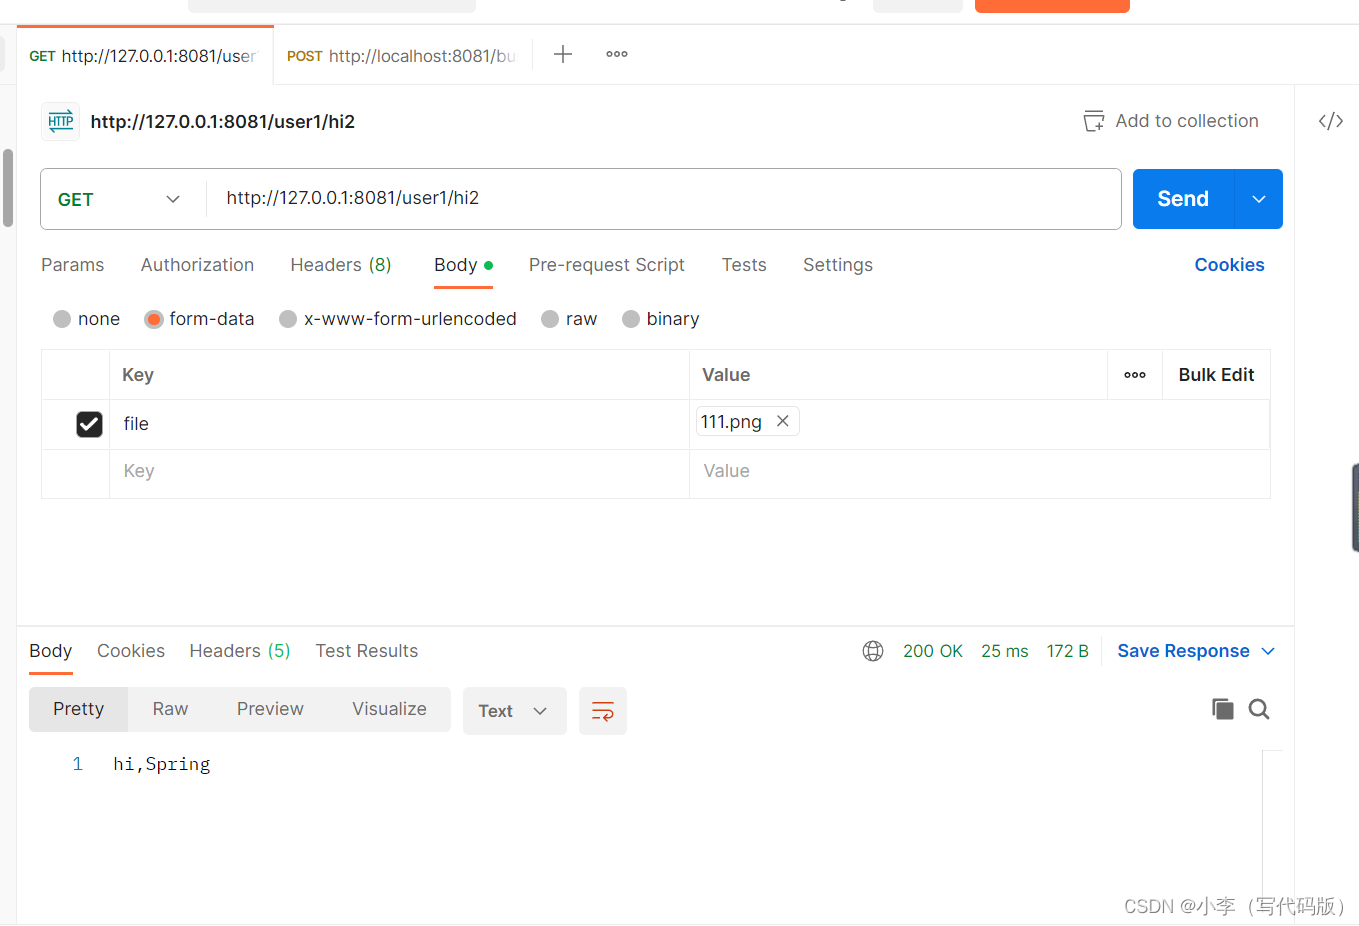
public class UserController {@RequestMapping("/hi")public String sayHi(){return "hi,Spring MVC";}
}访问地址127.0.0.1:8081/user/hi就可以打印出想要的文字:
3.1.2@RequestMapping 注解介绍
@RequestMapping的基础使用:
@Controller
@RequestMapping("/web")
public class WebController {@RequestMapping("/index")public String index(){
//        return "hello,springmvc";return "/index.html";}@ResponseBody
//    @RequestMapping(value = "/indexData",method = RequestMethod.POST)
//    @PostMapping("/indexData")@GetMapping("/indexData")public String indexData(){return "hello,springmvc";
//        return "/index.html";}
}@Controller
@ResponseBody
public class UserController1 {@RequestMapping("/hi")public String sayHi(){return "hi,Spring";}
}3.1.3 @RequestMapping 是 post 还是 get 请求?
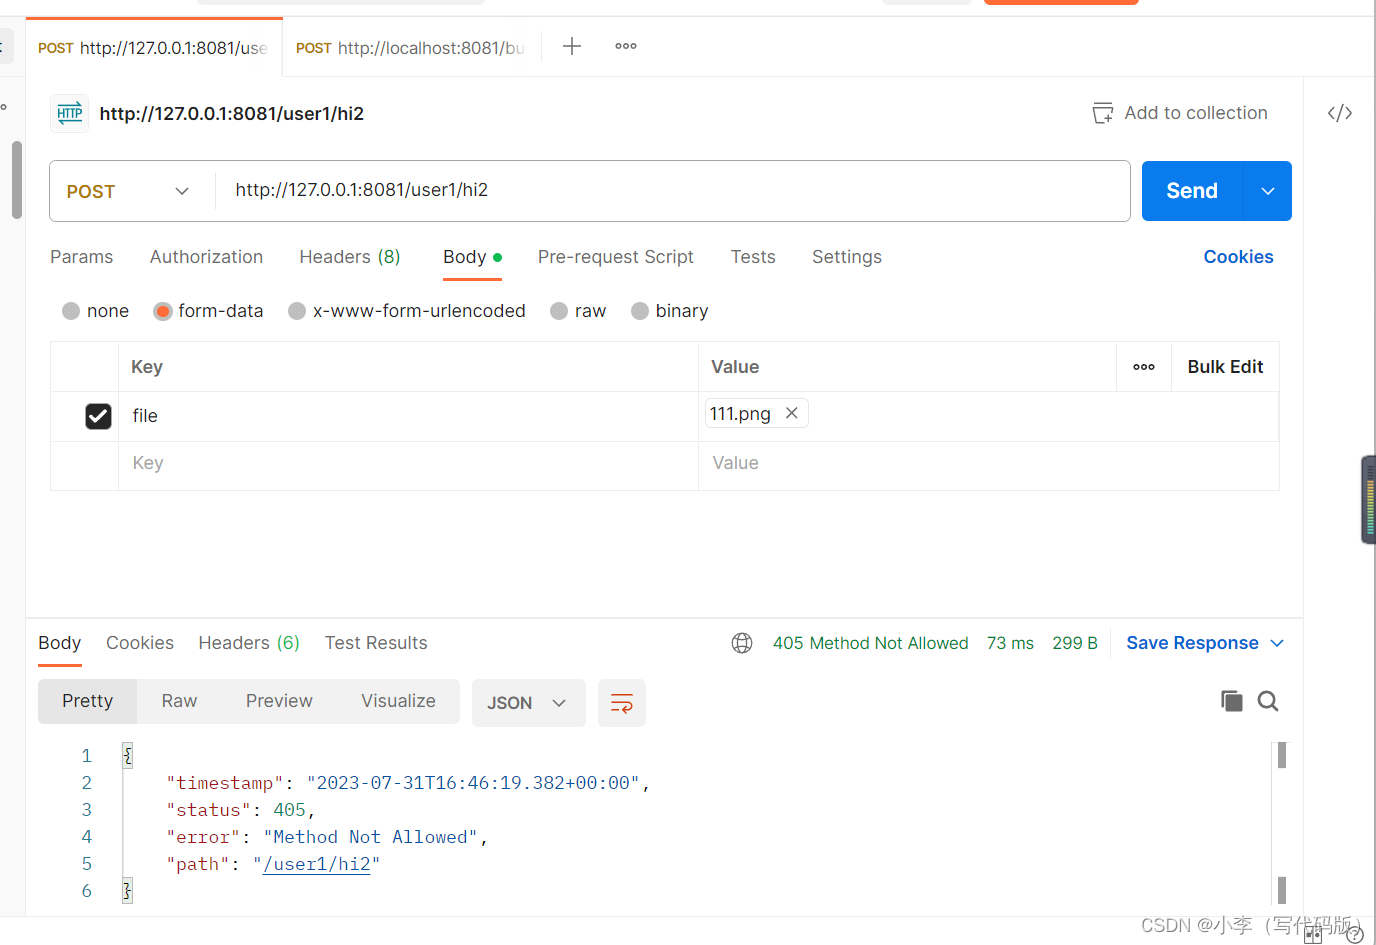
根据postman可以发现,@RequestMapping既有post请求,也有get请求。那如果只想要post或者get请求呢?
指定 GET/POST ⽅法类型:
public class UserController1 {@RequestMapping(value = "/hi2",method = RequestMethod.GET)public String sayHi2(){return "hi,Spring";}
}
 3.1.4 @GetMapping 和 PostMapping
//写法1
@RequestMapping("/hi2")
//写法2
@RequestMapping(value = "/hi2",method = RequestMethod.GET)
//写法3
@GetMapping("hi2")
post请求的2种写法:
//写法1
@RequestMapping(value = "hi2",method = RequestMethod.POST)
//写法2
@PostMapping("hi2")
3.2 获取参数
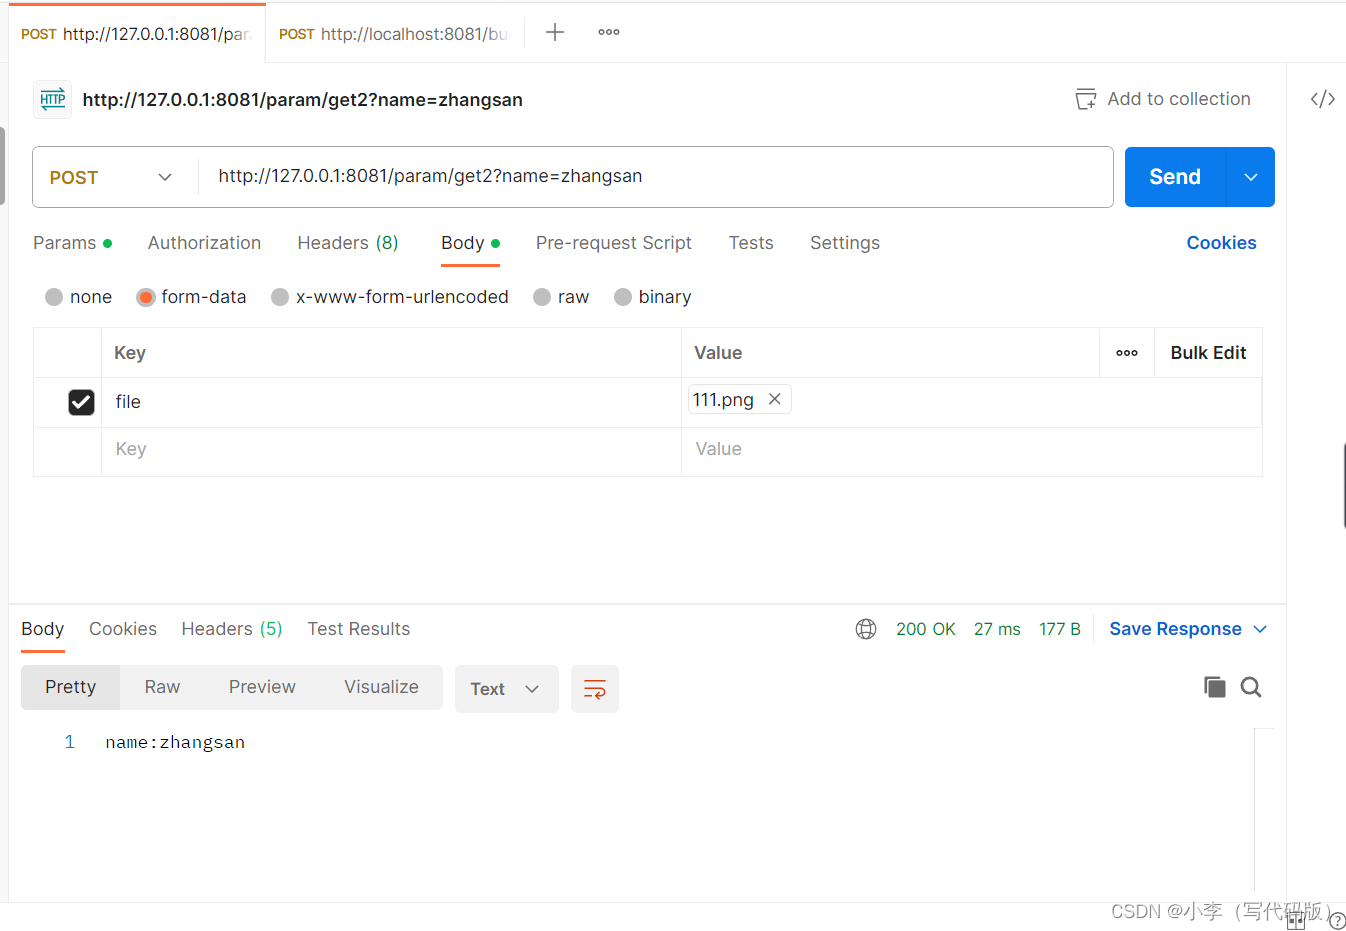
3.2.1 传递单个参数
在 Spring MVC 中可以直接⽤⽅法中的参数来实现传参,⽐如以下代码:
@RequestMapping("/get2")public String get2(String name){return "name:"+name;}在 postman 中访问⽅法:
3.2.2 传递对象
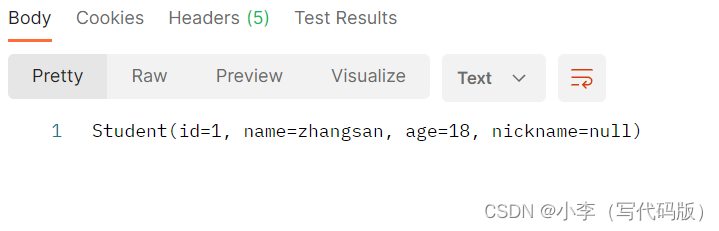
并且 Spring MVC 可以⾃动实现参数对象的赋值,⽐如Student对象:
@Data
public class Student {private Integer id;private  String name;private Integer age;private String nickname;
}
传递对象代码实现:
@RequestMapping("/get6")public String get6(Student student){return student.toString();}最终执行结果:
3.2.3 表单参数传递/传递多个参数(⾮对象)
@RequestMapping("/get3")public String get3(String name,Integer age){return "name:"+name+","+"age:"+age;}3.2.4 后端参数重命名(后端参数映射)
@RequestMapping("/m4")public Object method4(@RequestParam("time") String createtime){System.out.println("时间:" + createtime);return "/index.html";}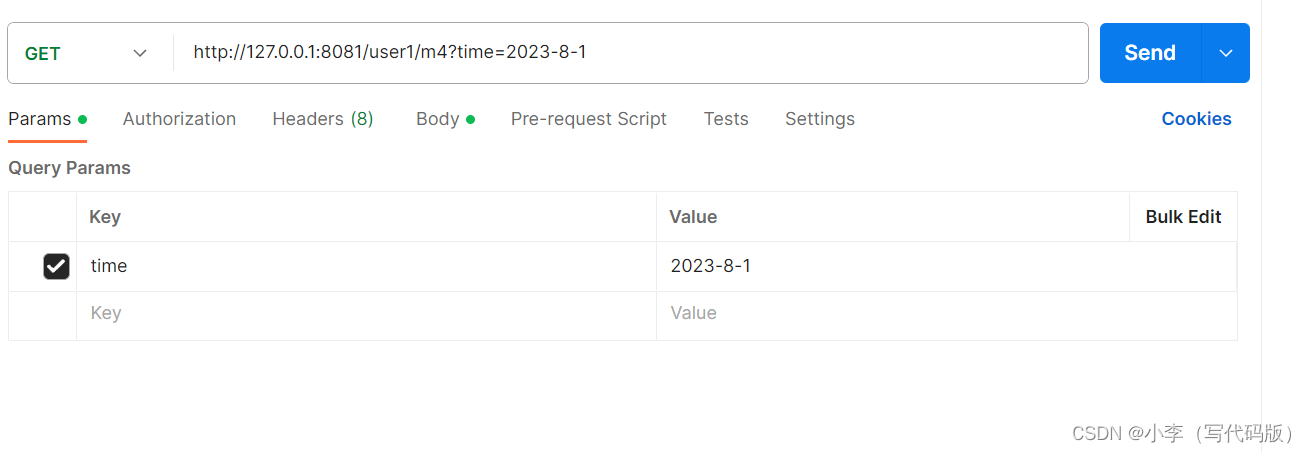
3.2.5 设置参数必传@RequestParam
上⾯的列⼦,如果我们是前端传递⼀个⾮ time 的参数,就会出现程序报错的情况,如下图所示:


⾮必传参数设置
@RequestMapping("/m4")public Object method4(@RequestParam(value = "time",required = false) String createtime) {System.out.println("时间:" + createtime);return "/index.html";}3.2.6 @RequestBody 接收JSON对象
后端接收代码:
@RequestMapping("/get8")public String get8(@RequestBody Student student){log.info(student.toString());return student.toString();}3.2.7 获取URL中参数@PathVariable
后端实现代码:
//取url地址@RequestMapping("/get9/{shopid}/{dealid}")public String get9(@PathVariable Integer shopid,@PathVariable("dealid") Integer dealId) {return "shopid:"+shopid+",dealId:"+dealId;}字段需要保持一致,如果不一致,需要在@PathVariable设置参数的名称
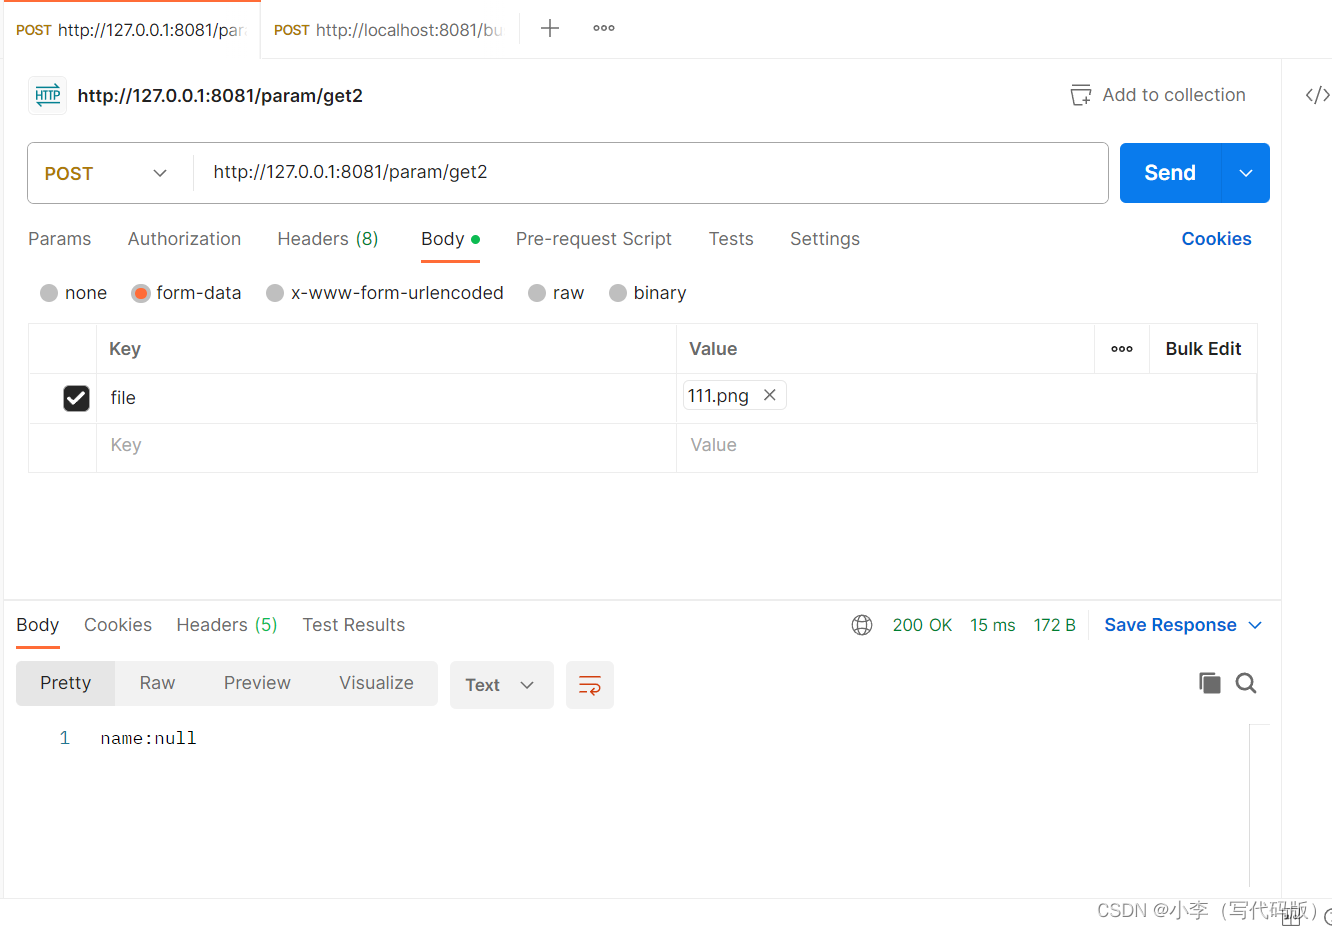
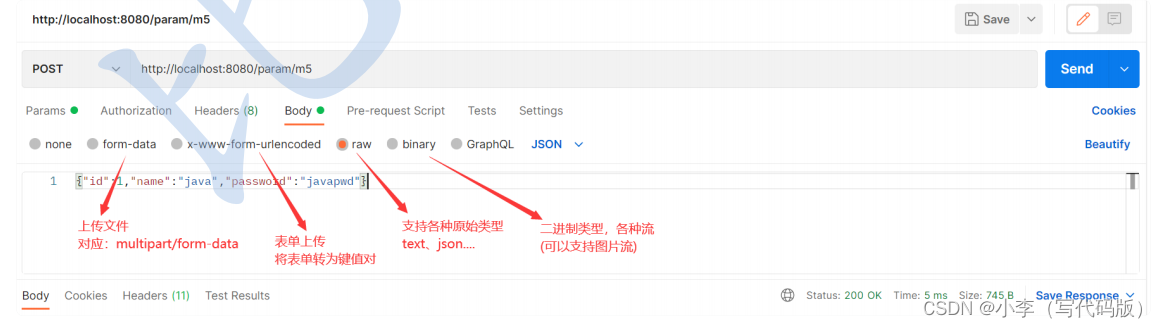
3.2.8 上传⽂件@RequestPart
后端代码实现:
@RequestMapping("/get10")public String get10(@RequestPart("file") MultipartFile file) throws IOException {log.info(file.getOriginalFilename());file.transferTo(new File("D:/temp/"+file.getOriginalFilename()));return "success";}3.2.9 获取Cookie/Session/header
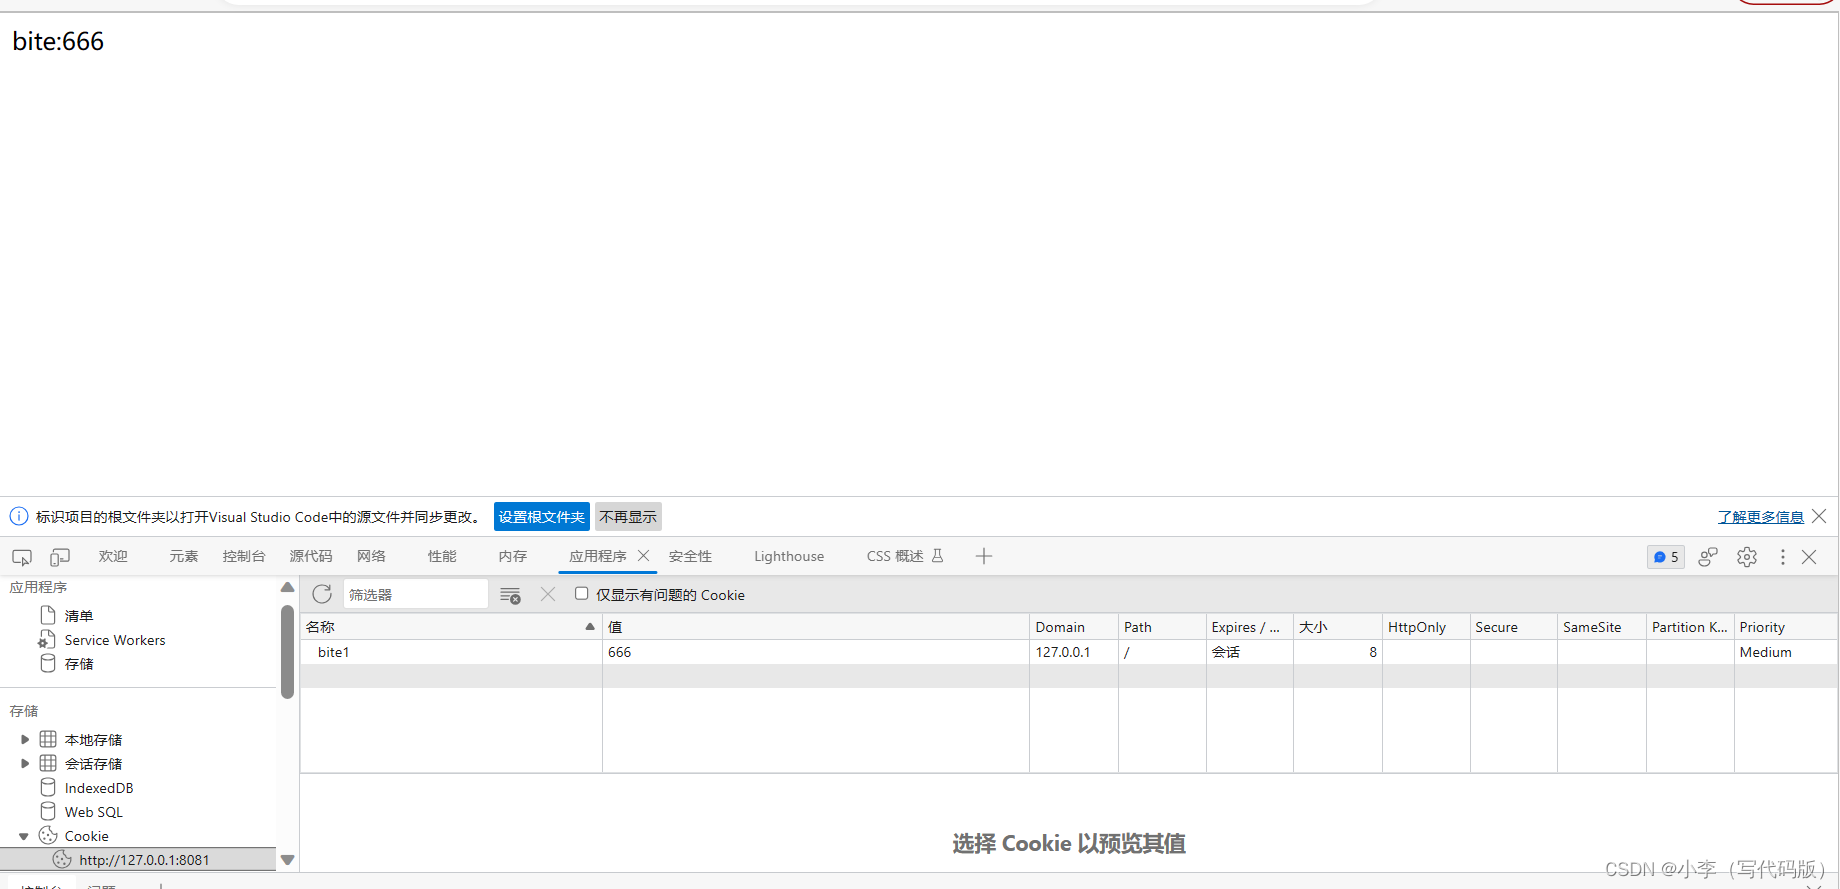
后端代码实现:
使用@CookieValue注解来实现
@RequestMapping("/get11")public String grt11(@CookieValue(name = "bite1",required = false) String bite){return "bite:"+bite;}如果cookie中不存在这个key,就会报错

我们手动设置cookie,页面就会访问成功,所以cookie是可以造假的。
获取session:
后端代码实现:
@RequestMapping("/get12")public String grt12(@SessionAttribute(required = false) String username){return "username:"+username;}直接执行是获取不到session的,我们需要在后端中设置session
设置session:
后端代码实现:
@RequestMapping("/set1")public String set1(HttpSession session){session.setAttribute("username","bite");return "success";}先执行这个方法,就会在前端获取到session:
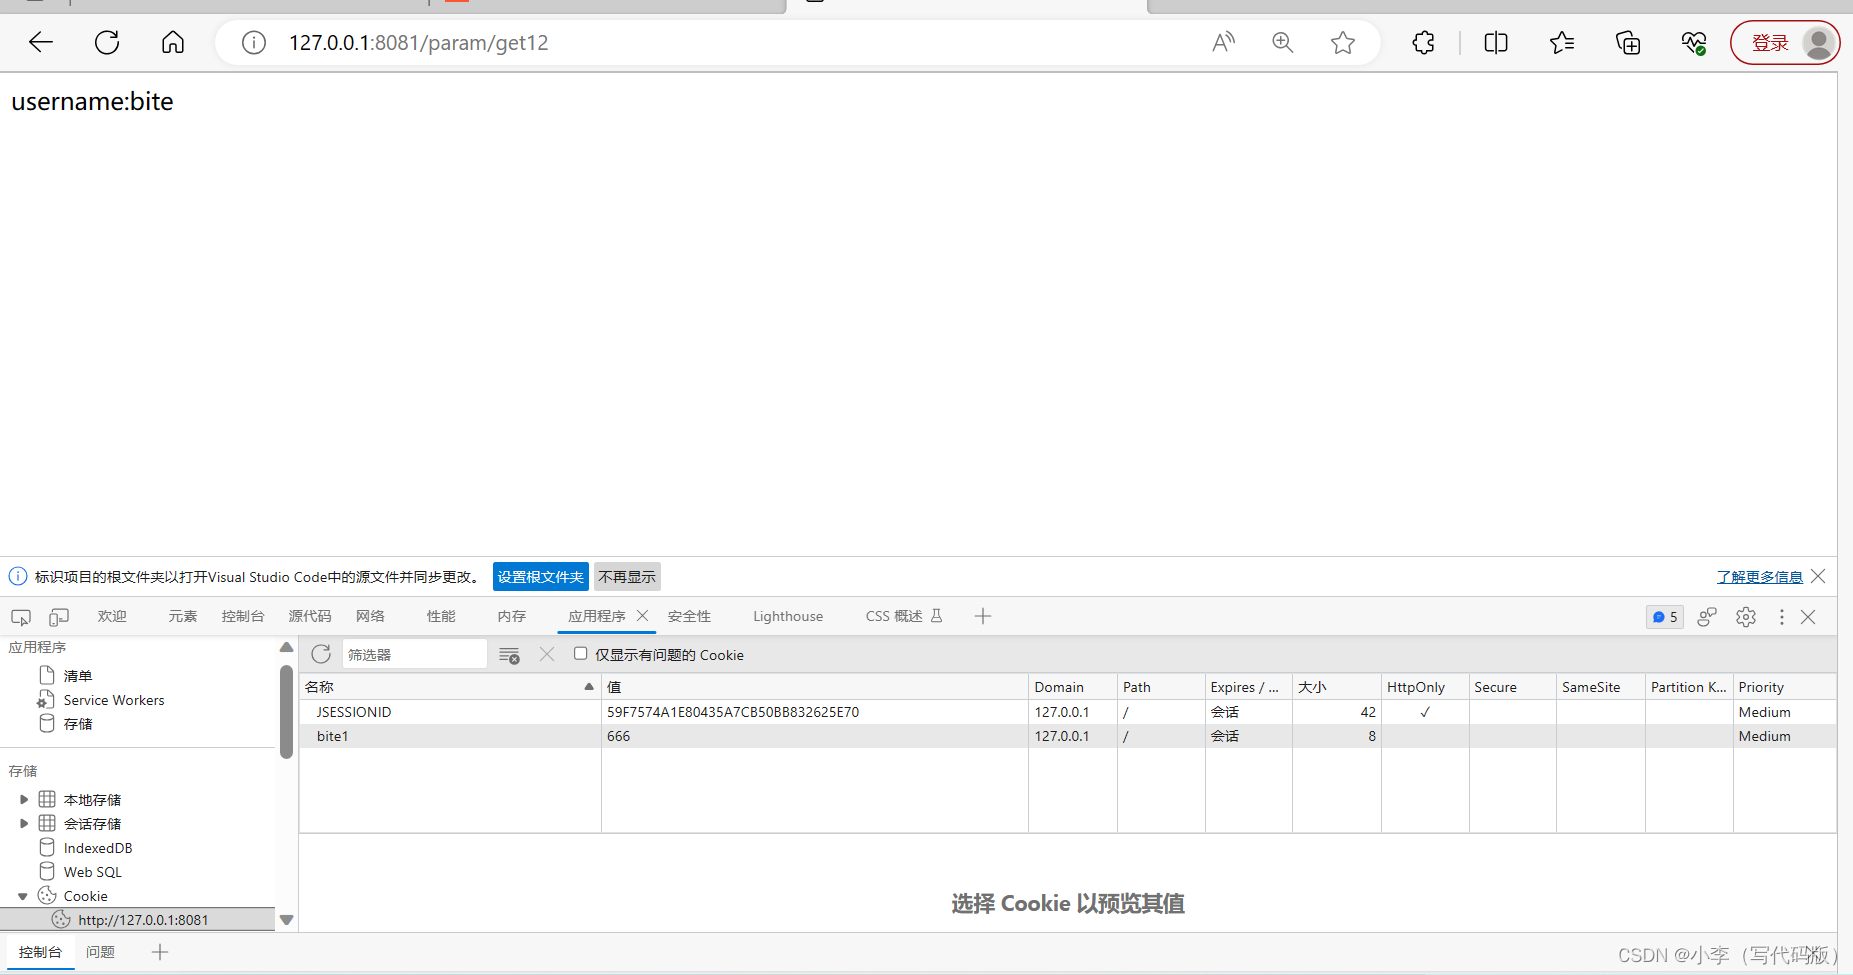 session在存储时就是以键值对的方式存储的
获取header:
后端代码实现:
@RequestMapping("/get13")public String get13(@RequestHeader("User-Agent") String userAgent){return "userAgent:"+userAgent;}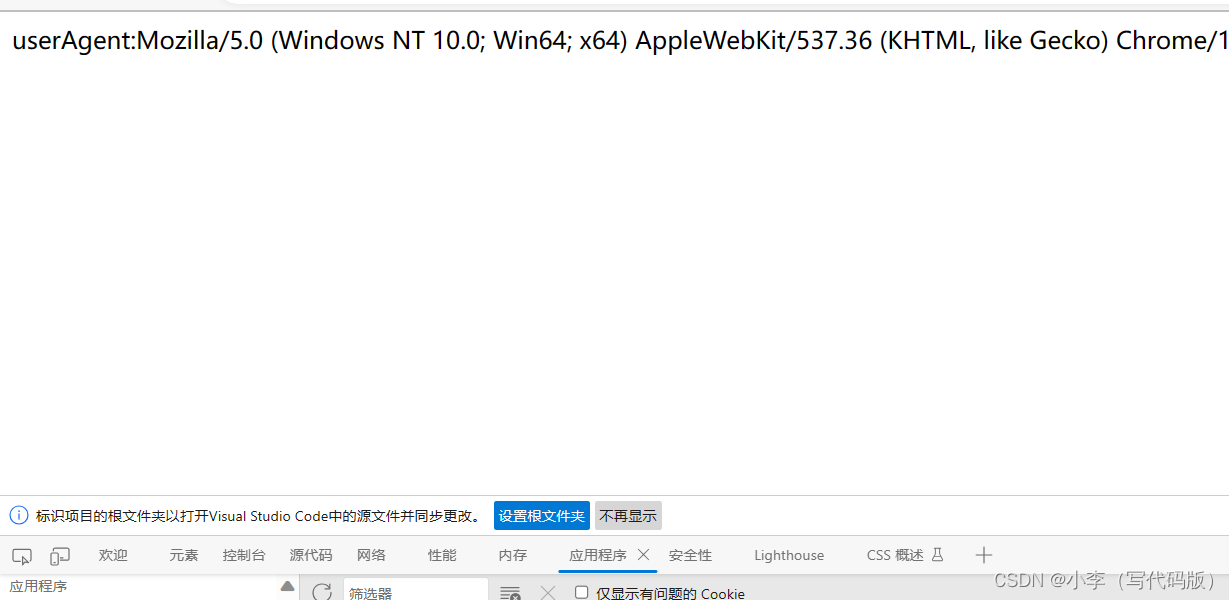 3.2.10返回Jason对象
@RequestMapping("/get14")public Map<String,String> get14(){Map<String,String>map=new HashMap<>();map.put("k1","v1");map.put("k2","v2");map.put("k3","v3");map.put("k4","v4");map.put("k5","v5");return map;} 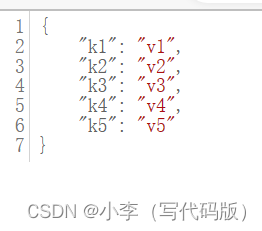
使用filder抓包: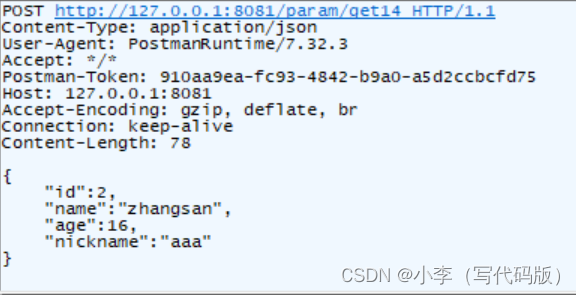
4.请求转发和请求重定向
@Controller
@RequestMapping("/index")
public class IndexController {/*** 请求转发* @return*/@RequestMapping("/forward")public String forward(){return "forward:/index.html";}@RequestMapping("/redirect")public String redirect(){return "redirect:/index.html";}
}
使用forward不会改变url

使用redirect会改变url。
