【Ansible 的脚本 --- playbook 剧本】
目录
- 一、playbook 剧本介绍
- 二、示例
- 1、运行playbook
- 2、定义、引用变量
- 三、使用playbook部署lnmp集群
一、playbook 剧本介绍
playbooks 本身由以下各部分组成
(1)Tasks:任务,即通过 task 调用 ansible 的模板将多个操作组织在一个 playbook 中运行
(2)Variables:变量
(3)Templates:模板
(4)Handlers:处理器,当changed状态条件满足时,(notify)触发执行的操作
(5)Roles:角色
二、示例
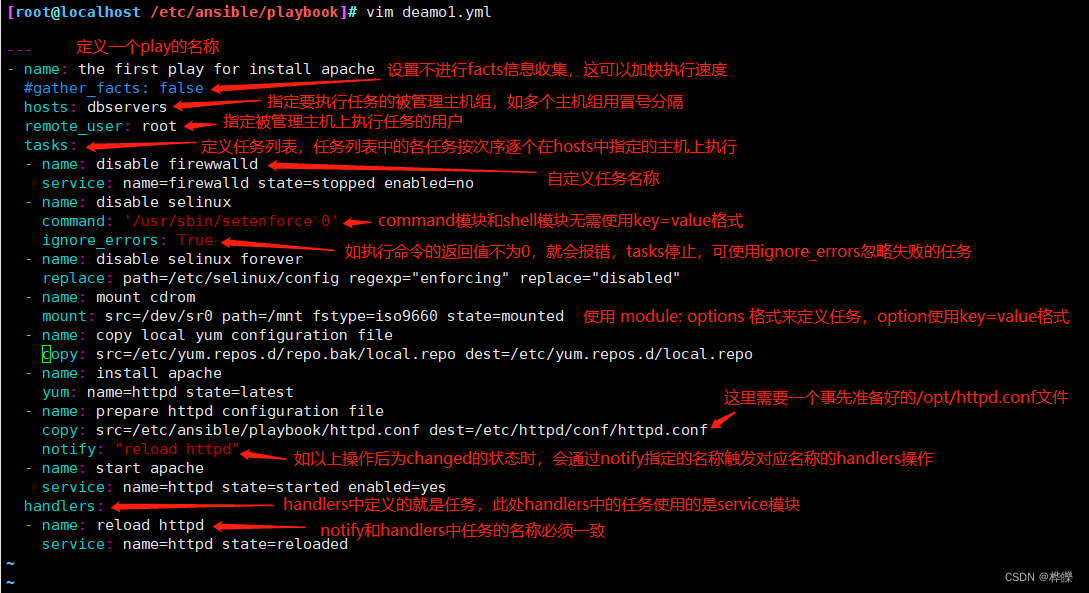
vim /etc/ansible/playbook/deamo1.yml
---
- name: the first play for install apache#gather_facts: falsehosts: dbserversremote_user: roottasks:- name: disable firewwalldservice: name=firewalld state=stopped enabled=no- name: disable selinuxcommand: '/usr/sbin/setenforce 0'ignore_errors: True- name: disable selinux foreverreplace: path=/etc/selinux/config regexp="enforcing" replace="disabled"- name: mount cdrommount: src=/dev/sr0 path=/mnt fstype=iso9660 state=mounted- name: copy local yum configuration filecopy: src=/etc/yum.repos.d/repo.bak/local.repo dest=/etc/yum.repos.d/local.repo- name: install apacheyum: name=httpd state=latest- name: prepare httpd configuration filecopy: src=/etc/ansible/playbook/httpd.conf dest=/etc/httpd/conf/httpd.confnotify: "reload httpd"- name: start apacheservice: name=httpd state=started enabled=yeshandlers:- name: reload httpdservice: name=httpd state=reloaded
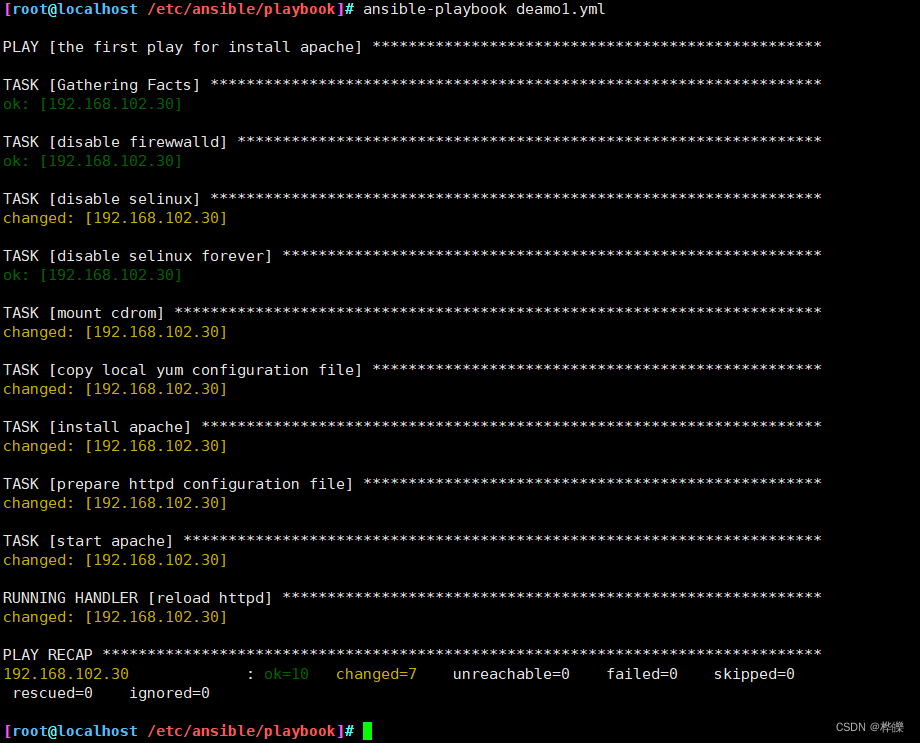
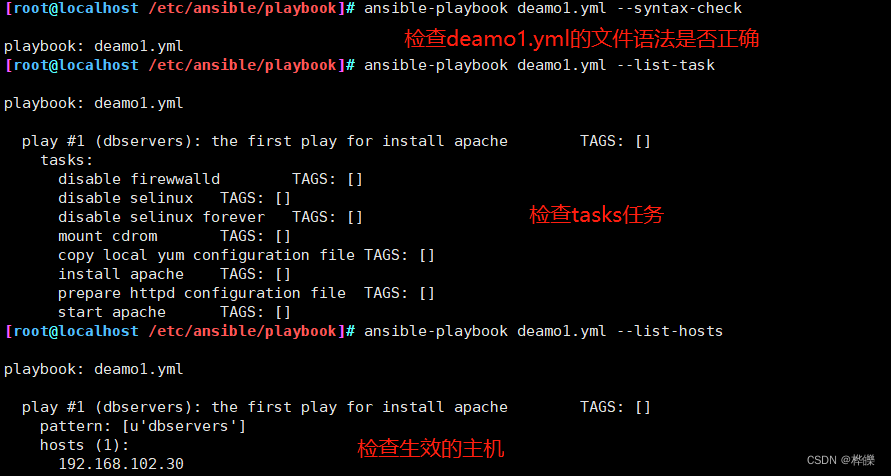
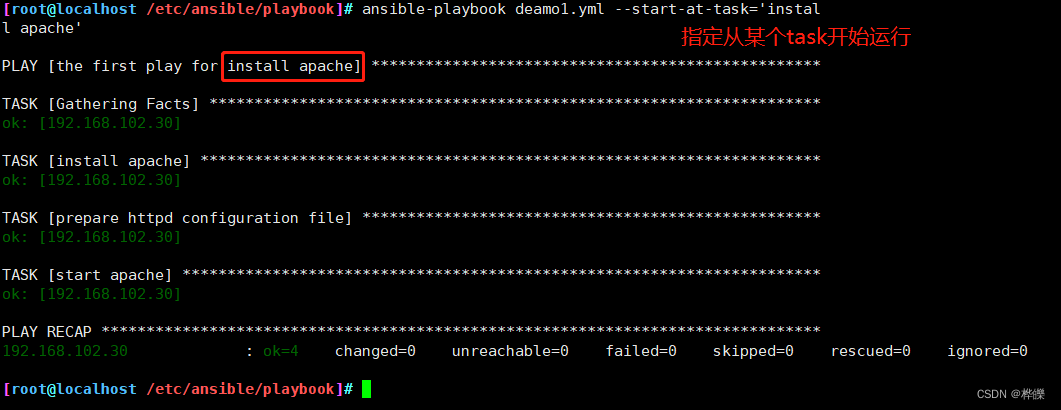
1、运行playbook
ansible-playbook deamo1.yml
//补充参数:
-k(–ask-pass):用来交互输入ssh密码
-K(-ask-become-pass):用来交互输入sudo密码
-u:指定用户
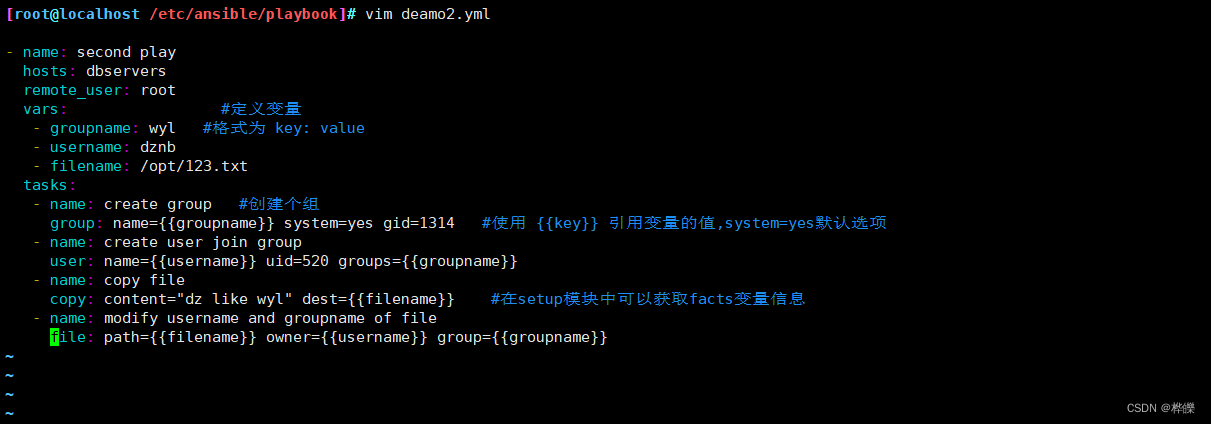
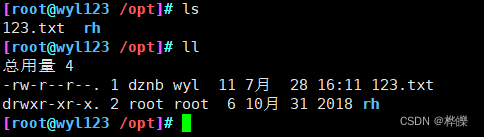
2、定义、引用变量
三、使用playbook部署lnmp集群
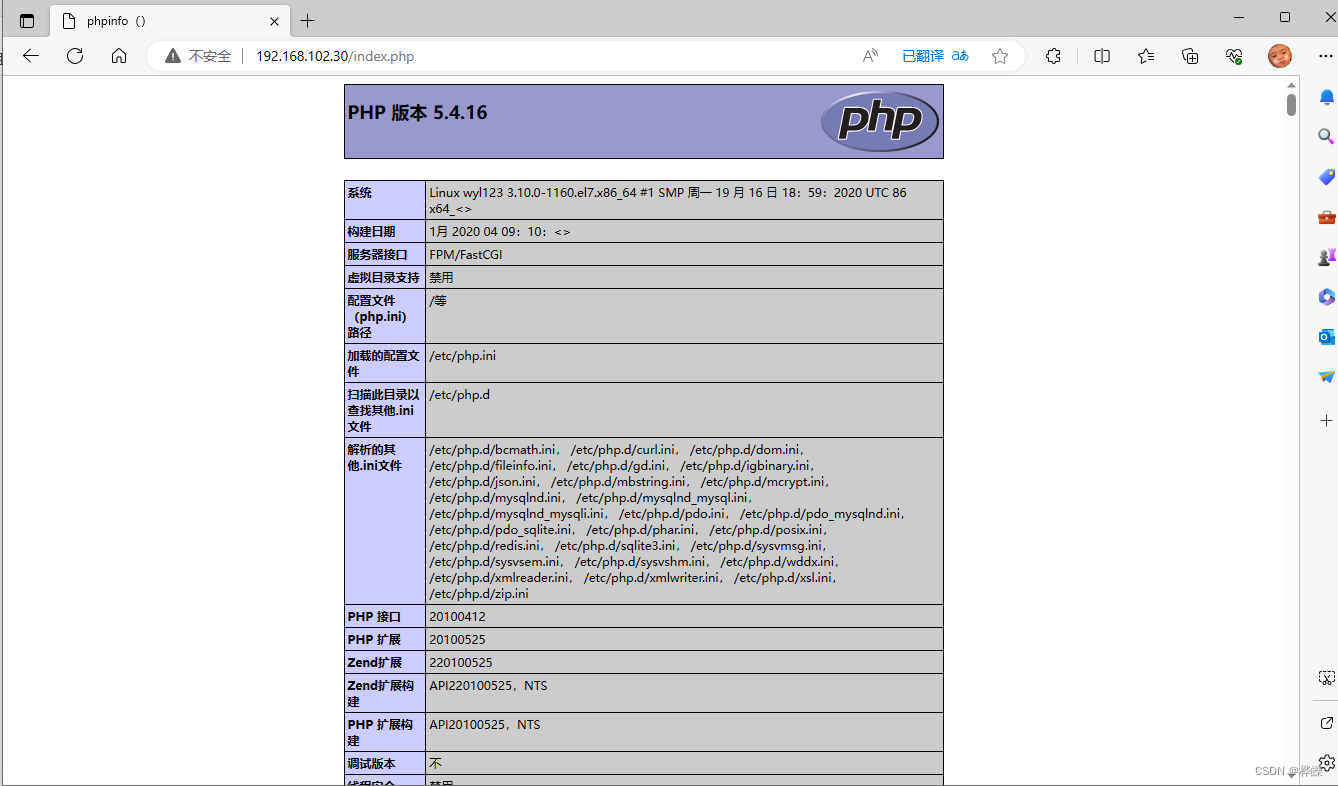
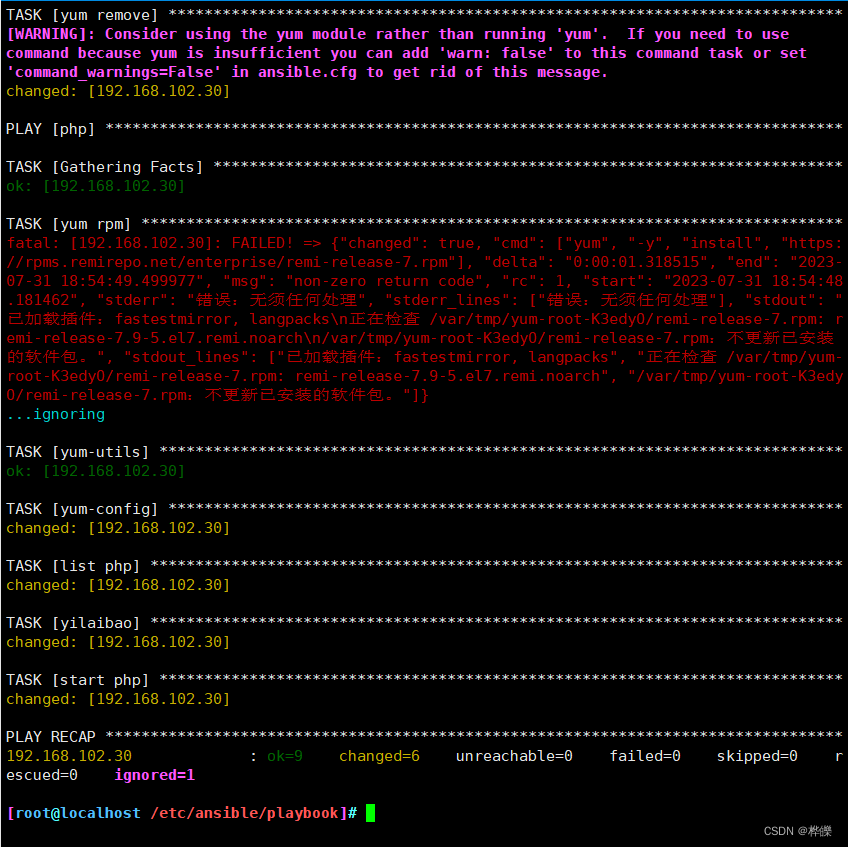
- name: the first play for install nginxhosts: dbserversremote_user: roottasks:- name: disable firewwalldservice: name=firewalld state=stopped enabled=no- name: disable selinuxcommand: '/usr/sbin/setenforce 0'ignore_errors: True- name: disable selinux foreverreplace: path=/etc/selinux/config regexp="enforcing" replace="disabled"- name: mount cdrommount: src=/dev/sr0 path=/mnt fstype=iso9660 state=mounted- name: copy local yum configuration filecopy: src=/etc/yum.repos.d/nginx.repo dest=/etc/yum.repos.d/nginx.repo- name: install nginxyum: name=nginx- name: prepare nginx configuration filecopy: src=/etc/ansible/playbook/default.conf dest=/etc/nginx/conf.d/default.conf- name: start nginxservice: name=nginx state=started enabled=yes- name: wordpresscopy: src=/usr/share/nginx/html/wordpress dest=/usr/share/nginx/html/- name: mysqlhosts: dbserversremote_user: roottasks:- name: remove mariadbshell: yum remove mariadb* -yignore_errors: True- name: yumcommand: wget https://repo.mysql.com/mysql57-community-release-el7-11.noarch.rpm- name: install mysql57command: rpm -ivh mysql57-community-release-el7-11.noarch.rpm- name: change mysql-community-servershell: sed -i 's/gpgcheck=1/gpgcheck=0/' /etc/yum.repos.d/mysql-community.repo- name: install mysql-serveryum: name=mysql-server- name: start mysqlservice: name=mysqld.service state=started enabled=yes- name: mysql congruation filecopy: src=/etc/ansible/playbook/mysql.sh dest=/var/lib/mysql- name: echo passwordshell: grep "password" /var/log/mysqld.log | awk 'NR==1{print $NF}' #在日志文件中找出root用户的初始密码register: mysql_password #将初始密码导入到mysql_password的变量中- name: echodebug:msg: "{{ mysql_password }}" #输出变量mysql_password的值- name: grant locationshell: mysql --connect-expired-password -uroot -p"{{ mysql_password['stdout'] }}" -e "ALTER USER 'root'@'localhost' IDENTIFIED BY 'Admin@123';"- name: grantshell: mysql --connect-expired-password -uroot -pAdmin@123 -e "grant all privileges on *.* to 'root'@'%' identified by 'Admin@123456' with grant option;"- name: create databaseshell: mysql --connect-expired-password -uroot -pAdmin@123 -e "create database wordpress;"- name: grantshell: mysql --connect-expired-password -uroot -pAdmin@123 -e "grant all on wordpress.* to 'admin'@'%' identified by 'Admin@123456';"- name: grantshell: mysql --connect-expired-password -uroot -pAdmin@123 -e "grant all on wordpress.* to 'admin'@'localhost' identified by 'Admin@123456';"- name: flushshell: mysql --connect-expired-password -uroot -pAdmin@123 -e 'flush privileges;'- name: yum removecommand: yum -y remove mysql57-community-release-el7-10.noarch- name: phphosts: dbserversremote_user: roottasks:- name: yum rpmcommand: yum -y install https://rpms.remirepo.net/enterprise/remi-release-7.rpmignore_errors: true- name: yum-utilsyum: name=yum-utils- name: yum-configcommand: yum-config-manager --enable remi-php74- name: list phpcommand: yum list php- name: yilaibaocommand: yum -y install php php-cli php-fpm php-mysqlnd php-zip php-devel php-gd php-mcrypt php-mbstring php-curl php-xml php-pear php-bcmath php-json php-redis- name: start phpservice: name=php-fpm state=started enabled=yes
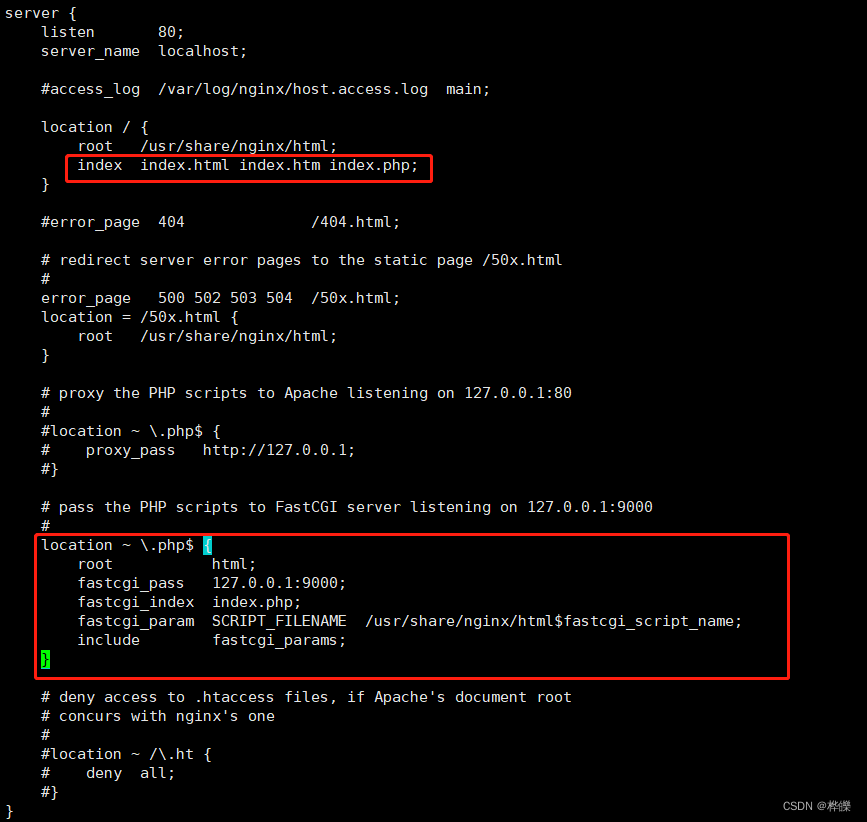
将yum安装的nginx里面的配置文件进行修改,后传输到对应的远程主机

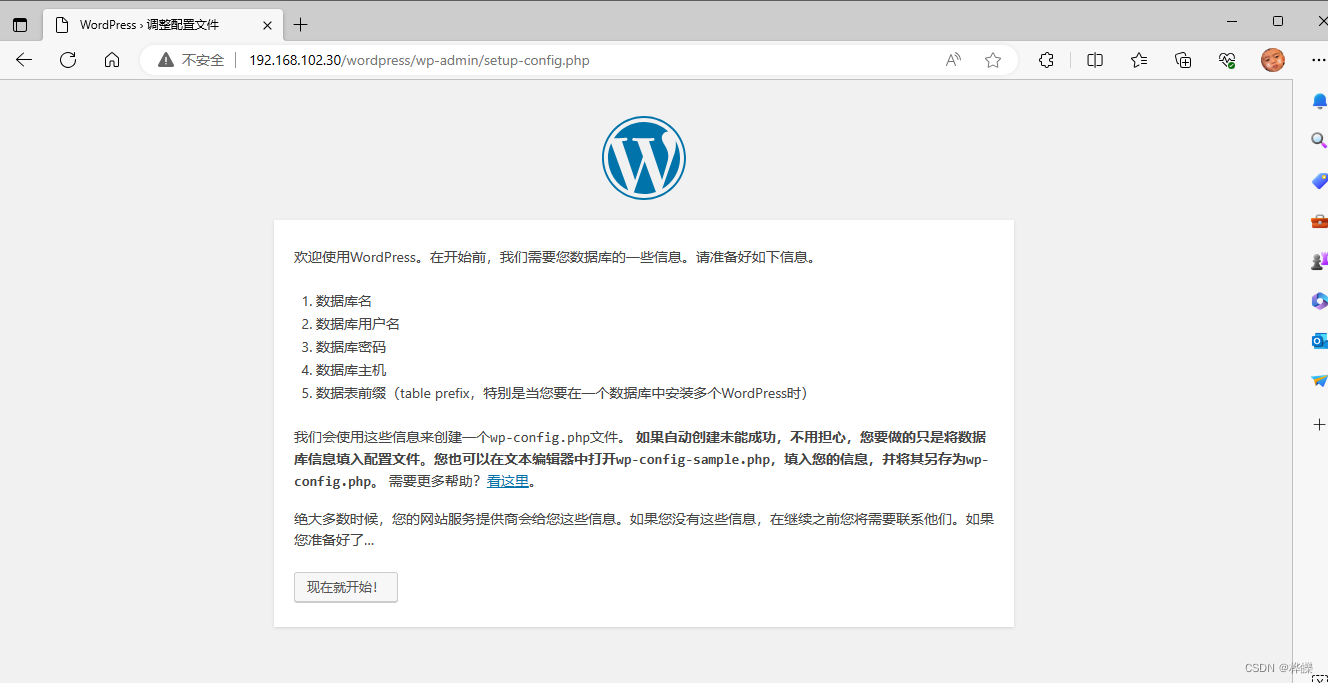
解压wordpress压缩文件,放入到对应的html网页目录底下
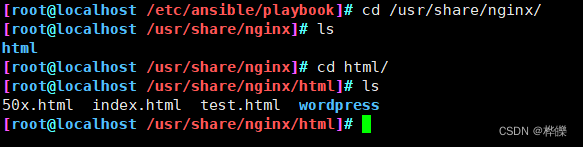
进行传输到远程主机里的网页页面目录上

使用浏览器进行访问测试