4. WebGPU 存储缓冲区 (WebGPU Storage Buffers)
这篇文章是关于存储缓冲区的,我们从上一篇文章暂停的地方继续。
存储缓冲区在许多方面类似于统一缓冲区。如果我们所做的只是将 JavaScript 中的 UNIFORM 更改为 STORAGE 并将 WGSL 中的 var 更改为 var<storage, read> ,那么上一页中的示例就可以正常工作。
其实区别就在这里,不用重命名变量就可以有更合适的名字。
const staticUniformBuffer = device.createBuffer({label: `static uniforms for obj: ${i}`,size: staticUniformBufferSize,// usage: GPUBufferUsage.UNIFORM | GPUBufferUsage.COPY_DST,usage: GPUBufferUsage.STORAGE | GPUBufferUsage.COPY_DST,});...const uniformBuffer = device.createBuffer({label: `changing uniforms for obj: ${i}`,size: uniformBufferSize,// usage: GPUBufferUsage.UNIFORM | GPUBufferUsage.COPY_DST,usage: GPUBufferUsage.STORAGE | GPUBufferUsage.COPY_DST,});
在我们的 WSGL 中
@group(0) @binding(0) var<storage, read> ourStruct: OurStruct;@group(0) @binding(1) var<storage, read> otherStruct: OtherStruct;
无需其他更改即可正常工作,就像以前一样
统一缓冲区和存储缓冲区之间的差异 Differences between uniform buffers and storage buffers
统一缓冲区和存储缓冲区之间的主要区别是:
-
对于特定的用例,统一缓冲区可以更快
这真的取决于用例。一个典型的应用程序需要绘制很多不同的东西。对于3D游戏,该应用程序可能会绘制汽车、建筑物、岩石、灌木丛、人等……每一个都需要传递与我们上面的示例类似的方向和材料属性。在这种情况下,使用统一缓冲区是推荐的解决方案。 -
存储缓冲区可以比统一缓冲区大得多。
The minimum maximum size of a uniform buffer is 64k
统一缓冲区的最小最大大小为64k
The minimum maximum size of a storage buffer is 128meg
存储缓冲区的最小最大大小为 128megBy minimum maximum, there is a maximum size a
buffer of certain type can be. For uniform buffers that maximum size
is at least 64k. For storage buffers it’s at least 128meg. We’ll
cover limits in another article.
通过最小最大值,某种类型的缓冲区可以达到最大大小。对于最大大小至少为
64k 的统一缓冲区。对于存储缓冲区,它至少为 128 兆。我们将在另一篇文章中介绍限制。
3.存储缓冲区可以读/写,统一缓冲区是只读的
我们在第一篇文章的计算着色器示例中看到了写入存储缓冲区的示例。
鉴于上面的前两点,让我们以最后一个示例为例,将其更改为在一次绘制调用中绘制所有 100 个三角形。这是一个可能适合存储缓冲区的用例。我说可能是因为,WebGPU 与其他编程语言相似。有很多方法可以实现同一件事,比如 array.forEach 对比 for (const elem of array) 对比 for (let i = 0; i < array.length; ++i) 。每个都有它的用途。 WebGPU 也是如此。我们尝试做的每一件事都有多种实现方式。当谈到绘制三角形时**,WebGPU 关心的只是我们从顶点着色器返回 builtin(position) 的值**,并从片段着色器返回 location(0) 的颜色/值。 见【注释1】
我们要做的第一件事是将存储声明更改为运行时大小的数组。
// @group(0) @binding(0) var<storage, read> ourStruct: OurStruct;
// @group(0) @binding(1) var<storage, read> otherStruct: OtherStruct;
@group(0) @binding(0) var<storage, read> ourStructs: array<OurStruct>;
@group(0) @binding(1) var<storage, read> otherStructs: array<OtherStruct>;
然后我们将更改着色器以使用这些值
@vertex fn vs(@builtin(vertex_index) vertexIndex : u32,@builtin(instance_index) instanceIndex: u32
) -> @builtin(position) {var pos = array<vec2f, 3>(vec2f( 0.0,  0.5),  // top centervec2f(-0.5, -0.5),  // bottom leftvec2f( 0.5, -0.5)   // bottom right);let otherStruct = otherStructs[instanceIndex];let ourStruct = ourStructs[instanceIndex];return vec4f(pos[vertexIndex] * otherStruct.scale + ourStruct.offset, 0.0, 1.0);
}
我们向顶点着色器添加了一个名为 instanceIndex 的新参数,并赋予它 @builtin(instance_index) 属性,这意味着它从 WebGPU 为绘制的每个“实例”获取其值。当我们调用 draw 时,我们可以传递实例数的第二个参数,对于绘制的每个实例,正在处理的实例数将传递给我们的函数。
使用 instanceIndex 可以从结构数组中获取指定的结构元素。
We also need to some get the color from the correct array element and use it in our fragment shader. The fragment shader doesn’t have access to @builtin(instance_index) because that would make no sense. We could pass it as an inter-stage variable but it would be more common to look up the color in the vertex shader and just pass the color.
我们还需要从正确的数组元素中获取颜色,并在我们的片段着色器中使用它。片段着色器无法访问 @builtin(instance_index) ,因为那没有任何意义。我们可以将它作为阶段间变量传递,但更常见的做法是在顶点着色器中查找颜色并传递颜色。
为此,我们将使用另一个结构,就像我们在关于阶段间变量的文章中所做的那样
struct VSOutput {@builtin(position) position: vec4f,@location(0) color: vec4f,
}@vertex fn vs(@builtin(vertex_index) vertexIndex : u32,@builtin(instance_index) instanceIndex: u32
// ) -> @builtin(position) vec4f {
) -> VSOutput {var pos = array<vec2f, 3>(vec2f( 0.0,  0.5),  // top centervec2f(-0.5, -0.5),  // bottom leftvec2f( 0.5, -0.5)   // bottom right);let otherStruct = otherStructs[instanceIndex];let ourStruct = ourStructs[instanceIndex];// return vec4f(//  pos[vertexIndex] * otherStruct.scale + ourStruct.offset, 0.0, 1.0);var vsOut: VSOutput;vsOut.position = vec4f(pos[vertexIndex] * otherStruct.scale + ourStruct.offset, 0.0, 1.0);vsOut.color = ourStruct.color;return vsOut;
}// @fragment fn fs() -> @location(0) vec4f {
//   return ourStruct.color;
@fragment fn fs(vsOut: VSOutput) -> @location(0) vec4f {return vsOut.color;
}
现在我们已经修改了 WGSL 着色器,让我们更新 JavaScript。
代码如下:
const kNumObjects = 100;const objectInfos = [];// create 2 storage buffersconst staticUnitSize =4 * 4 + // color is 4 32bit floats (4bytes each)2 * 4 + // offset is 2 32bit floats (4bytes each)2 * 4; // paddingconst changingUnitSize =2 * 4; // scale is 2 32bit floats (4bytes each)const staticStorageBufferSize = staticUnitSize * kNumObjects;const changingStorageBufferSize = changingUnitSize * kNumObjects;const staticStorageBuffer = device.createBuffer({label: 'static storage for objects',size: staticStorageBufferSize,usage: GPUBufferUsage.STORAGE | GPUBufferUsage.COPY_DST,});const changingStorageBuffer = device.createBuffer({label: 'changing storage for objects',size: changingStorageBufferSize,usage: GPUBufferUsage.STORAGE | GPUBufferUsage.COPY_DST,});// offsets to the various uniform values in float32 indicesconst kColorOffset = 0;const kOffsetOffset = 4;const kScaleOffset = 0;{const staticStorageValues = new Float32Array(staticStorageBufferSize / 4);for (let i = 0; i < kNumObjects; ++i) {const staticOffset = i * (staticUnitSize / 4);// These are only set once so set them nowstaticStorageValues.set([rand(), rand(), rand(), 1], staticOffset + kColorOffset); // set the colorstaticStorageValues.set([rand(-0.9, 0.9), rand(-0.9, 0.9)], staticOffset + kOffsetOffset); // set the offsetobjectInfos.push({scale: rand(0.2, 0.5),});}device.queue.writeBuffer(staticStorageBuffer, 0, staticStorageValues);}// a typed array we can use to update the changingStorageBufferconst storageValues = new Float32Array(changingStorageBufferSize / 4);const bindGroup = device.createBindGroup({label: 'bind group for objects',layout: pipeline.getBindGroupLayout(0),entries: [{ binding: 0, resource: { buffer: staticStorageBuffer }},{ binding: 1, resource: { buffer: changingStorageBuffer }},],});
上面我们创建了 2 个存储缓冲区。一个用于 OurStruct 数组,另一个用于 OtherStruct 数组。
然后我们用偏移量和颜色填充 OurStruct 数组的值,然后将该数据上传到 staticStorageBuffer 。
我们只创建一个引用两个缓冲区的绑定组。
新的渲染代码是
function render() {// Get the current texture from the canvas context and// set it as the texture to render to.renderPassDescriptor.colorAttachments[0].view =context.getCurrentTexture().createView();const encoder = device.createCommandEncoder();const pass = encoder.beginRenderPass(renderPassDescriptor);pass.setPipeline(pipeline);// Set the uniform values in our JavaScript side Float32Arrayconst aspect = canvas.width / canvas.height;//for (const {scale, bindGroup, uniformBuffer, uniformValues} of objectInfos) {// uniformValues.set([scale / aspect, scale], kScaleOffset); // set the scale// device.queue.writeBuffer(uniformBuffer, 0, uniformValues);// pass.setBindGroup(0, bindGroup);// pass.draw(3); // call our vertex shader 3 times// }// set the scales for each objectobjectInfos.forEach(({scale}, ndx) => {const offset = ndx * (changingUnitSize / 4);storageValues.set([scale / aspect, scale], offset + kScaleOffset); // set the scale});// upload all scales at oncedevice.queue.writeBuffer(changingStorageBuffer, 0, storageValues);pass.setBindGroup(0, bindGroup);pass.draw(3, kNumObjects); // call our vertex shader 3 times for each instancepass.end();const commandBuffer = encoder.finish();device.queue.submit([commandBuffer]);}
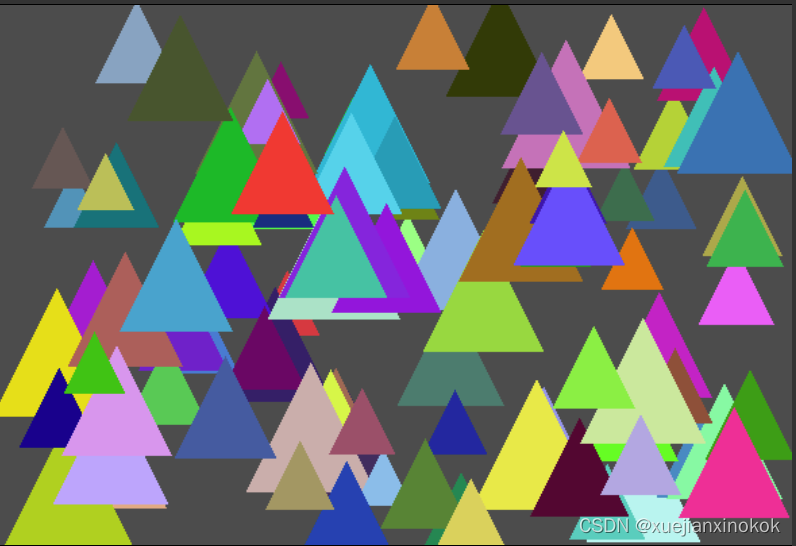
上面的代码将绘制 kNumObjects 实例。对于每个实例,WebGPU 将调用顶点着色器 3 次, vertex_index 设置为 0、1、2, instance_index 设置为 0 到 kNumObjects - 1
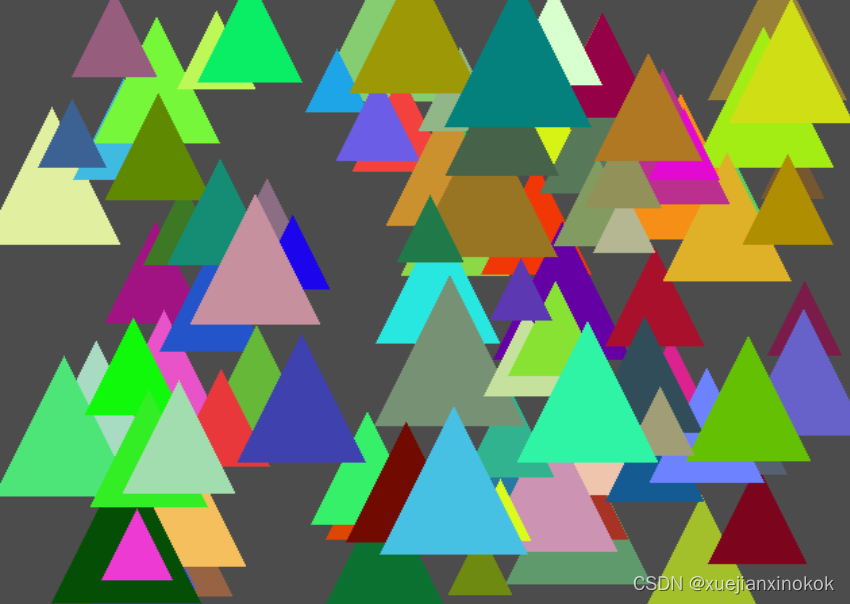
我们绘制了 100 个三角形,每个三角形具有不同的比例、颜色和偏移量。对于您想要绘制同一对象的大量实例的情况,这是一种实现方法。
顶点数据使用存储缓冲区
到目前为止,我们一直在着色器中直接硬编码三角形。存储缓冲区的一个用例是存储顶点数据。就像我们在上面的示例中通过 instance_index 索引当前存储缓冲区一样,我们可以使用 vertex_index 索引另一个存储缓冲区来获取顶点数据。
我们开始吧!
struct OurStruct {color: vec4f,offset: vec2f,
};struct OtherStruct {scale: vec2f,
};struct Vertex {position: vec2f,
};struct VSOutput {@builtin(position) position: vec4f,@location(0) color: vec4f,
};@group(0) @binding(0) var<storage, read> ourStructs: array<OurStruct>;
@group(0) @binding(1) var<storage, read> otherStructs: array<OtherStruct>;
@group(0) @binding(2) var<storage, read> pos: array<Vertex>;@vertex fn vs(@builtin(vertex_index) vertexIndex : u32,@builtin(instance_index) instanceIndex: u32
) -> VSOutput {//var pos = array<vec2f, 3>(//  vec2f( 0.0,  0.5),  // top center//  vec2f(-0.5, -0.5),  // bottom left//  vec2f( 0.5, -0.5)   // bottom right//);let otherStruct = otherStructs[instanceIndex];let ourStruct = ourStructs[instanceIndex];var vsOut: VSOutput;vsOut.position = vec4f(pos[vertexIndex].position * otherStruct.scale + ourStruct.offset, 0.0, 1.0);vsOut.color = ourStruct.color;return vsOut;
}@fragment fn fs(vsOut: VSOutput) -> @location(0) vec4f {return vsOut.color;
}
现在我们需要为一些顶点数据再设置一个存储缓冲区。首先让我们创建一个函数来生成一些顶点数据。大概是一个圆。
function createCircleVertices({radius = 1,numSubdivisions = 24,innerRadius = 0,startAngle = 0,endAngle = Math.PI * 2,
} = {}) {// 2 triangles per subdivision, 3 verts per tri, 2 values (xy) each.const numVertices = numSubdivisions * 3 * 2;const vertexData = new Float32Array(numSubdivisions * 2 * 3 * 2);let offset = 0;const addVertex = (x, y) => {vertexData[offset++] = x;vertexData[offset++] = y;};// 2 vertices per subdivision//// 0--1 4// | / /|// |/ / |// 2 3--5for (let i = 0; i < numSubdivisions; ++i) {const angle1 = startAngle + (i + 0) * (endAngle - startAngle) / numSubdivisions;const angle2 = startAngle + (i + 1) * (endAngle - startAngle) / numSubdivisions;const c1 = Math.cos(angle1);const s1 = Math.sin(angle1);const c2 = Math.cos(angle2);const s2 = Math.sin(angle2);// first triangleaddVertex(c1 * radius, s1 * radius);addVertex(c2 * radius, s2 * radius);addVertex(c1 * innerRadius, s1 * innerRadius);// second triangleaddVertex(c1 * innerRadius, s1 * innerRadius);addVertex(c2 * radius, s2 * radius);addVertex(c2 * innerRadius, s2 * innerRadius);}return {vertexData,numVertices,};
}
上面的代码用这样的三角形制作了一个圆
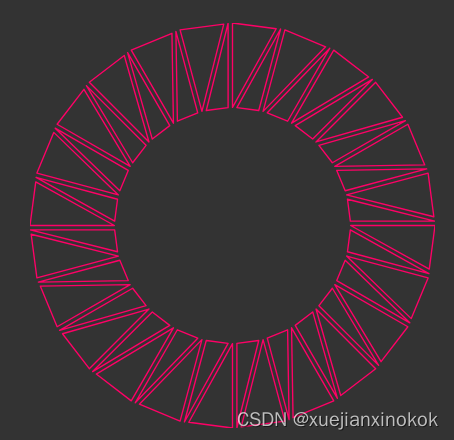
所以我们可以用它来用圆的顶点填充存储缓冲区
  // setup a storage buffer with vertex dataconst { vertexData, numVertices } = createCircleVertices({radius: 0.5,innerRadius: 0.25,});const vertexStorageBuffer = device.createBuffer({label: 'storage buffer vertices',size: vertexData.byteLength,usage: GPUBufferUsage.STORAGE | GPUBufferUsage.COPY_DST,});device.queue.writeBuffer(vertexStorageBuffer, 0, vertexData);
And then we need to add it to our bind group.
然后我们需要将它添加到我们的绑定组中。const bindGroup = device.createBindGroup({label: 'bind group for objects',layout: pipeline.getBindGroupLayout(0),entries: [{ binding: 0, resource: { buffer: staticStorageBuffer }},{ binding: 1, resource: { buffer: changingStorageBuffer }},{ binding: 2, resource: { buffer: vertexStorageBuffer }},],});
最后在渲染时,我们需要要求渲染圆圈中的所有顶点。
pass.draw(3, kNumObjects); // call our vertex shader 3 times for several instancespass.draw(numVertices, kNumObjects);

上面我们用了
struct Vertex {pos: vec2f;
};@group(0) @binding(2) var<storage, read> pos: array<Vertex>;
我们可以不使用 struct 而直接使用 vec2f 。
@group(0) @binding(2) var<storage, read> pos: vec2f;
但是,通过使它成为一个结构,以后添加顶点数据不是更容易吗?
通过存储缓冲区传递顶点越来越受欢迎。有人告诉我,尽管一些较旧的设备比我们将在接下来的一篇关于顶点缓冲区中介绍的经典方法慢。
【注释1】We can have multiple color attachments and then we’ll need to return more colors/value for location(1), location(2), etc… ↩︎
我们可以有多个颜色附件,然后我们需要为 location(1) 、 location(2) 等返回更多颜色/值……↩︎