Springboot +spring security,自定义认证和授权异常处理器
一.简介
在Spring Security中异常分为两种:
- AuthenticationException 认证异常
- AccessDeniedException 权限异常 我们先给大家演示下如何自定义异常处理器,然后再结合源码帮助大家进行分析
二.创建项目
如何创建一个SpringSecurity项目,前面文章已经有说明了,这里就不重复写了。
三.自定义异常处理器
3.1配置SecurityConfig
这里主要是authenticationEntryPoint和accessDeniedHandler配置,代码如下:
@Beanpublic SecurityFilterChain config(HttpSecurity http) throws Exception {http.authorizeHttpRequests().anyRequest().authenticated().and().formLogin().loginPage("/login.html").loginProcessingUrl("/login").permitAll().and().cors().configurationSource(corsConfigurationSource()).and().exceptionHandling().authenticationEntryPoint(new AuthenticationEntryPoint() {@Overridepublic void commence(HttpServletRequest request, HttpServletResponse response, AuthenticationException authException) throws IOException, ServletException {Map<String, Object> result = new HashMap<>();result.put("code", -1);result.put("msg", "authenticationEntryPoint");result.put("data", authException.getMessage());System.out.println("调用次数");writeResp(result, response);}}).accessDeniedHandler(new AccessDeniedHandler() {@Overridepublic void handle(HttpServletRequest request, HttpServletResponse response, AccessDeniedException accessDeniedException) throws IOException, ServletException {Map<String, Object> result = new HashMap<>();result.put("code", -1);result.put("msg", "accessDeniedHandler");result.put("data", accessDeniedException.getMessage());writeResp(result, response);}}).and().csrf().disable();http.headers().cacheControl();return http.build();}
3.2自定义登录页面
为什么要自定义登录页面呢,因为如果我们实现了异常处理端点,security 就不会将生成登录页面的过滤器加入,我们看下源码:“authenticationEntryPoint == null)”才会添加自定义生成登录页面的过滤器。
代码如下:
public void configure(H http) {AuthenticationEntryPoint authenticationEntryPoint = null;ExceptionHandlingConfigurer<?> exceptionConf = http.getConfigurer(ExceptionHandlingConfigurer.class);if (exceptionConf != null) {authenticationEntryPoint = exceptionConf.getAuthenticationEntryPoint();}if (this.loginPageGeneratingFilter.isEnabled() && authenticationEntryPoint == null) {this.loginPageGeneratingFilter = postProcess(this.loginPageGeneratingFilter);http.addFilter(this.loginPageGeneratingFilter);LogoutConfigurer<H> logoutConfigurer = http.getConfigurer(LogoutConfigurer.class);if (logoutConfigurer != null) {http.addFilter(this.logoutPageGeneratingFilter);}}}
登陆页面代码:
<!DOCTYPE html>
<html lang="en" xmlns:th="http://www.thymeleaf.org">
<head><meta charset="UTF-8"><title>Title</title>
</head>
<body>
<div th:text="SPRING_SECURITY_LAST_EXCEPTION"></div>
<form action="/login" method="post">用户名:<input name="username" type="text"><br>密码:<input name="password" type="password"><br><button type="submit">登陆</button>
</form>
</body>
</html>
3.3配置用户信息
代码如下:
spring.security.user.password=123456
spring.security.user.roles=admin
spring.security.user.name=lglbc
3.4添加controller
代码如下:
@RequestMapping("/user")@PreAuthorize("hasRole('user')")public String user() {return "hello";}@RequestMapping("/admin")@PreAuthorize("hasRole('admin')")public String admin() {return "admin";}
3.4验证
验证匿名访问user接口
http://localhost:8080/user,截图如下:

返回的是自定义异常,被Authentication进行处理,稍后从源码角度分析。
验证登录后访问admin接口
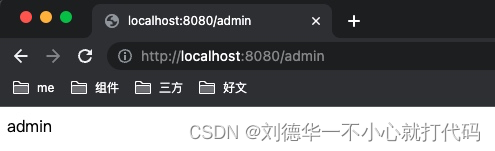
请求成功,返回接口数据 需要注意的是,如果实现了异常端点,想之前自动跳转到登录页面将不再生效,因为这些逻辑都是在默认的异常端点里面处理
3.5异常过滤器实现原理分析
上面讲到自定义异常端点的回调都是通过异常处理过滤器实现,我们现在就从这块开始看, 首先,我们还是从入口开始找:.exceptionHandling() 点击.exceptionHandling()进入到代码中,我们发现我们熟悉的ExceptionHandlingConfigurer,代码如下:
public ExceptionHandlingConfigurer<HttpSecurity> exceptionHandling() throws Exception {return getOrApply(new ExceptionHandlingConfigurer<>());}
3.5.1init
ExceptionHandlingConfigurer没有重写,所以我们就直接看configure方法
3.5.2configure
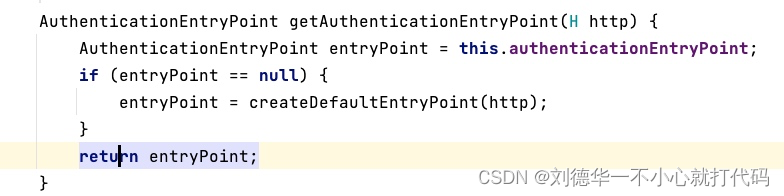
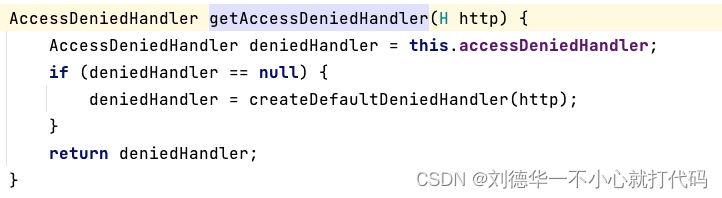
public void configure(H http) {AuthenticationEntryPoint entryPoint = getAuthenticationEntryPoint(http);ExceptionTranslationFilter exceptionTranslationFilter = new ExceptionTranslationFilter(entryPoint,getRequestCache(http));AccessDeniedHandler deniedHandler = getAccessDeniedHandler(http);exceptionTranslationFilter.setAccessDeniedHandler(deniedHandler);exceptionTranslationFilter = postProcess(exceptionTranslationFilter);http.addFilter(exceptionTranslationFilter);}
- 创建过滤 ExceptionTranslationFilter
- 获取两种异常的处理端点,如果我们配置了就会使用我们自己的,否则使用默认的 *
- 将端点配置到ExceptionTranslationFilter中
- 将ExceptionTranslationFilter 放到IOC容器中,并且放到过滤器链中 *
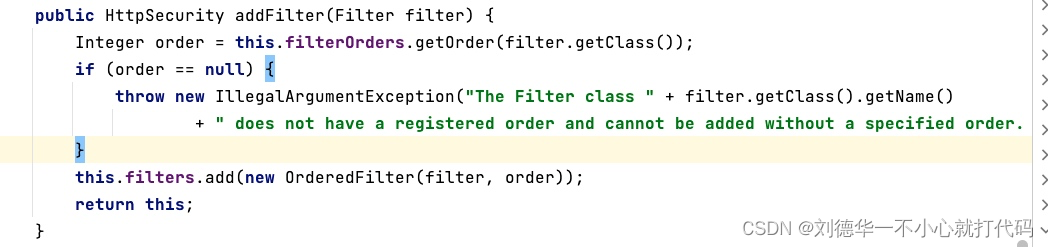
加入的时候,会获取过滤器的优先级,ExceptionTranslationFilter放在了AuthorizationFilter之前,这个后面讲到为什么这么做

看configure方法就是为了看它到底使用什么过滤器,现在我们直接看ExceptionTranslationFilter。
3.5.3ExceptionTranslationFilter
private void doFilter(HttpServletRequest request, HttpServletResponse response, FilterChain chain)throws IOException, ServletException {try {chain.doFilter(request, response);}catch (IOException ex) {throw ex;}catch (Exception ex) {// Try to extract a SpringSecurityException from the stacktraceThrowable[] causeChain = this.throwableAnalyzer.determineCauseChain(ex);RuntimeException securityException = (AuthenticationException) this.throwableAnalyzer.getFirstThrowableOfType(AuthenticationException.class, causeChain);if (securityException == null) {securityException = (AccessDeniedException) this.throwableAnalyzer.getFirstThrowableOfType(AccessDeniedException.class, causeChain);}if (securityException == null) {rethrow(ex);}if (response.isCommitted()) {throw new ServletException("Unable to handle the Spring Security Exception "+ "because the response is already committed.", ex);}handleSpringSecurityException(request, response, chain, securityException);}}
在doFilter方法中,异常过滤器直接调用了下个过滤器,并没有做什么
- 捕获执行下个过滤器的异常
- 将异常丢给handleSpringSecurityException()方法进行处理
handleSpringSecurityException类的代码如下:
private void handleSpringSecurityException(HttpServletRequest request, HttpServletResponse response,FilterChain chain, RuntimeException exception) throws IOException, ServletException {if (exception instanceof AuthenticationException) {handleAuthenticationException(request, response, chain, (AuthenticationException) exception);}else if (exception instanceof AccessDeniedException) {handleAccessDeniedException(request, response, chain, (AccessDeniedException) exception);}}
根据异常类型不同,分别调用不同的处理方法
handleAuthenticationException类代码如下:
private void handleAuthenticationException(HttpServletRequest request, HttpServletResponse response,FilterChain chain, AuthenticationException exception) throws ServletException, IOException {this.logger.trace("Sending to authentication entry point since authentication failed", exception);sendStartAuthentication(request, response, chain, exception);}protected void sendStartAuthentication(HttpServletRequest request, HttpServletResponse response, FilterChain chain,AuthenticationException reason) throws ServletException, IOException {// SEC-112: Clear the SecurityContextHolder's Authentication, as the// existing Authentication is no longer considered validSecurityContext context = SecurityContextHolder.createEmptyContext();SecurityContextHolder.setContext(context);this.requestCache.saveRequest(request, response);this.authenticationEntryPoint.commence(request, response, reason);}
这个是直接调用了this.authenticationEntryPoint.commence方法,authenticationEntryPoint讲过,如果我们配置了就使用配置的,否则使用默认的端点处理
handleAccessDeniedException类代码如下:
private void handleAccessDeniedException(HttpServletRequest request, HttpServletResponse response,FilterChain chain, AccessDeniedException exception) throws ServletException, IOException {Authentication authentication = SecurityContextHolder.getContext().getAuthentication();boolean isAnonymous = this.authenticationTrustResolver.isAnonymous(authentication);if (isAnonymous || this.authenticationTrustResolver.isRememberMe(authentication)) {sendStartAuthentication(request, response, chain,new InsufficientAuthenticationException(this.messages.getMessage("ExceptionTranslationFilter.insufficientAuthentication","Full authentication is required to access this resource")));}else {this.accessDeniedHandler.handle(request, response, exception);}}
这个处理逻辑和前面有点不同
- 如果未登录或者是rememberMe,则还是调用sendStartAuthentication
- 否则调用this.accessDeniedHandler.handle(),这个和前面的逻辑一致
四.最后用一张图总结
