Android中AIDL的简单使用(Hello world)
AIDL:Android Interface Definition Language(Android接口定义语言)
作用:跨进程通讯。如A应用调用B应用提供的接口
代码实现过程简述:
A应用创建aidl接口,并且创建一个Service来实现这个接口(在onBind方法里面return我们这个接口的实例)。
把A应用创建的aidl文件原封不动的搬至B应用中(注意包名类名都要一样),B应用bindService的方式来绑定A应用创建的这个Service,从而调用A应用提供的接口。
实现:
一、A应用(服务端)(提供接口被调用者):
1、创建AIDL文件:
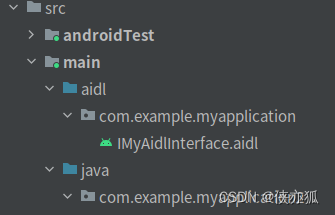
Android Studio在项目main目录右键新建,找到AIDL,它会帮我们创建文件夹和文件,默认名字IMyAidlInterface,开发者根据需求修改名字
里面有:
interface IMyAidlInterface {/*** Demonstrates some basic types that you can use as parameters* and return values in AIDL.*/void basicTypes(int anInt, long aLong, boolean aBoolean, float aFloat,double aDouble, String aString);//上面这个是新建的时候自己生成的,可以去掉,我们自己新建以下方法,一个get(从服务端取值),一个set(传值给服务端)String getHelloString();void setHelloString(String string);
}
写了之后make project一下,会自动生成IMyAidlInterface类。
2、创建service:(不需要A应用手动startService,B应用bindService的时候这个服务就会自动起来)
public class AidlTestService extends Service {private String hello;@Overridepublic void onCreate() {super.onCreate();hello = "hello";}@Nullable@Overridepublic IBinder onBind(Intent intent) {return new MyBinder();}public class MyBinder extends IMyAidlInterface.Stub{@Overridepublic void basicTypes(int anInt, long aLong, boolean aBoolean, float aFloat, double aDouble, String aString) throws RemoteException {Log.i("xaeHu", "basicTypes: \nanInt = "+anInt+"\naLong = "+aLong+"\naBoolean = "+aBoolean+"\naFloat = "+aFloat+"\naDouble = "+aDouble+"\naString = "+aString);}@Overridepublic String getHelloString() throws RemoteException {return hello;}@Overridepublic void setHelloString(String string) throws RemoteException {hello = string;}}
}
3、清单文件声明这个service:(网上有说这个name需要全称,我这里实际没有用全称也能绑定成功)
<service android:name=".AidlTestService"android:enabled="true"android:exported="true" />A应用的工作完成,接下来是B应用如何使用这个接口:
二、B应用(客户端)(接口调用者):
1、清单文件声明A应用的包名:(Android11新增,如果项目targetSdk>=30的话需要这一步,否则bindService是调不起来A应用的服务的)(这个坑网上很多AIDL的教程博客都没有说)
<!-- 配置服务端的包名--><queries><package android:name="com.example.myapplication" /></queries>2、把A应用创建的AIDL文件包括A应用包名一起复制到B应用main目录下:
我这边A应用包名是“com.example.myapplication”,B应用包名是“com.example.myapplication2”
注意aidl的包名要与A应用一致,否者调用方法的时候会报异常:java.lang.SecurityException: Binder invocation to an incorrect interface
放进来之后make project一下,会自动生成IMyAidlInterface类。
3、绑定服务,调用aidl接口提供的方法:
比如直接在MainActivity的onCreate里面去绑定服务:
public class MainActivity extends AppCompatActivity{private IMyAidlInterface myAidlInterface;private final ServiceConnection connection = new ServiceConnection() {@Overridepublic void onServiceConnected(ComponentName name, IBinder service) {myAidlInterface = IMyAidlInterface.Stub.asInterface(service);}@Overridepublic void onServiceDisconnected(ComponentName name) {myAidlInterface = null;}};@Overrideprotected void onCreate(Bundle savedInstanceState) {super.onCreate(savedInstanceState);setContentView(R.layout.activity_main);//点击按钮一去绑定服务findViewById(R.id.btn1).setOnClickListener(v -> {Intent intent = new Intent();intent.setComponent(new ComponentName("com.example.myapplication","com.example.myapplication.AidlTestService"));boolean re = bindService(intent, connection, Context.BIND_AUTO_CREATE);Log.i("xaeHu", "bindService: "+re);});//点击按钮2调用set方法findViewById(R.id.btn2).setOnClickListener(v -> {if(myAidlInterface != null){try {myAidlInterface.setHelloString("hello world");} catch (RemoteException e) {e.printStackTrace();}}else {Log.e("xaeHu", "btn2 onclick: myAidlInterface == null");}});//点击按钮3调用get方法findViewById(R.id.btn3).setOnClickListener(v -> {if(myAidlInterface != null){try {Toast.makeText(this, myAidlInterface.getHelloString(), Toast.LENGTH_SHORT).show();} catch (RemoteException e) {e.printStackTrace();}}else {Log.e("xaeHu", "btn3 onclick: myAidlInterface == null");}});}@Overrideprotected void onDestroy() {super.onDestroy();unbindService(connection);}
}
简单的AIDL调用就搞定啦。
进阶:
上面的演示是传递基本数据类型为参数的,接下来通过AIDL传递对象
先在aidl文件夹中创建实体对象文件,再在java文件夹中创建实体类,不然的话在java中创建了实体类,再在aidl中创建相同的名字会提示错误。
A应用中:
比如我们创建Student对象,在aidl文件夹中就是Student.aidl,里面代码很简单:
package com.example.myapplication;parcelable Student;然后再在java中创建Student.java,注意需要实现Parcelable:
public class Student implements Parcelable {private int id;private String name;private int age;private int sex;public Student() {}public Student(int id, String name, int age, int sex) {this.id = id;this.name = name;this.age = age;this.sex = sex;}protected Student(Parcel in) {id = in.readInt();name = in.readString();age = in.readInt();sex = in.readInt();}public static final Creator<Student> CREATOR = new Creator<Student>() {@Overridepublic Student createFromParcel(Parcel in) {return new Student(in);}@Overridepublic Student[] newArray(int size) {return new Student[size];}};public String getName() {return name;}public int getAge() {return age;}public int getSex() {return sex;}public int getId() {return id;}@Overridepublic int describeContents() {return 0;}@Overridepublic void writeToParcel(@NonNull Parcel dest, int flags) {dest.writeInt(id);dest.writeString(name);dest.writeInt(age);dest.writeInt(sex);}@Overridepublic String toString() {return "Student{" +"id=" + id +", name='" + name + '\'' +", age=" + age +", sex=" + sex +'}';}
}
在aidl接口中添加方法:(注意addStudent(in Student student);参数需要添加in表示接收参数,另外有out、inout)
// IMyAidlInterface.aidl
package com.example.myapplication;import com.example.myapplication.Student;
// Declare any non-default types here with import statementsinterface IMyAidlInterface {/*** Demonstrates some basic types that you can use as parameters* and return values in AIDL.*/void basicTypes(int anInt, long aLong, boolean aBoolean, float aFloat,double aDouble, String aString);String getHelloString();void setHelloString(String string);void addStudent(in Student student);Student getStudent(int id);
}
服务中实现这两个方法:
private Map<Integer,Student> studentMap;@Override
public void addStudent(Student student) throws RemoteException {Log.i("xaeHu", "addStudent: "+student);if(studentMap == null){studentMap = new HashMap<>();}studentMap.put(student.getId(), student);
}@Override
public Student getStudent(int id) throws RemoteException {if(studentMap != null){Student student = studentMap.get(id);Log.i("xaeHu", id + " -> getStudent: "+student);return student;}Log.i("xaeHu", id + " -> getStudent: null");return null;
}
B应用:
同样的把aidl文件和类搬过来,注意实体对象的包名需要与A应用包名一致:

然后同样的,在绑定服务之后就可以调用了:
myAidlInterface.addStudent(new Student(1,"student1",26,0));
myAidlInterface.addStudent(new Student(2,"student2",27,1));Log.i("xaeHu", "getStudent1: "+myAidlInterface.getStudent(1));
Log.i("xaeHu", "getStudent2: "+myAidlInterface.getStudent(2));