前端开发之vue动态路由实现方案
前端开发之vue动态路由实现方案
- 前言
- 2. 实现
- 1、登录页面创建登录函数和watch监听路由
- 2、调用的login方法
- (1)登录方法
- (2)存储token
- 3、router.push的时候调用路由守卫
- (1)创建路由守卫,建议路由守卫封装为单独的文件
- (2)var文件引用
- (3)将在main中添加调用,由于我封装到permissions.ts文件中,通过var文件调用
- (4) setRoutes方法:存储vuex中routes,合并路由列表
- (5)filterRoutes:根据权限和rolesControl过滤路由
- (6)toLoginRoute:
- 4、创建router.js 文件,创建路由列表和添加路由的方法
前言
本篇讲解的路由实现方案:默认存在的路由json->登录获取路由的json数据和权限->index.vue页面通过watch监听router为路由附加默认值->通过router.push跳转->触发beforeEach实现页面权限的判断和addrouter合并路由列表
2. 实现
1、登录页面创建登录函数和watch监听路由
//redirect 赋值
watch: {$route: {handler (route) {this.redirect = (route.query && route.query.redirect) || '/'},immediate: true}},
//登录函数
const ruleForm = ref('')
const login = (userInfo) => {dispatch('user/login', userInfo)
}
const handleRoute = () => {return data.redirect === '/404' || data.redirect === '/403'? '/': data.redirect
}
const handleLogin = () => {ruleForm.value.validate(async (valid) => {if (valid) {try {data.loading = trueawait login(data.forms)await router.push(handleRoute())} finally {data.loading = false}}})
}
2、调用的login方法
(1)登录方法
const actions = {//登录成功将token存储到localStorage中,并为vuex的token中赋值async login ({ commit }: { commit: any }, userInfo: any) {// const { data } = await login(userInfo)// const token = data[tokenName]const token = 'admin-token-bbfd1c4e-4e11-F71E-B4B6-aEbCE62cDC3A'if (token) {commit('setToken', token)const hour = new Date().getHours()} else {const err = `登录接口异常,未正确返回${tokenName}...`throw err}}
}
(2)存储token
 * @description 存储token* @param token*/
export function setToken (token:any) {if (storage) {if (storage === 'localStorage') {return localStorage.setItem(tokenTableName, token)} else if (storage === 'sessionStorage') {return sessionStorage.setItem(tokenTableName, token)} else if (storage === 'cookie') {return cookie.set(tokenTableName, token)} else {return localStorage.setItem(tokenTableName, token)}} else {return localStorage.setItem(tokenTableName, token)}
}
3、router.push的时候调用路由守卫
(1)创建路由守卫,建议路由守卫封装为单独的文件
详细讲解了路由的跳转和
/*** @description 路由守卫*/
import store from '@/store'
import router from '@/router'
import getPageTitle from '@/utils/pageTitle'
import { toLoginRoute } from '@/utils/routes'
import configOb from '@/config'
//调用封装的配置文件
//intelligence(前端导出路由)和all(后端导出路由)两种方式
//authentication: 'intelligence',
const { authentication } = configOb
export function setup () {router.beforeEach(async (to, from, next) => {//获取tokenlet hasToken = store.getters['user/token']if (hasToken) {if (store.getters['routes/routes'].length) {// 禁止已登录用户返回登录页if (to.path === '/login') {next({ path: '/' })} else next()} else {//setRoutes:下面讲解,存储vuex中routes,合并路由列表await store.dispatch('routes/setRoutes', authentication)next({ ...to, replace: true })}} else {next(toLoginRoute(to.path))}})router.afterEach((to) => {//设置标题document.title = getPageTitle(to.meta.title)})
}
(2)var文件引用
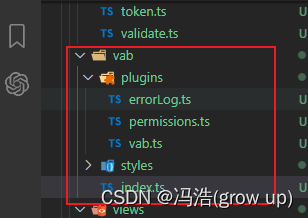
export function setupVab (app: any) {// 加载插件const Plugins = require.context('./plugins', true, /\.ts$/)Plugins.keys().forEach((key) => Plugins(key).setup(app))
}
(3)将在main中添加调用,由于我封装到permissions.ts文件中,通过var文件调用
import { createApp } from 'vue'
import App from './App.vue'
import { setupVab } from '@/vab'const app = createApp(App)
setupVab(app)
(4) setRoutes方法:存储vuex中routes,合并路由列表
async setRoutes ({ commit }: { commit: any }, mode = 'none') {// 默认前端路由const routes = [...asyncRoutes]// 设置游客路由关闭路由拦截const control = mode === 'visit' ? false : rolesControl// 后端路由// if (authentication === 'all') {// const { data } = await getRouterList()// const { list } = data// if (!isArray(list))// gp.$baseMessage(// '路由格式返回有误!',// 'error',// false,// 'vab-hey-message-error'// )// if (list[list.length - 1].path !== '*') {// list.push({// path: '/:pathMatch(.*)*',// redirect: '/404',// name: 'NotFound',// hidden: true// })// routes = convertRouter(list)// }// 根据权限和rolesControl过滤路由const finallyRoutes = filterRoutes([...constantRoutes, ...routes], control)// // 设置菜单所需路由commit('setRoutes', finallyRoutes)// // 根据可访问路由重置Vue Routerawait resetRouter(finallyRoutes)},
(5)filterRoutes:根据权限和rolesControl过滤路由
export function filterRoutes (routes:any, rolesControl:any, baseUrl = '/') {return routes.filter((route:any) => {if (rolesControl && route.meta && route.meta.roles) {return hasAccess(route.meta.roles)return false} else { return true }})// .map((route) => {//   if (route.path !== '*' && !isExternal(route.path))//     route.fullPath = resolve(baseUrl, route.path)//   if (route.children)//     route.children = filterRoutes(//       route.children,//       rolesControl,//       route.fullPath//     )//   return route// })
}
(6)toLoginRoute:
/*** 获取当前跳转登录页的Route* @param currentPath 当前页面地址*/
export function toLoginRoute (currentPath:any) {if (recordRoute && currentPath !== '/') {return {path: '/login',query: { redirect: currentPath },replace: true}} else {return { path: '/login', replace: true }}
}
4、创建router.js 文件,创建路由列表和添加路由的方法
设置默认路由和模拟请求后添加的路由,定义添加路由的方法
// 定义路由和路由添加的方法
import { createRouter, createWebHashHistory, createWebHistory } from 'vue-router'
import configOb from '@/config'
import { getNames } from '@/utils/routes'//设置默认数组
export const constantRoutes = [{path: '/login',name: 'Login',component: () => import('@/views/login/index.vue'),hidden: true},{path: '/403',name: '403',component: () => import('../views/403.vue'),hidden: true},{path: '/404',name: '404',component: () => import('../views/404.vue'),hidden: true}
]//假设请求的到的数组
export const asyncRoutes = [{path: '/',name: 'Root',// component: Layout,redirect: '/index',meta: {title: '平台首页',icon: 'iconfont icon-ptsyy icon-white'},children: [{path: 'index',name: 'Index',component: () => import('../views/index/index.vue'),meta: {title: '首页',icon: 'home-2-line',noClosable: true}}]},{path: '/error',name: 'Error',// component: Layout,redirect: '/error/403',menuHidden: true,meta: {title: '错误页',icon: 'error-warning-line'},children: [{path: '403',name: 'Error403',component: () => import('../views/403.vue'),meta: {title: '403',icon: 'error-warning-line'}},{path: '404',name: 'Error404',component: () => import('../views/404.vue'),meta: {title: '404',icon: 'error-warning-line'}}]},{path: '/:pathMatch(.*)*',redirect: '/404',name: 'NotFound',hidden: true}
]//是否开启hash模式
const { isHashRouterMode, publicPath } = configOb
const router = createRouter({history: isHashRouterMode? createWebHashHistory(publicPath): createWebHistory(publicPath),routes: constantRoutes
})/*** 添加路由* @param routes*/
function addRouter (routes:any) {routes.forEach((route:any) => {if (!router.hasRoute(route.name)) router.addRoute(route)if (route.children) addRouter(route.children)})
}export default router