做问卷用哪个网站好/网络营销服务有哪些
目录
一、Vue3工程环境配置、项目基础脚手架搭建、Vue3基础语法、Vue3集成Element-Plus的详细教程。(博客链接如下)
二、Element-Plus常用组件使用(输入框、下拉框、单选框多选框、el-image图片、轮播图、日期时间选择器、表格、分页组件、插槽、对话框)。(博客链接如下)
三、 Vue3集成Vue-Router。(实操)
(1)入门。
(2)路由跳转。
<1>定义新路由。
index.js文件中的createRouter()函数。
<2>RouterLink。(跳转路由)
Home.vue代码。
Test.vue代码。
Demo.vue代码。
Home.vue页面渲染效果。
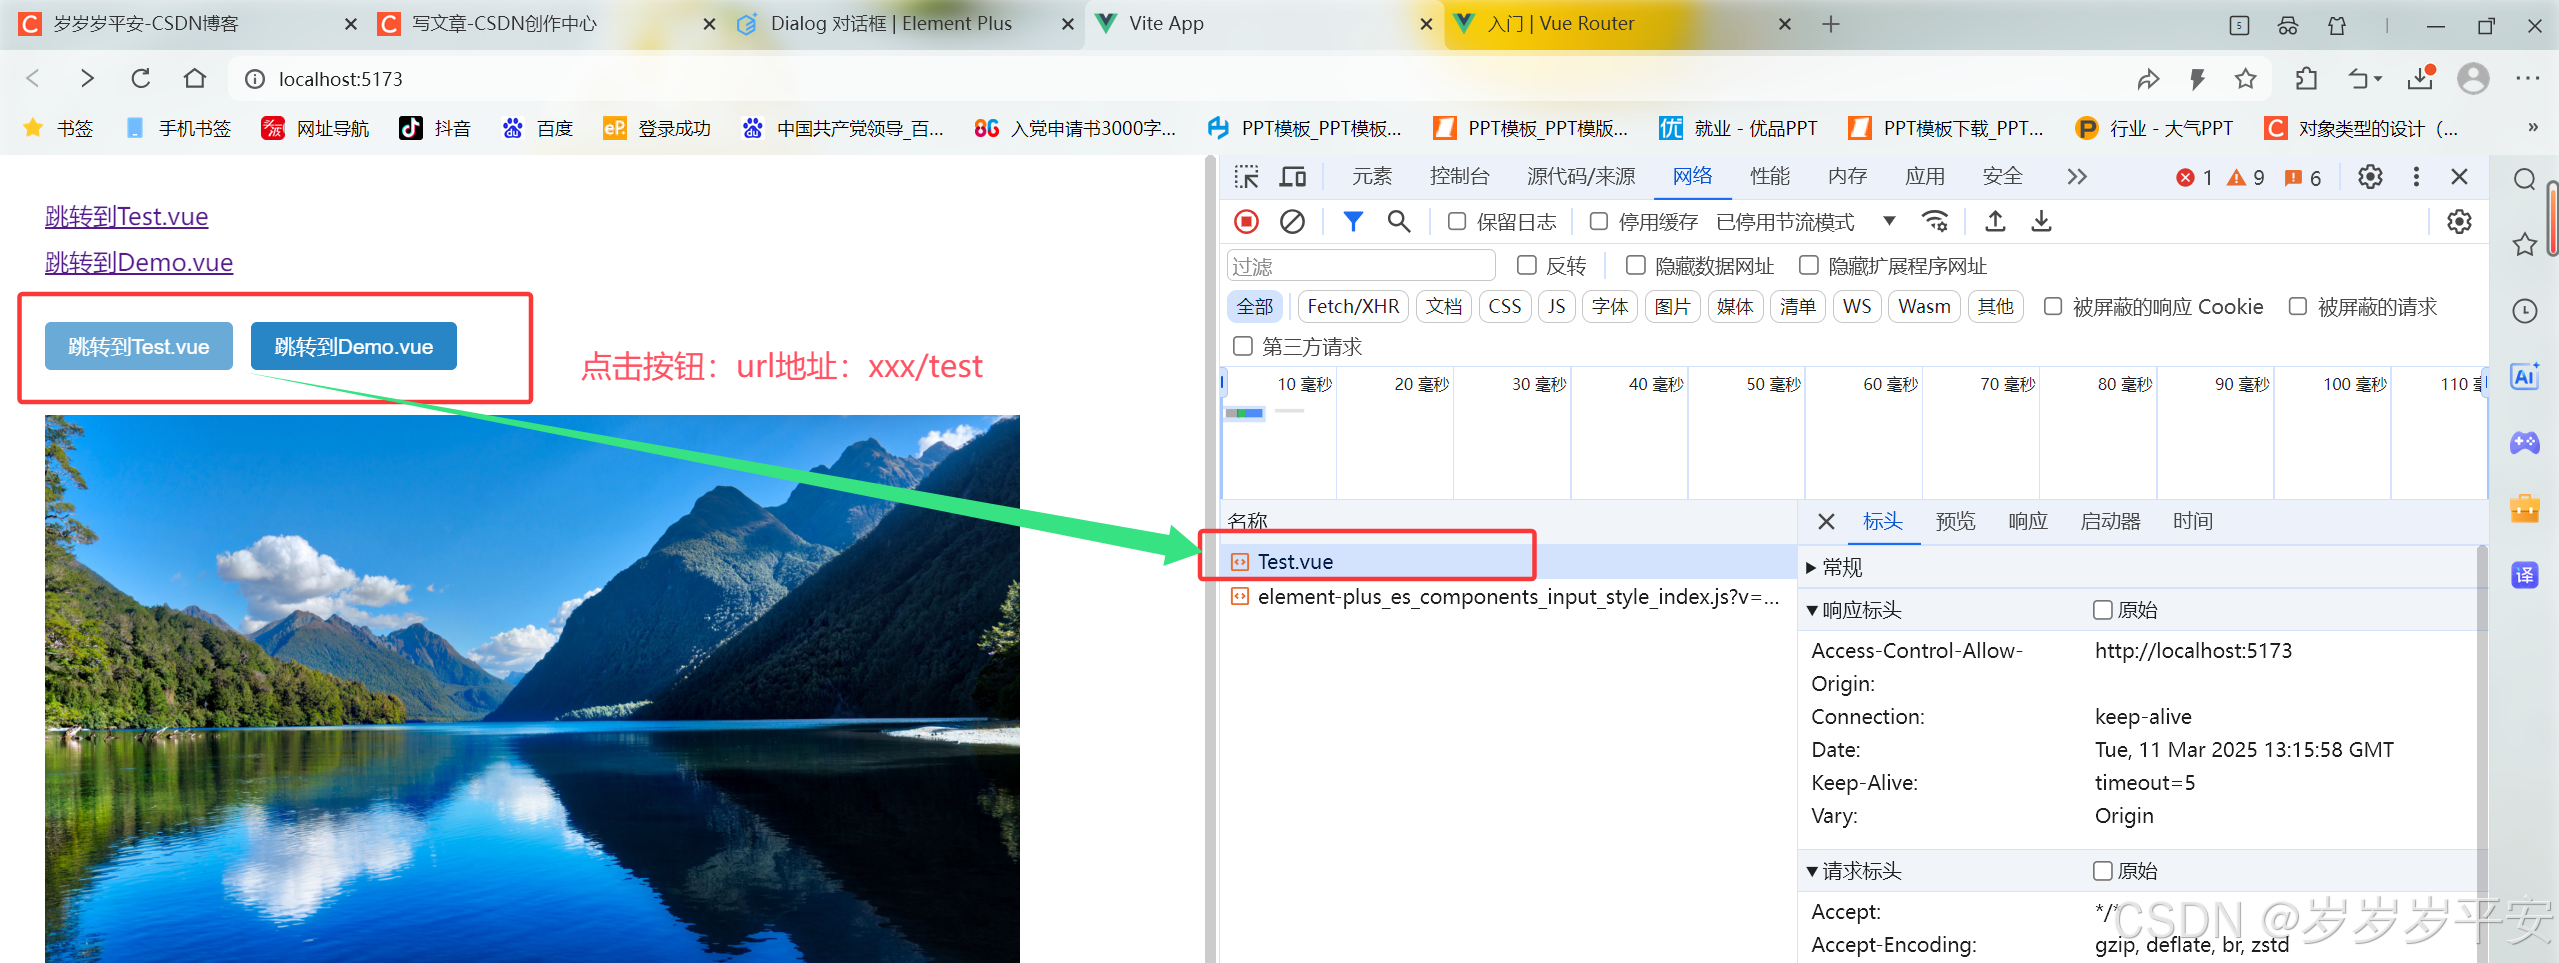
跳转到Test.vue页面渲染效果。
跳转到Demo.vue页面渲染效果。
<3>编程式路由跳转。
导入router对象。
router.push("/xxx")实现编程式路由跳转。
router.replace("/xxx")实现编程式路由跳转。
(3)设置默认页面的路由('/')跳转。
<1>重新配置Home.vue的路由。
<2>设置'/'的路由跳转。(redirect重定向)
(4)路由跳转时—传参。(核心)
<1>路由跳转+传递单个参数id=1。
手动拼接方式('/xxx?id=1')。(query类型参数)
获取路由跳转时的传参。(链式获取传参的query对象)
<2>路由跳转+传递多个参数id=1&username=张三。
<3>路由跳转的多参数传递。(设置对象方式传递)
(5)预告:《Vue3集成Vue-Router(下)》博客中内容。
嵌套路由。
路由守卫。
404NotFound页面的设计与配置路由。
一、Vue3工程环境配置、项目基础脚手架搭建、Vue3基础语法、Vue3集成Element-Plus的详细教程。(博客链接如下)
- Vue3实战学习(Vue环境配置、快速上手及卸载、下载安装Node.js超详细教程(2025)、npm配置淘宝镜像)(1)_创建vue工程 安装淘宝镜像-CSDN博客
- Vue3实战学习(IDEA中打开、启动与搭建Vue3工程极简脚手架教程(2025超详细教程)、Windows系统命令行启动Vue3工程)(2)-CSDN博客
- Vue3实战学习(Vue3的基础语法学习与使用(超详细))(3)_vue3 {... }-CSDN博客
- Vue3实战学习(Vue3集成Element-Plus(常用依赖、插件安装与导入 。按钮、图标组件。自定义主题的实现)(超详细))(4)_vue3安装依赖-CSDN博客
二、Element-Plus常用组件使用(输入框、下拉框、单选框多选框、el-image图片、轮播图、日期时间选择器、表格、分页组件、插槽、对话框)。(博客链接如下)
- Vue3实战学习(Element-Plus常用组件的使用(输入框、下拉框、单选框多选框、el-image图片))(上)(5)-CSDN博客
- Vue3实战学习(Element-Plus常用组件的使用(轮播图、日期时间选择器、表格、分页组件、对话框)(超详细))(下)(6)-CSDN博客
三、 Vue3集成Vue-Router。(实操)
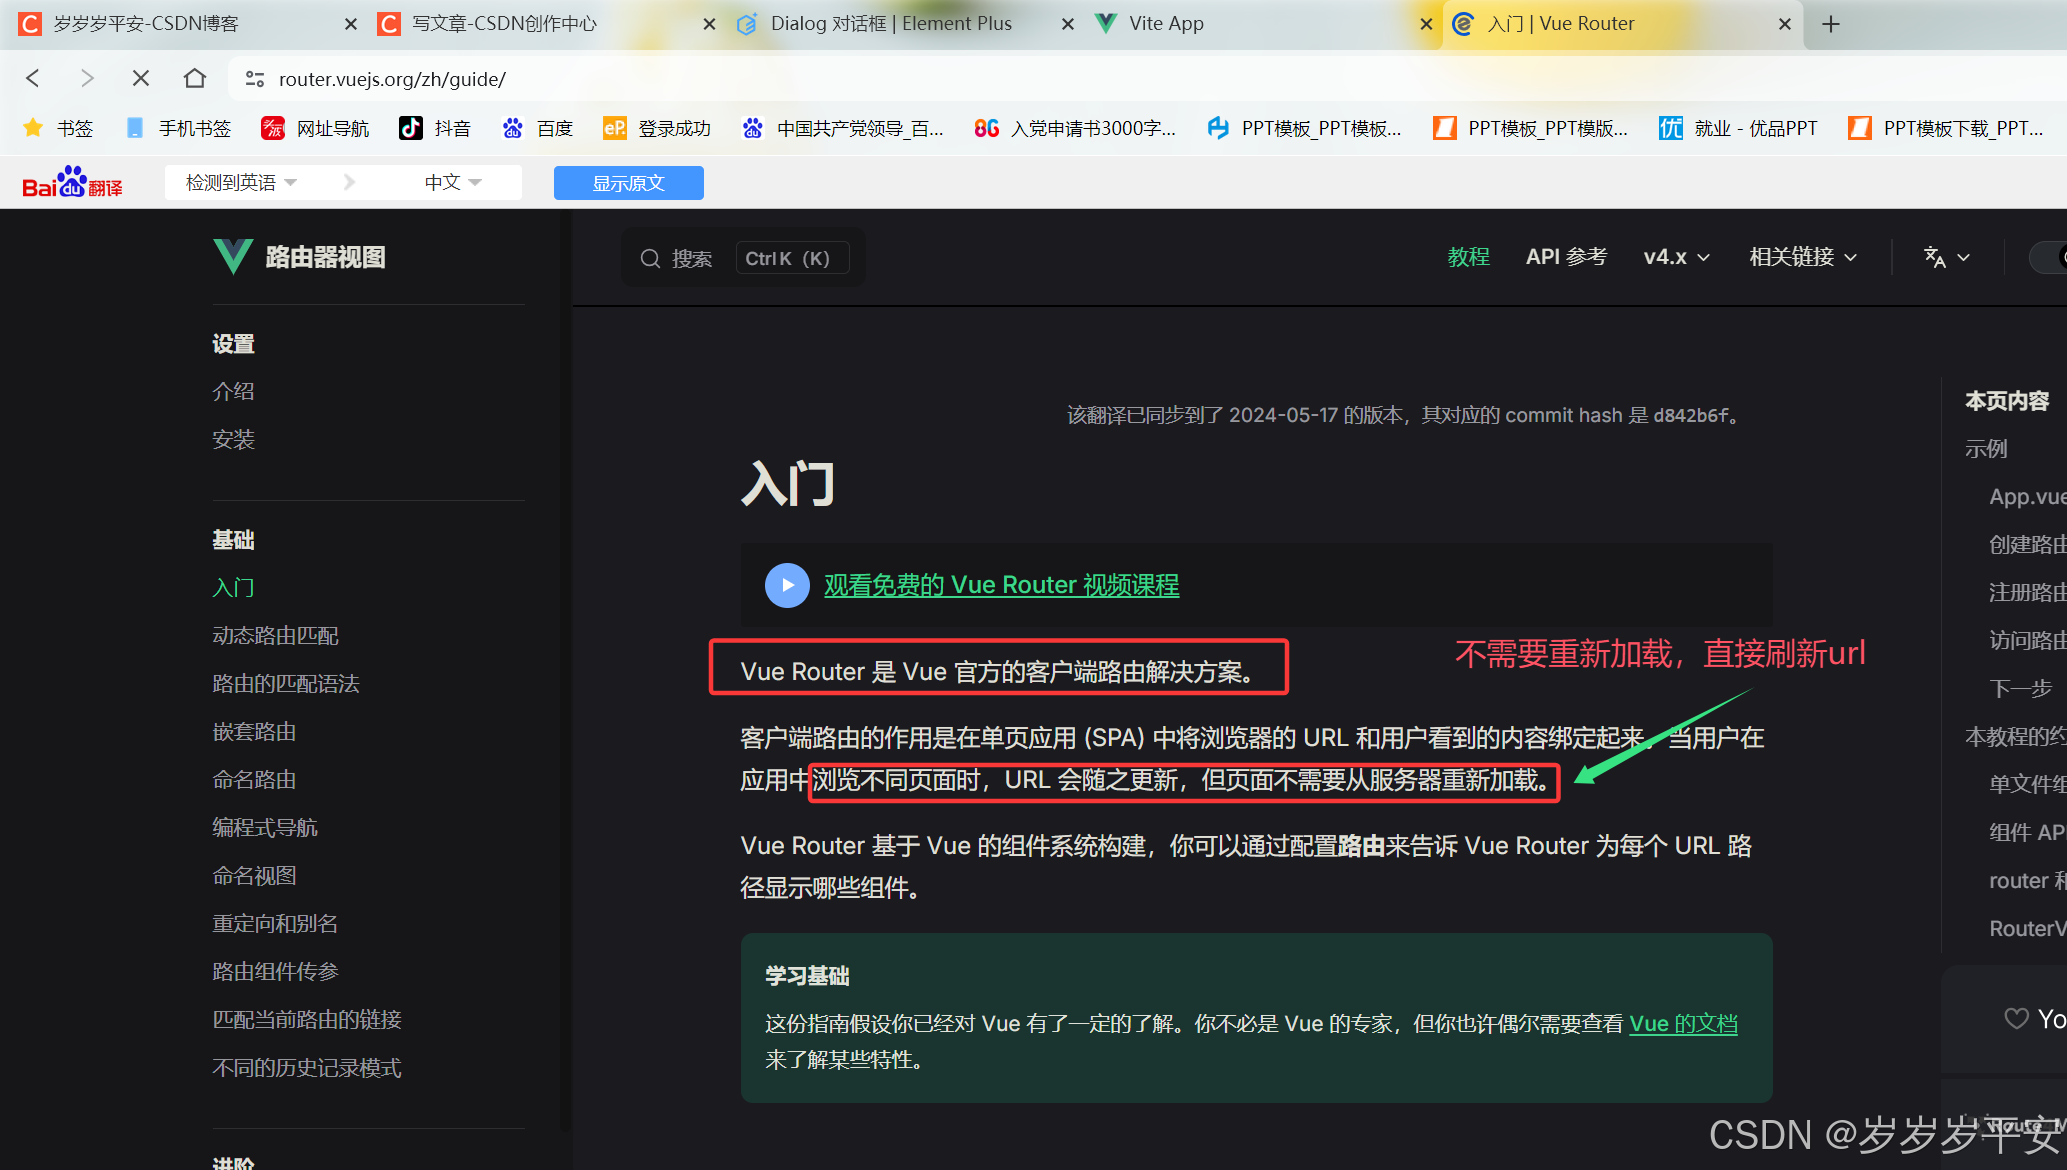
(1)入门。
- Vue-Router的官方网址:Vue Router | The official Router for Vue.js。
- 性能好、在不刷新页面的情况下跳转路由——>提供用户的体验感。
(2)路由跳转。
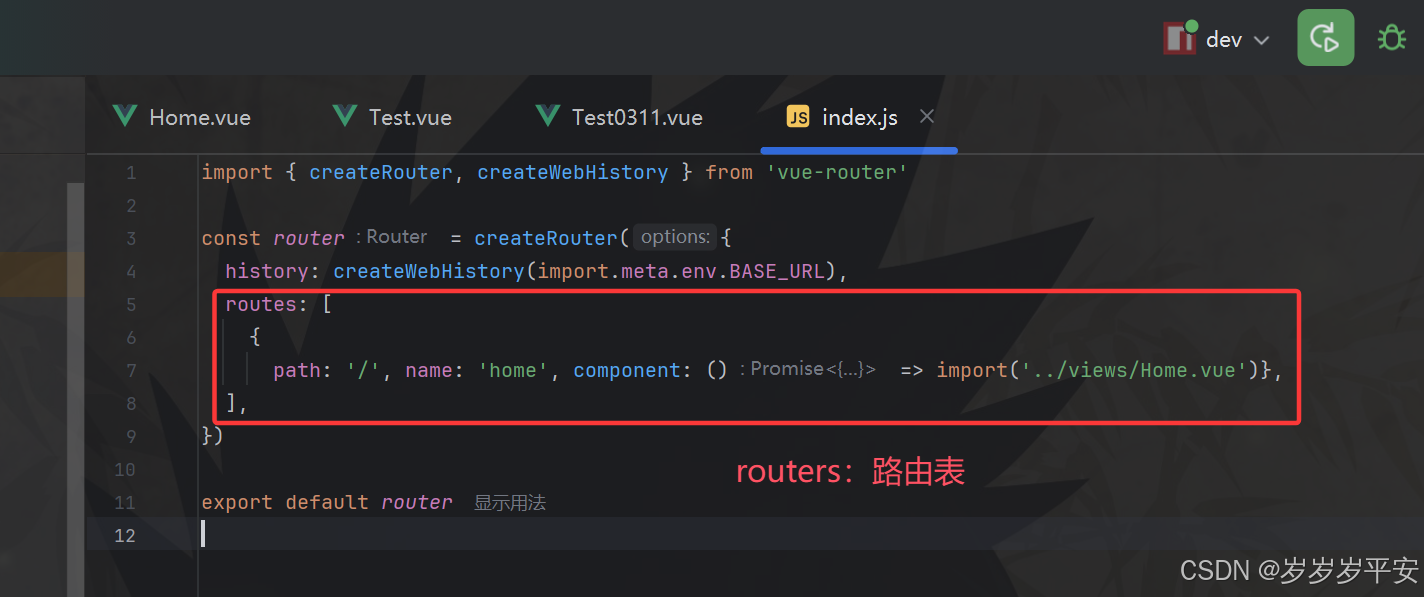
<1>定义新路由。
index.js文件中的createRouter()函数。
- 路由表中每一个路由对象对应着一个单读页面。
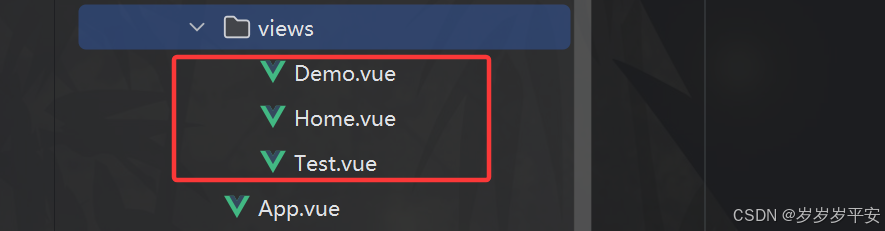
- 给剩下的两个页面:Test.vue、Demo.vue在路由表中定义新路由。
- index.js文件。
import { createRouter, createWebHistory } from 'vue-router'const router = createRouter({history: createWebHistory(import.meta.env.BASE_URL),routes: [{path: '/', name: 'home', component: () => import('../views/Home.vue')},{path: '/test', name: 'test', component: () => import('../views/Test.vue')},{path: '/demo', name: 'demo', component: () => import('../views/Demo.vue')},],
})export default router
<2>RouterLink。(跳转路由)
- 在Home.vue页面中添加跳转Test.vue、Demo.vue两个页面。
- <RouterLink to="需跳转的路由"></RouterLink>。
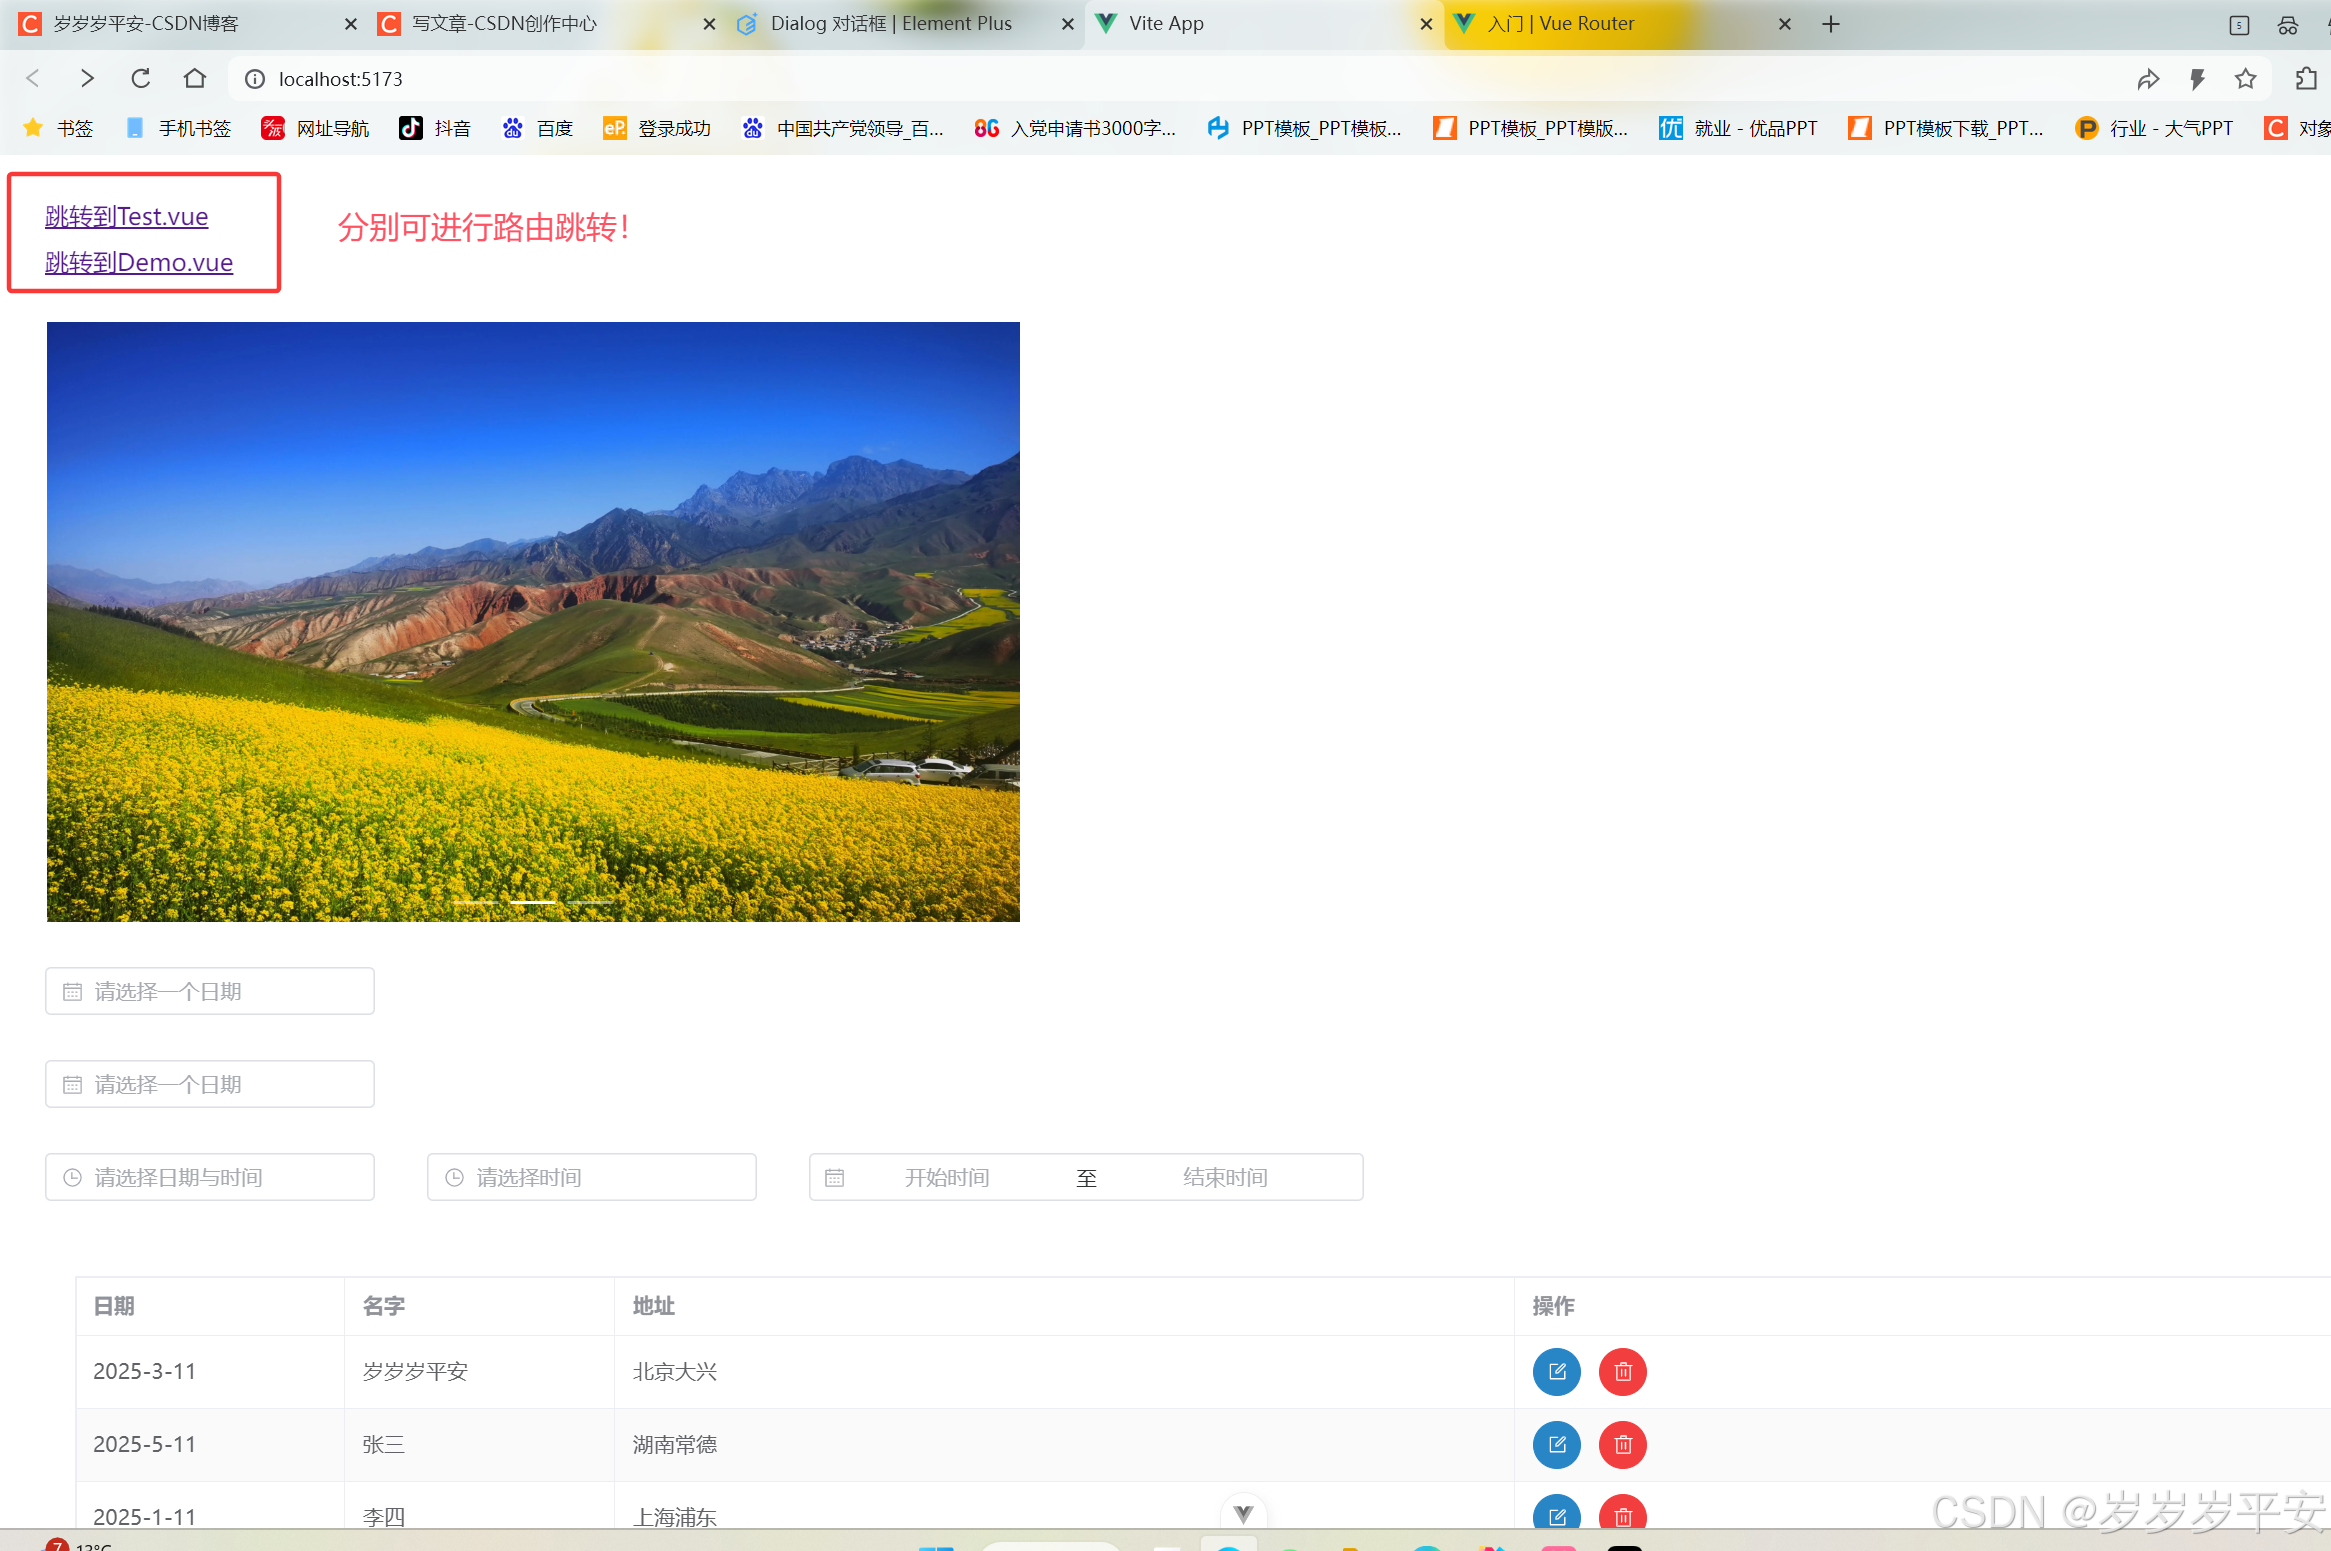
Home.vue代码。
<template><div>
<!--  路由跳转  --><div style="margin: 30px"><div style="margin-bottom: 10px"><RouterLink to="/test">跳转到Test.vue</RouterLink></div><div><RouterLink to="/demo">跳转到Demo.vue</RouterLink></div></div><!-- 走马灯/轮播图   --><div style="margin: 30px"><el-carousel height="400px" style="width: 650px"><el-carousel-item v-for="item in data.images" :key="item">
<!--    图片高度不一致可以通过height设置      --><img style="width: 100%" height="400px" :src="item" alt="风景"></el-carousel-item></el-carousel></div><!--  日期选择器  --><div style="margin: 30px;"><el-date-pickerv-model="data.date"type="date"format="YYYY/MM/DD"placeholder="请选择一个日期"/> <span style="margin-left: 10px">{{data.date}}</span></div><!--  日期选择器  --><div style="margin: 30px;"><el-date-pickerv-model="data.date02"type="date"format="YYYY/MM/DD"value-format="YYYY-MM-DD"placeholder="请选择一个日期"/> <span style="margin-left: 10px">{{data.date02}}</span></div><div style="margin: 30px"><el-date-pickerv-model="data.dateAndTime"type="datetime"format="YYYY-MM-DD HH:mm:ss"value-format="YYYY-MM-DD HH:mm:ss"placeholder="请选择日期与时间"/> <span style="margin-left: 10px">{{data.dateAndTime}}</span><el-time-picker style="margin-left: 20px"v-model="data.time"arrow-controlformat="HH:mm:ss"value-format="HH:mm:ss"placeholder="请选择时间"/> <span style="margin-left: 10px">{{data.time}}</span><el-date-picker style="margin-left: 20px"v-model="data.dateRange"type="daterange"format="YYYY-MM-DD"value-format="YYYY-MM-DD"range-separator="至"start-placeholder="开始时间"end-placeholder="结束时间"/><span style="margin-left: 10px">{{data.dateRange?.length?data.dateRange[0]:''}} {{data.dateRange?.length?data.dateRange[1]:''}}</span></div><div style="margin: 50px"><el-table :data="data.tableData" border stripe style="width:100%"><el-table-column prop="date" label="日期" width="180" /><el-table-column prop="name" label="名字" width="180" /><el-table-column prop="address" label="地址" /><el-table-column label="操作"><template #default="scope"><el-button type="primary" circle v-on:click="edit(scope.row)"><el-icon><Edit /></el-icon></el-button><el-button type="danger" circle v-on:click="del(scope.row.id)"><el-icon><Delete /></el-icon></el-button></template></el-table-column></el-table><div style="padding: 10px 0"><el-paginationv-model:current-page="data.currentPage"v-model:page-size="data.pageSize":page-sizes="[5, 10, 15, 20]"layout="total, sizes, prev, pager, next, jumper":total="40"/></div></div>
<!--  设置弹窗默认显示为false  -->
<!--  dialogTableVisible控制弹窗显示  --><el-dialog v-model="data.dialogTableVisible" title="编辑行对象的数据" width="800"><div style="padding: 10px 0"><div style="margin: 10px">日期:{{data.row.date}}</div><div style="margin: 10px">名称:{{data.row.name}}</div><div style="margin: 10px">地址:{{data.row.address}}</div></div></el-dialog></div>
</template>
<script setup>import lun1 from '@/assets/lun01.png' import lun2 from '@/assets/lun02.png' import lun3 from '@/assets/lun03.png'import {reactive} from "vue"; import {Delete, Edit} from "@element-plus/icons-vue";//定义数据的常用方式 const data = reactive({images:[lun1,lun2,lun3],date:'',date02:'',dateAndTime:'',time:'',dateRange:null,currentPage:1,pageSize:5,tableData:[{ id:1, date:'2025-3-11',name:'岁岁岁平安',address:'北京大兴' },{ id:2, date:'2025-5-11',name:'张三',address:'湖南常德' },{ id:3, date:'2025-1-11',name:'李四',address:'上海浦东' },{ id:4, date:'2025-3-11',name:'小鲁班',address:'北京大兴' },],dialogTableVisible:false,row:null, }) //假数据处理 data.tableData = data.tableData.splice(0,5);//根据id删除 const del = (id) =>{alert('id为'+id+'用户正在被执行删除操作!') }//编辑行对象 const edit = (row) =>{data.dialogTableVisible = truedata.row=row }</script>
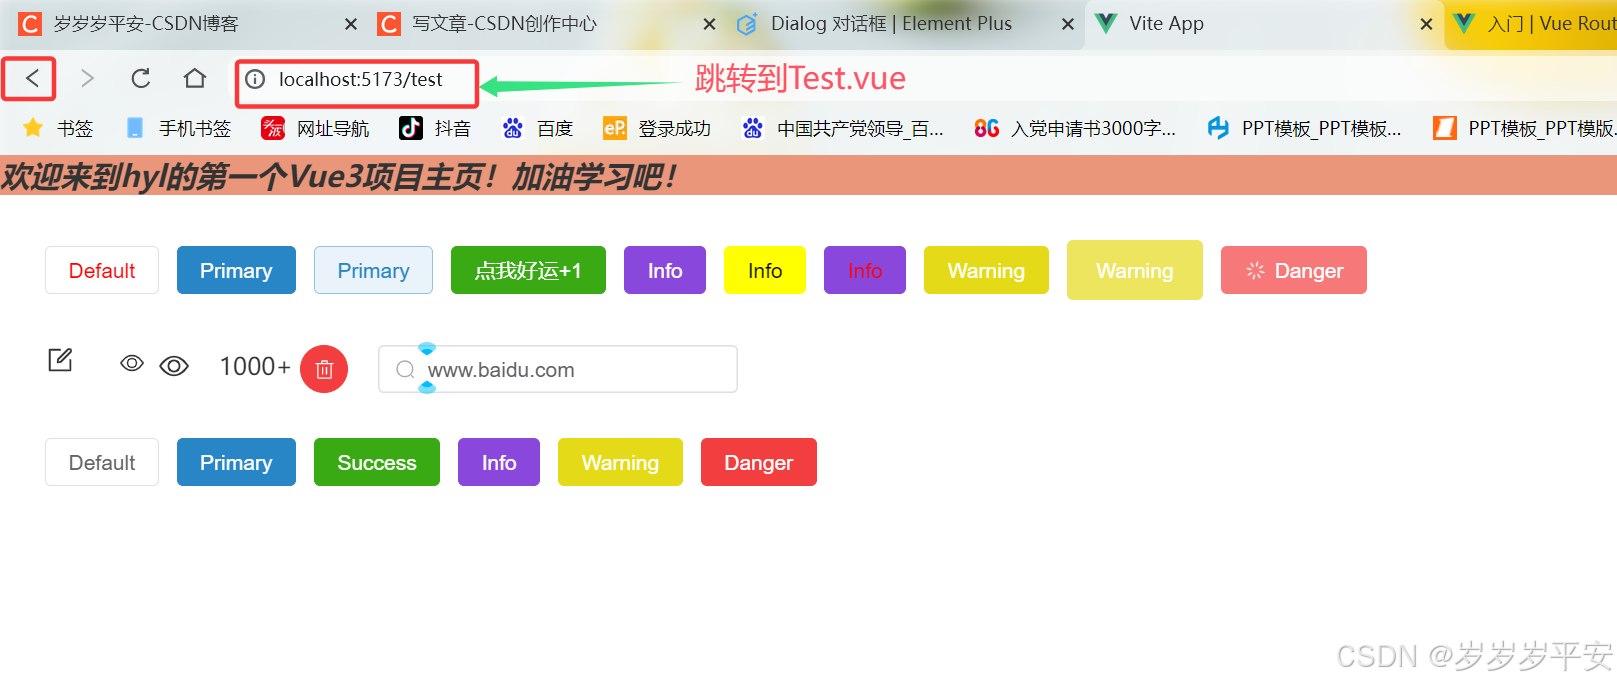
Test.vue代码。
<template><div><div style="background-color: darksalmon; font-size: 20px; font-weight: bold; font-style: italic; margin-bottom: 30px" >欢迎来到hyl的第一个Vue3项目主页!加油学习吧!</div><div style="margin: 30px"><el-button v-bind:style="data.css01">Default</el-button><el-button type="primary">Primary</el-button><el-button type="primary" plain>Primary</el-button><el-button v-on:click="clickSuccess" type="success">点我好运+1</el-button><el-button type="info">Info</el-button><el-button type="info" color="yellow">Info</el-button><el-button type="info" style="color:red;">Info</el-button><el-button type="warning">Warning</el-button><el-button type="warning" size="large">Warning</el-button><el-button type="danger" loading>Danger</el-button></div><div style="margin: 30px"><el-icon :size="20"><Edit /></el-icon><span style="margin-left: 30px"><el-icon style="margin-right: 10px"><View /></el-icon><el-icon size="20" style="top: 4px;margin-right: 20px" ><View /></el-icon>1000+<el-button style="margin-right: 20px" type="danger" :icon="Delete" circle /><el-inputv-model="data.str"style="width: 240px"placeholder="Type something":prefix-icon="Search"/></span></div><div style="margin: 30px"><el-button>Default</el-button><el-button type="primary">Primary</el-button><el-button type="success">Success</el-button><el-button type="info">Info</el-button><el-button type="warning">Warning</el-button><el-button type="danger">Danger</el-button></div></div>
</template>
<script setup>import {reactive, ref} from "vue";import {Delete, Edit, Search, View} from "@element-plus/icons-vue";//第二种定义数据的方式 const data = reactive({css01:{color : 'red',},str:'www.baidu.com' })const clickSuccess = () =>{alert("你使用的是:element-plus组件!你的好运+1") }</script>
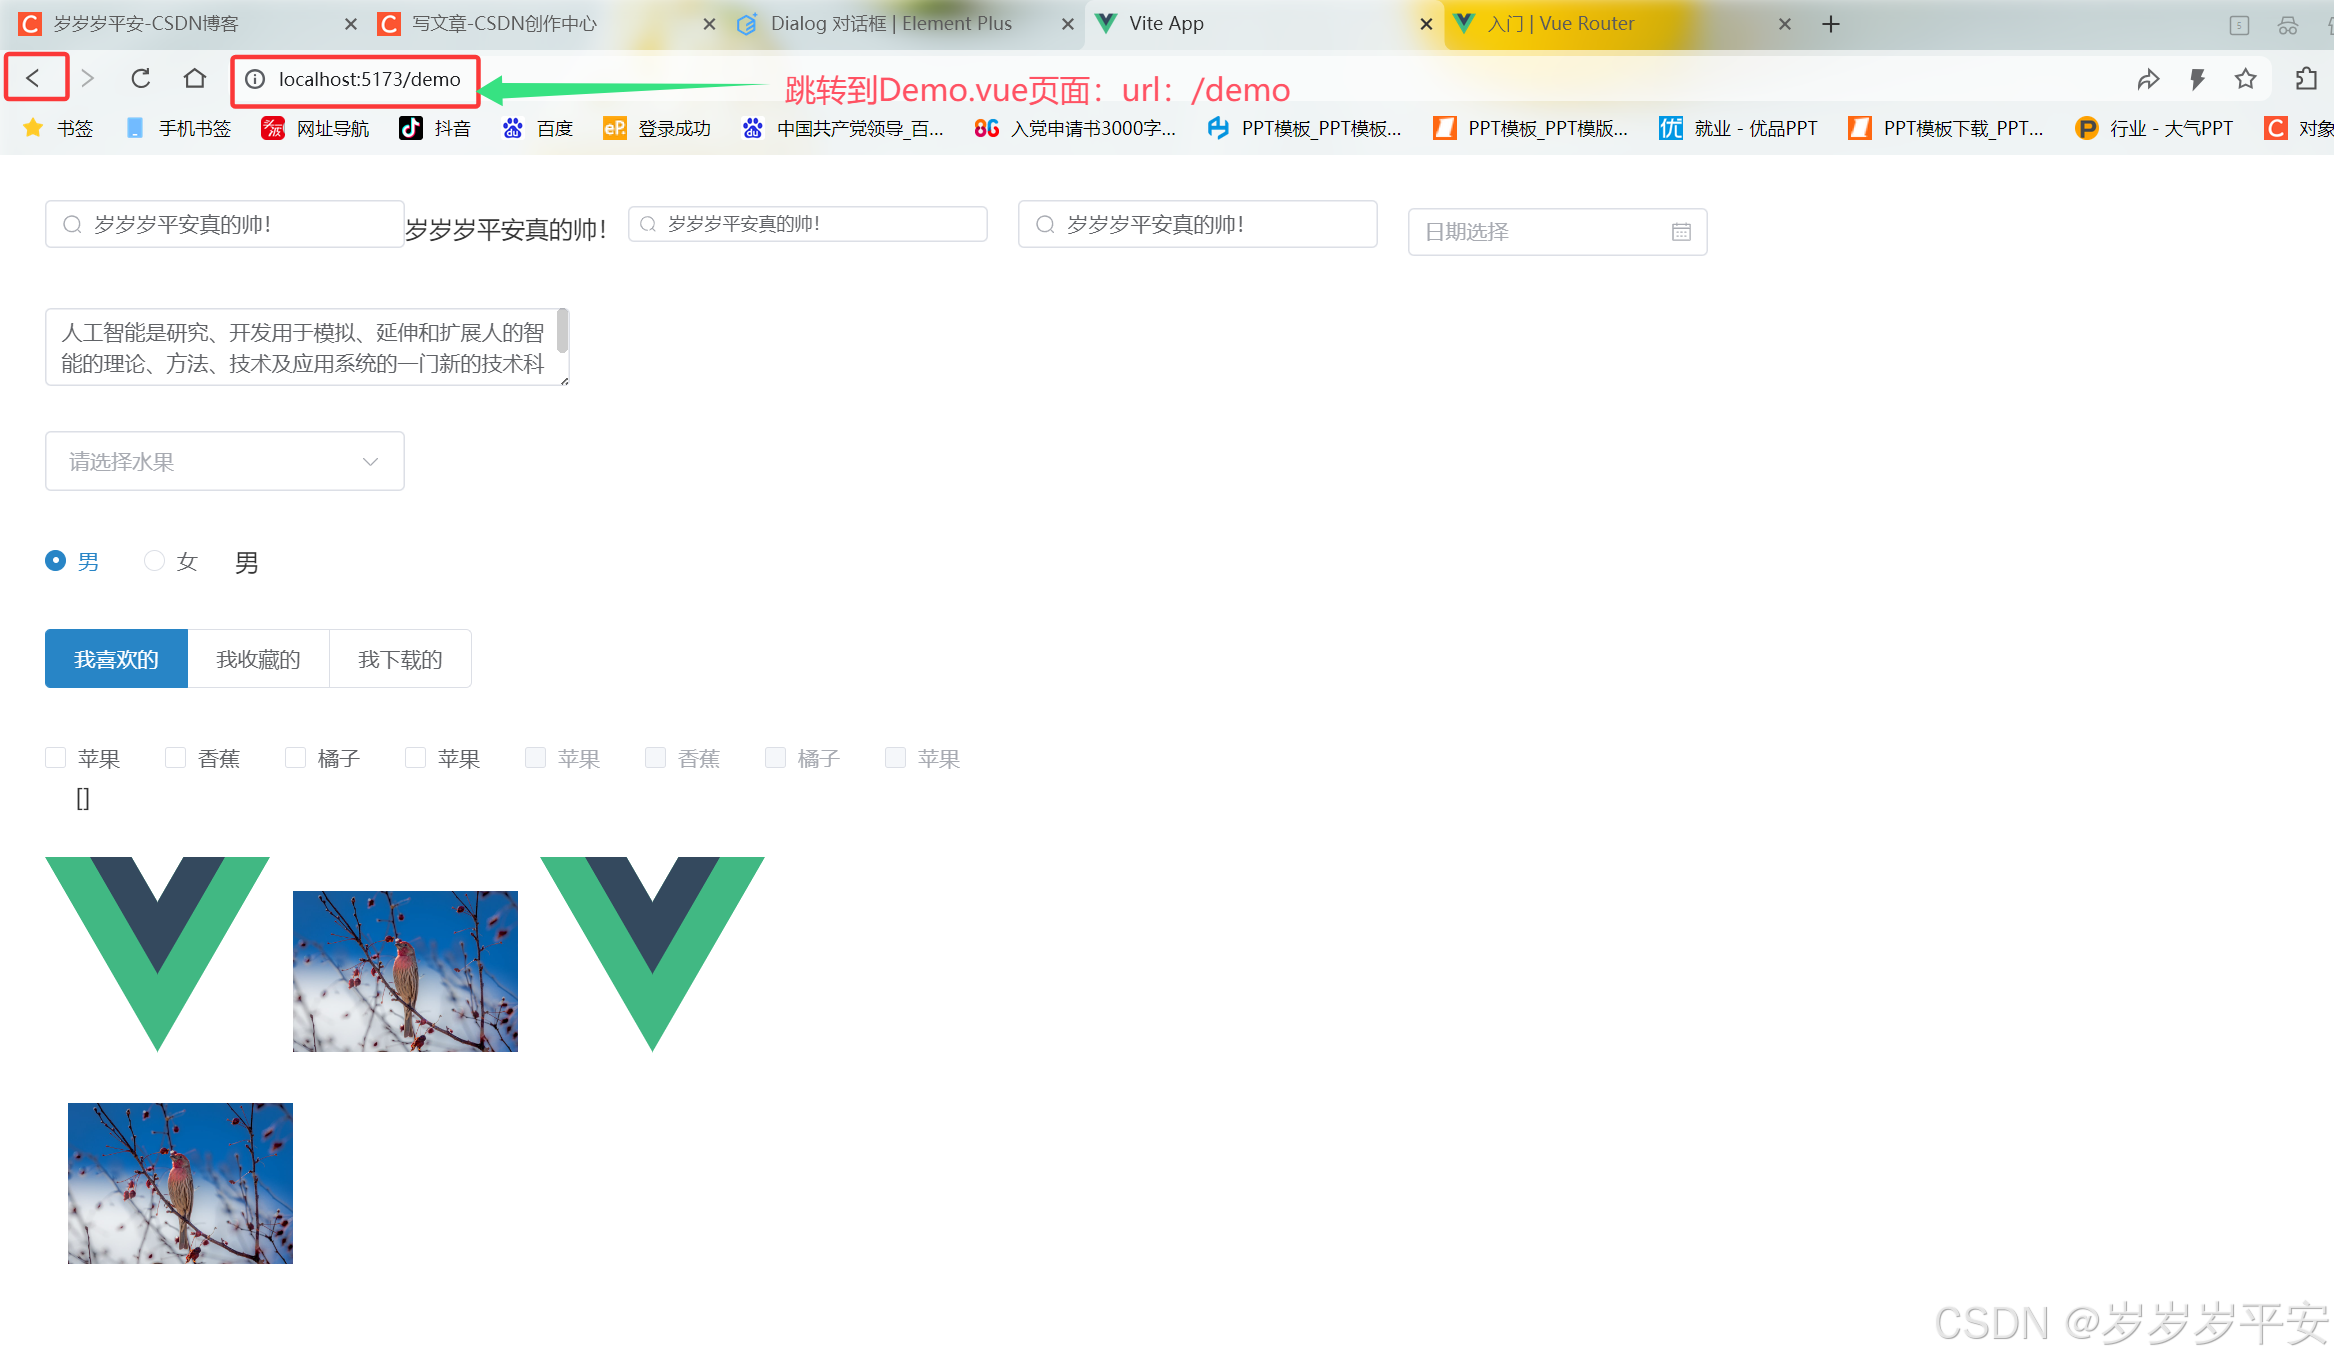
Demo.vue代码。
<template><div><div style="margin: 30px"><el-input v-model="data.input" style="width: 240px;margin-bottom:10px" placeholder="请输入内容" readonly :prefix-icon="Search"/>{{data.input}}<el-input v-model="data.input" size="small" style="width: 240px;margin-bottom:10px" placeholder="请输入内容" readonly :prefix-icon="Search"/><el-input v-model="data.input" clearable style="width: 240px;margin-bottom:10px;margin-left: 20px" placeholder="请输入内容" :prefix-icon="Search"/><!-- 默认占整行。可以通过设置width调整宽度 --><el-input style="width: 200px;margin-left: 20px" placeholder="日期选择" readonly :suffix-icon="Calendar"/></div><div style="margin: 30px;"><el-input type="textarea" v-model="data.describe" style="width: 350px" placeholder="日期选择"/></div><div style="margin: 30px"><el-selectv-model="data.value"clearablemultiplevalue-key="id"placeholder="请选择水果"size="large"style="width: 240px"><el-optionv-for="item in data.options":key="item.id":label="item.label":value="item.name"/></el-select> <span style="margin-left: 10px">{{data.value}}</span></div><div style="margin: 30px"><el-radio-group v-model="data.sex"><el-radio value="男" label="男"></el-radio><el-radio value="女" label="女"></el-radio></el-radio-group> <span style="margin-left: 20px">{{data.sex}}</span></div><div style="margin: 30px"><el-radio-group v-model="data.tar" size="large"><el-radio-button label="我喜欢的" value="1" /><el-radio-button label="我收藏的" value="2" /><el-radio-button label="我下载的" value="3" /></el-radio-group></div><div style="margin: 30px"><el-checkbox-group v-model="data.checkList"><el-checkbox v-for="item in data.options":key="item.id":label="item.label":value="item.name"/><el-checkbox v-for="item in data.options"disabled:key="item.id":label="item.label":value="item.name"/></el-checkbox-group> <span style="margin-left: 20px">{{data.checkList}}</span></div><div style="margin: 30px"><img src="@/assets/logo.svg" alt="vue" width="150px"><el-image style="width: 150px;margin-left: 15px" :src="data.url" /><el-image style="width: 150px;margin-left: 15px" :src="img" /></div><div style="margin: 30px"><el-image style="width: 150px;margin-left: 15px" :src="data.url" :preview-src-list="data.urlList "/></div></div></template><script setup>import {reactive} from "vue"; import {Calendar, Search} from "@element-plus/icons-vue"; import img from '@/assets/logo.svg'//定义数据的常用方式 const data = reactive({input:'岁岁岁平安真的帅!',describe:'人工智能是研究、开发用于模拟、延伸和扩展人的智能的理论、方法、技术及应用系统的一门新的技术科学。',value:'',options:[{id:1,label:'苹果',name:'苹果'},{id:2,label:'香蕉',name:'香蕉'},{id:3,label:'橘子',name:'橘子'},{id:4,label:'苹果',name:'苹果2'},],sex:'男',tar:"1",checkList:[],url:'https://fuss10.elemecdn.com/e/5d/4a731a90594a4af544c0c25941171jpeg.jpeg',urlList:['https://fuss10.elemecdn.com/e/5d/4a731a90594a4af544c0c25941171jpeg.jpeg','https://fuss10.elemecdn.com/a/3f/3302e58f9a181d2509f3dc0fa68b0jpeg.jpeg','https://fuss10.elemecdn.com/1/34/19aa98b1fcb2781c4fba33d850549jpeg.jpeg','https://fuss10.elemecdn.com/0/6f/e35ff375812e6b0020b6b4e8f9583jpeg.jpeg',]})</script>
Home.vue页面渲染效果。
跳转到Test.vue页面渲染效果。
跳转到Demo.vue页面渲染效果。
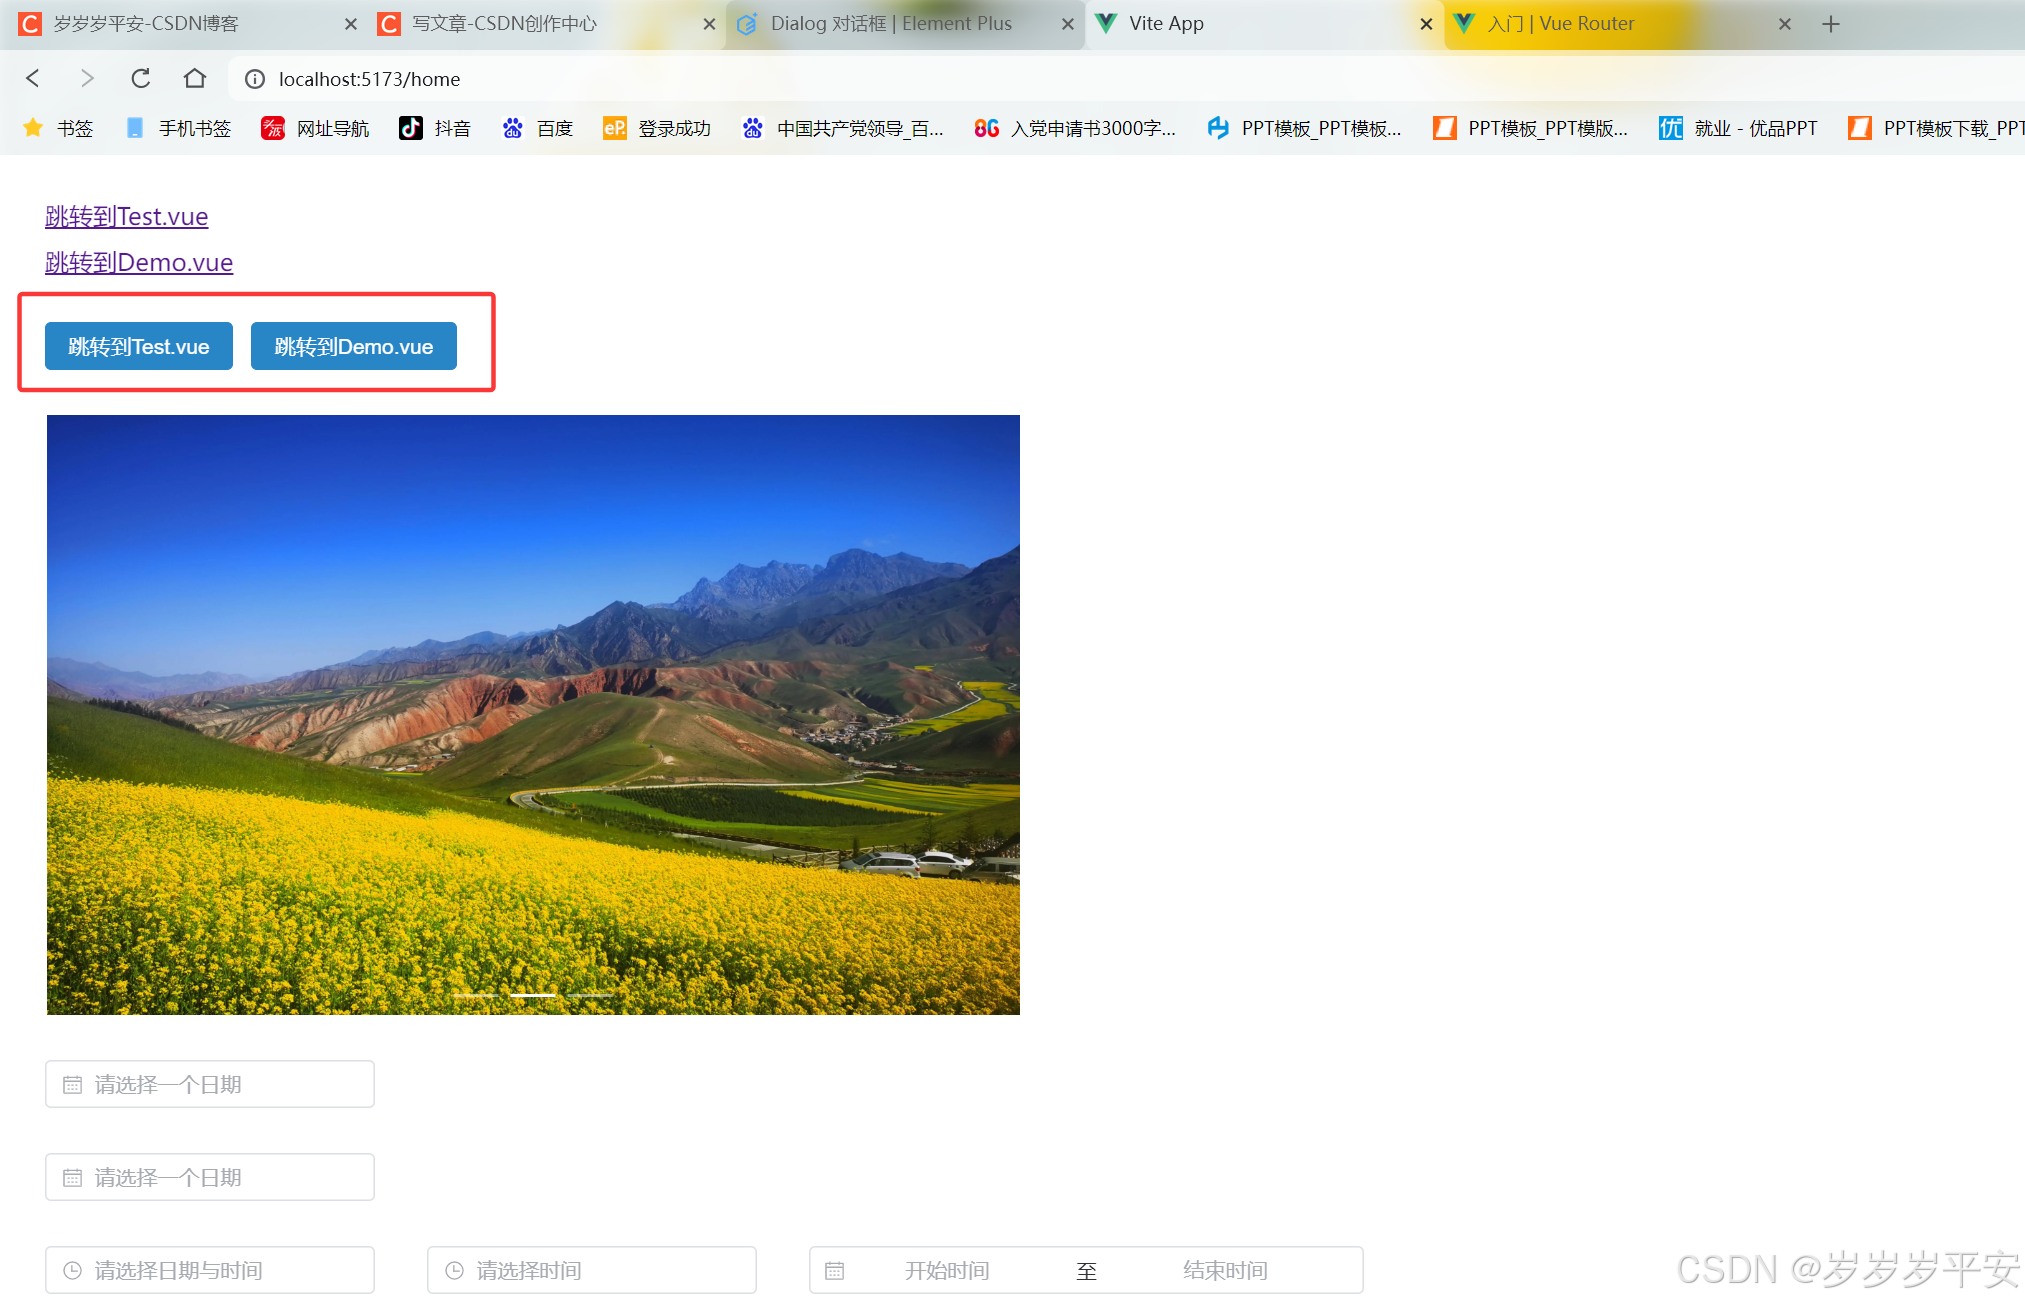
<3>编程式路由跳转。
导入router对象。
router.push("/xxx")实现编程式路由跳转。
<div style="margin: 30px"><el-button type="primary" v-on:click="router.push('/test')">跳转到Test.vue</el-button><el-button type="primary" v-on:click="router.push('/demo')">跳转到Demo.vue</el-button>
</div>
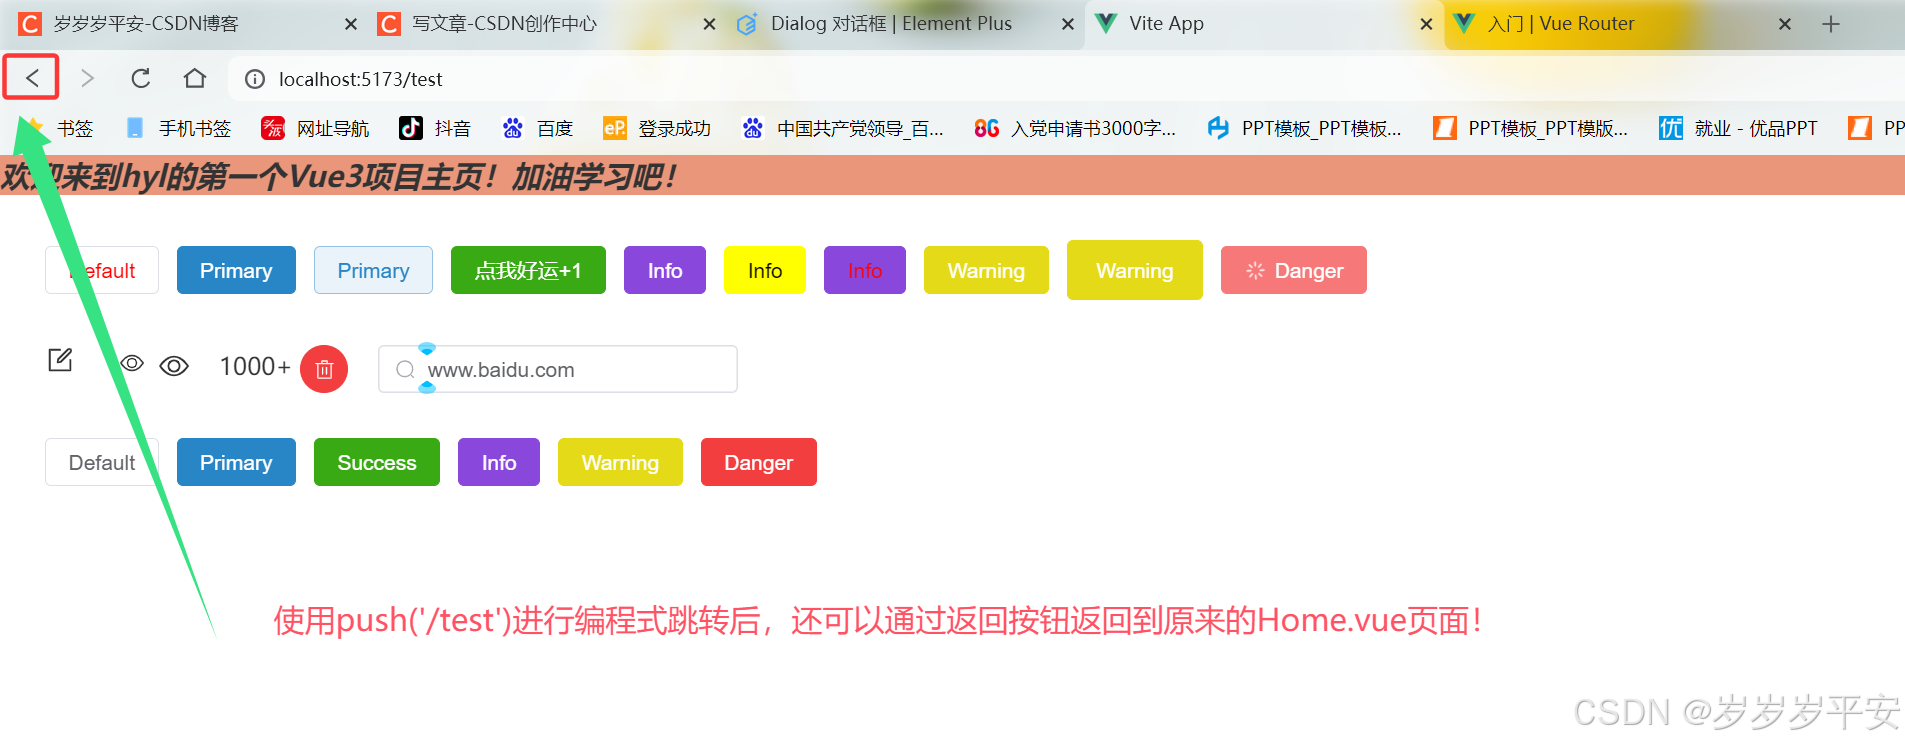
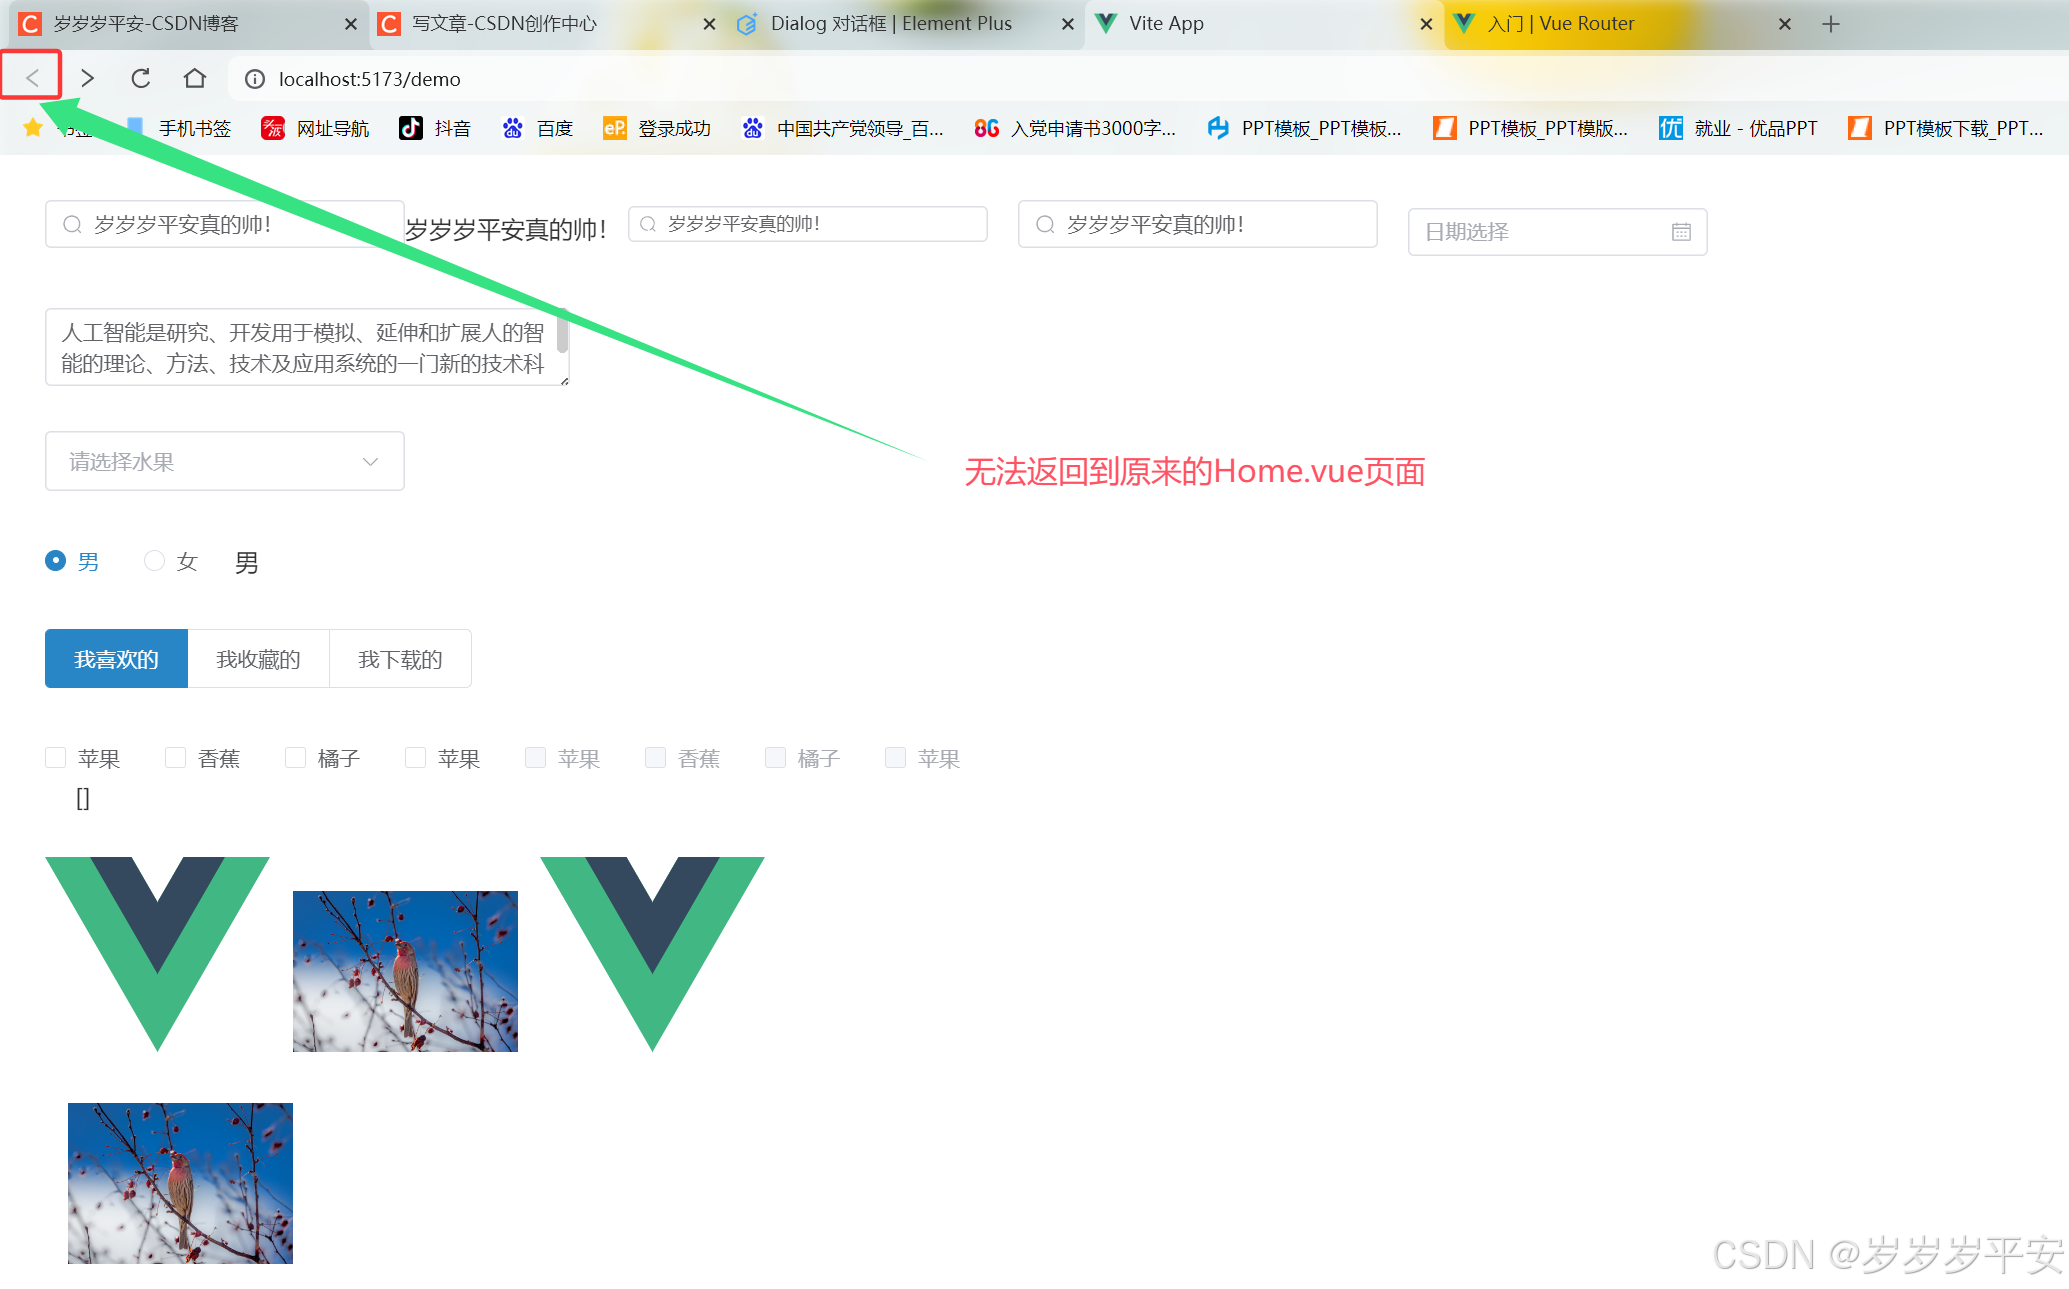
router.replace("/xxx")实现编程式路由跳转。
- 原理:replace('/xxx')是把当前的路由替换,而不是在路由表中添加一个新路由。所以无法返回原来的页面。而使用push('/xxx')完成路由跳转后,还可以返回原来的页面。
<div style="margin: 30px"><el-button type="primary" v-on:click="router.push('/test')">跳转到Test.vue</el-button><el-button type="primary" v-on:click="router.replace('/demo')">跳转到Demo.vue</el-button>
</div>


(3)设置默认页面的路由('/')跳转。
<1>重新配置Home.vue的路由。
import { createRouter, createWebHistory } from 'vue-router'const router = createRouter({history: createWebHistory(import.meta.env.BASE_URL),routes: [{path: '/home', name: 'home', component: () => import('../views/Home.vue')},{path: '/test', name: 'test', component: () => import('../views/Test.vue')},{path: '/demo', name: 'demo', component: () => import('../views/Demo.vue')},],
})export default router
<2>设置'/'的路由跳转。(redirect重定向)
import { createRouter, createWebHistory } from 'vue-router'const router = createRouter({history: createWebHistory(import.meta.env.BASE_URL),routes: [{path:'/',redirect:'/home'},{path: '/home', name: 'home', component: () => import('../views/Home.vue')},{path: '/test', name: 'test', component: () => import('../views/Test.vue')},{path: '/demo', name: 'demo', component: () => import('../views/Demo.vue')},],
})export default router
(4)路由跳转时—传参。(核心)
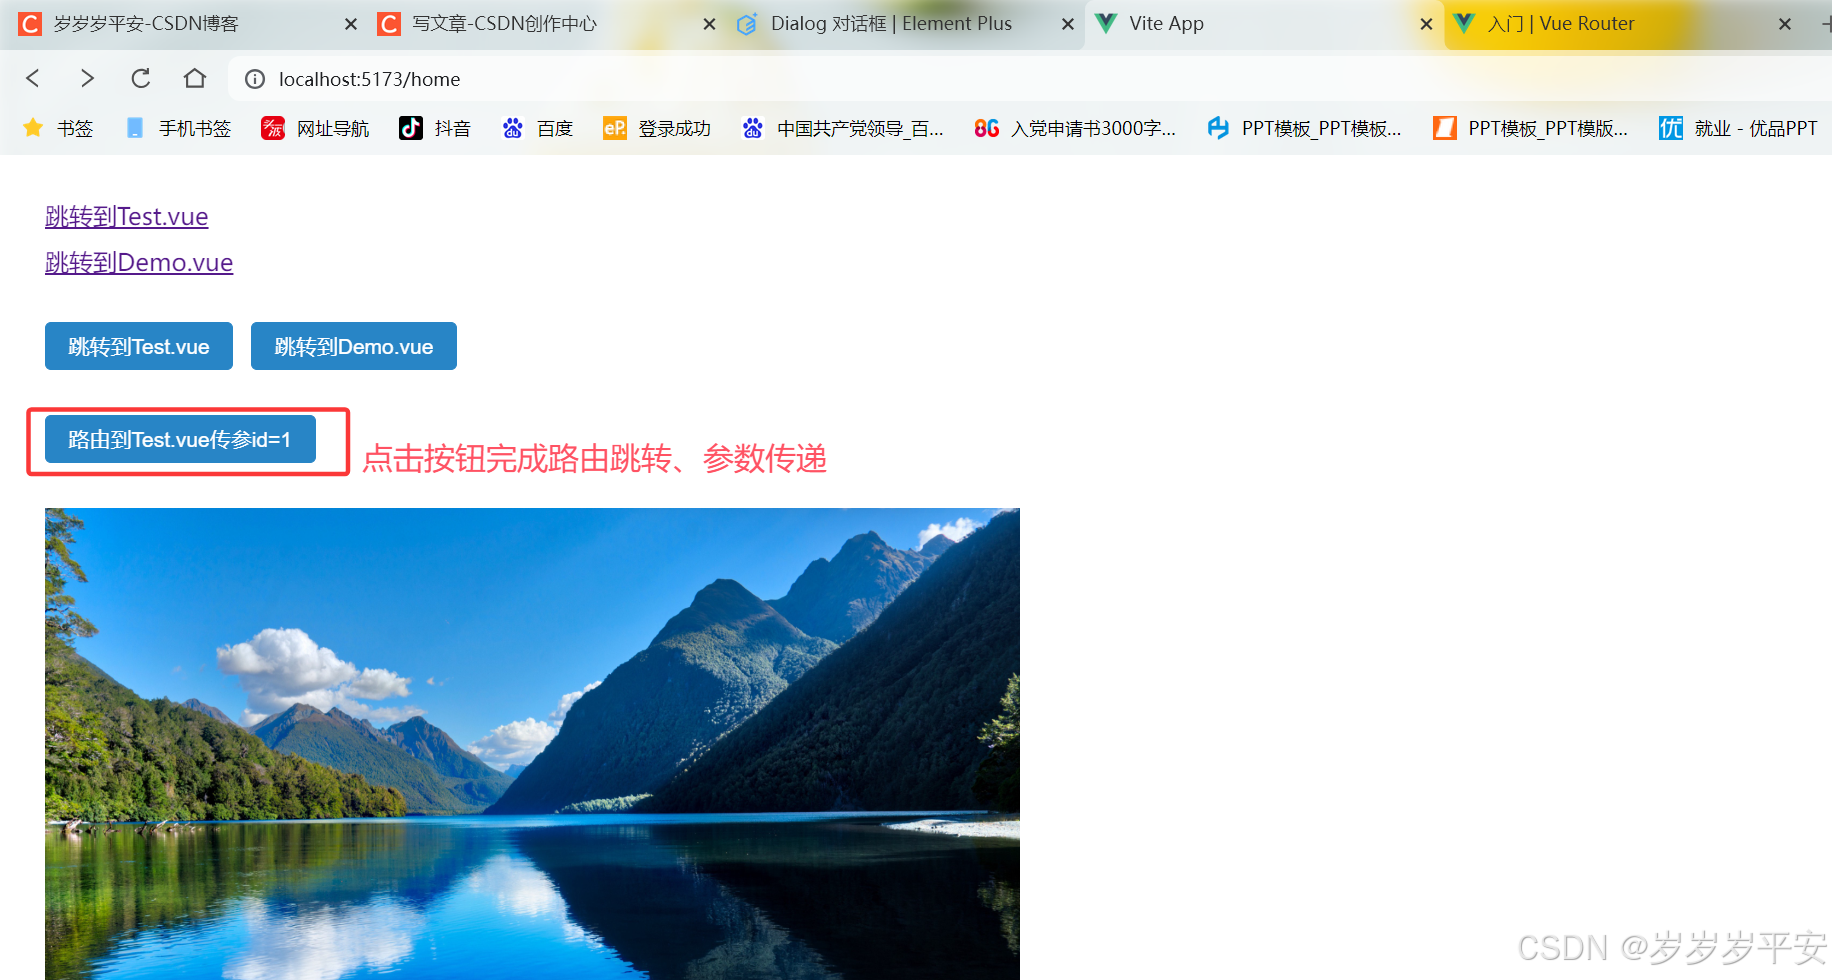
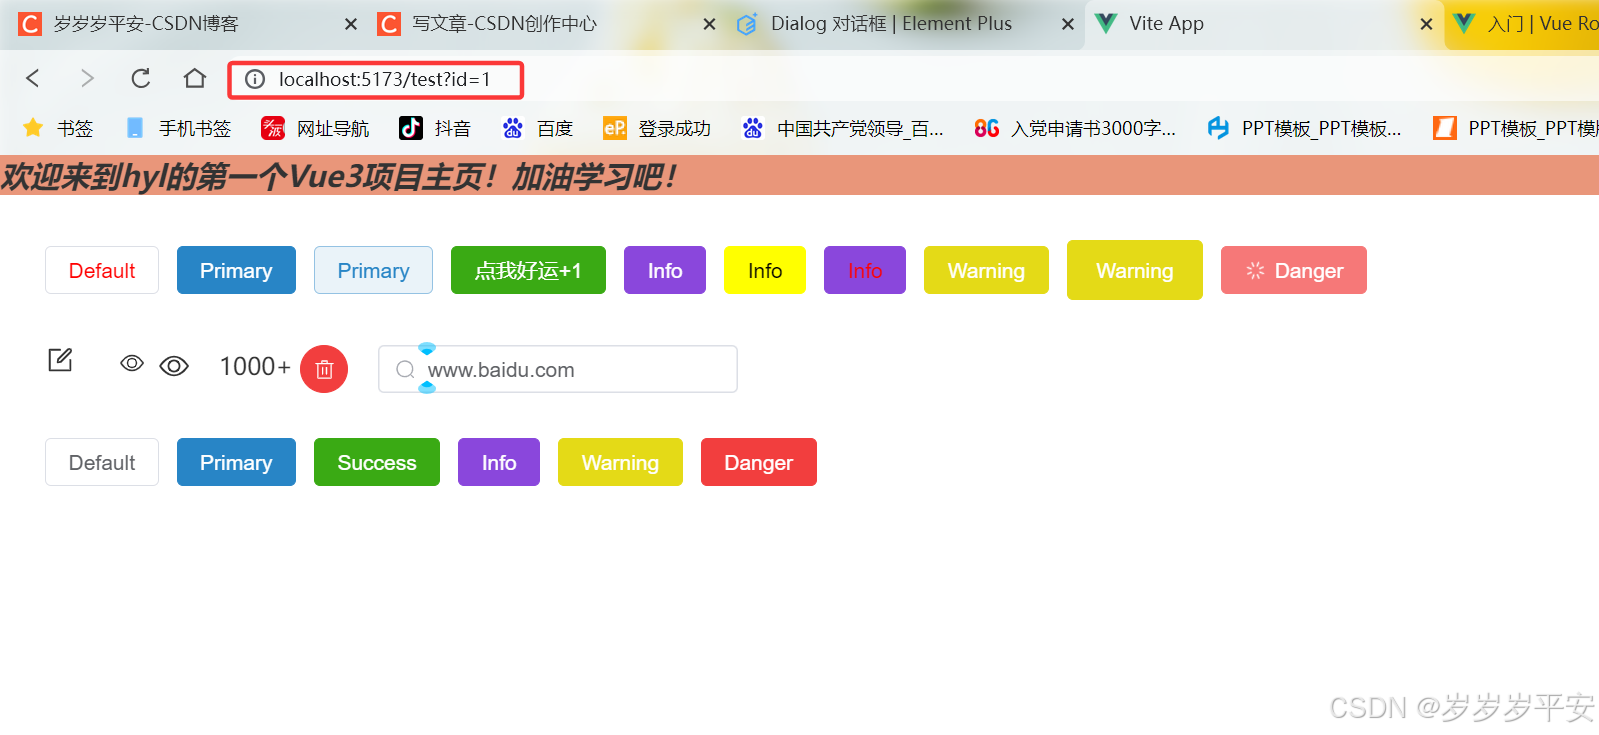
<1>路由跳转+传递单个参数id=1。
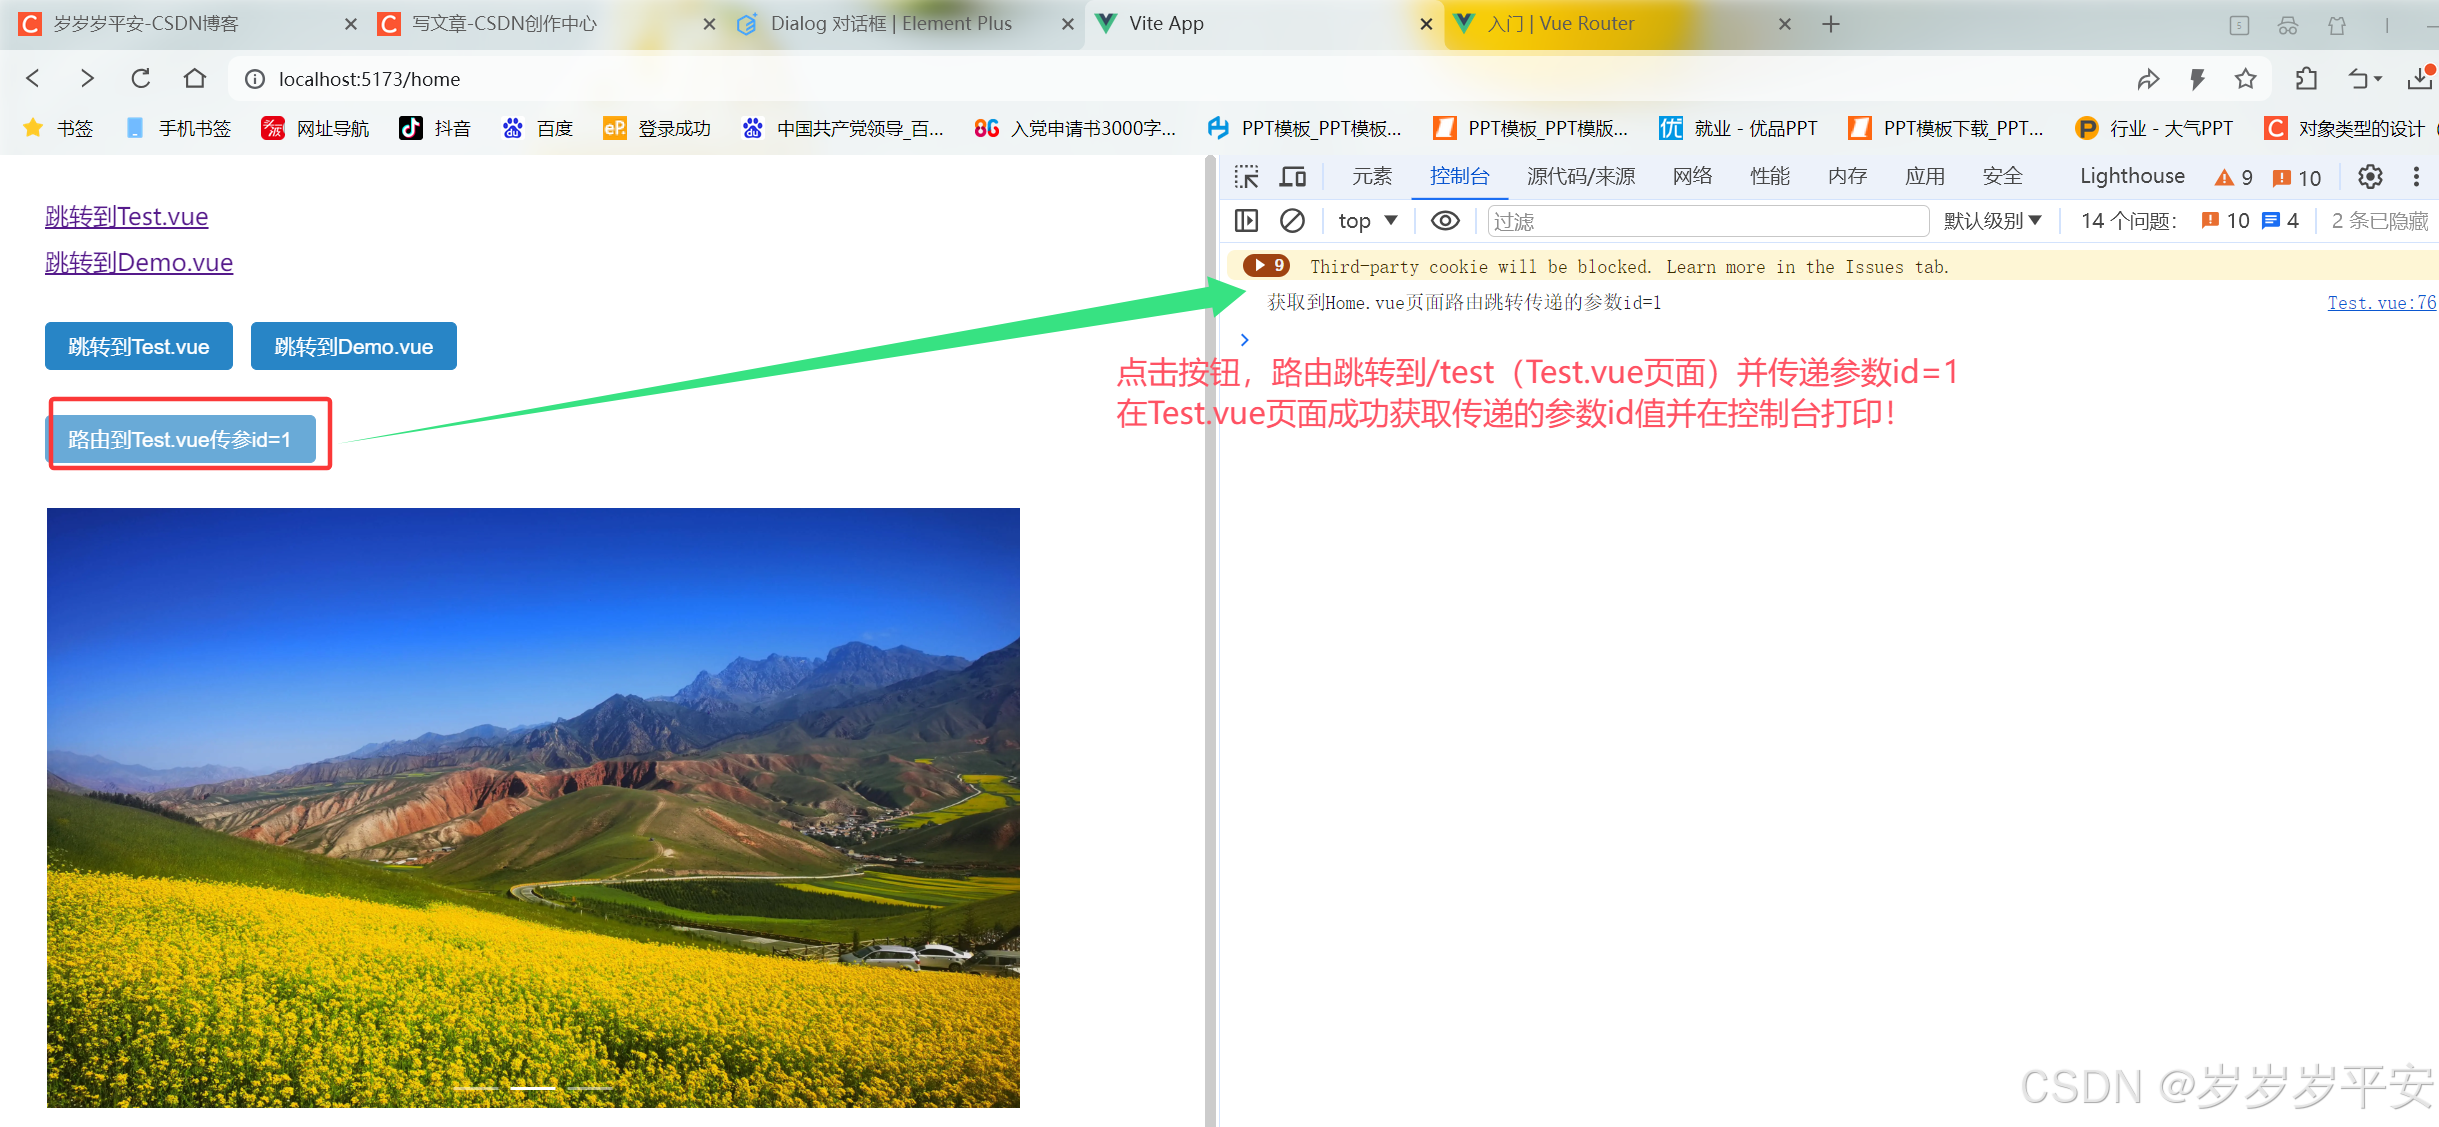
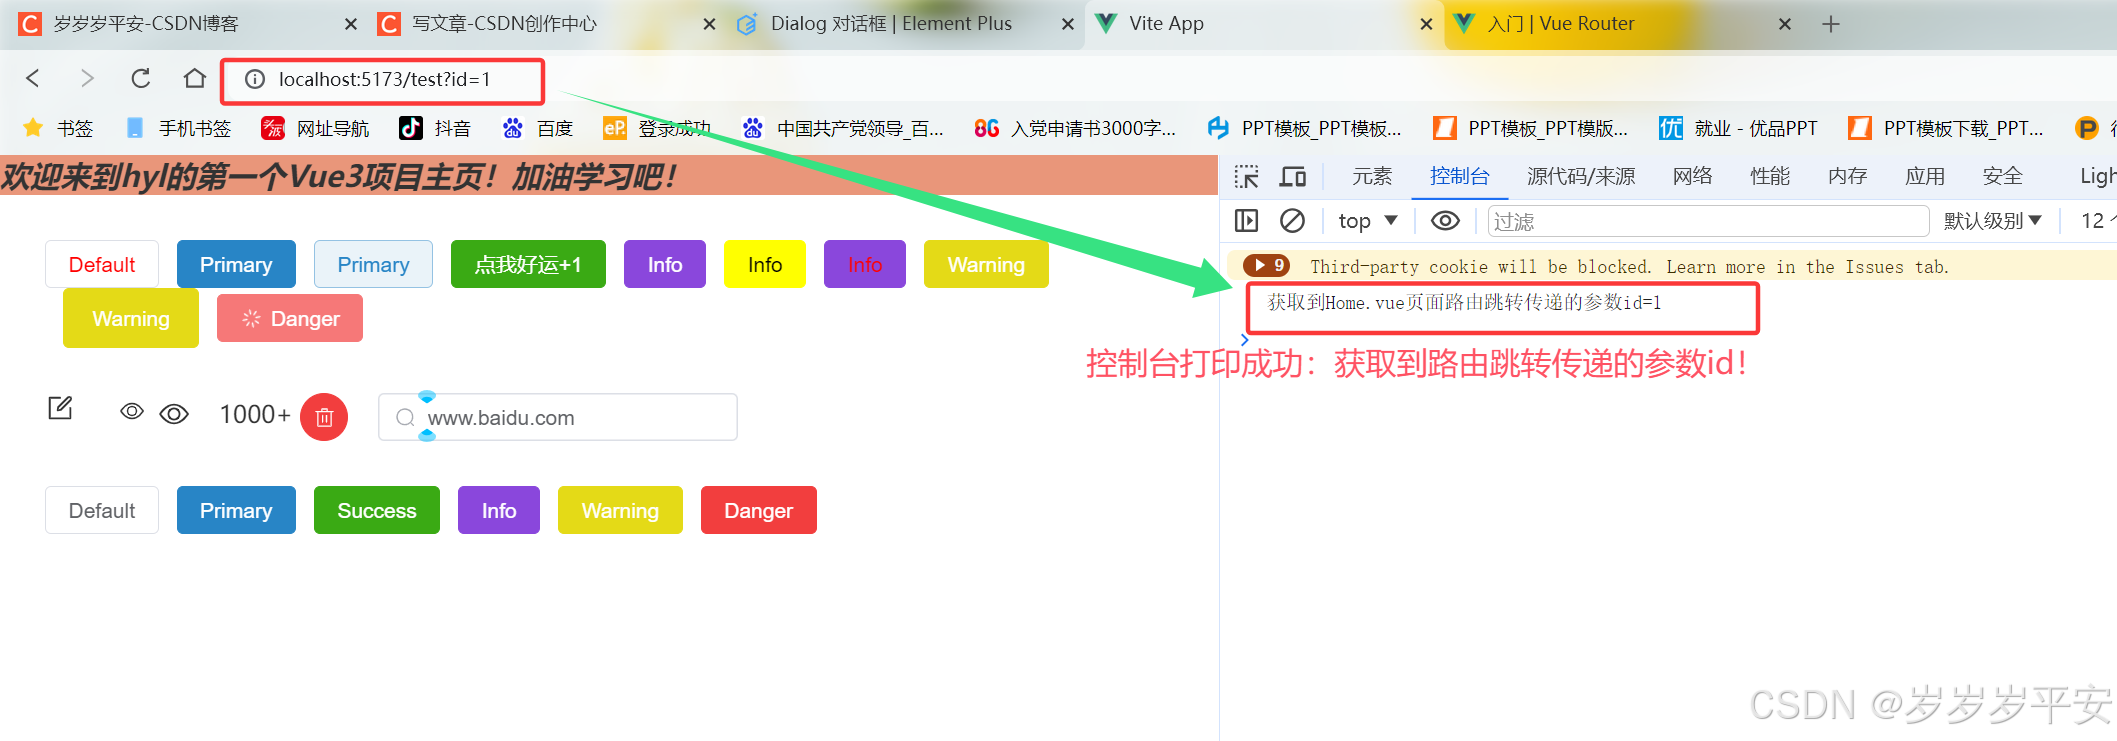
手动拼接方式('/xxx?id=1')。(query类型参数)
<div style="margin: 30px"><el-button type="primary" v-on:click="router.push('/test?id=1')">路由到Test.vue传参id=1</el-button>
</div>
import router from "@/router/index.js";
获取路由跳转时的传参。(链式获取传参的query对象)
<script setup>import {reactive} from "vue";
import router from "@/router/index.js";//第二种定义数据的方式
const data = reactive({id:router.currentRoute.value.query.id,
})//测试是否获取到路由传递的传参值
console.log('获取到Home.vue页面路由跳转传递的参数id='+data.id)</script>
<2>路由跳转+传递多个参数id=1&username=张三。
- Home.vue页面添加代码示例。
<div style="margin: 30px"><el-button type="primary" v-on:click="router.push('/test?id=1')">路由到Test.vue传参id=1</el-button><el-button type="primary" v-on:click="router.push('/test?id=1&username=张三')">路由到Test.vue传参id=1&username=张三</el-button>
</div>
import router from "@/router/index.js";
- 页面渲染效果。
- Test.vue页面添加代码示例。
<script setup>import {reactive} from "vue";
import router from "@/router/index.js";//第二种定义数据的方式
const data = reactive({id:router.currentRoute.value.query.id,username:router.currentRoute.value.query.username,
})//测试是否获取到路由传递的传参值
console.log('获取到Home.vue页面路由跳转传递的参数id='+data.id)
console.log('获取到Home.vue页面路由跳转传递的参数username='+data.username)</script>
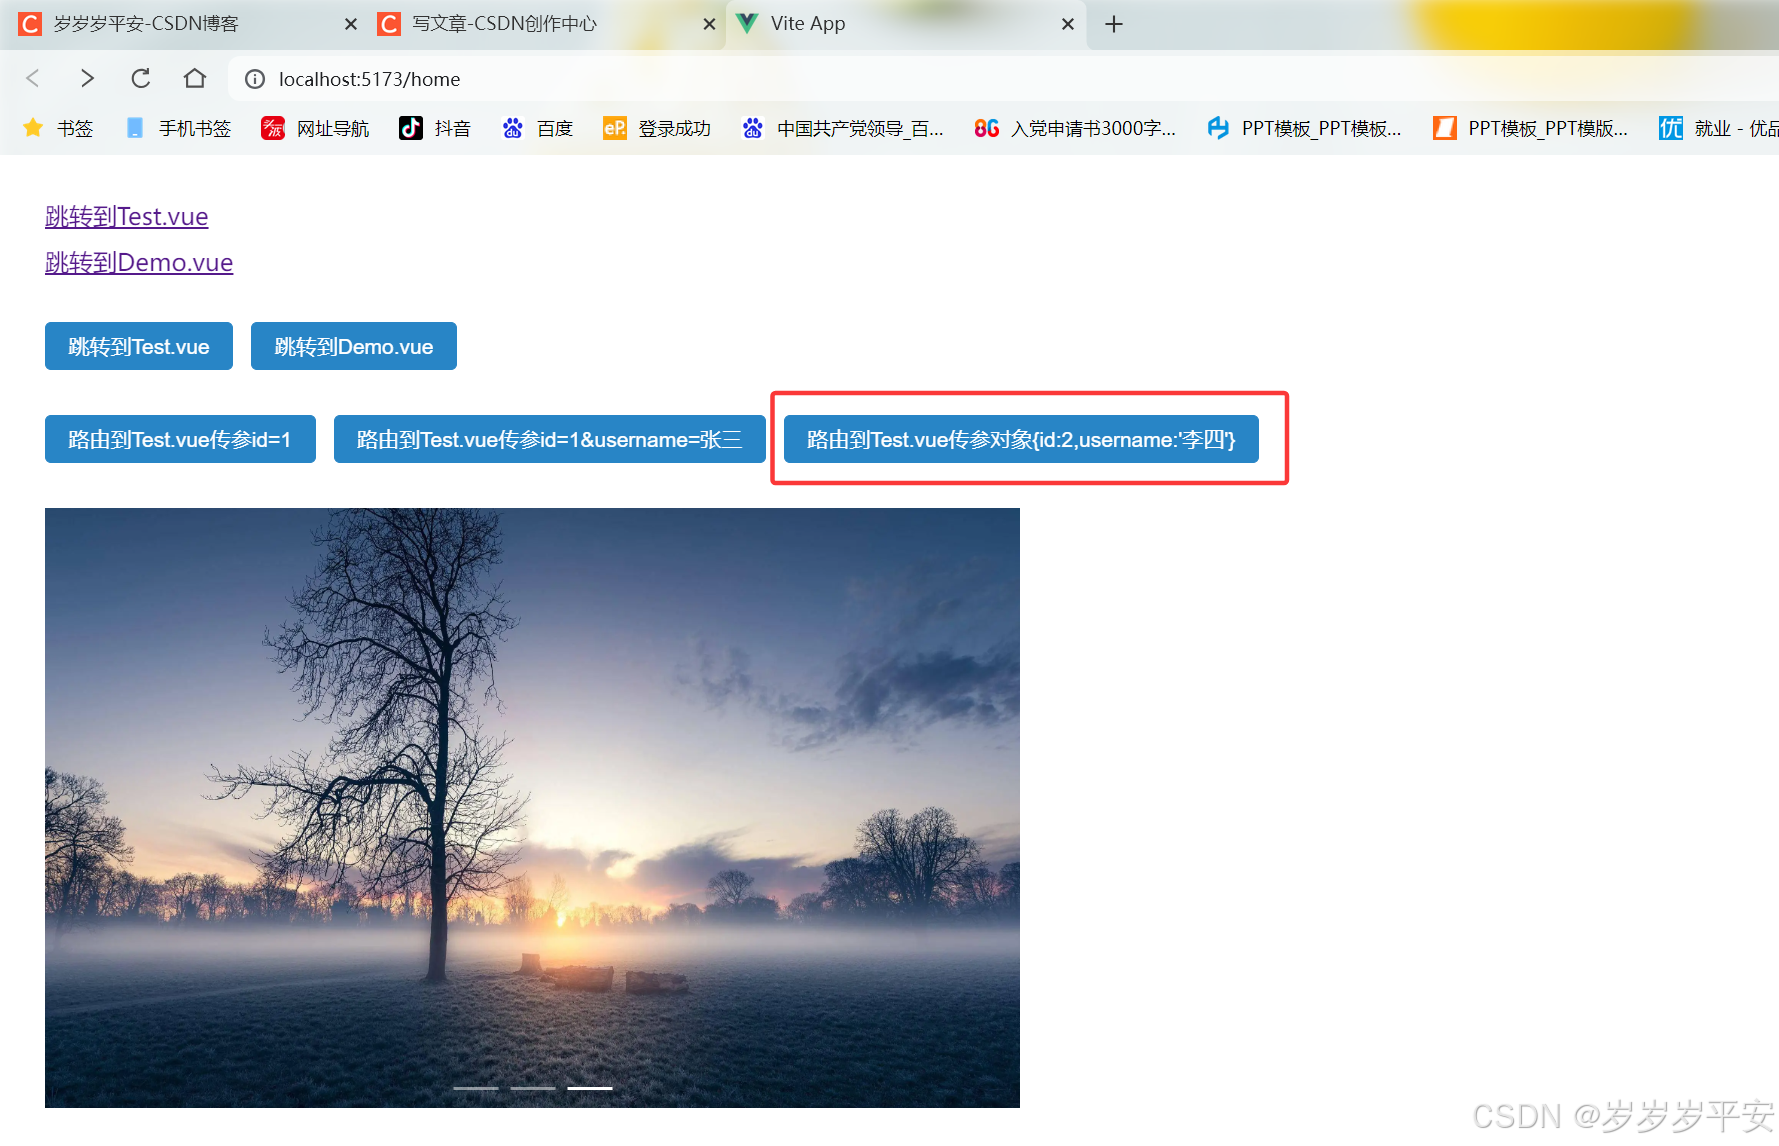
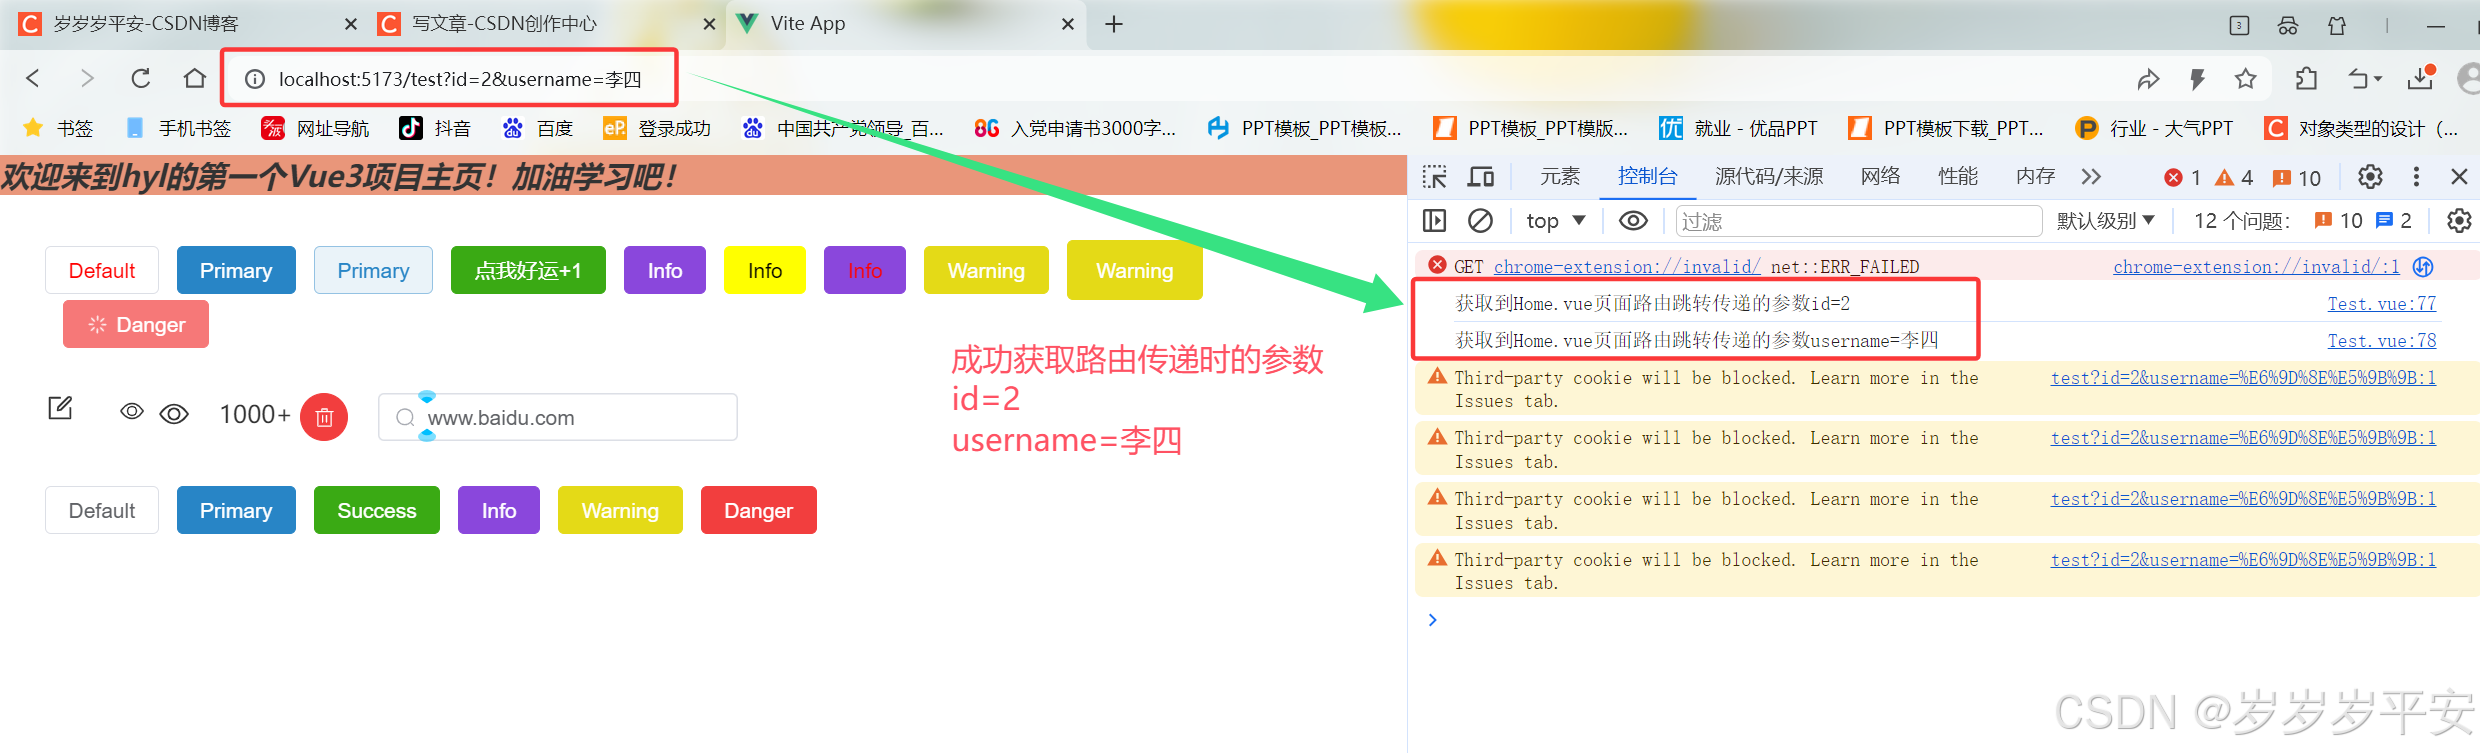
<3>路由跳转的多参数传递。(设置对象方式传递)
<el-button type="primary" v-on:click="router.push( {path:'/test',query:{'id':2,'username':'李四'} } )">路由到Test.vue传参id=2&username=李四</el-button>import router from "@/router/index.js";
- 控制台打印获取到对应的多个参数传递的值。


(5)预告:《Vue3集成Vue-Router(下)》博客中内容。
嵌套路由。
路由守卫。
404NotFound页面的设计与配置路由。