webase全家桶搭建教程过程记录+bug解决
前置条件
Ubuntu20
基础环境搭建
检查Java
java -version检查mysql(Ubuntu部署MySQL)
mysql --version在装MySQL的时候发现了一个问题
就是不管怎么sudo mysql_secure_installation,,第二步设置密码就是不对,解决方案如下
用这个命令进入mysql
sudo mysql在sql命令行输入以下命令回车,你就可以把密码改成mynewpassword(自己的密码)
ALTER USER 'root'@'localhost' IDENTIFIED WITH mysql_native_password by 'mynewpassword';exit回到终端命令行,输入:
sudo mysql_secure_installation 里面就是这五个步骤
(1)安装验证密码插件。(2)设置root管理员在数据库中的专有密码。(3)随后删除匿名账户,并使用root管理员从远程登录数据库,以确保数据库上运行的业务的安全性。(4)删除默认的测试数据库,取消测试数据库的一系列访问权限。(5)刷新授权列表,让初始化的设定立即生效。
检查Python
使用Python3.6或以上版本:
python --version
# python3时
python3 --version
PyMySQL部署(Python3.6+)
Python3.6及以上版本,需安装PyMySQL依赖包
sudo apt-get install -y python3-pip
sudo pip3 install PyMySQL
这个时候会遇到一个bug
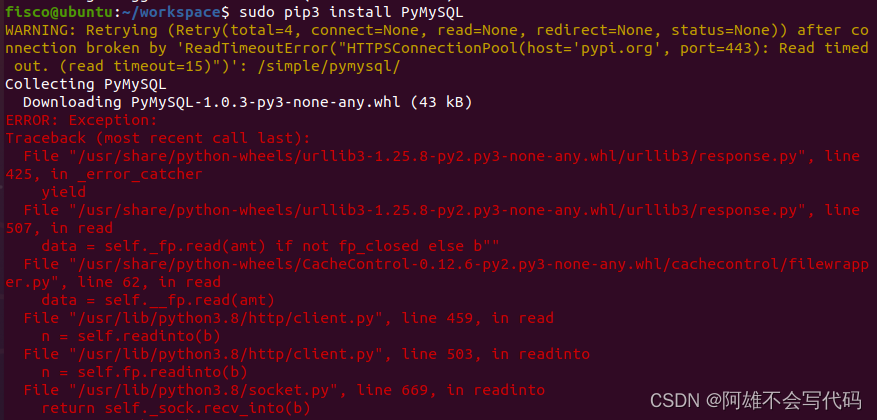
这个bug是因为超时了,解决方法为多试几次或者换源,这里为了后续方便我们使用换源的方式
pip install requests -i http://mirrors.aliyun.com/pypi/simple/附上其他源:
阿里云 http://mirrors.aliyun.com/pypi/simple/中国科技大学 https://pypi.mirrors.ustc.edu.cn/simple/豆瓣(douban) http://pypi.douban.com/simple/清华大学 https://pypi.tuna.tsinghua.edu.cn/simple/中国科学技术大学 http://pypi.mirrors.ustc.edu.cn/simple/
应用部署
拉取依赖安装包
wget https://osp-1257653870.cos.ap-guangzhou.myqcloud.com/WeBASE/releases/download/v1.5.4/webase-deploy.zip解压安装包
unzip webase-deploy.zip进入目录
cd webase-deploy部署配置
vi common.properties[common]# Webase Subsystem Version (v1.1.0 or above)
webase.web.version=v1.5.4
webase.mgr.version=v1.5.4
webase.sign.version=v1.5.3
webase.front.version=v1.5.4#####################################################################
# if use [installDockerAll] to install WeBASE by docker
# if use [installAll] or [installWeBASE], ignore configuration here# 1: enable mysql in docker
# 0: mysql run in host, required fill in the configuration of webase-node-mgr and webase-sign
docker.mysql=1# if [docker.mysql=1], mysql run in host (only works in [installDockerAll])
# run mysql 5.6 by docker
docker.mysql.port=23306
# default user [root]
docker.mysql.password=123456
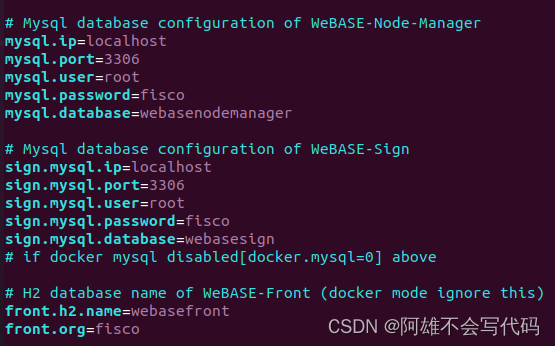
###################################################################### Mysql database configuration of WeBASE-Node-Manager
mysql.ip=localhost
mysql.port=3306
mysql.user=root
mysql.password=fisco
mysql.database=webasenodemanager# Mysql database configuration of WeBASE-Sign
sign.mysql.ip=localhost
sign.mysql.port=3306
sign.mysql.user=root
sign.mysql.password=fisco
sign.mysql.database=webasesign
# if docker mysql disabled[docker.mysql=0] above# H2 database name of WeBASE-Front (docker mode ignore this)
front.h2.name=webasefront
front.org=fisco# WeBASE-Web service port
web.port=5000
# enable WeBASE-Web overview pages for mobile phone(docker mode not support h5 yet)
# (0: disable, 1: enable)
web.h5.enable=1# WeBASE-Node-Manager service port
mgr.port=5001# WeBASE-Front service port
front.port=5002# WeBASE-Sign service port
sign.port=5004# Node listening IP
node.listenIp=127.0.0.1
# Node p2p service port
node.p2pPort=30300
# Node channel service port
node.channelPort=20200
# Node rpc service port
node.rpcPort=8545# Encrypt type (0: standard, 1: guomi)
encrypt.type=0
# ssl encrypt type (0: standard ssl, 1: guomi ssl)
# only guomi type support guomi ssl
encrypt.sslType=0# Use existing chain or not (yes/no)
if.exist.fisco=yes### if build new chain, [if.exist.fisco=no]
# Configuration required when building a new chain
# Fisco-bcos version
fisco.version=2.8.0
# Number of building nodes (default value: 2)
node.counts=nodeCounts### if using exited chain, [if.exist.fisco=yes]
# The path of the existing chain, the path of the start_all.sh script
# Under the path, there should be a 'sdk' directory where the SDK certificates (ca.crt, sdk.crt, node.key and gm directory(gm ssl)) are stored
fisco.dir=/home/fisco/workspace/nodes/127.0.0.1
# Node directory in [fisco.dir] for WeBASE-Front to connect
# example: 'node.dir=node0' would auto change to '/data/app/nodes/127.0.0.1/node0'
# Under the path, there is a conf directory where node certificates (ca.crt, node.crt and node.key) are stored
node.dir=node0
这里我修改了
1、数据库账号密码
2、链条路径
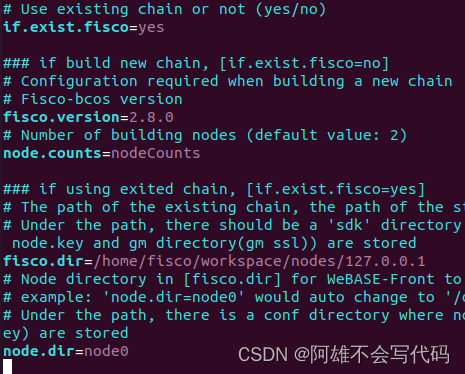
因为我有自己的链,所以我就使用了我搭建的链目录,目录下一定要存在SDK文件夹一般都是ip文件夹
部署并启动所有服务
python3 deploy.py installAll检查所有的进程服务
ps -ef | grep nodeps -ef | grep webase.front ps -ef | grep webase.node.mgrps -ef | grep nginx ps -ef | grep webase.sign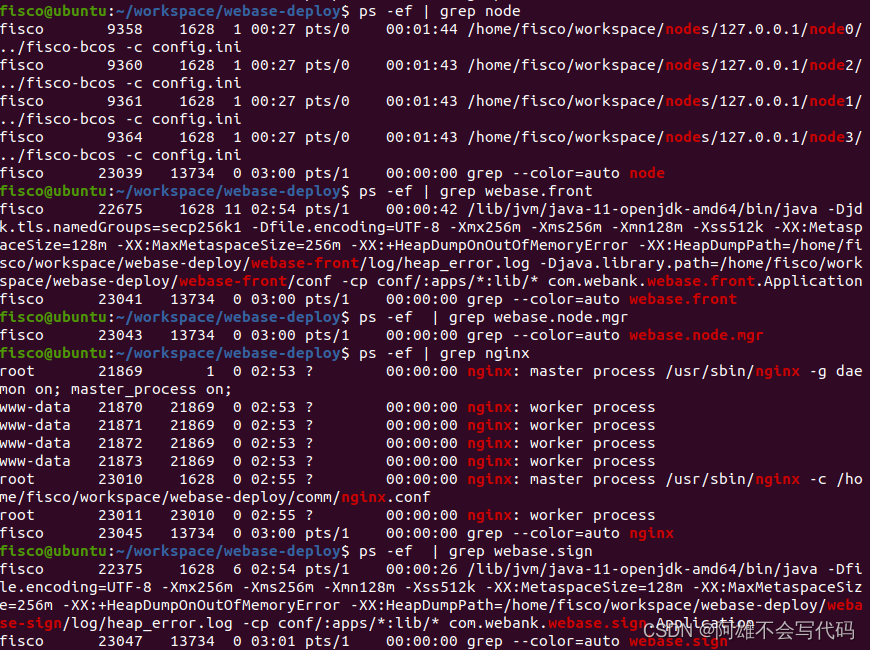
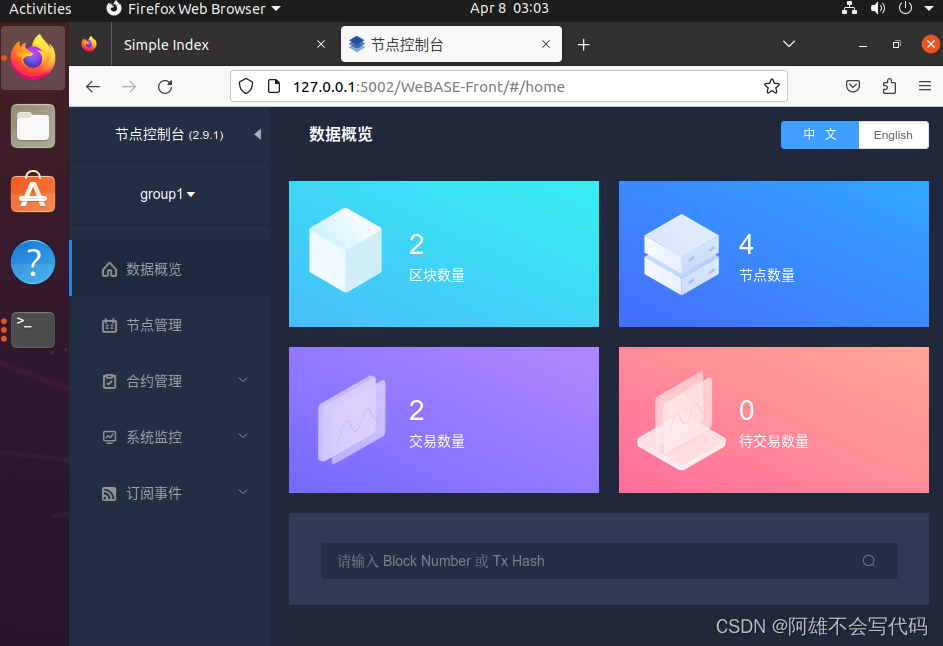
访问浏览器就可以啦
http://{deployIP}:{webPort}
示例:http://localhost:5000