1. 安装和配置
<dependency>
<groupId>org.springframework.boot</groupId>
<artifactId>spring-boot-starter-amqp</artifactId>
</dependency><dependency>
<groupId>com.fasterxml.jackson.core</groupId>
<artifactId>jackson-databind</artifactId>
</dependency>
1.2 yml 配置
### 生产端的配置
spring:rabbitmq:host: localhostport: 5672virtual-host: / # 虚拟主机username: guestpassword: guestpublisher-returns: true  #确认消息已经发送到队列,生产上无需开启# simple:同步等待confirm结果,直到超时#开启消息确认 :correlated:异步回调,MQ返回结果时会回调这个ComfirmCallbackpublisher-confirm-type: correlated #确认消息已发送到交换机
## 生产端的配置
spring:rabbitmq:host: localhostport: 5672virtual-host: / # 虚拟主机username: guestpassword: guestpublisher-returns: true  #确认消息已经发送到队列,生产上无需开启# simple:同步等待confirm结果,直到超时#开启消息确认 :correlated:异步回调,MQ返回结果时会回调这个ComfirmCallbackpublisher-confirm-type: correlated #确认消息已发送到交换机
2.生产端的消息确认发送代码
/*** (1) RabbitTemplate.ConfirmCallback 这个接口是用来确定消息是否到达交换器的* (2) RabbitTemplate.ReturnsCallback 这个则是用来确定消息是否到达队列的,未到达队列时会被调用*/
@Service
@Slf4j
public class RabbitMqConfirmCallback implements RabbitTemplate.ConfirmCallback,RabbitTemplate.ReturnsCallback{private RabbitTemplate rabbitTemplate;public void queueConfirm(Map<String, String> map) {// 第一个参数表示交换机,第二个参数表示 routing key,第三个参数即消息rabbitTemplate.convertAndSend("confirm_exchange", "confirm_key1", map, new CorrelationData("111"));// 故意输入一个不存在的交换机rabbitTemplate.convertAndSend("confirm_exchange_2222", "confirm_key1", map, new CorrelationData("22222"));// 故意输入一个不存在的队列rabbitTemplate.convertAndSend("confirm_exchange", "confirm_key1_333333", map, new CorrelationData("3333"));log.info("Confirm -- 消息--发送结束");}/*** 需要给ConfirmCallback赋值 不然不会走回调方法,默认是null* //将当前类的实例设置为 RabbitMQ 的确认回调处理器,跟下面的confirm方法联合使用,* // 还需要打开配置:spring: rabbitmq: publisher-confirm-type: correlated*/@PostConstructpublic void init(){rabbitTemplate.setConfirmCallback(this);rabbitTemplate.setReturnsCallback(this);}@Autowiredpublic RabbitMqConfirmCallback(RabbitTemplate rabbitTemplate) {this.rabbitTemplate = rabbitTemplate;
//        rabbitTemplate.setConfirmCallback(this);}/** 此方法用于监听消息是否发送到交换机* 回调*/@Overridepublic void confirm(CorrelationData correlationData, boolean ack, String cause) {if (ack) {log.info("confirm -- 监听消息成功发送到交换机--回调id = {}", correlationData);} else {log.info("confirm -- 消息没有发送到交换机回调id= {},消息发送失败:{}。", correlationData, cause);}}@Overridepublic void returnedMessage(ReturnedMessage returnedMessage) {log.info("消息未到达队列 --- returnedMessage= " + returnedMessage);}
}
2.2 生产端的截图

3.消费端代码
@Component
@Slf4j
public class RabbitConfirmConsumer {// 交换机public static final String confirm_exchange_name = "confirm_exchange";// 队列public static final String confirm_queue_name="confirm_queue";// routingkeypublic static final String confirm_routing_key = "confirm_key1";// 声明交换机@Bean("confirmExchange")public DirectExchange confirmExchange(){return new DirectExchange(confirm_exchange_name);}// 声明队列@Bean("confirmQueue")public Queue confirmQueue() {return QueueBuilder.durable(confirm_queue_name).build();}// 绑定队列到交换机@Beanpublic Binding queueBingExchange(Queue confirmQueue,DirectExchange confirmExchange){return BindingBuilder.bind(confirmQueue).to(confirmExchange).with(confirm_routing_key);}/*** ack:成功处理消息,RabbitMQ从队列中删除该消息* nack:消息处理失败,RabbitMQ需要再次投递消息* reject:消息处理失败并拒绝该消息,RabbitMQ从队列中删除该消息*/@RabbitListener(queues = "confirm_queue")public void consumerConfirm(Message message, Channel channel, @Payload Map<String, Object> map,@Header(AmqpHeaders.DELIVERY_TAG) long tag) throws IOException {//获取消息的唯一标记long deliveryTag = message.getMessageProperties().getDeliveryTag();log.info("接收的消息为:{},消息的唯一标记={}, 直接注入的tag= {}",message, deliveryTag, tag);if(message.getBody() != null){//获取消息的内容byte[] body = message.getBody();//basicAck:表示成功确认,使用此回执方法后,消息会被rabbitmq broker 删除。channel.basicAck(deliveryTag,false);//false 表示仅确认当前消息消费成功log.info("接收的消息为:{}", map);}else{channel.basicReject(message.getMessageProperties().getDeliveryTag(),true);log.info("未消费数据");}}}
3.2消费端截图
 4 消费端重试机制
@Service
@Slf4j
public class RabbitRetryConsumer {@Beanpublic Queue retryQueue(){Map<String,Object> params = new HashMap<>();return QueueBuilder.durable("retry_queue").withArguments(params).build();}@Beanpublic TopicExchange retryTopicExchange(){return new TopicExchange("retry_exchange",true,false);}//队列与交换机进行绑定@Beanpublic Binding BindingRetryQueueAndRetryTopicExchange(Queue retryQueue, TopicExchange retryTopicExchange){return BindingBuilder.bind(retryQueue).to(retryTopicExchange).with("retry_key");}int count  = 0;//测试重试,需要在yml配置 retry@RabbitListener(queues = "retry_queue")public void retryConsumer(Map<String, String> map, Channel channel, @Header(AmqpHeaders.DELIVERY_TAG) long tag) throws Exception {log.info("retryConsumer 重试次数 = {},重试接收数据为:{}",count++, map);int i = 10 /0;channel.basicAck(tag,false);}}
4.2 重试机制截图

5. 限流设置--消费端
spring:rabbitmq:listener:simple:acknowledge-mode: manual # 开启手动确认模式prefetch: 5 #控制消费者从队列中预取(prefetch)消息的数量,以此来实现流控制
5.1 生产端--发送19条信息
@GetMapping("/xianliu")public String xianliuTest(){for(int i = 1; i < 20; i++){Map<String, String> map = new HashMap<>();map.put("key","限流测试--" + i);rabbitMqProducer.xianliuTest(map);}return "限流测试发送成功";}/**** 限流消息的发送测试*/public void xianliuTest(Map<String, String> map) {// 第一个参数表示交换机,第二个参数表示 routing key,第三个参数即消息rabbitTemplate.convertAndSend("confirm_exchange", "confirm_key1", map, new CorrelationData("111"));}
5.2 消费端
/*** ack:成功处理消息,RabbitMQ从队列中删除该消息* nack:消息处理失败,RabbitMQ需要再次投递消息* reject:消息处理失败并拒绝该消息,RabbitMQ从队列中删除该消息*/@RabbitListener(queues = "confirm_queue")public void consumerConfirm(Message message, Channel channel, @Payload Map<String, Object> map,@Header(AmqpHeaders.DELIVERY_TAG) long tag) throws IOException {//获取消息的唯一标记long deliveryTag = message.getMessageProperties().getDeliveryTag();log.info("接收的消息为:{},消息的唯一标记={}, 直接注入的tag= {}",message, deliveryTag, tag);if(message.getBody() != null){//basicAck:表示成功确认,使用此回执方法后,消息会被rabbitmq broker 删除。//channel.basicAck(deliveryTag,false);//false 表示仅确认当前消息消费成功log.info("接收的消息为:{}", map);}else{//否定确认//channel.basicNack(deliverTag,false,true);//requeue为false,则变成死信队列channel.basicReject(message.getMessageProperties().getDeliveryTag(),true);log.info("未消费数据");}}
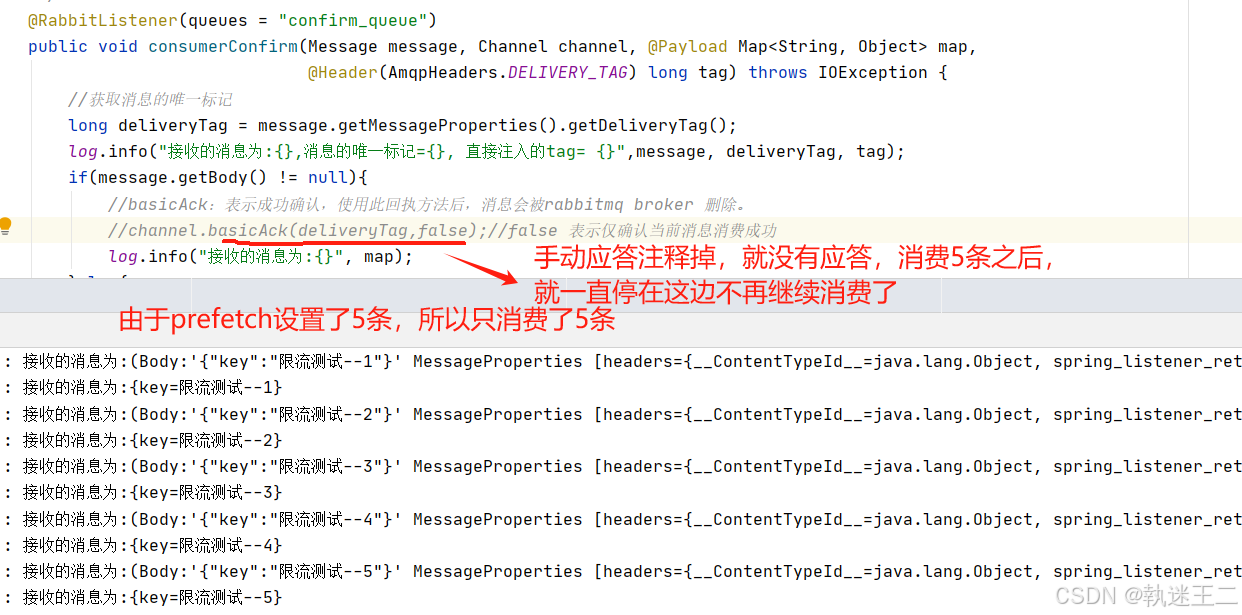
5.3 注释掉channel.basicAck--堵塞了
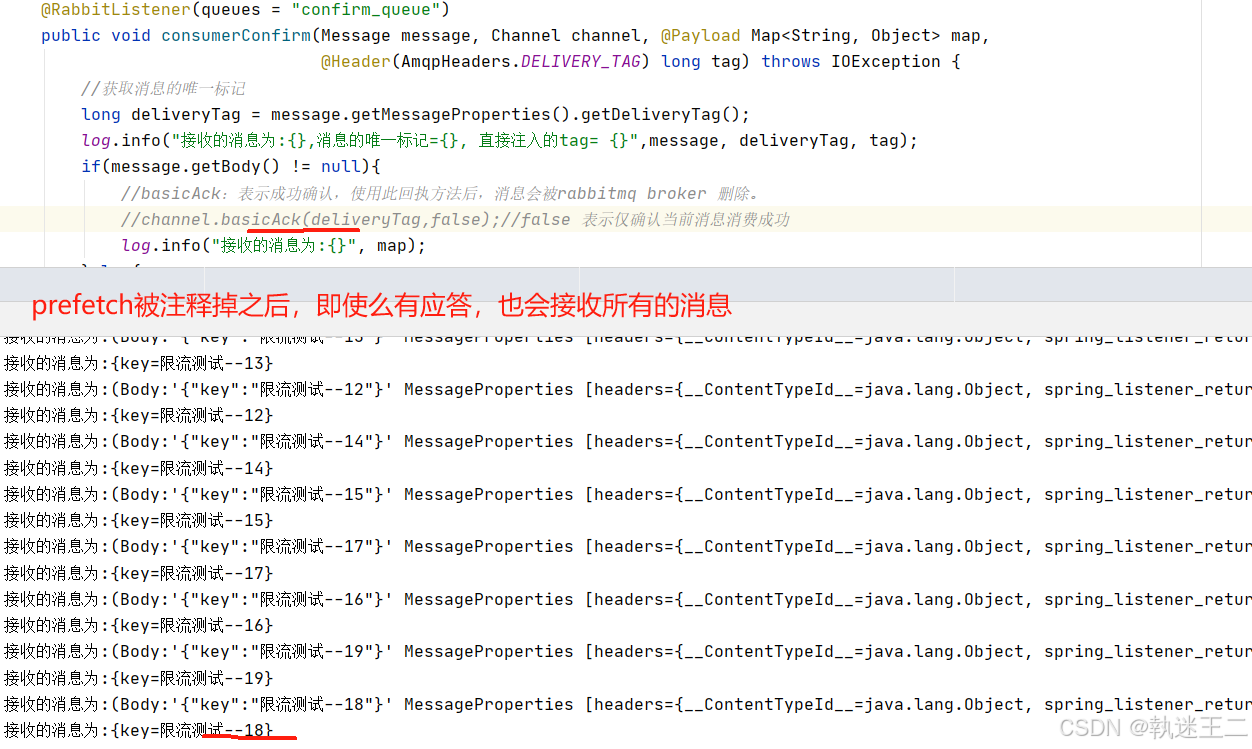
5.4 注释掉了 prefetch -- 19条全部被消费,即使没有ack