【Unity3D】Jobs、Burst并行计算裁剪Texture3D物体
版本:Unity2019.4.0f1
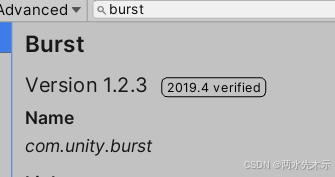
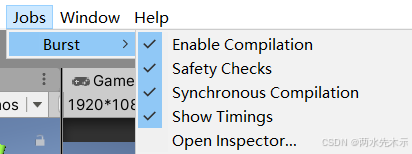
PackageManager下载Burst插件(1.2.3版本)
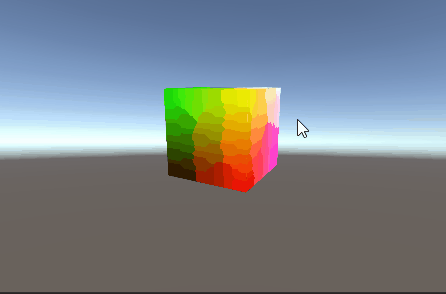
利用如下代码,生成一个Texture3D资源,它只能脚本生成,是一个32*32*32的立方体,导出路径记得改下,不然报错。
using UnityEditor;
using UnityEngine;public class ExampleEditorScript
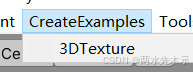
{[MenuItem("CreateExamples/3DTexture")]static void CreateTexture3D(){// 配置纹理int size = 32;TextureFormat format = TextureFormat.RGBA32;TextureWrapMode wrapMode = TextureWrapMode.Clamp;// 创建纹理并应用配置Texture3D texture = new Texture3D(size, size, size, format, false);texture.wrapMode = wrapMode;// 创建 3 维数组以存储颜色数据Color[] colors = new Color[size * size * size];// 填充数组,使纹理的 x、y 和 z 值映射为红色、蓝色和绿色float inverseResolution = 1.0f / (size - 1.0f);for (int z = 0; z < size; z++){int zOffset = z * size * size;for (int y = 0; y < size; y++){int yOffset = y * size;for (int x = 0; x < size; x++){colors[x + yOffset + zOffset] = new Color(x * inverseResolution,y * inverseResolution, z * inverseResolution, 1.0f);}}}// 将颜色值复制到纹理texture.SetPixels(colors);// 将更改应用到纹理,然后将更新的纹理上传到 GPUtexture.Apply();// 将纹理保存到 Unity 项目AssetDatabase.CreateAsset(texture, "Assets/JobsDemo/Example3DTexture.asset");}
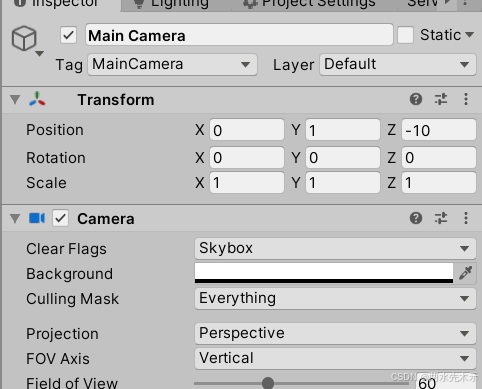
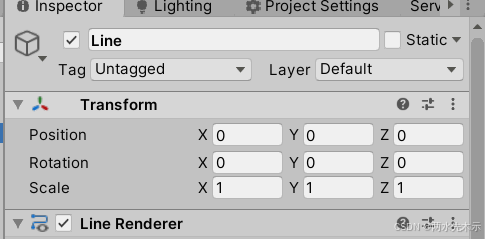
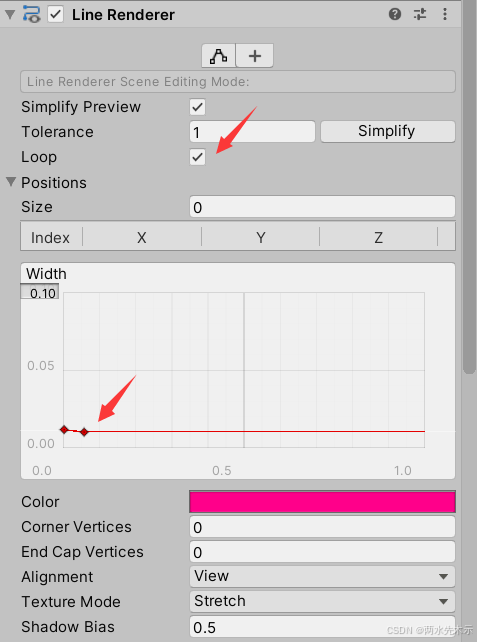
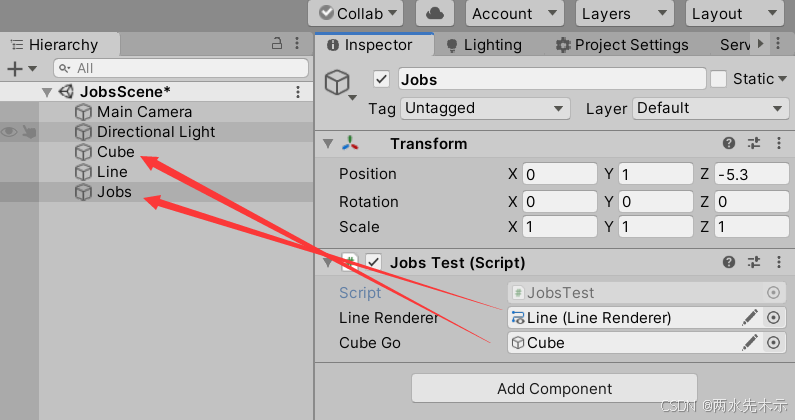
}场景上创建一个Cube和LineRenderer(注意Line的位置要设置到(0,0,0) 如下图 摄像机保持位置(0,1,-10))
新建一个材质球挂到Cube上,Shader代码如下:

Shader "Unlit/VolumeShader"
{Properties{_MainTex("Texture", 3D) = "white" {}_Alpha("Alpha", float) = 0.02_StepSize("Step Size", float) = 0.01}SubShader{Tags { "Queue" = "Transparent" "RenderType" = "Transparent" }Blend One OneMinusSrcAlphaLOD 100Pass{CGPROGRAM#pragma vertex vert#pragma fragment frag#include "UnityCG.cginc"// 最大光线追踪样本数#define MAX_STEP_COUNT 128// 允许的浮点数误差#define EPSILON 0.00001fstruct appdata{float4 vertex : POSITION;};struct v2f{float4 vertex : SV_POSITION;float3 objectVertex : TEXCOORD0;float3 vectorToSurface : TEXCOORD1;};sampler3D _MainTex;float4 _MainTex_ST;float _Alpha;float _StepSize;v2f vert(appdata v){v2f o;// 对象空间中的顶点将成为光线追踪的起点o.objectVertex = v.vertex;// 计算世界空间中从摄像机到顶点的矢量float3 worldVertex = mul(unity_ObjectToWorld, v.vertex).xyz;o.vectorToSurface = worldVertex - _WorldSpaceCameraPos;o.vertex = UnityObjectToClipPos(v.vertex);return o;}float4 BlendUnder(float4 color, float4 newColor){color.rgb += (1.0 - color.a) * newColor.a * newColor.rgb;color.a += (1.0 - color.a) * newColor.a;return color;}fixed4 frag(v2f i) : SV_Target{// 开始在对象的正面进行光线追踪float3 rayOrigin = i.objectVertex;// 使用摄像机到对象表面的矢量获取射线方向float3 rayDirection = mul(unity_WorldToObject, float4(normalize(i.vectorToSurface), 1));float4 color = float4(0, 0, 0, 0);float3 samplePosition = rayOrigin;// 穿过对象空间进行光线追踪for (int i = 0; i < MAX_STEP_COUNT; i++){// 仅在单位立方体边界内累积颜色if (max(abs(samplePosition.x), max(abs(samplePosition.y), abs(samplePosition.z))) < 0.5f + EPSILON){float4 sampledColor = tex3D(_MainTex, samplePosition + float3(0.5f, 0.5f, 0.5f));sampledColor.a *= _Alpha;color = BlendUnder(color, sampledColor);samplePosition += rayDirection * _StepSize;}}return color;}ENDCG}}
}
新建一个空物体Jobs,挂载脚本JobsTest.cs
using System;
using System.Collections;
using System.Collections.Generic;
using Unity.Burst;
using Unity.Collections;
using Unity.Collections.LowLevel.Unsafe;
using Unity.Jobs;
using UnityEngine;public class JobsTest : MonoBehaviour
{private int width, height, depth;public LineRenderer lineRenderer;public GameObject cubeGo;private Transform cubeTrans;private Texture3D _Tex3D;private Color[] colors;private Color[] cacheColor;NativeArray<Color> nativeColors;NativeArray<ColorData> nativeColorDatas;MyJob myJob = new MyJob();private void Awake(){Material mat = cubeGo.GetComponent<MeshRenderer>().sharedMaterial;_Tex3D = (Texture3D)mat.GetTexture("_MainTex");width = _Tex3D.width;height = _Tex3D.height;depth = _Tex3D.depth;colors = _Tex3D.GetPixels();cacheColor = _Tex3D.GetPixels();cubeTrans = cubeGo.transform;Debug.Log(colors.Length);}private void OnEnable(){lineRenderer.positionCount = 1;_Tex3D.SetPixels(cacheColor);_Tex3D.Apply();nativeColors = new NativeArray<Color>(colors.Length, Allocator.Persistent);nativeColorDatas = new NativeArray<ColorData>(colors.Length, Allocator.Persistent);myJob.width = width;myJob.height = height;myJob.depth = depth;myJob.colors = nativeColors;myJob.colorDatas = nativeColorDatas;for (int z = 0; z < depth; z++){for (int y = 0; y < height; y++){for (int x = 0; x < width; x++){int i = z * (width * height) + y * width + x;nativeColors[i] = colors[i];ColorData colorData = new ColorData();colorData.x = x;colorData.y = y;colorData.z = z;nativeColorDatas[i] = colorData;}}}}private void OnDisable(){_Tex3D.SetPixels(cacheColor);_Tex3D.Apply();nativeColorDatas.Dispose();nativeColors.Dispose();}// Update is called once per framevoid Update(){if (Input.GetMouseButtonDown(0)){Vector3 screenPos = Input.mousePosition;screenPos.z = 1;lineRenderer.SetPosition(lineRenderer.positionCount - 1, Camera.main.ScreenToWorldPoint(screenPos));if (lineRenderer.positionCount == 3){Calculate();lineRenderer.positionCount = 1;}else{lineRenderer.positionCount++;}}else{if (lineRenderer.positionCount > 1){Vector3 screenPos = Input.mousePosition;screenPos.z = 1;lineRenderer.SetPosition(lineRenderer.positionCount - 1, Camera.main.ScreenToWorldPoint(screenPos));}}}private void Calculate(){float startTime = Time.realtimeSinceStartup;//模型坐标myJob.p1 = cubeTrans.InverseTransformPoint(lineRenderer.GetPosition(0));myJob.p2 = cubeTrans.InverseTransformPoint(lineRenderer.GetPosition(1));myJob.p3 = cubeTrans.InverseTransformPoint(lineRenderer.GetPosition(2));myJob.object2World = cubeTrans.localToWorldMatrix;myJob.world2Camera = Camera.main.worldToCameraMatrix;myJob.camera2Clip = Camera.main.projectionMatrix;JobHandle jobHandle = default;jobHandle = myJob.ScheduleParallel(colors.Length, 64, jobHandle);jobHandle.Complete();_Tex3D.SetPixels(nativeColors.ToArray());_Tex3D.Apply();Debug.Log((Time.realtimeSinceStartup - startTime) * 1000 + "ms");}
}[BurstCompile]
public struct MyJob : IJobFor
{//[NativeDisableContainerSafetyRestriction]public NativeArray<Color> colors;//[NativeDisableContainerSafetyRestriction] //发现jobs日志有 out of length报错可用此特性忽略public NativeArray<ColorData> colorDatas;public Vector3 p1, p2, p3;public int width, height, depth;public Matrix4x4 object2World;public Matrix4x4 world2Camera;public Matrix4x4 camera2Clip;public void Execute(int index){if (colors[index] == Color.clear){return;}Vector3 localPoint = new Vector3(colorDatas[index].x / (width * 1.0f), colorDatas[index].y / (height * 1.0f), colorDatas[index].z / (depth * 1.0f)) - (Vector3.one * 0.5f);Vector2 screenPoint = Local2Screen(localPoint);Vector2 screenP1 = Local2Screen(p1);Vector2 screenP2 = Local2Screen(p2);Vector2 screenP3 = Local2Screen(p3);bool isInside = IsPointInTriangle(screenPoint, screenP1, screenP2, screenP3);if (isInside){colors[index] = Color.clear;}}//2个二维向量行列式值,可理解为求出了2个二维向量构成的面的法线z值private float Cross(Vector2 a, Vector2 b, Vector2 p){return (b.x - a.x) * (p.y - a.y) - (b.y - a.y) * (p.x - a.x);}private bool IsPointInTriangle(Vector2 p, Vector2 a, Vector2 b, Vector2 c){float signOfTrig = Cross(a, b, c);float signOfAB = Cross(a, b, p);float signOfCA = Cross(c, a, p);float signOfBC = Cross(b, c, p);bool d1 = (signOfAB * signOfTrig > 0);bool d2 = (signOfCA * signOfTrig > 0);bool d3 = (signOfBC * signOfTrig > 0);return d1 && d2 && d3;//方法2://Vector3 pa = a - p;//Vector3 pb = b - p;//Vector3 pc = c - p;//分别进行3次,求其中2个向量构成的三角面的法线;//Vector3 pab = Vector3.Cross(pa, pb);//Vector3 pbc = Vector3.Cross(pb, pc);//Vector3 pca = Vector3.Cross(pc, pa);//分别进行3次,求其中2个法线构成的点积(夹角)>0代表两条法线方向相同//float z1 = Vector3.Dot(pab, pbc);//float z2 = Vector3.Dot(pab, pca);//float z3 = Vector3.Dot(pbc, pca);//若3条法线之间的朝向都是相同的,说明p点在<a,b,c>三角形内//return z1 > 0 && z2 > 0 && z3 > 0; }private Vector2 Local2Screen(Vector3 localPos){Vector3 worldPos = object2World.MultiplyPoint(localPos);Vector3 cameraPos = world2Camera.MultiplyPoint(worldPos);Vector4 clipPos = camera2Clip * new Vector4(cameraPos.x, cameraPos.y, cameraPos.z, 1.0f);if (clipPos.w != 0){clipPos = clipPos / clipPos.w;}float screenX = (clipPos.x + 1) / 2f * 1920f;float screenY = (clipPos.y + 1) / 2f * 1080f;return new Vector2(screenX, screenY);}
}
public struct ColorData
{public float x, y, z;
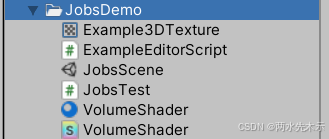
}项目资源:
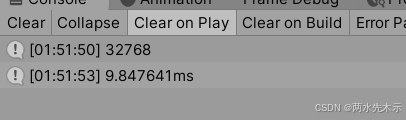
耗时如下: