【安卓】WebView的用法与HTTP访问网络
文章目录
- WebView的用法
- 使用http访问网络
- 使用HttpURLConnection
- 使用OkHttp
前些天发现了一个巨牛的人工智能学习网站,通俗易懂,风趣幽默,忍不住分享一下给大家。 点击跳转到网站。
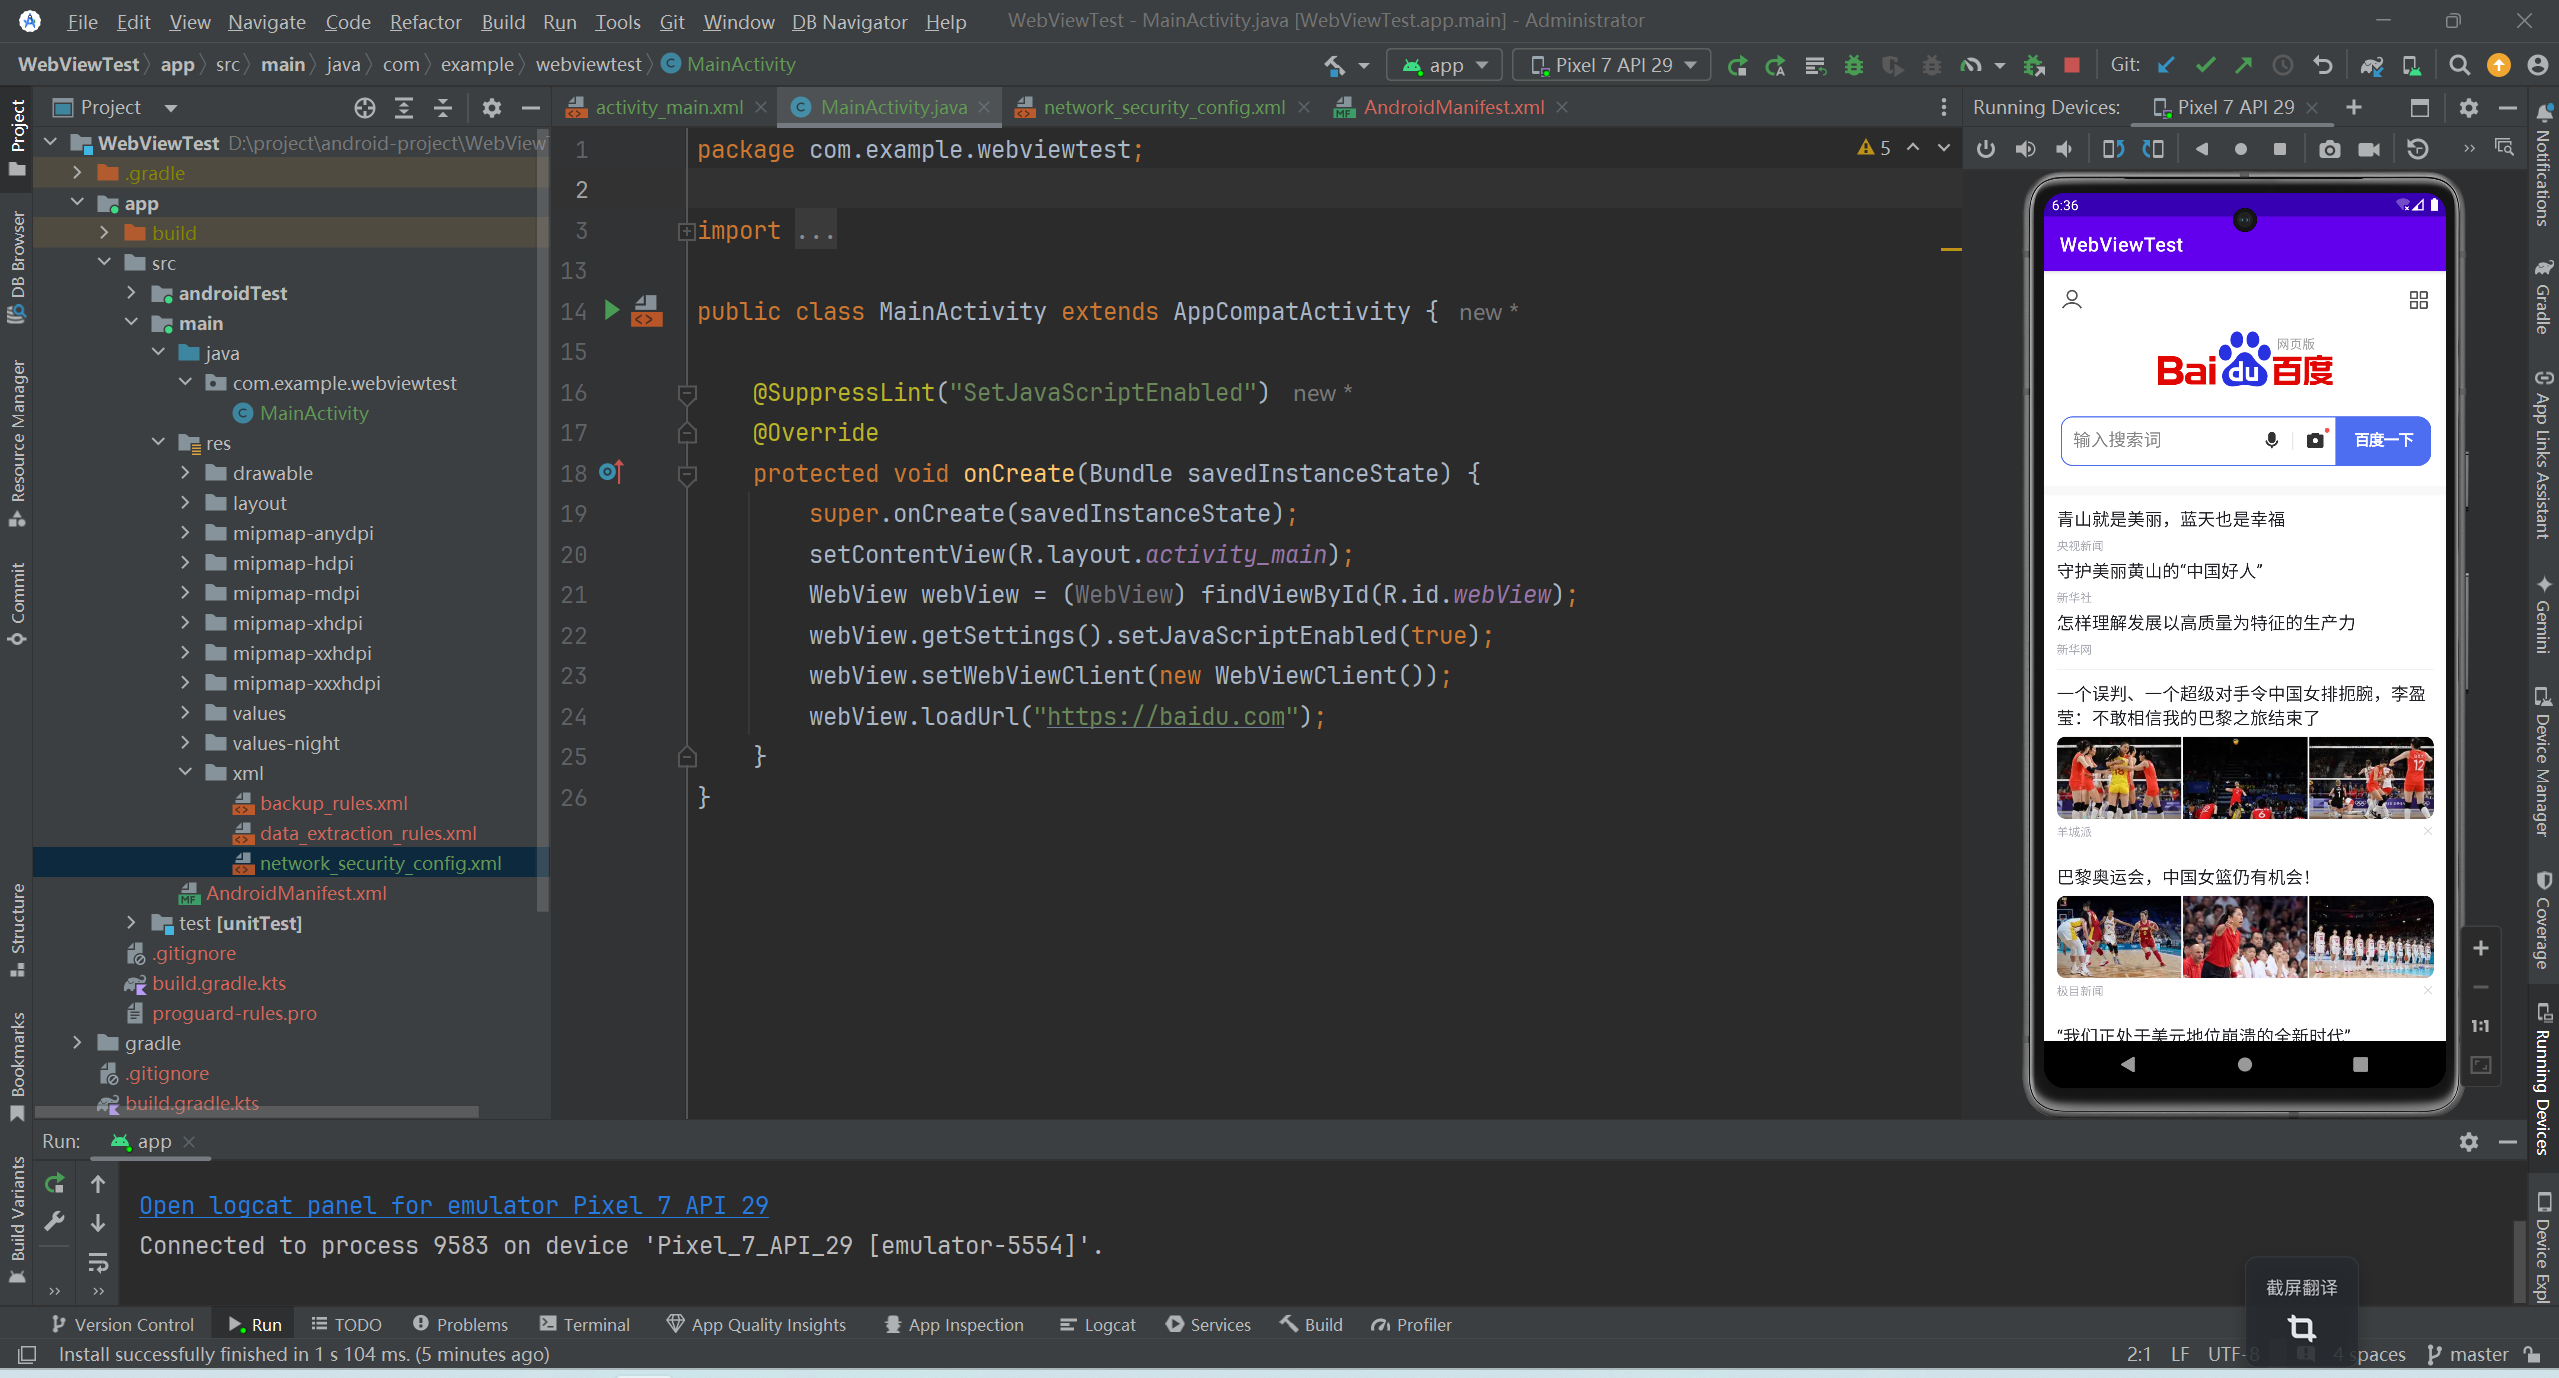
WebView的用法
新建一个WebViewTest项目,然后修改activity_main.xml中的代码。在布局中添加webView控件,用来显示网页。
<LinearLayout xmlns:android="http://schemas.android.com/apk/res/android"android:layout_width="match_parent"android:layout_height="match_parent" ><WebViewandroid:id="@+id/webView"android:layout_width="match_parent"android:layout_height="match_parent" />
</LinearLayout>
然后修改MainActivity中的代码。
public class MainActivity extends AppCompatActivity {@SuppressLint("SetJavaScriptEnabled")@Overrideprotected void onCreate(Bundle savedInstanceState) {super.onCreate(savedInstanceState);setContentView(R.layout.activity_main);WebView webView = (WebView) findViewById(R.id.webView);webView.getSettings().setJavaScriptEnabled(true);webView.setWebViewClient(new WebViewClient());webView.loadUrl("http://baidu.com");}
}
getSettings()方法可以设置一些浏览器的属性。setJavaScriptEnabled()方法,让WebView支持JavaScript脚本。
修改AndroidManifest.xml文件,并加入权限声明。
代码可能会报 net::ERR_CLEARTEXT_NOT_PERMITTED 错误。
可以创建文件:res/xml/network_security_config.xml。
<?xml version="1.0" encoding="utf-8"?>
<network-security-config><domain-config cleartextTrafficPermitted="true"><domain includeSubdomains="true">api.example.com(to be adjusted)</domain></domain-config>
</network-security-config>
然后对AndroidManifest.xml文件做修改。
<application...android:networkSecurityConfig="@xml/network_security_config"...>
使用http访问网络
使用HttpURLConnection
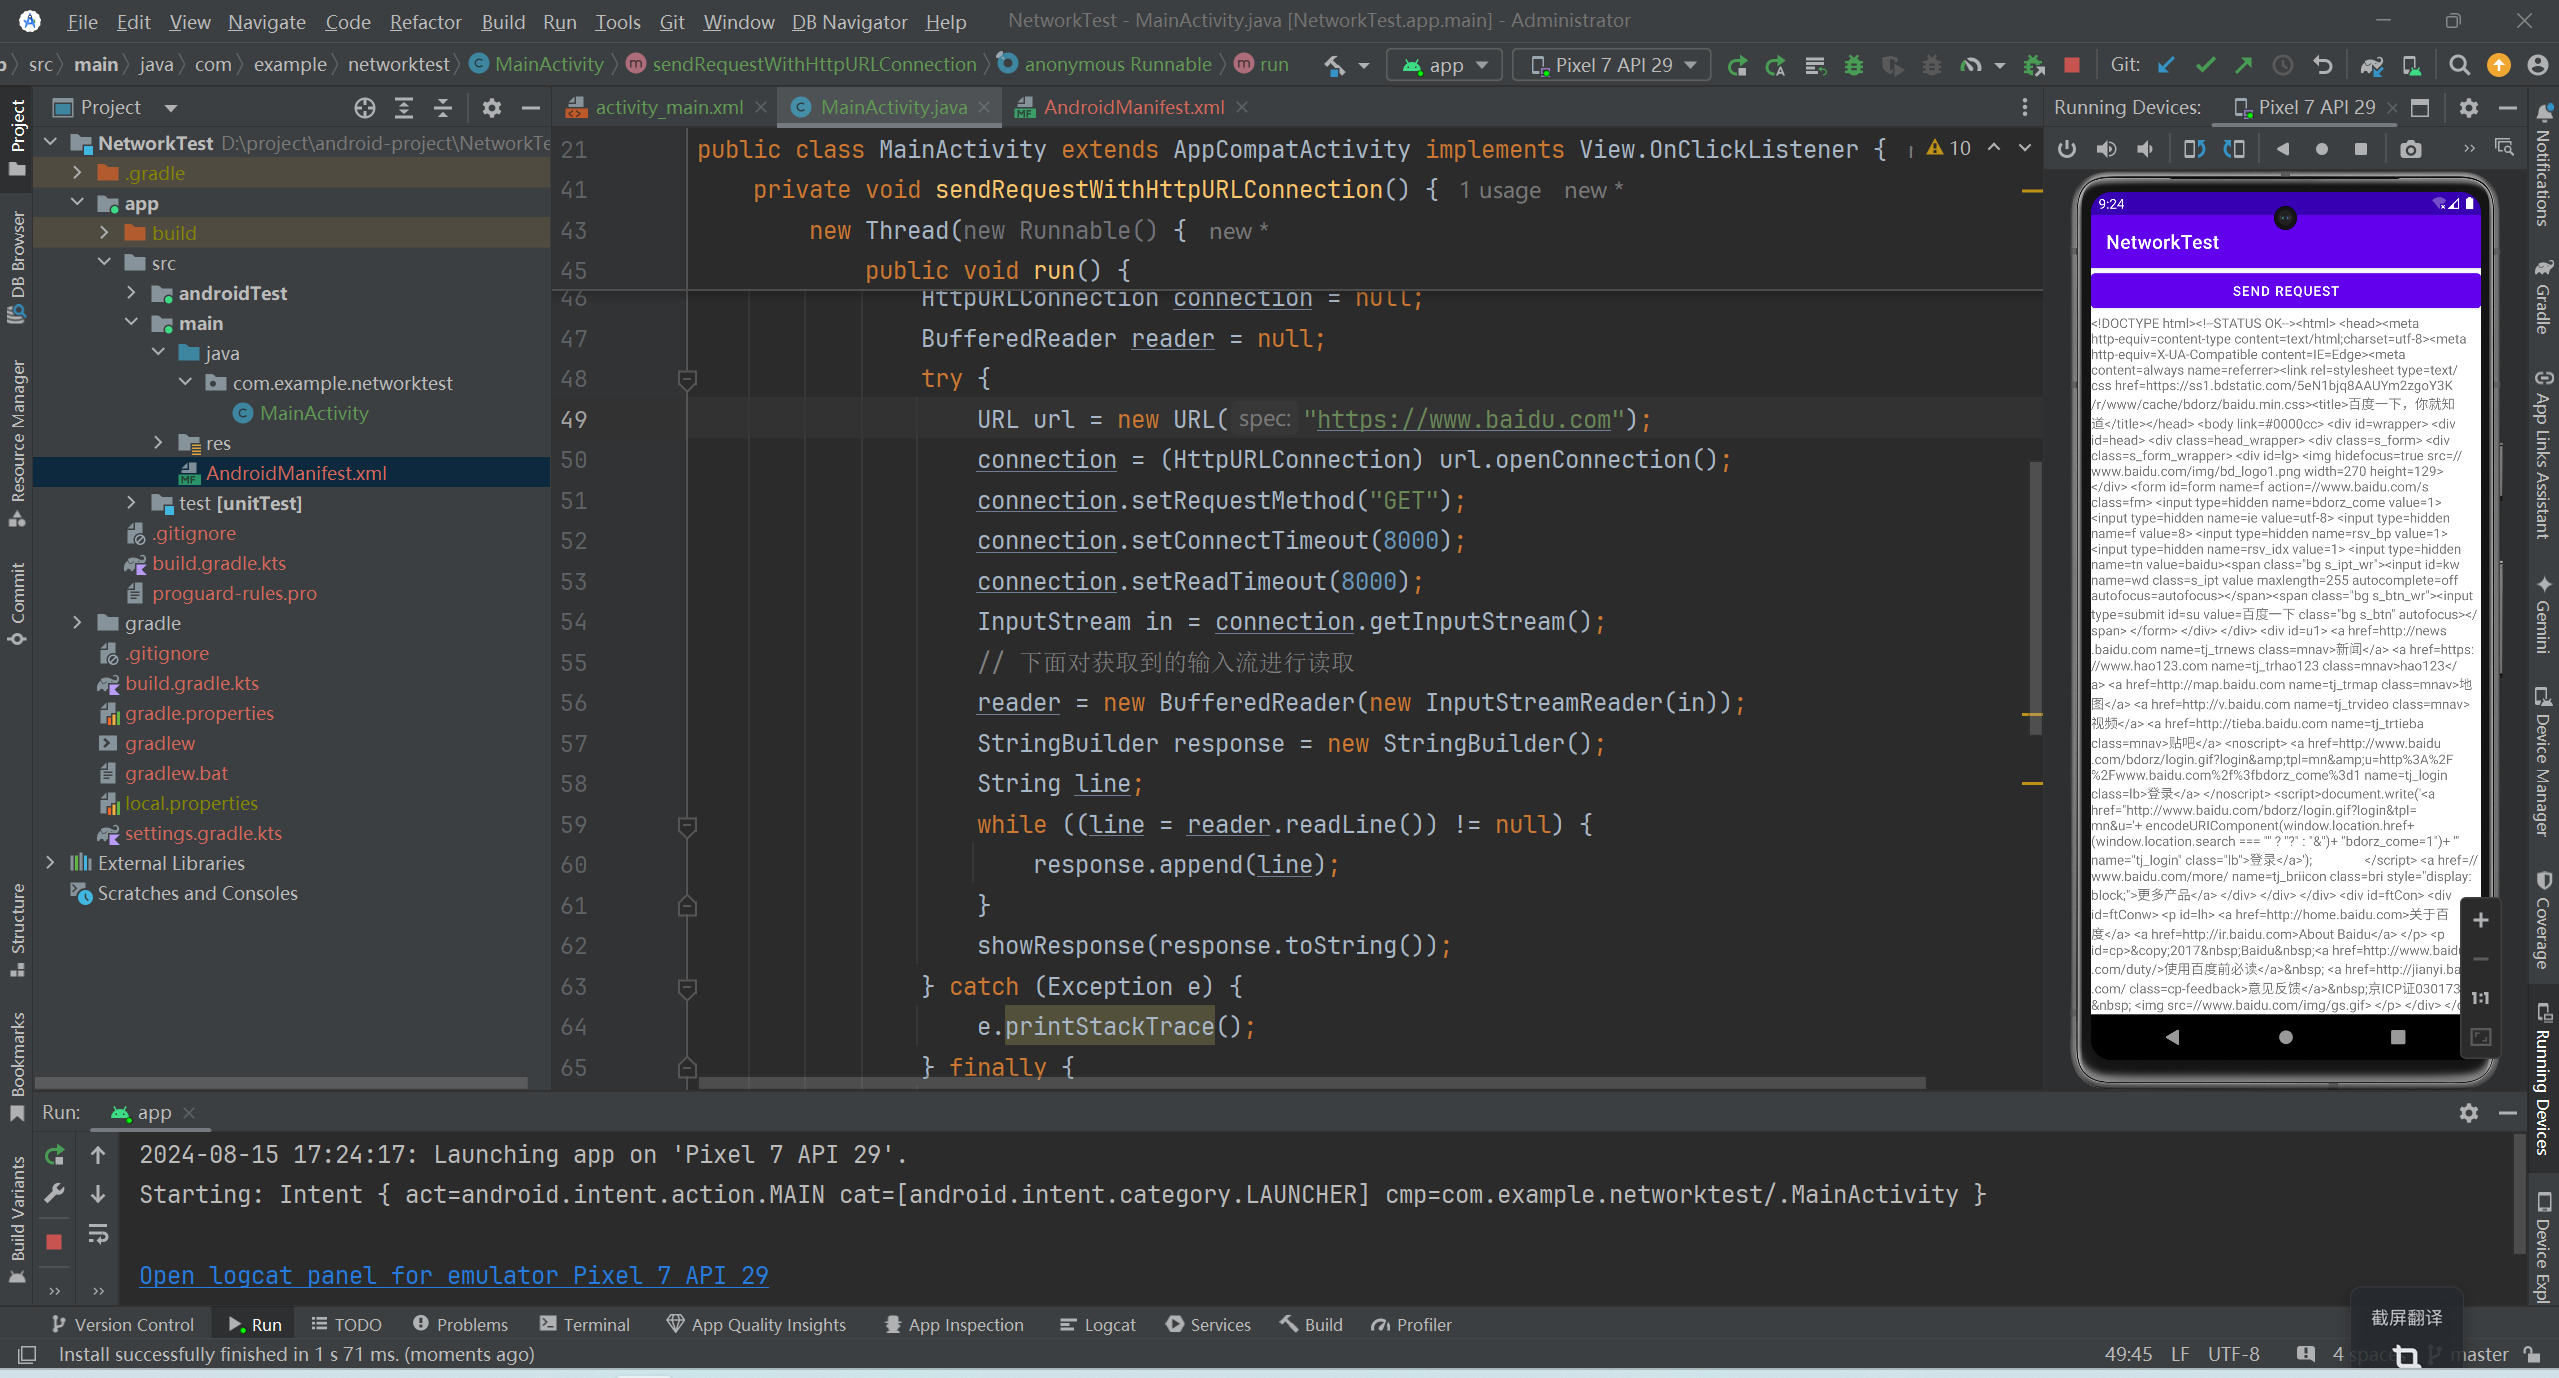
首先需要获取HttpURLConnection的实例,一般只需创建一个URL对象,并传入目标的网络地址,然后调用一下openConnection()方法即可。
URL url = new URL(“http://www.baidu.com”);
HttpURLConnection connection = (HttpURLConnection) url.openConnection();
HTTP请求常用的方法主要有两个:GET和POST。GET表示希望从服务器那里获取数据,而POST则表示希望提交数据给服务器。
connection.requestMethod = “GET”
调用getInputStream()方法就可以获取到服务器返回的输入流。
InputStream in = connection.getInputStream();
最后可以调用disconnect()方法将这个HTTP连接关闭。
connection.disconnect()
新建一个NetworkTest项目,首先修改activity_main.xml中的代码。在不居中添加一个按钮用于发送HTTP请求,TextView用于将服务器返回的数据显示出来。借助ScrollView控件,以滚动的形式查看屏幕外的内容。
<LinearLayout xmlns:android="http://schemas.android.com/apk/res/android"android:orientation="vertical"android:layout_width="match_parent"android:layout_height="match_parent" ><Buttonandroid:id="@+id/sendRequestBtn"android:layout_width="match_parent"android:layout_height="wrap_content"android:text="Send Request" /><ScrollViewandroid:layout_width="match_parent"android:layout_height="match_parent" ><TextViewandroid:id="@+id/responseText"android:layout_width="match_parent"android:layout_height="wrap_content" /></ScrollView>
</LinearLayout>
接着修改MainActivity中的代码。
public class MainActivity extends AppCompatActivity implements View.OnClickListener {TextView responseText;@Overrideprotected void onCreate(Bundle savedInstanceState) {super.onCreate(savedInstanceState);setContentView(R.layout.activity_main);Button sendRequest = (Button) findViewById(R.id.sendRequestBtn);responseText = (TextView) findViewById(R.id.responseText);sendRequest.setOnClickListener(this);}@Overridepublic void onClick(View v) {if (v.getId() == R.id.sendRequestBtn) {sendRequestWithHttpURLConnection();}}private void sendRequestWithHttpURLConnection() {// 开启线程来发起网络请求new Thread(new Runnable() {@Overridepublic void run() {HttpURLConnection connection = null;BufferedReader reader = null;try {URL url = new URL("https://www.baidu.com");connection = (HttpURLConnection) url.openConnection();connection.setRequestMethod("GET");connection.setConnectTimeout(8000);connection.setReadTimeout(8000);InputStream in = connection.getInputStream();// 下面对获取到的输入流进行读取reader = new BufferedReader(new InputStreamReader(in));StringBuilder response = new StringBuilder();String line;while ((line = reader.readLine()) != null) {response.append(line);}showResponse(response.toString());} catch (Exception e) {e.printStackTrace();} finally {if (reader != null) {try {reader.close();} catch (IOException e) {e.printStackTrace();}}if (connection != null) {connection.disconnect();}}}}).start();}private void showResponse(final String response) {runOnUiThread(new Runnable() {@Overridepublic void run() {// 在这里进行UI操作,将结果显示到界面上responseText.setText(response);}});}
}
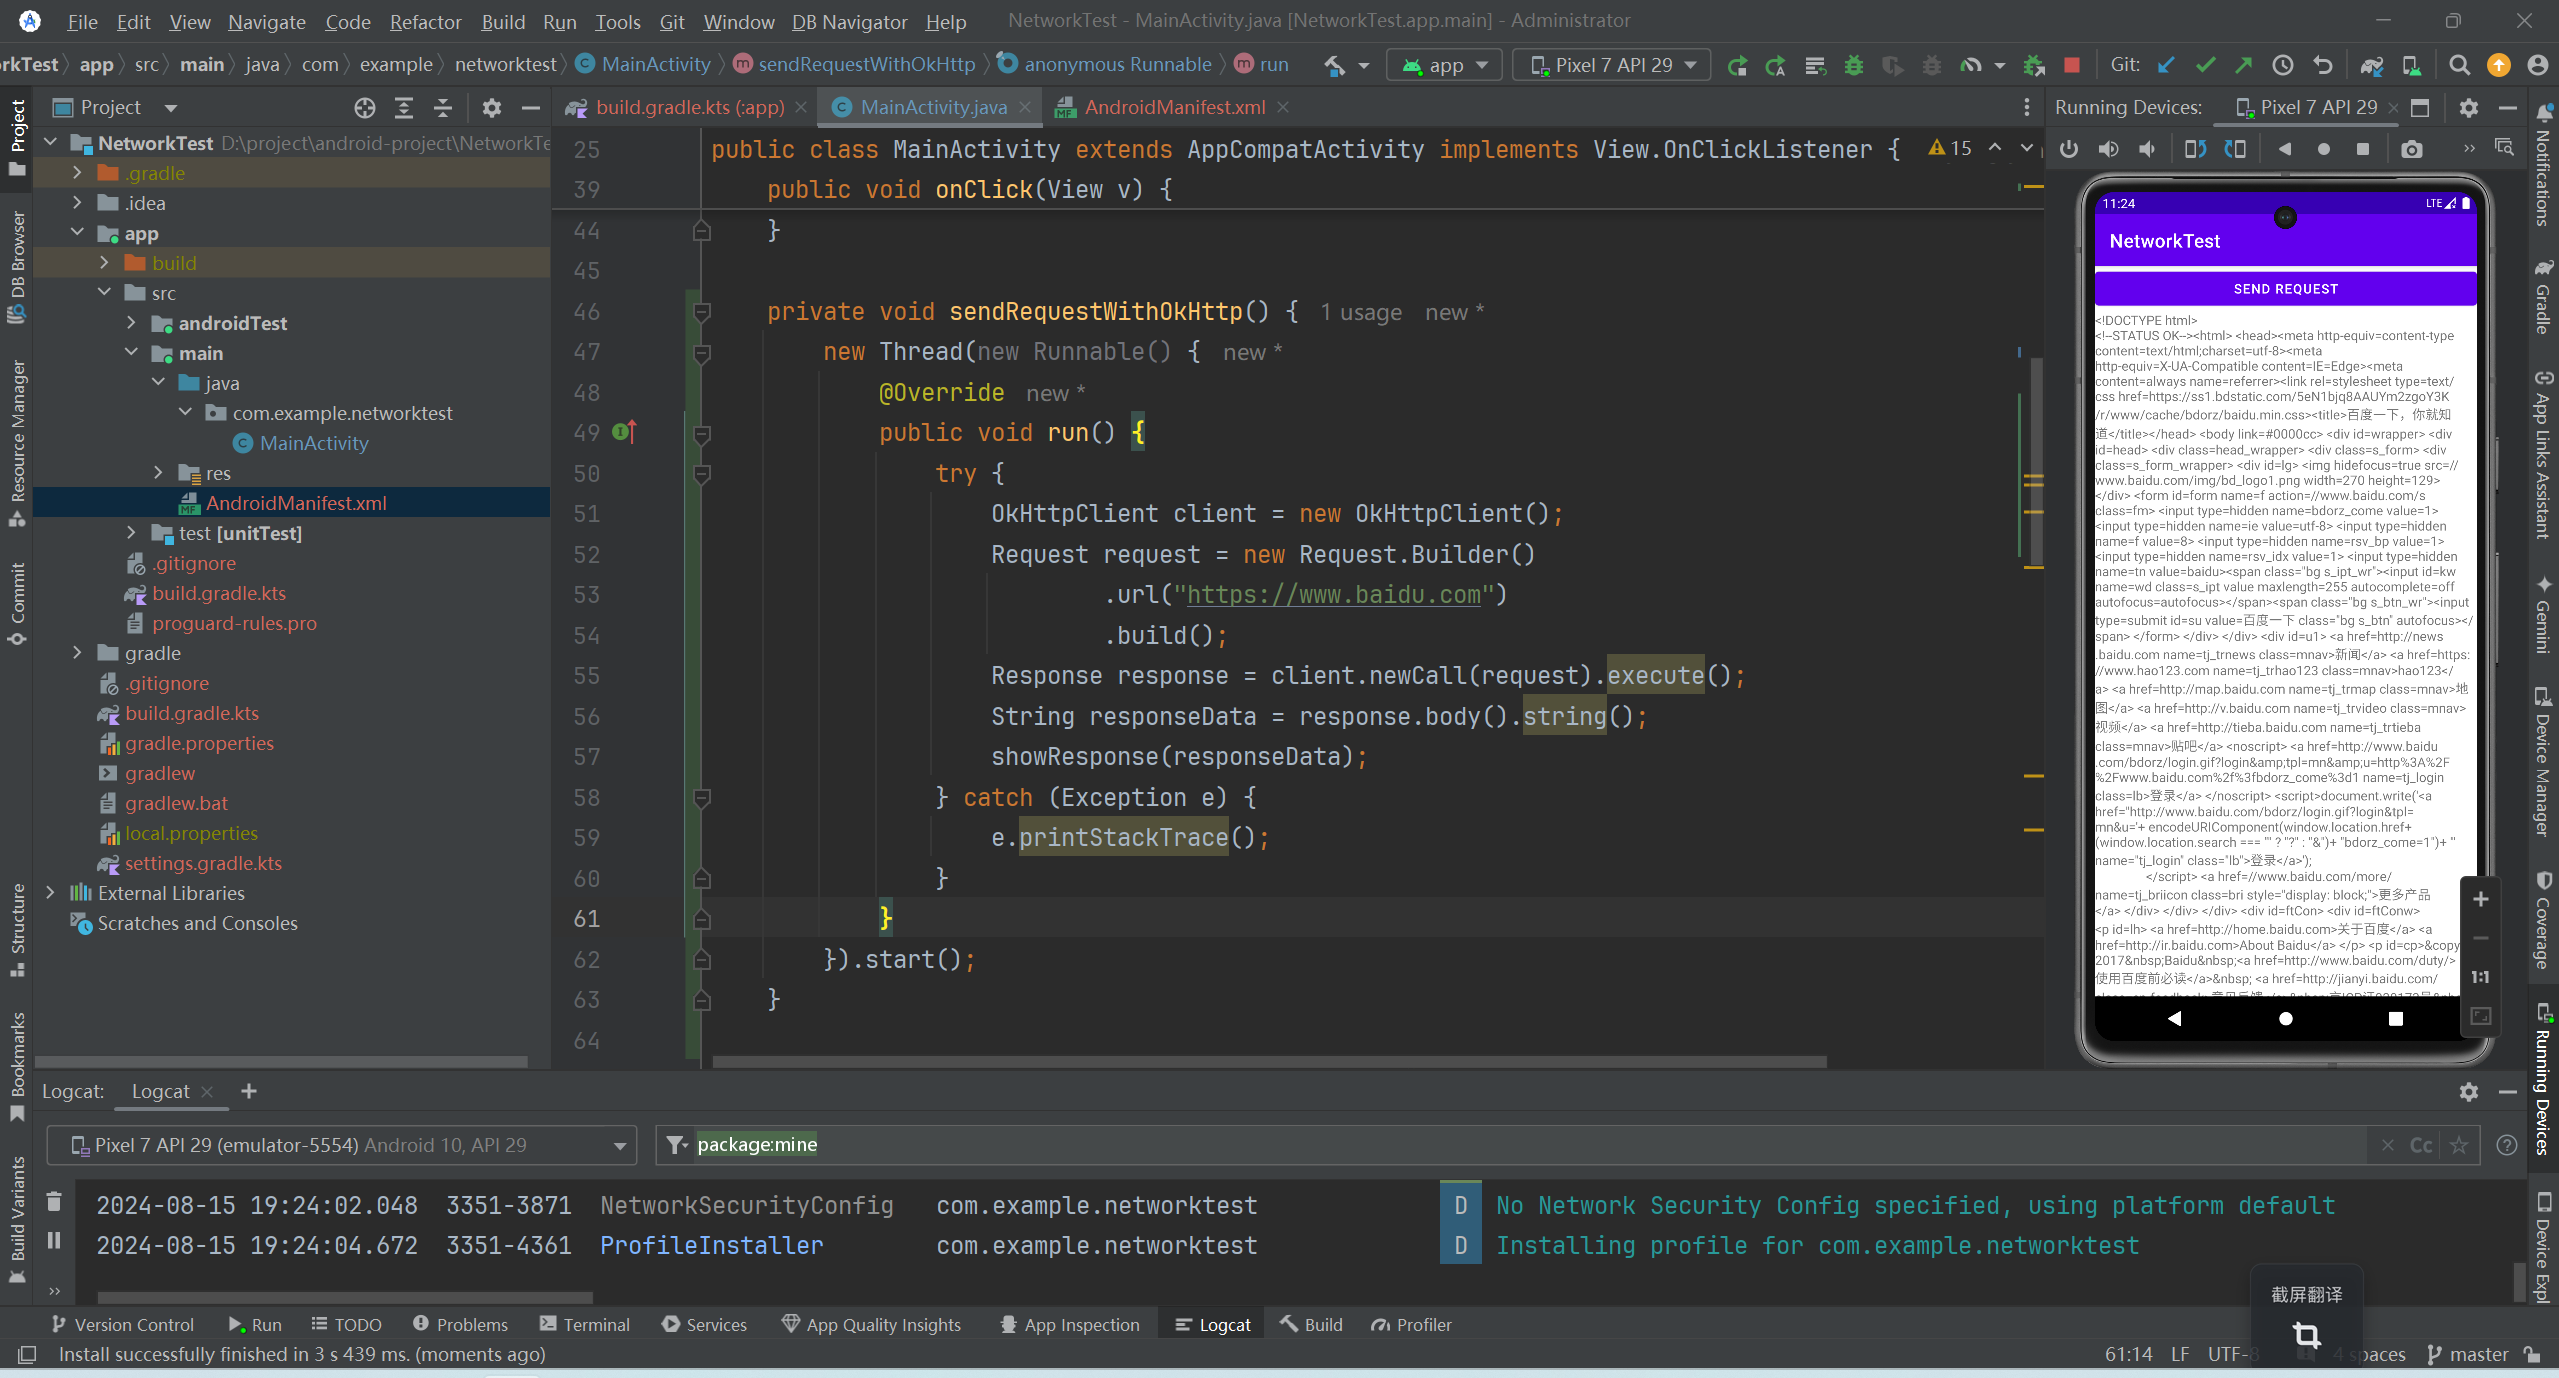
使用OkHttp
OkHttp是一个开源项目,它不仅在接口封装上做得简单易用,就连在底层实现上也是自成一派,比起原生的HttpURLConnection,可以说是有过之而无不及,现在已经成了广大Android开发者首选的网络通信库。
OkHttp的项目主页地址是:https://github.com/square/okhttp。
在使用OkHttp之前,我们需要先在项目中添加OkHttp库的依赖。编辑app/build.gradle文件。
dependencies {implementation(libs.appcompat)implementation(libs.material)implementation(libs.activity)implementation(libs.constraintlayout)testImplementation(libs.junit)androidTestImplementation(libs.ext.junit)androidTestImplementation(libs.espresso.core)implementation("com.squareup.okhttp3:okhttp:4.4.1")//okHttp
}
添加上述依赖会自动下载两个库:一个是OkHttp库,一个是Okio库,后者是前者的通信基础。
修改MainActivity中的代码。
public class MainActivity extends AppCompatActivity implements View.OnClickListener {TextView responseText;@Overrideprotected void onCreate(Bundle savedInstanceState) {super.onCreate(savedInstanceState);setContentView(R.layout.activity_main);Button sendRequest = (Button) findViewById(R.id.sendRequestBtn);responseText = (TextView) findViewById(R.id.responseText);sendRequest.setOnClickListener(this);}@Overridepublic void onClick(View v) {if (v.getId() == R.id.sendRequestBtn) {
//            sendRequestWithHttpURLConnection();sendRequestWithOkHttp();}}private void sendRequestWithOkHttp() {new Thread(new Runnable() {@Overridepublic void run() {try {OkHttpClient client = new OkHttpClient();Request request = new Request.Builder().url("https://www.baidu.com").build();Response response = client.newCall(request).execute();String responseData = response.body().string();showResponse(responseData);} catch (Exception e) {e.printStackTrace();}}}).start();}private void sendRequestWithHttpURLConnection() {// 开启线程来发起网络请求new Thread(new Runnable() {@Overridepublic void run() {HttpURLConnection connection = null;BufferedReader reader = null;try {URL url = new URL("https://www.baidu.com");connection = (HttpURLConnection) url.openConnection();connection.setRequestMethod("GET");connection.setConnectTimeout(8000);connection.setReadTimeout(8000);InputStream in = connection.getInputStream();// 下面对获取到的输入流进行读取reader = new BufferedReader(new InputStreamReader(in));StringBuilder response = new StringBuilder();String line;while ((line = reader.readLine()) != null) {response.append(line);}showResponse(response.toString());} catch (Exception e) {e.printStackTrace();} finally {if (reader != null) {try {reader.close();} catch (IOException e) {e.printStackTrace();}}if (connection != null) {connection.disconnect();}}}}).start();}private void showResponse(final String response) {runOnUiThread(new Runnable() {@Overridepublic void run() {// 在这里进行UI操作,将结果显示到界面上responseText.setText(response);}});}
}