QT | 编写一个简单的上位机
QT | 编写一个简单的上位机
时间:2023-03-19
参考:
1.易懂 | 手把手教你编写你的第一个上位机
2.QT中修改窗口的标题和图标
3.图标下载
1.打开QT Creator
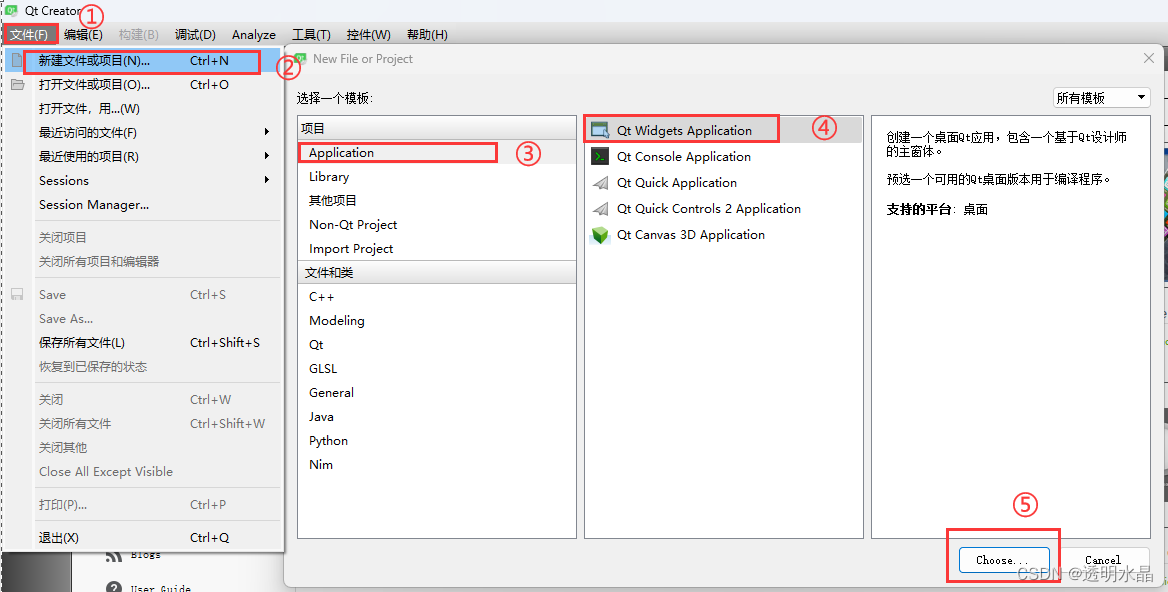
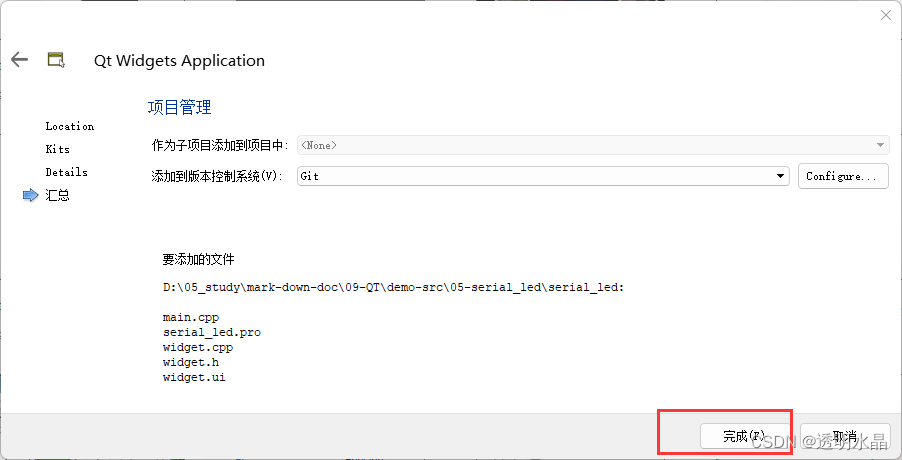
2.新建工程
Qt Creator可以创建多种项目,在最左侧的列表框中单击“Application”,中间的列表框中列出了可以创建的应用程序的模板,各类应用程序如下:
Qt Widgets Application,支持桌面平台的有图形用户界面(Graphic User Interface,GUI) 界面的应用程序。GUI的设计完全基于C++语言,采用Qt提供的一套C++类库。Qt Console Application,控制台应用程序,无GUI界面,一般用于学习C/C++语言,只需要简单的输入输出操作时可创建此类项目。Qt Quick Application,创建可部署的Qt Quick 2应用程序。Qt Quick是Qt支持的一套GUI开发架构,其界面设计采用QML语言,程序架构采用C++语言。利用Qt Quick可以设计非常炫的用户界面,一般用于移动设备或嵌入式设备上无边框的应用程序的设计。Qt Quick Controls 2 Application,创建基于Qt Quick Controls 2组件的可部署的Qt Quick 2应用程序。Qt Quick Controls 2组件只有Qt 5.7及以后版本才有。Qt Canvas 3D Application,创建Qt Canvas 3D QML项目,也是基于QML语言的界面设计,支持3D画布。
如下图:在此界面中选择需要创建界面的基类(
base class)。有 3 种基类可以选择:
QMainWindow是主窗口类,主窗口具有主菜单栏、工具栏和状态栏,类似于一般的应用程序的主窗口;QWidget是所有具有可视界面类的基类,选择QWidget创建的界面对各种界面组件都可以 支持;QDialog是对话框类,可建立一个基于对话框的界面;在此选择
QMainWindow作为基类,自动更改的各个文件名不用手动去修改。勾选“创建界面”复选框。这个选项如果勾选,就会由Qt Creator创建用户界面文件,否则,需要自己编程手工创建界面。初始学习,为了了解Qt Creator的设计功能,勾选此选项。

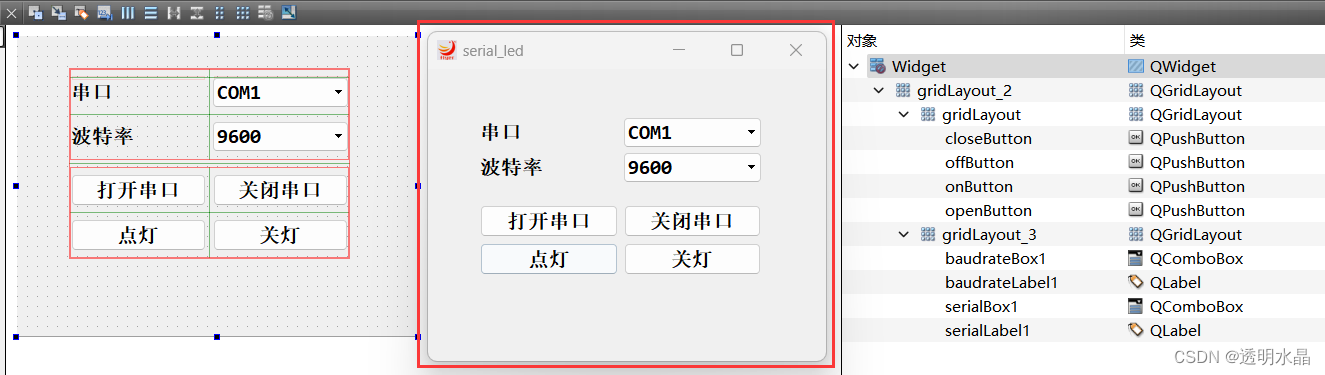
3.上位机界面设计
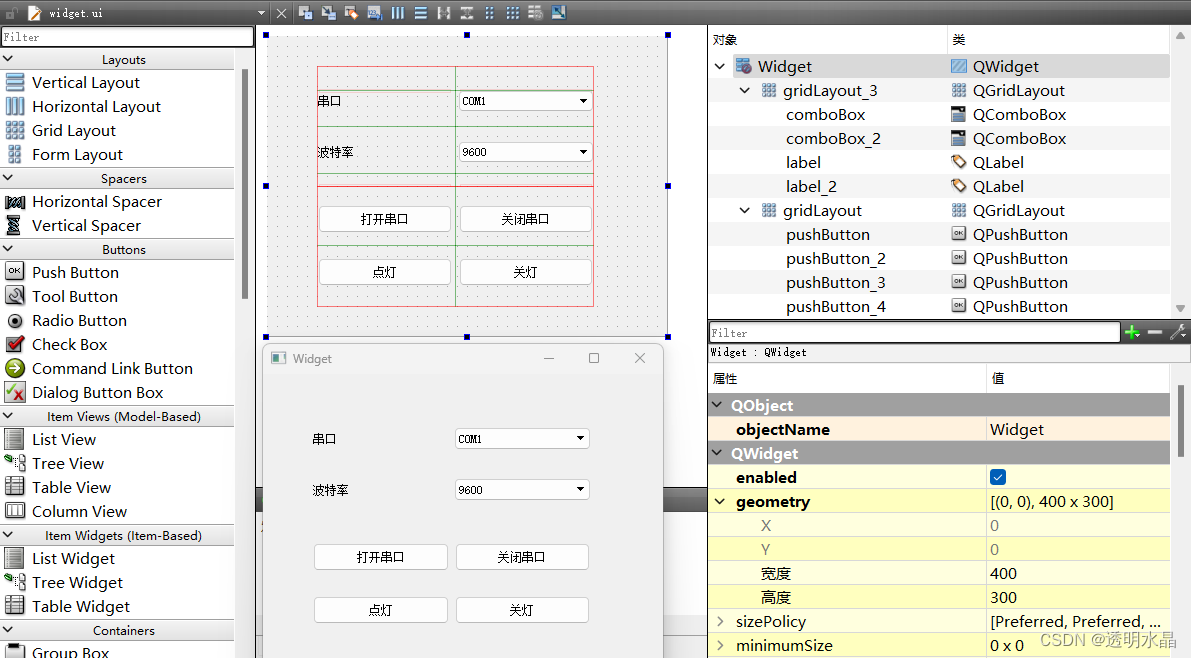
3-1.界面布局
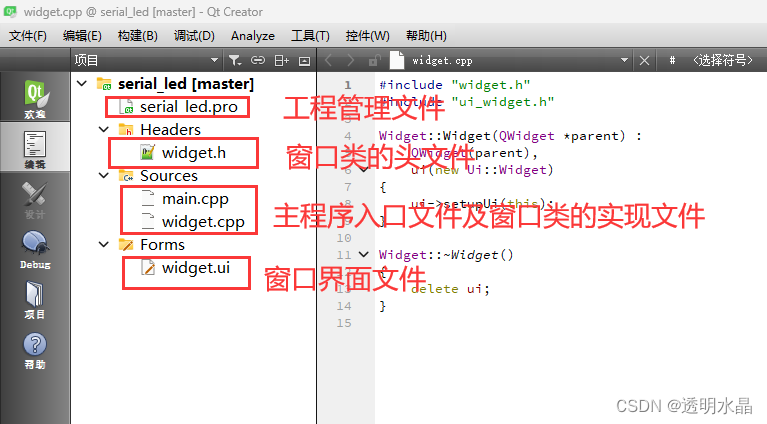
双击“
widget.ui”文件。进入可视化设计界面。
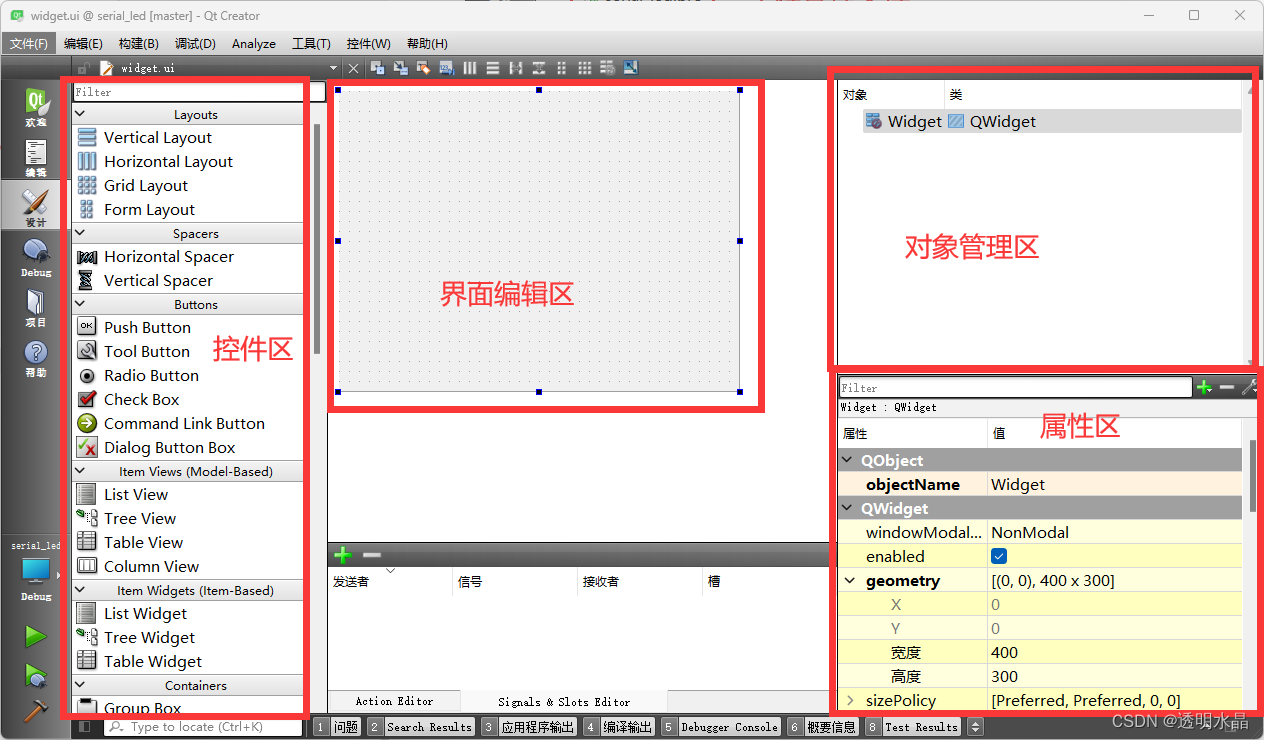
使用拖曳的形式从左侧拖出控件摆放在画布上。
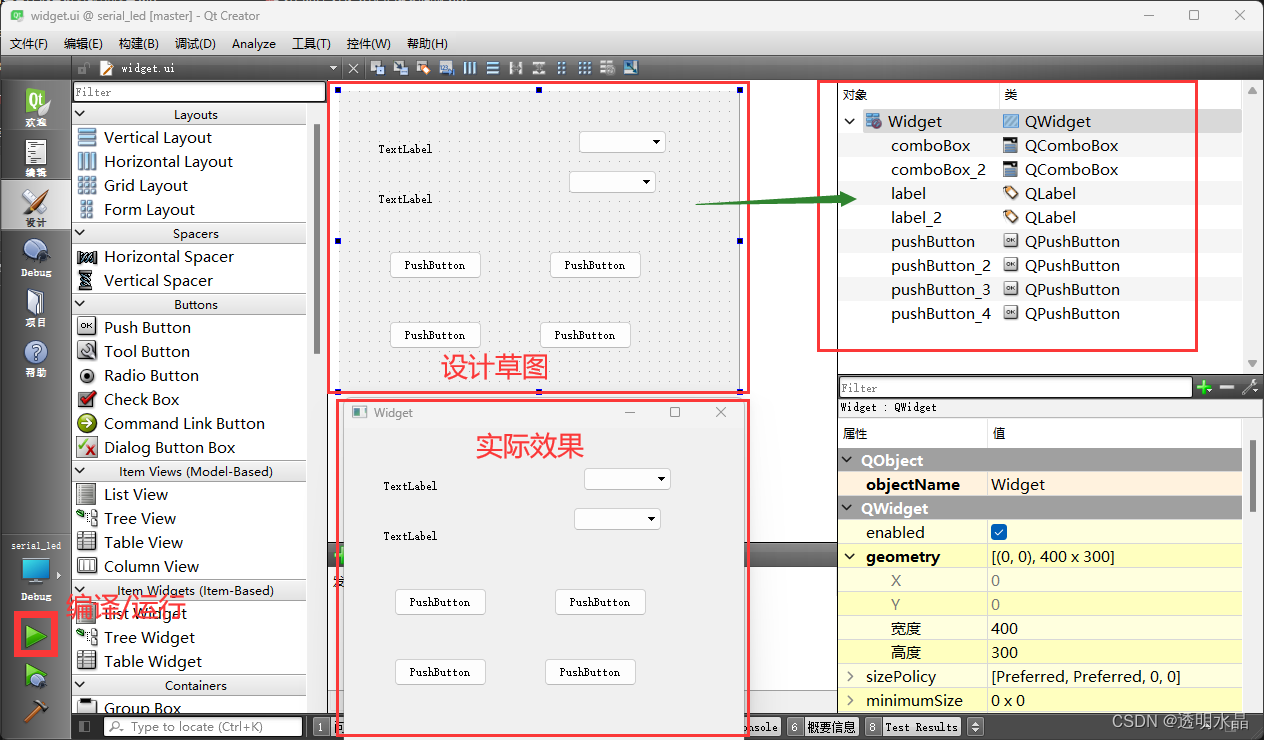
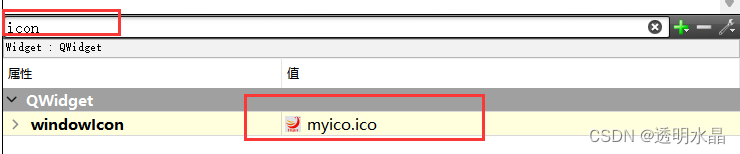
3-2.修改窗口标题

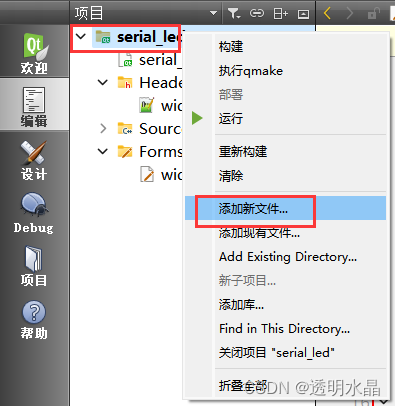
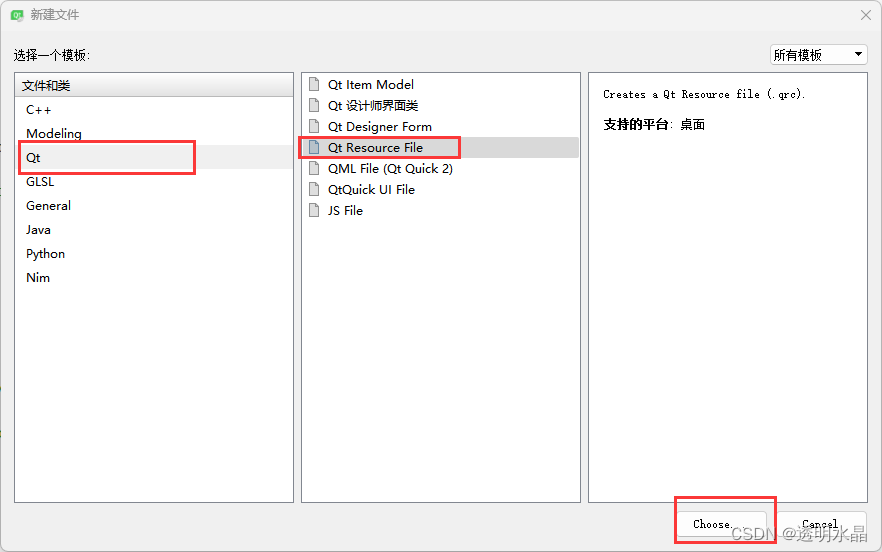
3-3.修改窗口图标
鼠标选中工程,右键,然后选择“添加新文件”;
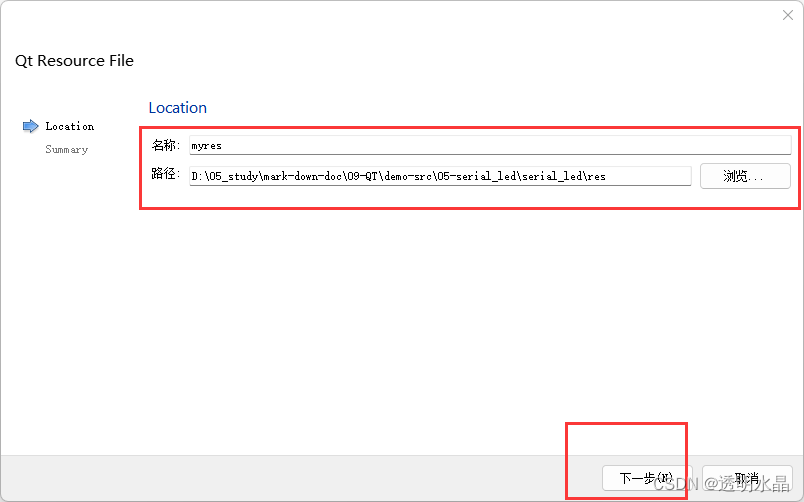
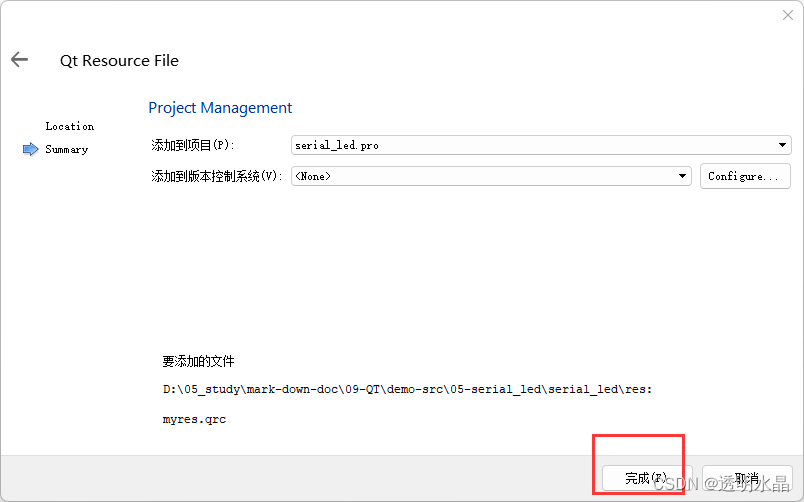
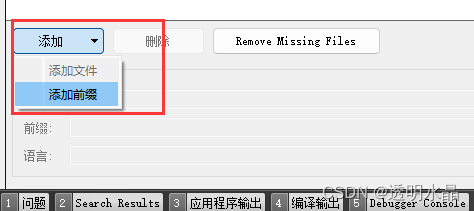
打开“
myres.qrc”文件,选择:添加-》添加前缀;前缀改为“/”;
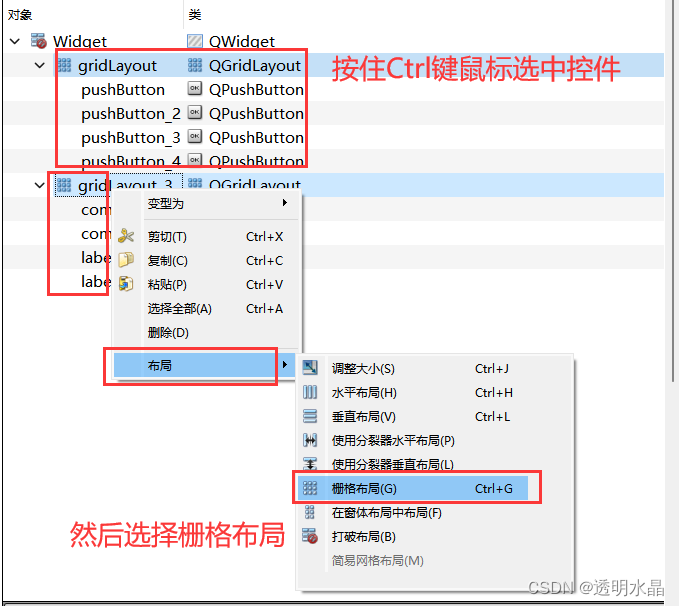
3-4.重新布局
3-4-1.打破布局
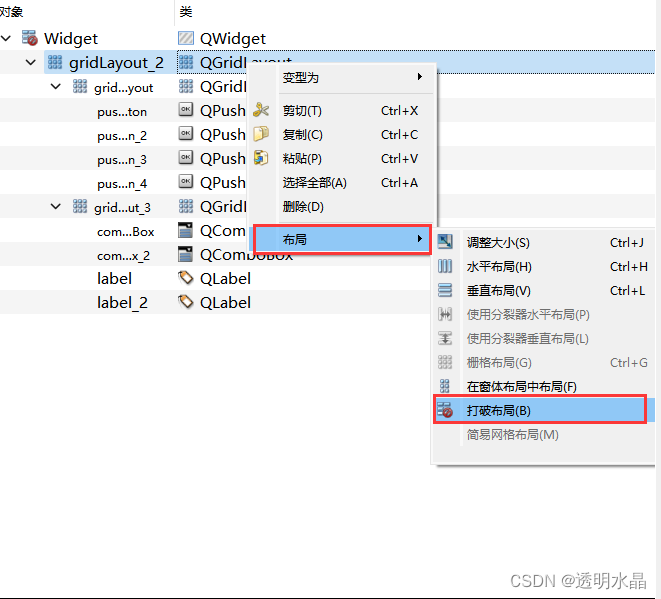
3-4-2.选择栅格布局
4.上位机逻辑编写
QT += core gui serialport
#-------------------------------------------------
#
# Project created by QtCreator 2023-03-19T22:52:53
#
#-------------------------------------------------QT       += core gui serialportgreaterThan(QT_MAJOR_VERSION, 4): QT += widgetsTARGET = serial_led
TEMPLATE = app# The following define makes your compiler emit warnings if you use
# any feature of Qt which as been marked as deprecated (the exact warnings
# depend on your compiler). Please consult the documentation of the
# deprecated API in order to know how to port your code away from it.
DEFINES += QT_DEPRECATED_WARNINGS# You can also make your code fail to compile if you use deprecated APIs.
# In order to do so, uncomment the following line.
# You can also select to disable deprecated APIs only up to a certain version of Qt.
#DEFINES += QT_DISABLE_DEPRECATED_BEFORE=0x060000    # disables all the APIs deprecated before Qt 6.0.0SOURCES += \main.cpp \widget.cppHEADERS += \widget.hFORMS += \widget.uiRESOURCES += \res/myres.qrc
在
widget.h的Widget类中添加一个QSerialPort成员:
#ifndef WIDGET_H
#define WIDGET_H#include <QWidget>
#include <QSerialPort>
#include <QSerialPortInfo>namespace Ui {
class Widget;
}class Widget : public QWidget
{Q_OBJECTpublic:explicit Widget(QWidget *parent = 0);~Widget();private slots:void on_onButton_clicked();void on_offButton_clicked();void on_openButton_clicked();void on_closeButton_clicked();private:Ui::Widget *ui;QSerialPort *serialPort;
};#endif // WIDGET_H
#include "widget.h"
#include "ui_widget.h"
#include <QMessageBox>Widget::Widget(QWidget *parent) :QWidget(parent),ui(new Ui::Widget)
{QStringList serialNamePort;ui->setupUi(this);this->setWindowTitle("serial_led");/* 创建一个串口对象 */serialPort = new QSerialPort(this);/* 搜索所有可用串口 */foreach (const QSerialPortInfo &inf0, QSerialPortInfo::availablePorts()) {serialNamePort<<inf0.portName();}ui->serialBox->addItems(serialNamePort);
}Widget::~Widget()
{delete ui;
}void Widget::on_onButton_clicked()
{/* 串口设置 */serialPort->setPortName(ui->serialBox->currentText());serialPort->setBaudRate(ui->baudrateBox->currentText().toInt());serialPort->setDataBits(QSerialPort::Data8);serialPort->setStopBits(QSerialPort::OneStop);serialPort->setParity(QSerialPort::NoParity);/* 打开串口提示框 */if (true == serialPort->open(QIODevice::ReadWrite)){QMessageBox::information(this, "提示", "串口打开成功");}else{QMessageBox::critical(this, "提示", "串口打开失败");}
}void Widget::on_offButton_clicked()
{serialPort->close();
}void Widget::on_openButton_clicked()
{serialPort->write("ON\n");qDebug("ON\n");
}void Widget::on_closeButton_clicked()
{serialPort->write("OFF\n");qDebug("OFF\n");
}