使用pyqt5编写一个七彩时钟
使用pyqt5编写一个七彩时钟
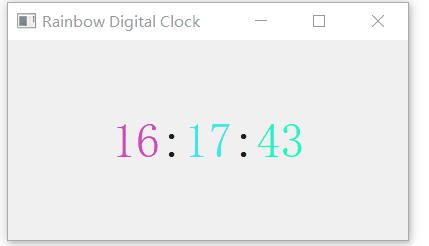
- 效果
- 代码解析
- 定义 RainbowClockWindow 类
- 初始化用户界面
- 显示时间方法
- 完整代码
在这篇博客中,我们将使用 PyQt5 创建一个简单的七彩数字时钟。
效果
代码解析
定义 RainbowClockWindow 类
class RainbowClockWindow(QMainWindow):def __init__(self):super().__init__()self.setWindowTitle('Rainbow Digital Clock')self.setGeometry(100, 100, 400, 200)self.initUI()初始化用户界面
def initUI(self):layout = QVBoxLayout()self.time_layout = QHBoxLayout()self.time_layout.setSpacing(0) # 设置标签之间的间距为0self.hour_label = QLabel(self)self.hour_label.setAlignment(Qt.AlignCenter)self.hour_label.setStyleSheet("font-size: 48px;")self.colon1_label = QLabel(self)self.colon1_label.setAlignment(Qt.AlignCenter)self.colon1_label.setStyleSheet("font-size: 48px;")self.colon1_label.setText(":")self.minute_label = QLabel(self)self.minute_label.setAlignment(Qt.AlignCenter)self.minute_label.setStyleSheet("font-size: 48px;")self.colon2_label = QLabel(self)self.colon2_label.setAlignment(Qt.AlignCenter)self.colon2_label.setStyleSheet("font-size: 48px;")self.colon2_label.setText(":")self.second_label = QLabel(self)self.second_label.setAlignment(Qt.AlignCenter)self.second_label.setStyleSheet("font-size: 48px;")self.time_layout.addWidget(self.hour_label)self.time_layout.addWidget(self.colon1_label)self.time_layout.addWidget(self.minute_label)self.time_layout.addWidget(self.colon2_label)self.time_layout.addWidget(self.second_label)layout.addLayout(self.time_layout)layout.setAlignment(Qt.AlignCenter) # 居中对齐container = QWidget()container.setLayout(layout)self.setCentralWidget(container)timer = QTimer(self)timer.timeout.connect(self.showTime)timer.start(1000)self.showTime()- 创建一个垂直布局 QVBoxLayout 和一个水平布局 QHBoxLayout,并设置水平布局的标签间距为0。
- 创建五个标签:hour_label、colon1_label、minute_label、colon2_label 和
second_label,并设置标签的对齐方式和样式,使其在窗口中居中并且字体大小为 48 像素。 - 将五个标签添加到水平布局中。
- 将水平布局添加到垂直布局中,并设置垂直布局居中对齐。
- 创建一个容器 QWidget,将布局设置为该容器的布局,并将容器设置为主窗口的中央控件。
- 创建一个 QTimer 对象,每秒触发一次 timeout 事件,连接到 showTime 方法。
- 调用 showTime 方法显示当前时间。
显示时间方法
def showTime(self):current_time = QTime.currentTime()hour = current_time.toString('hh')minute = current_time.toString('mm')second = current_time.toString('ss')# Generate random colors for hour, minute, and secondhour_color = QColor(random.randint(0, 255), random.randint(0, 255), random.randint(0, 255))minute_color = QColor(random.randint(0, 255), random.randint(0, 255), random.randint(0, 255))second_color = QColor(random.randint(0, 255), random.randint(0, 255), random.randint(0, 255))self.hour_label.setText(hour)self.hour_label.setStyleSheet(f"font-size: 48px; color: {hour_color.name()};")self.minute_label.setText(minute)self.minute_label.setStyleSheet(f"font-size: 48px; color: {minute_color.name()};")self.second_label.setText(second)self.second_label.setStyleSheet(f"font-size: 48px; color: {second_color.name()};")# Colon colorsself.colon1_label.setStyleSheet(f"font-size: 48px; color: #000000;")self.colon2_label.setStyleSheet(f"font-size: 48px; color: #000000;")- showTime 方法获取当前时间并将其格式化为小时、分钟和秒。
- 为小时、分钟和秒生成随机颜色,并将这些颜色应用到相应的标签上。
- 将两个冒号标签的颜色固定为黑色。
完整代码
import sys
import random
from PyQt5.QtWidgets import QApplication, QMainWindow, QLabel, QHBoxLayout, QVBoxLayout, QWidget
from PyQt5.QtCore import QTimer, QTime, Qt
from PyQt5.QtGui import QColorclass RainbowClockWindow(QMainWindow):def __init__(self):super().__init__()self.setWindowTitle('Rainbow Digital Clock')self.setGeometry(100, 100, 400, 200)self.initUI()def initUI(self):layout = QVBoxLayout()self.time_layout = QHBoxLayout()self.time_layout.setSpacing(0)  # 设置标签之间的间距为0self.hour_label = QLabel(self)self.hour_label.setAlignment(Qt.AlignCenter)self.hour_label.setStyleSheet("font-size: 48px;")self.colon1_label = QLabel(self)self.colon1_label.setAlignment(Qt.AlignCenter)self.colon1_label.setStyleSheet("font-size: 48px;")self.colon1_label.setText(":")self.minute_label = QLabel(self)self.minute_label.setAlignment(Qt.AlignCenter)self.minute_label.setStyleSheet("font-size: 48px;")self.colon2_label = QLabel(self)self.colon2_label.setAlignment(Qt.AlignCenter)self.colon2_label.setStyleSheet("font-size: 48px;")self.colon2_label.setText(":")self.second_label = QLabel(self)self.second_label.setAlignment(Qt.AlignCenter)self.second_label.setStyleSheet("font-size: 48px;")self.time_layout.addWidget(self.hour_label)self.time_layout.addWidget(self.colon1_label)self.time_layout.addWidget(self.minute_label)self.time_layout.addWidget(self.colon2_label)self.time_layout.addWidget(self.second_label)layout.addLayout(self.time_layout)layout.setAlignment(Qt.AlignCenter)  # 居中对齐container = QWidget()container.setLayout(layout)self.setCentralWidget(container)timer = QTimer(self)timer.timeout.connect(self.showTime)timer.start(1000)self.showTime()def showTime(self):current_time = QTime.currentTime()hour = current_time.toString('hh')minute = current_time.toString('mm')second = current_time.toString('ss')# Generate random colors for hour, minute, and secondhour_color = QColor(random.randint(0, 255), random.randint(0, 255), random.randint(0, 255))minute_color = QColor(random.randint(0, 255), random.randint(0, 255), random.randint(0, 255))second_color = QColor(random.randint(0, 255), random.randint(0, 255), random.randint(0, 255))self.hour_label.setText(hour)self.hour_label.setStyleSheet(f"font-size: 48px; color: {hour_color.name()};")self.minute_label.setText(minute)self.minute_label.setStyleSheet(f"font-size: 48px; color: {minute_color.name()};")self.second_label.setText(second)self.second_label.setStyleSheet(f"font-size: 48px; color: {second_color.name()};")# Colon colorsself.colon1_label.setStyleSheet(f"font-size: 48px; color: #000000;")self.colon2_label.setStyleSheet(f"font-size: 48px; color: #000000;")if __name__ == "__main__":app = QApplication(sys.argv)window = RainbowClockWindow()window.show()sys.exit(app.exec_())