SpringAop实战(xml文件/纯注解两种方式)
AOP的概述
什么是AOP?
在软件业,AOP为Aspect Oriented Programming的缩写,意为:面向切面编程
• AOP是一种编程范式,隶属于软工范畴,指导开发者如何组织程序结构
• AOP最早由AOP联盟的组织提出的,制定了一套规范.Spring将AOP思想引入到框架中,必须遵守AOP联盟的规范
• 通过预编译方式或者运行期动态代理实现程序功能的统一维护的一种技术
• AOP是OOP的延续,是软件开发中的一个热点,也是Spring框架中的一个重要内容,是函数式编程的一种衍生范型
• 利用AOP可以对业务逻辑的各个部分进行隔离,从而使得业务逻辑各部分之间的耦合度降低,提高程序的可重用性,同时提高了开发的效率
AOP:面向切面编程.(思想.—解决OOP遇到一些问题)
AOP采取横向抽取机制,取代了传统纵向继承体系重复性代码(性能监视、事务管理、安全检查、缓存)
AOP,可以在不修改源代码的前提下,对程序进行增强!
AOP的底层实现
JDK的动态代理技术
1、为接口创建代理类的字节码文件(.class文件)
2、使用ClassLoader类加载器将字节码文件加载到JVM
3、创建代理类实例对象(proxyObject),执行对象的目标方法
AOP的底层实现是动态代理,Spring框架的动态代理是基于JDK的接口动态代理(还有基于继承的cglib动态代理,有兴趣的读者可以自行学习)
接口实现的动态代理相比于单继承的cglib实现的动态代理更为灵活
AOP的优势
运行期间,不修改源代码的情况下对已有的方法进行增强
优势
- 减少重复的代码
- 提供开发的效率
- 维护方便
SpringAop的相关名词解释
Joinpoint(连接点)
所谓连接点是指那些被拦截到的点。在spring中,这些点指的是方法,因为spring只支持方法类型的连接点
Pointcut(切入点)
所谓切入点是指我们要对哪些Joinpoint进行拦截的定义(其实和连接点基本上是一回事,Pointcut = Joinpoint拦截)
Advice(通知/增强)
所谓通知是指拦截到Joinpoint之后所要做的事情。
通知分为
前置通知(如开启事务),
后置通知(如提交事务),
异常通知(如回滚事务),
最终通知(如关闭资源),
环绕通知(上面所有通知的集合体,但是需要自己完整写出环绕通知方法)
Target(目标对象)
代理的目标对象,也就是代理类对象代理的目标类对象
Weaving(织入)
是指把增强应用到目标对象来创建新的代理对象的过程
大白话就是代理类实现接口(重写的方法包含增强的部分)+ 创建代理类对象的过程
Proxy(代理)
一个类被AOP织入增强后,就产生一个结果代理类
Aspect(切面)
是切入点和通知的结合,以后咱们自己来编写和配置的(代理类)
AOP实战
以mysql的事务管理为例
1. 需要用到的maven依赖
以下依赖中,最重要的是AOP相关的依赖
<dependencies><dependency><groupId>org.springframework</groupId><artifactId>spring-context</artifactId><version>5.0.2.RELEASE</version></dependency><dependency><groupId>commons-logging</groupId><artifactId>commons-logging</artifactId><version>1.2</version></dependency><dependency><groupId>log4j</groupId><artifactId>log4j</artifactId><version>1.2.12</version></dependency><!--有单元测试的环境,Spring5版本,Junit4.12版本--><dependency><groupId>junit</groupId><artifactId>junit</artifactId><version>4.12</version><scope>test</scope></dependency><!--连接池--><dependency><groupId>com.alibaba</groupId><artifactId>druid</artifactId><version>1.1.10</version></dependency><!--mysql驱动包--><dependency><groupId>mysql</groupId><artifactId>mysql-connector-java</artifactId><version>5.1.6</version></dependency><!-- Spring整合Junit测试的jar包 --><dependency><groupId>org.springframework</groupId><artifactId>spring-test</artifactId><version>5.0.2.RELEASE</version><scope>test</scope></dependency><!--AOP相关依赖--><!-- AOP联盟 --><dependency><groupId>aopalliance</groupId><artifactId>aopalliance</artifactId><version>1.0</version></dependency><!-- Spring Aspects --><dependency><groupId>org.springframework</groupId><artifactId>spring-aspects</artifactId><version>5.0.2.RELEASE</version></dependency><!-- aspectj --><dependency><groupId>org.aspectj</groupId><artifactId>aspectjweaver</artifactId><version>1.8.3</version></dependency></dependencies>2. ApplicationContext.xml配置文件
引入具体的AOP的schema约束
<?xml version=”1.0” encoding=”UTF-8”?>
<beans xmlns=”http://www.springframework.org/schema/beans”xmlns:xsi=”http://www.w3.org/2001/XMLSchema-instance”xmlns:context=”http://www.springframework.org/schema/context”xmlns:aop=”http://www.springframework.org/schema/aop”xsi:schemaLocation=”http://www.springframework.org/schema/beanshttp://www.springframework.org/schema/beans/spring-beans.xsdhttp://www.springframework.org/schema/contexthttp://www.springframework.org/schema/context/spring-context.xsdhttp://www.springframework.org/schema/aophttp://www.springframework.org/schema/aop/spring-aop.xsd”></beans>
3. 实体类,实体Dao,实体DaoImpl,实体对应的Service,Service对应的ServiceIImpl
mysql连接池模拟工具类TxUtils(因为我们要模拟的就是mysql的事务(提交/回滚),所以事务相关的原子方法需要我们独自实现)
真实开发场景下,我们要么使用Spring自带的事务管理机制,要么使用mybatis管理事务,不会这样赤裸裸地封装连接池
package com.qcby.mySpring03.utils;import com.alibaba.druid.pool.DruidDataSource;import javax.sql.DataSource;
import java.sql.Connection;
import java.sql.SQLException;/*** 事务的工具类*/
public class TxUtils {private static DruidDataSource ds = null;// 使用ThreadLocal存储当前线程中的Connection对象private static ThreadLocal<Connection> threadLocal = new ThreadLocal<Connection>();// 在静态代码块中创建数据库连接池static {try {ds = new DruidDataSource();ds.setDriverClassName("com.mysql.cj.jdbc.Driver");ds.setUrl("jdbc:mysql:///mybatis_demo?serverTimezone=UTC");ds.setUsername("root");ds.setPassword("980708");ds.setInitialSize(5);ds.setMaxActive(10);ds.setMaxWait(3000);} catch (Exception e) {throw new ExceptionInInitializerError(e);}}/*** @Method: getConnection* @Description: 从数据源中获取数据库连接* @Anthor:* @return Connection* @throws SQLException*/public static Connection getConnection() throws SQLException {// 从当前线程中获取ConnectionConnection conn = threadLocal.get();if (conn == null) {// 从数据源中获取数据库连接conn = getDataSource().getConnection();// 将conn绑定到当前线程threadLocal.set(conn);}return conn;}/*** @Method: startTransaction* @Description: 开启事务* @Anthor:**/public static void startTransaction() {try {Connection conn = threadLocal.get();if (conn == null) {conn = getConnection();// 把 conn绑定到当前线程上threadLocal.set(conn);}// 开启事务conn.setAutoCommit(false);} catch (Exception e) {throw new RuntimeException(e);}}/*** @Method: rollback* @Description:回滚事务* @Anthor:*/public static void rollback() {try {// 从当前线程中获取ConnectionConnection conn = threadLocal.get();if (conn != null) {// 回滚事务conn.rollback();}} catch (Exception e) {throw new RuntimeException(e);}}/*** @Method: commit* @Description:提交事务* @Anthor:*/public static void commit() {try {// 从当前线程中获取ConnectionConnection conn = threadLocal.get();if (conn != null) {// 提交事务conn.commit();}} catch (Exception e) {throw new RuntimeException(e);}}/*** @Method: close* @Description:关闭数据库连接(注意,并不是真的关闭,而是把连接还给数据库连接池)* @Anthor:**/public static void close() {try {// 从当前线程中获取ConnectionConnection conn = threadLocal.get();if (conn != null) {conn.close();// 解除当前线程上绑定connthreadLocal.remove();}} catch (Exception e) {throw new RuntimeException(e);}}/*** @Method: getDataSource* @Description: 获取数据源* @Anthor:* @return DataSource*/public static DataSource getDataSource() {// 从数据源中获取数据库连接return ds;}}
实体类Car
public class Car {private int id;private String carName;private int size;private String color;@Overridepublic String toString() {return "Car{" +"carName='" + carName + '\'' +", size=" + size +", color='" + color + '\'' +'}';}public Car(int id, String carName, int size, String color) {this.id = id;this.carName = carName;this.size = size;this.color = color;}public Car() {}public Car(String carName, int size, String color) {this.carName = carName;this.size = size;this.color = color;}public int getId() {return id;}public void setId(int id) {this.id = id;}public String getCarName() {return carName;}public void setCarName(String carName) {this.carName = carName;}public int getSize() {return size;}public void setSize(int size) {this.size = size;}public String getColor() {return color;}public void setColor(String color) {this.color = color;}
}
CarDao接口
import java.sql.SQLException;
import java.util.List;public interface CarDao {List<Car> findAll();Car getById(Integer id);Integer insert(Car car) throws SQLException;Integer update(Car car);Integer delete(Integer id);}
CarDaoImpl实现类
import java.sql.Connection;
import java.sql.PreparedStatement;
import java.sql.ResultSet;
import java.sql.SQLException;
import java.util.ArrayList;
import java.util.List;@Repository("carDao")
public class CarDaoImpl implements CarDao {//    @Autowired
//    private DataSource dataSource;public List<Car> findAll() {//jdbc  查询数据库  拿到数据//1.加载驱动  连接池
//        dataSource.setDriverClassName("com.mysql.cj.jdbc.Driver");
//        dataSource.setUrl("jdbc:mysql:///spring_db");
//        dataSource.setUsername("root");
//        dataSource.setPassword("root");Connection conn = null;PreparedStatement stmt = null;ResultSet rs = null;List<Car> carList = new ArrayList<Car>();//2.获取连接对象try {conn = TxUtils.getConnection();//3.编写sqlString sql = "select * from car";//4.获取执行sql的stmt对象stmt = conn.prepareStatement(sql);//5.执行sqlrs = stmt.executeQuery();//6.遍历结果集while (rs.next()) {//实体类  account的实体类Car car = new Car();car.setId(rs.getInt("id"));car.setCarName(rs.getString("car_name"));car.setSize(rs.getInt("size"));car.setColor(rs.getString("color"));// 存储carList.add(car);}//7.关闭conn.close();stmt.close();rs.close();} catch (Exception e) {e.printStackTrace();}System.out.println("持久层:操作数据库保存订单");return carList;}public Car getById(Integer id) {return null;}public Integer insert(Car car) throws SQLException {Integer result = null;//jdbc  工具类实现获取连接 操作数据库  完成新增数据Connection connection = TxUtils.getConnection();// 编写sql语句String sql = "insert into car values (null,?,?,?)";// 预编译SQL语句PreparedStatement stmt = connection.prepareStatement(sql);// 设置值stmt.setString(1, car.getCarName());stmt.setInt(2, car.getSize());stmt.setString(3, car.getColor());// 执行操作result = stmt.executeUpdate();// 关闭资源 ,conn不能关闭stmt.close();return result;}public Integer update(Car car) {return null;}public Integer delete(Integer id) {return null;}
}
CarService接口
import java.sql.SQLException;
import java.util.List;public interface CarService {List<Car> findAll();void saveAll(Car car1, Car car2) throws SQLException;void saveAllTransaction(Car car1, Car car2);
}
CarServiceImpl实现类
package com.qcby.mySpring03.service.impl;import com.qcby.mySpring03.entity.Car;
import com.qcby.mySpring03.mapper.CarDao;
import com.qcby.mySpring03.service.CarService;
import com.qcby.mySpring03.utils.TxUtils;
import org.springframework.beans.factory.annotation.Autowired;
import org.springframework.stereotype.Service;import java.sql.SQLException;
import java.util.List;@Service("carService")
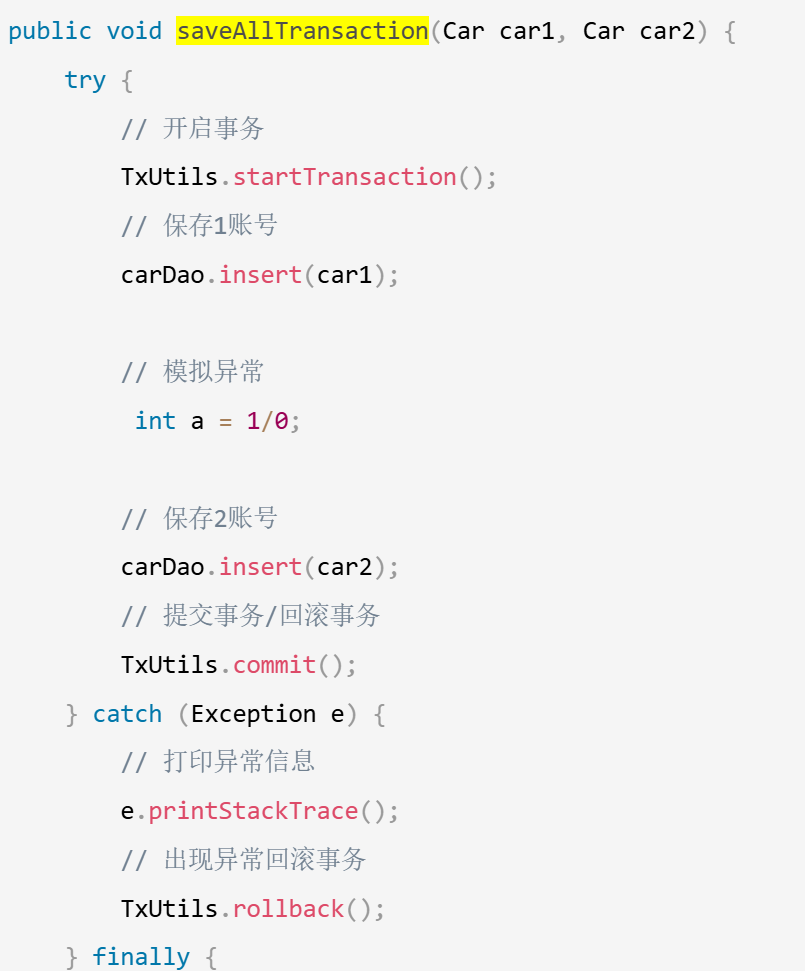
public class CarServiceImpl implements CarService {@Autowiredprivate CarDao carDao;public void setCarDao(CarDao carDao) {this.carDao = carDao;}public List<Car> findAll() {return carDao.findAll();}// 不使用事务的情况下public void saveAll(Car car1, Car car2) throws SQLException {carDao.insert(car1);// 模拟异常// int a = 1 / 0;carDao.insert(car2);}public void saveAllTransaction(Car car1, Car car2) {try {// 开启事务TxUtils.startTransaction();// 保存1账号carDao.insert(car1);// 模拟异常int a = 1/0;// 保存2账号carDao.insert(car2);// 提交事务/回滚事务TxUtils.commit();} catch (Exception e) {// 打印异常信息e.printStackTrace();// 出现异常回滚事务TxUtils.rollback();} finally {// 关闭资源TxUtils.close();}}}3.2 bean导入到ApplicationContext.xml中
<bean id="carDao" class="com.qcby.mySpring03.mapper.impl.CarDaoImpl"/><bean id="carService" class="com.qcby.mySpring03.service.impl.CarServiceImpl"/>
4. 自定义切面类(切入点表达式+通知/增强方法实现);在ApplicationContext.xml中配置AOP
这一部分是最重要的
4.1 自定义切面类(切入点表达式+通知/增强方法实现)
// 自定义切面类
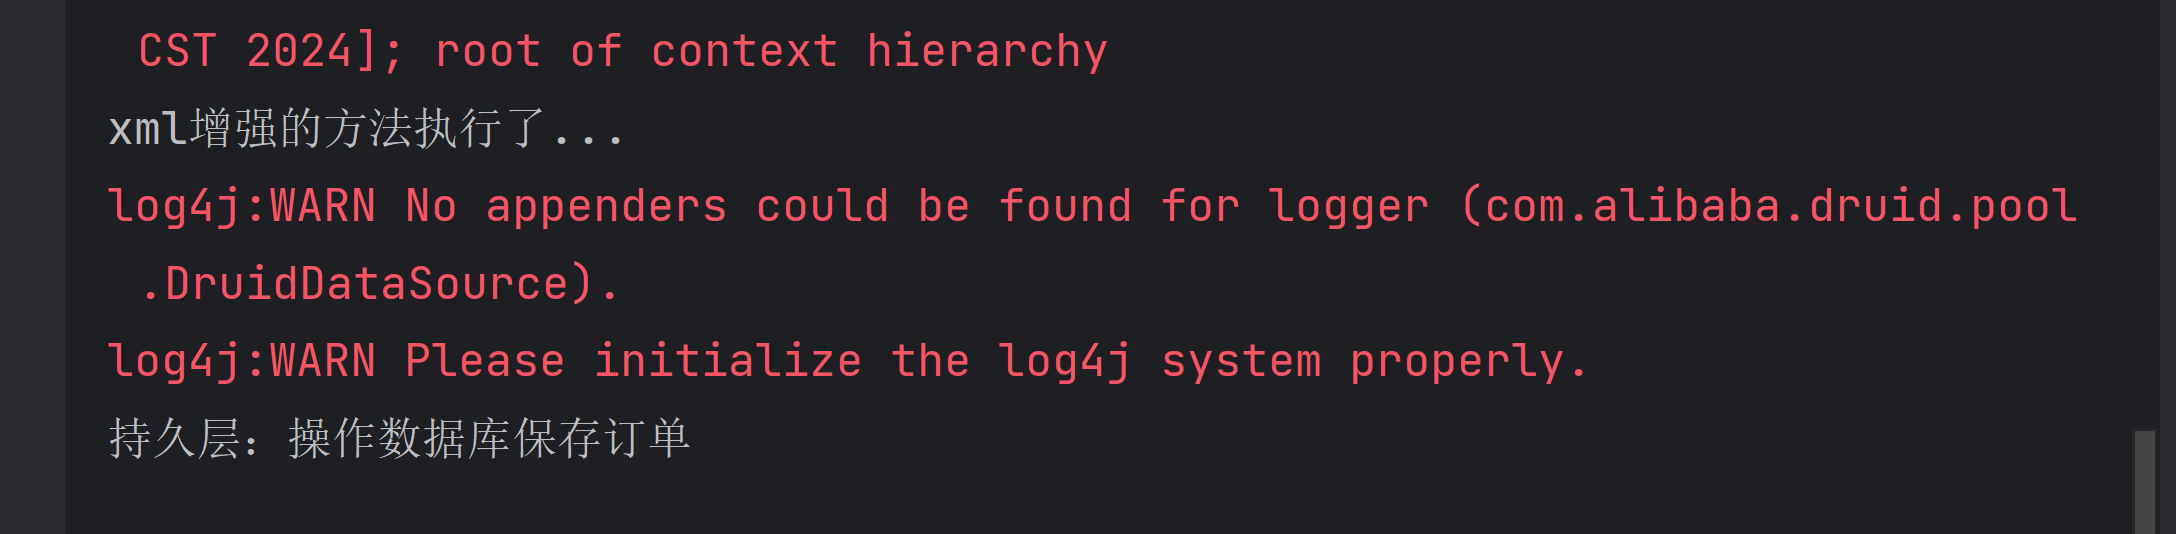
public class MyAspect {/*** 通知/增强的方法*/public void log() {// 发送手机短信// 发送邮件/记录日志/事务管理System.out.println("xml增强的方法执行了...");}
}
切入点表达式
切入点表达式的格式如下:
- execution([修饰符] 返回值类型 包名.类名.方法名(参数))
- 修饰符可以省略不写,不是必须要出现的。
- 返回值类型是不能省略不写的,根据你的方法来编写返回值。可以使用
*代替。 - 包名例如:com.tx.demo3.BookDaoImpl
- 首先com是不能省略不写的,但是可以使用
*代替 - 中间的包名可以使用
*号代替 - 如果想省略中间的包名可以使用
* - 类名也可以使用
*号代替,也有类似的写法:*DaoImpl - 方法也可以使用
*号代替 - 参数如果是一个参数可以使用
*号代替,如果想代表任意参数使用..
举例,所有省略都不写的切入点表达式:
execution(public void com.qcby.mySpring03.service .impl.UserServiceImpl.findAll())
简写过后:
execution(* *.qcby.*.service .impl.*ServiceImpl.*(..))
AOP配置
<!--自定义切面类导入-->
<bean id="myAspect" class="com.qcby.mySpring03.aop.MyAspect"/>
<!--AOP配置-->
<aop:config><aop:aspect ref="myAspect"><aop:before method="log"pointcut="execution( * *.qcby.*.service.impl.*ServiceImpl.*(..))"/></aop:aspect></aop:config>
测试
import org.junit.Test;
import org.junit.runner.RunWith;
import org.springframework.beans.factory.annotation.Autowired;
import org.springframework.test.context.ContextConfiguration;
import org.springframework.test.context.junit4.SpringJUnit4ClassRunner;@RunWith(SpringJUnit4ClassRunner.class)
@ContextConfiguration(value = {"classpath:ApplicationContext.xml"})
public class XmlAopTest {@Autowiredprivate UserService userService;@Autowiredprivate CarService carService;@Testpublic void xmlAopTest() {carService.findAll();}
}
运行结果
5. 纯注解AOP实战
通知类型注解
@Before—前置通知
@AfterReturing—后置通知
@Around—环绕通知(目标对象方法默认不执行的,需要手动执行)
@After—最终通知
@AfterThrowing—异常抛出通知
注解自定义切面类
@Component
@Aspect
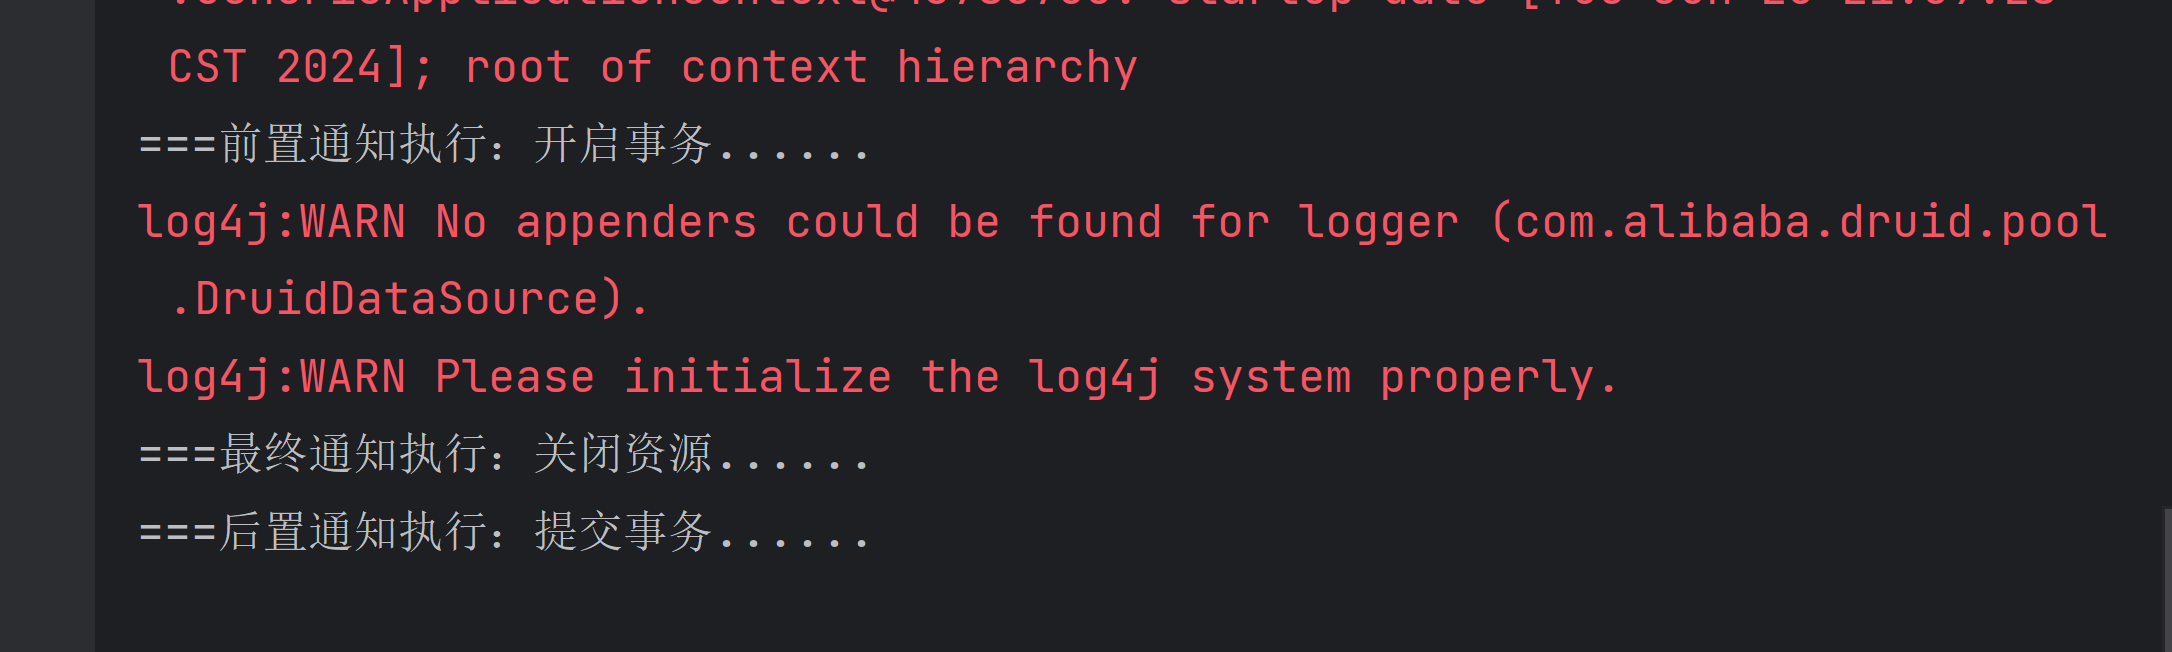
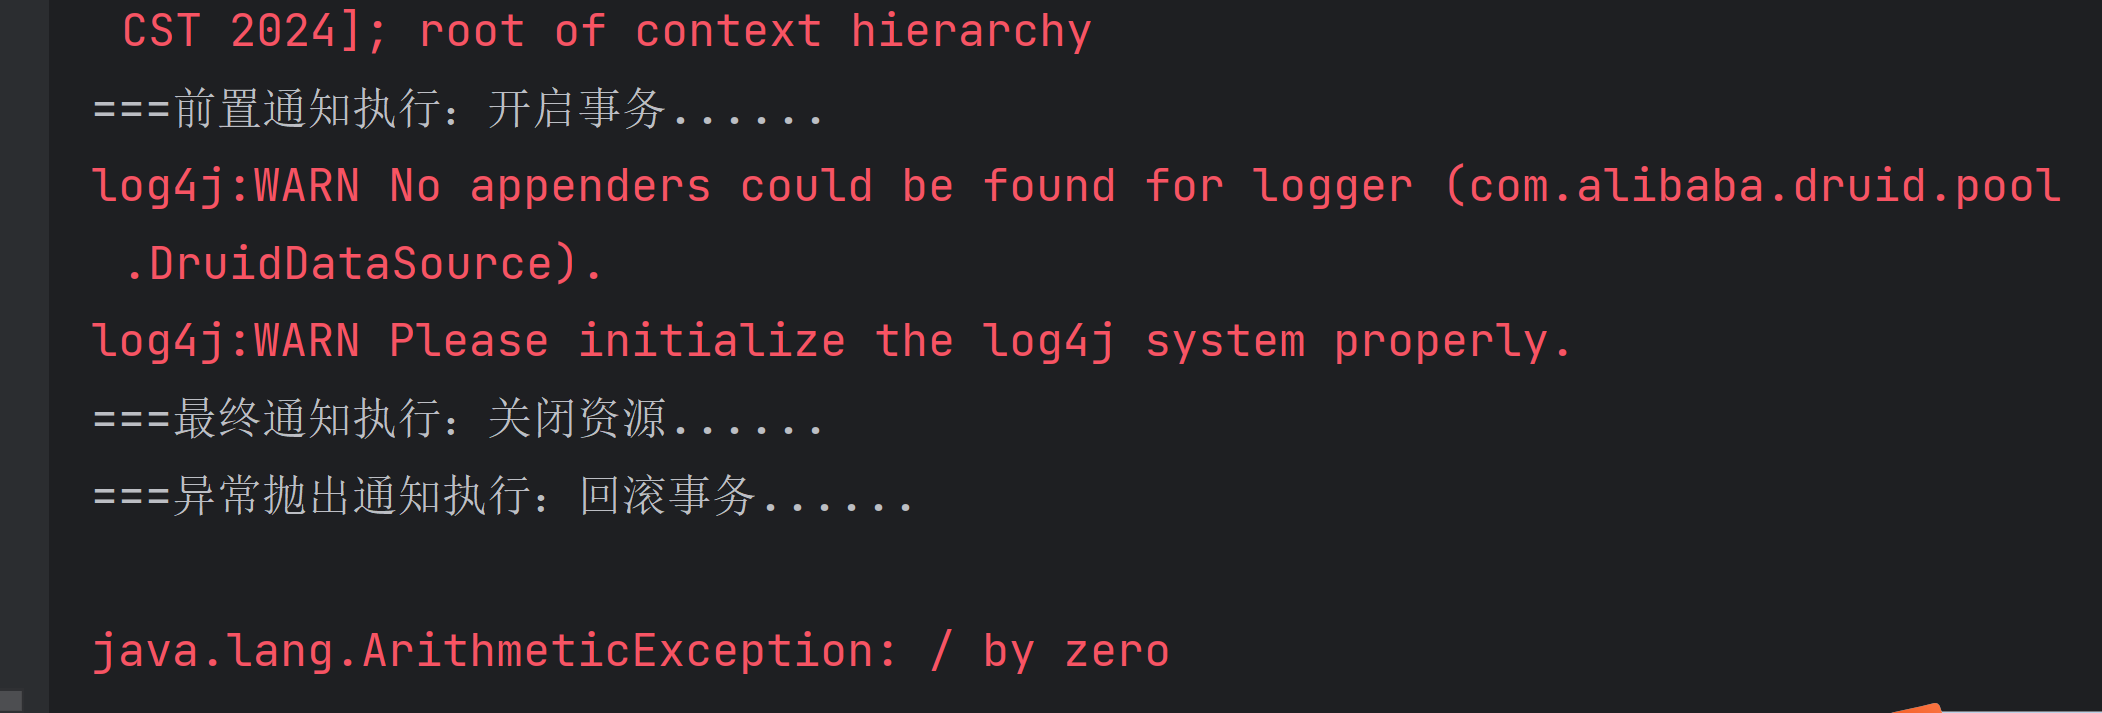
public class MyAnnoAspect {/*** 通知*/@Before(value = "execution( * com.qcby.*.service.impl.*ServiceImpl.*(..))")public void startTransaction() {System.out.println("===前置通知执行:开启事务......");TxUtils.startTransaction();}@AfterReturning(value = "execution( * com.qcby.*.service.impl.*ServiceImpl.*(..))")public void commit() {System.out.println("===后置通知执行:提交事务......");TxUtils.commit();}@AfterThrowing(value = "execution( * com.qcby.*.service.impl.*ServiceImpl.*(..))")public void rollback() {System.out.println("===异常抛出通知执行:回滚事务......");TxUtils.rollback();}@After(value = "execution( * com.qcby.*.service.impl.*ServiceImpl.*(..))")public void close() {System.out.println("===最终通知执行:关闭资源......");TxUtils.close();}}AOP配置类(开启AOP)
import org.springframework.context.annotation.Configuration;
import org.springframework.context.annotation.EnableAspectJAutoProxy;@Configuration
@EnableAspectJAutoProxy
public class SpringAopConfig {
}
Spring扫描包配置类(顺便引入上一个配置类)
@Configuration
@ComponentScan("com.qcby")
@Import(value = {SpringAopConfig.class})
public class SpringJunit4Config {
}
在CarServiceImpl(@Service),CarDaoImpl(@Repository)上控制反转的注解,并配置各自的依赖注入的注解(@Autowired)
@Service("carService")
public class CarServiceImpl implements CarService {@Autowiredprivate CarDao carDao;
@Repository("carDao")
public class CarDaoImpl implements CarDao {// 	有连接池工具类就不需要注入DataSource了
//    @Autowired
//    private DataSource dataSource;
测试
import org.junit.Test;
import org.junit.runner.RunWith;
import org.springframework.beans.factory.annotation.Autowired;
import org.springframework.test.context.ContextConfiguration;
import org.springframework.test.context.junit4.SpringJUnit4ClassRunner;import java.sql.SQLException;@RunWith(SpringJUnit4ClassRunner.class)
@ContextConfiguration(classes = SpringJunit4Config.class)
public class TransactionTest {@Autowiredprivate CarService carService;@Testpublic void shiwuTest() throws SQLException {Car car1 = new Car("car1", 100, "green");Car car2 = new Car("car2", 100, "yellow");carService.saveAll(car1, car2);}
}
由于存在除0异常,所以事务应该会回滚
执行结果
出现除0异常,事务回滚
没有出现异常,事务提交