windows anaconda 安装 Labelme
安装
# 创建环境
conda create -n labelme python=3.6
#激活环境
conda activate labelme
# 安装依赖
conda install pyqt
conda install pillow
# 安装labelme
conda install labelme=3.16.2
# 启动labelme
labelme
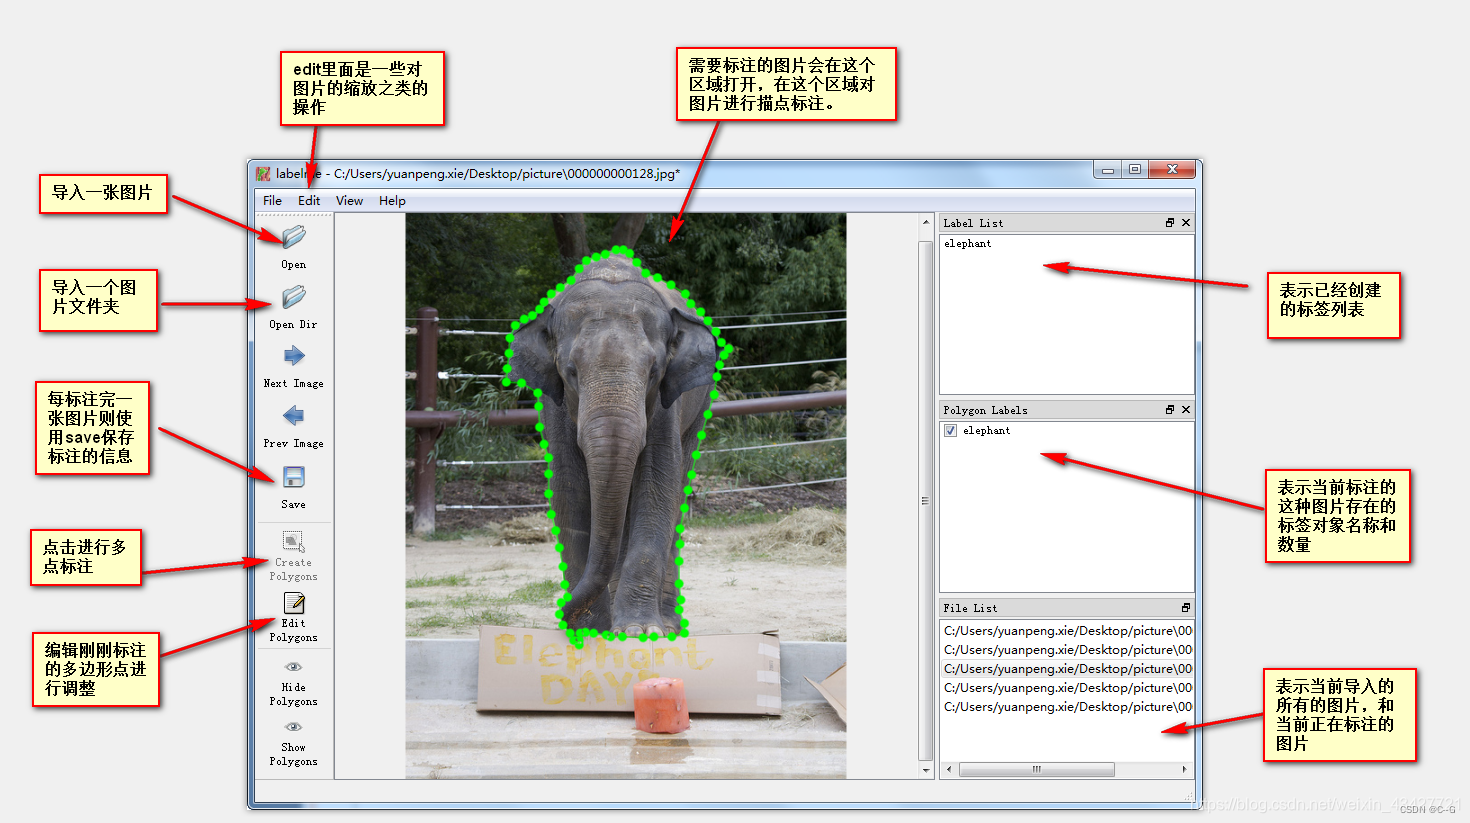
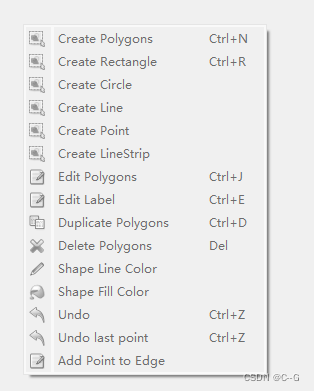
右键选择标注类型,从上到下为多边形(常用)、矩形、圆、线和点。
标注完之后点击save进行保存,注意:最好把标注完的json文件与原图存放在一个目录下,这样在后期查看的时候可以看到原图与标注区域的叠加,而不单单是原图。
标注json转换dataset
得到json文件之后,要将其转化成数据集使用,这里涉及到labelme源码的更改
首先,找到labelme的json_to_dataset.py
找到anaconda的安装位置,例如安装在D盘,然后找到下面说的具体位置:D:\Anaconda\envs\labelme\Lib\site-packages\labelme\cli,进入之后会发现有几个python source file,打开json_to_dataset.py,将代码做如下更改:
import argparse
import json
import os
import os.path as osp
import warningsimport PIL.Image
import yamlfrom labelme import utils
import base64def main():warnings.warn("This script is aimed to demonstrate how to convert the\n""JSON file to a single image dataset, and not to handle\n""multiple JSON files to generate a real-use dataset.")parser = argparse.ArgumentParser()parser.add_argument('json_file')parser.add_argument('-o', '--out', default=None)args = parser.parse_args()json_file = args.json_fileif args.out is None:# out_dir = osp.basename(json_file).replace('.', '_')# out_dir = osp.join(osp.dirname(json_file))out_dir = json_fileelse:out_dir = args.outif not osp.exists(out_dir):os.mkdir(out_dir)count = os.listdir(json_file)for i in range(0, len(count)):path = os.path.join(json_file, count[i])if os.path.isfile(path) and path.endswith("json"):with open(path) as data:data = json.load(data)if data['imageData']:imageData = data['imageData']else:imagePath = os.path.join(os.path.dirname(path), data['imagePath'])with open(imagePath, 'rb') as f:imageData = f.read()imageData = base64.b64encode(imageData).decode('utf-8')img = utils.img_b64_to_arr(imageData)label_name_to_value = {'_background_': 0}for shape in data['shapes']:label_name = shape['label']if label_name in label_name_to_value:label_value = label_name_to_value[label_name]else:label_value = len(label_name_to_value)label_name_to_value[label_name] = label_value# label_values must be denselabel_values, label_names = [], []for ln, lv in sorted(label_name_to_value.items(), key=lambda x: x[1]):label_values.append(lv)label_names.append(ln)assert label_values == list(range(len(label_values)))lbl = utils.shapes_to_label(img.shape, data['shapes'], label_name_to_value)captions = ['{}: {}'.format(lv, ln)for ln, lv in label_name_to_value.items()]lbl_viz = utils.draw_label(lbl, img, captions)out_child_dir = osp.basename(count[i]).replace('.', '_')out_child_dir = osp.join(out_dir, out_child_dir)if not osp.exists(out_child_dir):os.mkdir(out_child_dir)PIL.Image.fromarray(img).save(osp.join(out_child_dir, 'img.png'))# PIL.Image.fromarray(lbl).save(osp.join(out_child_dir, 'label.png'))utils.lblsave(osp.join(out_child_dir, 'label.png'), lbl)PIL.Image.fromarray(lbl_viz).save(osp.join(out_child_dir, 'label_viz.png'))with open(osp.join(out_child_dir, 'label_names.txt'), 'w') as f:for lbl_name in label_names:f.write(lbl_name + '\n')warnings.warn('info.yaml is being replaced by label_names.txt')info = dict(label_names=label_names)with open(osp.join(out_child_dir, 'info.yaml'), 'w') as f:yaml.safe_dump(info, f, default_flow_style=False)print('Saved to: %s' % out_child_dir)if __name__ == '__main__':main()
将之前标注好的json文件单独提取出来,放在一个目录下(C:\Users\16343\Desktop\box\close\json),然后进入批量处理的环境中,也就是执行把jaso->dataset的目录:
回退到D:\Anaconda\envs\labelme\Scripts
labelme_json_to_dataset.exe C:\Users\16343\Desktop\box\close\json -o C:\Users\16343\Desktop\box\close\json

-o 指定输出文件路径,默认为输入文件路径
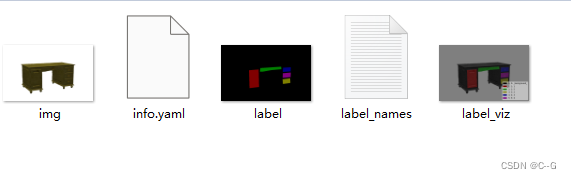
在C:\Users\16343\Desktop\box\close\json得到多个文件夹,每个文件夹内的文件如下
读取标注
上述文件中的label 是Mask图像, 显示彩图, 但实际是单通道位深为8的png图像, 也就是单通道图像, 并不是常见的RGB三通道
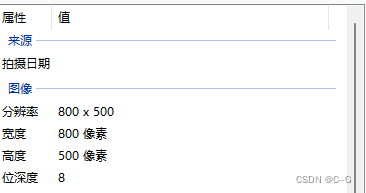
opencv读取会改变图像的像素值和格式,因此用用PIL.Image.open()读取.像素值在 [0, 255] 之间, 矩阵仍然是二维单通道
import PIL.Image as Image
import torchimage = Image.open("0_json/0_json/label.png")
image = torch.Tensor(np.array(image))
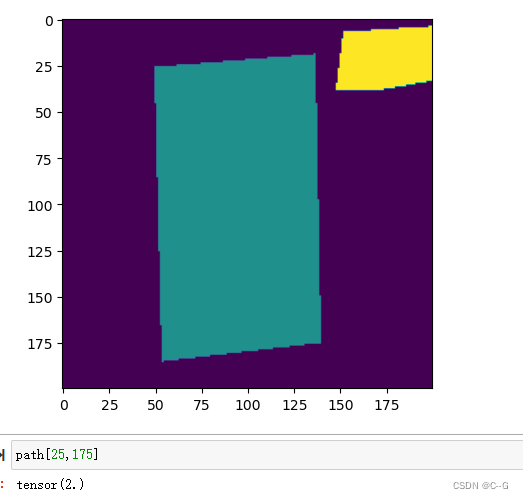
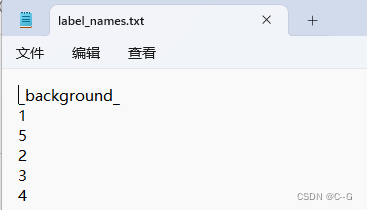
mask中的数值代表了label_names.txt的序列,也就是0代表_background_,2代表label_names.txt中的5,也就是我们的标签值。