SpringBoot整合RabbitMQ (持续更新中)
RabbitMQ 官网地址:RabbitMQ: One broker to queue them all | RabbitMQ
RabbitMQ 与 Erlang 版本兼容关系
|
|
|
|
|
|
|
|
|
|
|
|
|
|
|
|
|
|
|
|
RabbitMQ 安装
下载地址:RabbitMQ: One broker to queue them all | RabbitMQ
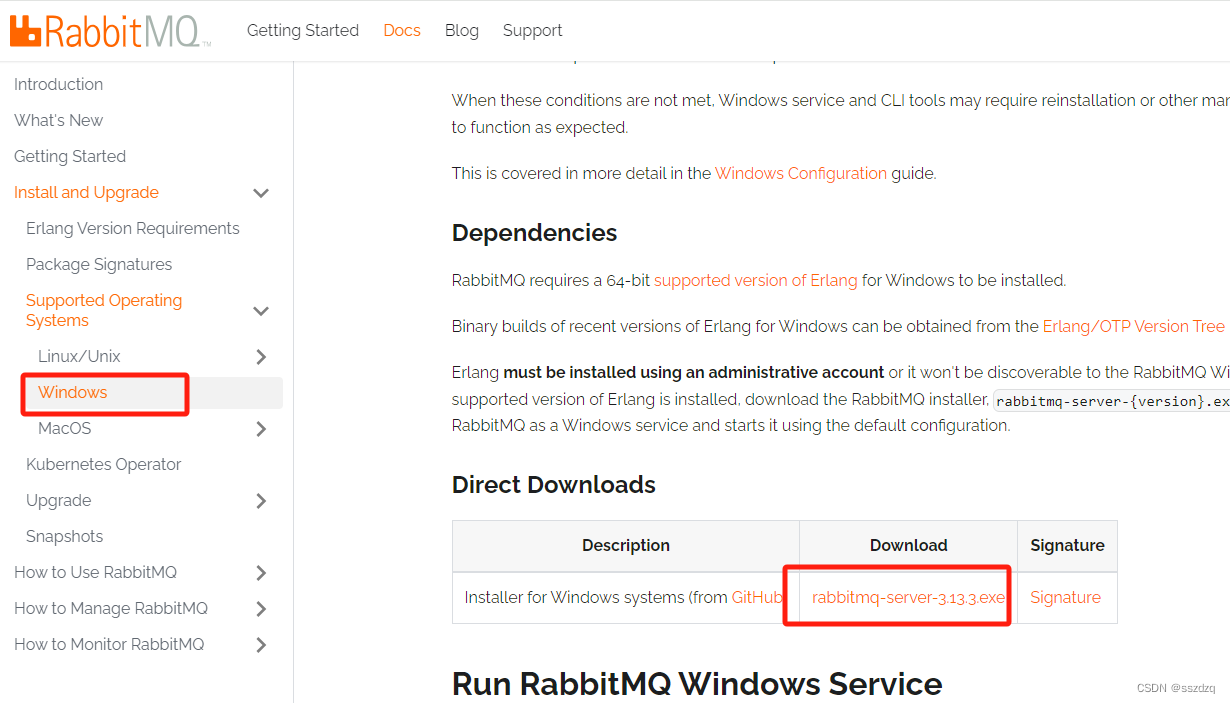
exe文件点击安装即可(其他系统版本看官网)
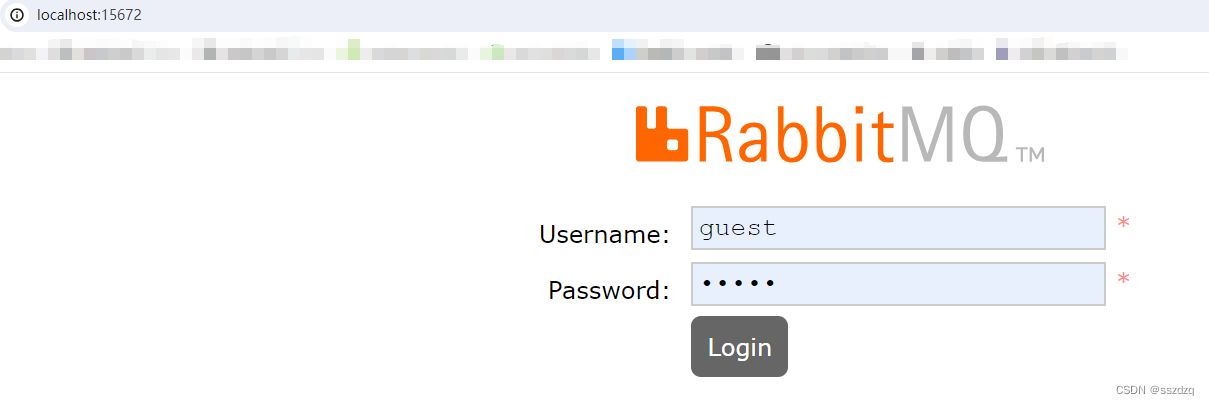
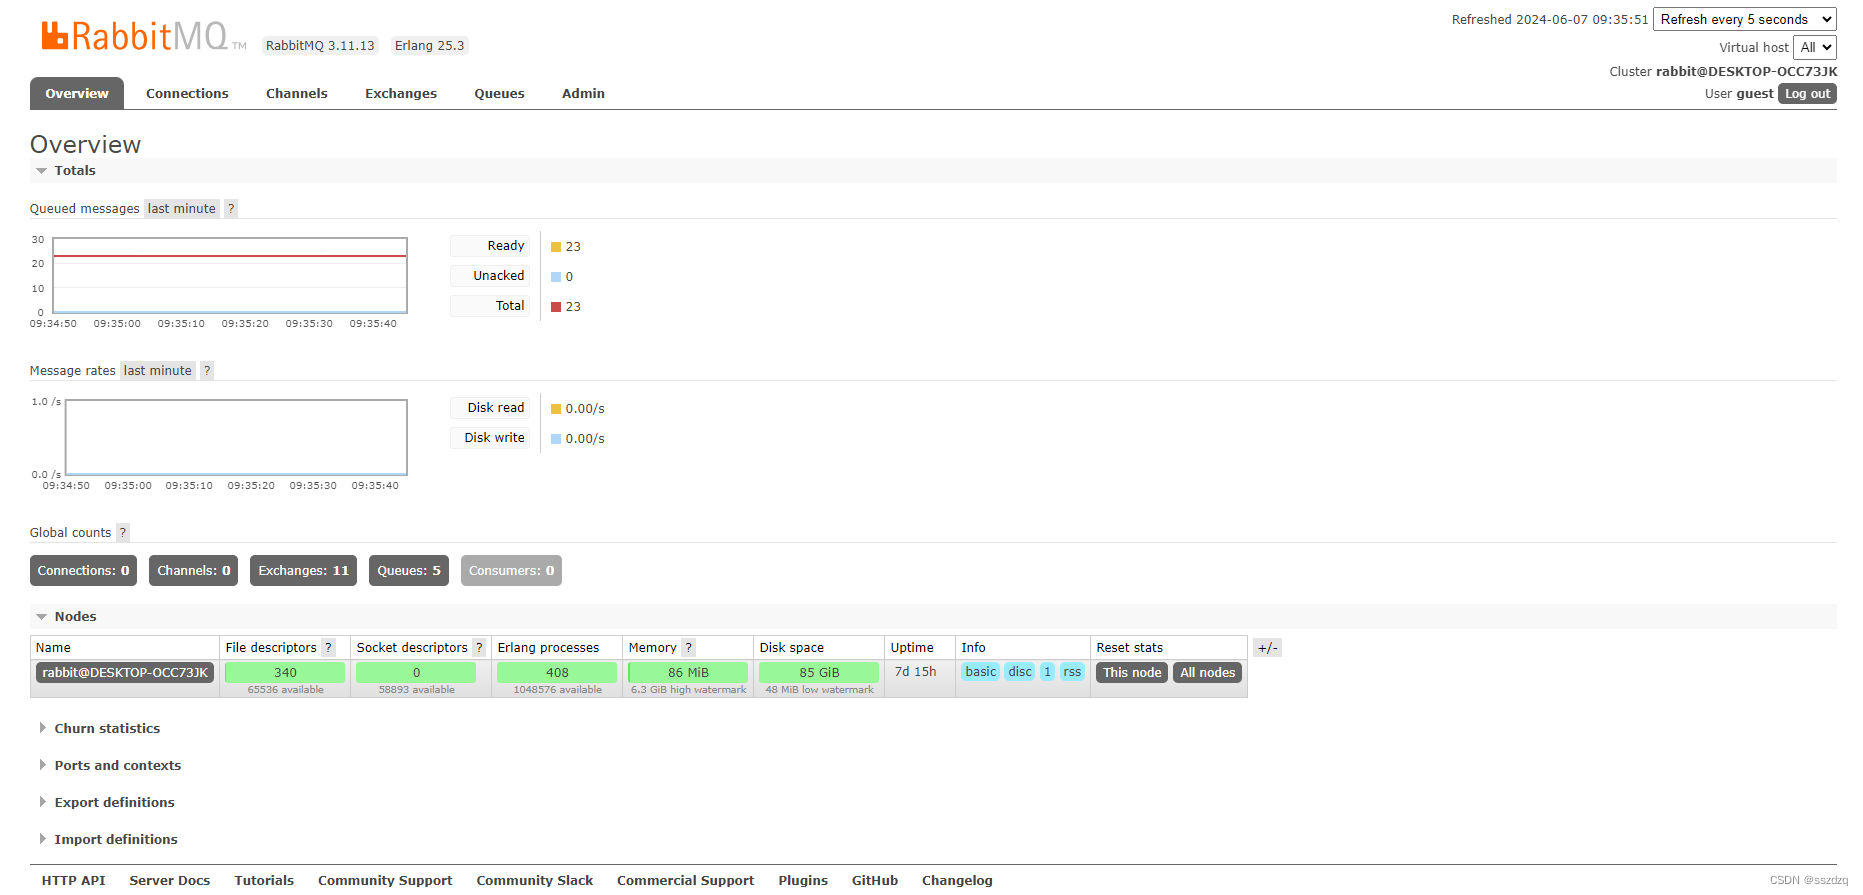
RabbitMQ管理界面
管理界面的默认端口:15672 ,默认账户/密码: gurest/guest
SpringBoot整合RabbitMQ
1.maven 依赖
<dependency><groupId>org.springframework.boot</groupId><artifactId>spring-boot-starter-amqp</artifactId><version>2.7.5</version>
</dependency>
2.添加配置文件
spring.rabbitmq.host=127.0.0.1
spring.rabbitmq.port=5672
spring.rabbitmq.username=guest
spring.rabbitmq.password=guest
3.添加配置文件
package com.label.config;import org.springframework.amqp.core.*;import org.springframework.beans.factory.annotation.Qualifier;
import org.springframework.context.annotation.Bean;
import org.springframework.stereotype.Component;/*** @author sszdzq*/
@Component
public class RabbitMqConfig {/*** 定义一个主题类型的交换机** @return*/@Bean("topic-exchange")public Exchange topicExchange() {return ExchangeBuilder.topicExchange("topic-exchange") // 交换机类型,交换机名称.durable(true) //ture为持久化,存到磁盘,false存到内存.build();}/*** 定义一个队列** @return*/@Bean("messageQueue")public Queue messageQueue() {return new Queue("messageQueue");}/*** 交换机、队列、路由键 进行绑定** @param exchange //交换机* @param queue //队列* @return*/@Beanpublic Binding bindQueueAndExchange(@Qualifier("topic-exchange") Exchange exchange, @Qualifier("messageQueue") Queue queue) {return BindingBuilder.bind(queue).to(exchange).with("news.*") //路由键.noargs();}
}
4.创建生产者与消费者
package com.label.contoller;import com.alibaba.fastjson.JSONObject;
import com.rabbitmq.client.Channel;
import lombok.extern.slf4j.Slf4j;
import org.json.JSONException;
import org.springframework.amqp.core.ExchangeTypes;
import org.springframework.amqp.core.Message;
import org.springframework.amqp.core.MessageProperties;
import org.springframework.amqp.rabbit.annotation.*;
import org.springframework.amqp.rabbit.core.RabbitTemplate;
import org.springframework.beans.factory.annotation.Autowired;
import org.springframework.http.ResponseEntity;
import org.springframework.web.bind.annotation.PostMapping;
import org.springframework.web.bind.annotation.RequestBody;
import org.springframework.web.bind.annotation.RequestMapping;
import org.springframework.web.bind.annotation.RestController;import java.io.IOException;@RestController
@Slf4j
@RequestMapping(value = "/rabbitmq")
public class TestController {@Autowiredprivate RabbitTemplate rabbitTemplate;/*** 直连类型** @param msg* @return*/@PostMapping("/directSend")public ResponseEntity sendMsgDirect(String msg) {/*** 普通直接链接*/rabbitTemplate.convertAndSend("direct_exchange", "direct_key", msg);/*** 设置属性 发送*/rabbitTemplate.convertAndSend("direct_exchange", "direct_key", msg, e -> {MessageProperties messageProperties = e.getMessageProperties();/*** 单位为毫秒("6000",6秒钟)* 过期后如果设置了死信队列,消息进入死信队列* 没有设置死信直接丢弃*/messageProperties.setExpiration("6000");return e;});return ResponseEntity.ok("3482347592");}/*** 扇形消息发送** @param msg* @return*/@PostMapping("/fanoutSend")public ResponseEntity sendMsgFanout(String msg) {/*** 广播模式下 没有路由建信息(填写也是无效)*/rabbitTemplate.convertAndSend("fanout_exchange", "", "this is test message");return ResponseEntity.ok("3482347592");}/*** 广播模式消费** @param msg*/@RabbitListener(bindings = @QueueBinding(exchange = @Exchange(value = "fanout_exchange", type = ExchangeTypes.FANOUT),value = @Queue("fanout_queue")))public void customerFanout(String msg) {log.info("广播消费:{}", msg);}/*** 类型:主题* 生产者 (创建消息)* 主题消费发送*/@PostMapping("/topic/send")public ResponseEntity producerTopicSend(@RequestBody JSONObject jb) throws JSONException {rabbitTemplate.convertAndSend("topic-exchange", jb.getString("topic"), jb.getString("msg"));return ResponseEntity.ok().build();}/*** 创建新的队列(绑定交换机:news.*,绑定路由键:news.330500000000)* x-expires: 队列的销毁时间** @param msg*/@RabbitListener(bindings = @QueueBinding(exchange = @Exchange(value = "topic-exchange", type = ExchangeTypes.TOPIC),value = @Queue(value = "message-one7", arguments = {@Argument(name = "x-expires", value = "10000", type = "java.lang.Integer")}),key = {"news.330500000000"}))public void customerTopic1(String msg) {log.info("主题消费 news.330500000000 :{}", msg);}/*** 手动确认** @param message* @param channel* @throws IOException*/@RabbitListener(bindings = @QueueBinding(exchange = @Exchange(value = "topic-exchange", type = ExchangeTypes.TOPIC),value = @Queue(value = "message-one"),key = {"news.*"}))public void customerTopic2(Message message, Channel channel) throws IOException {long deliveryTag = message.getMessageProperties().getDeliveryTag();try {log.info("主题消费 news.* :{}", new String(message.getBody()));channel.basicAck(deliveryTag, true);} catch (Exception e) {channel.basicNack(deliveryTag, true, true);throw new RuntimeException(e);}}
}