通过继承React.Component创建React组件-5
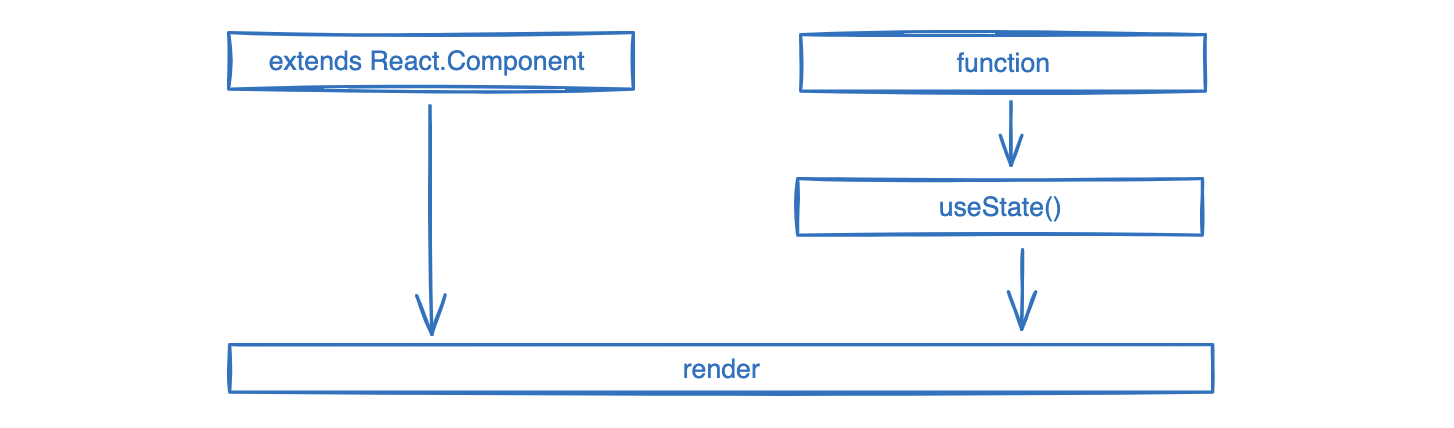
在React中,V16版本之前有三种方式创建组件(createClass()
本节先了解下用extnds React.Component 的方式创建React组件。
通过继承React.Component创建React组件
以下是一个简单的模板实现:
<script type="text/babel">//组件名称要用大写字母开头,因为React在渲染时会区分大小写。class Suggest extends React.Component { //自定义组件static defaultProps ={//定义组件参数默认值color: 'blue',text: 'Confirm',}; //state是一个属性,所以要写分号结尾constructor(props) { //定义构造函数,不需要写function关键字super(props); //必须要先调用父类的构造函数,否则无法使用this关键字this.state = { //定义state,一个属性,React组件的MVVM渲染就是造它来完成的//name: "korgs"}; }  //方法结尾没有逗号render() { //UI渲染方法return (<> {/*定义JSX最外层元素*/}<div> 我是显示内容 </div></>);}}const container = document.getElementById('app');const root = ReactDOM.createRoot(container);root.render(<Suggest text="我是参数值"/>); //组件调用
</script>
核心属性
props
props是properties的缩写。props是React用来让组件之间互相联系的一种机制,通俗地说就是方法的参数,组件的props一定来自于默认属性或通过父组件传递而来,在组件中通过this.props来获取。
render() { //UI渲染return (<><div>{this.props.text}</div></>);}//调用示例,这个值会覆盖掉组件中static defaultProps定义默认的值root.render(<Suggest text="我是参数值"/>);
props在React是单向数据流,值也是不可变的。当试图改变props的原始值时,React会报出类型错误的警告,一般可以通过复制的方法来操作:
var attribs = Object.assign({}, this.props); // 浅复制
const obj = {...this.state.obj, foo:'bar'};  //浅复制另一种写法(推荐)
propTypes
非必要实现,它会列出所有可传递给组件的参数列表,同时也提供了参数验证功能,但注意,它只会在控制台发出警告,并不会阻断程序运行,在V16之后已从React核心库中删除了,所以需要单独安装:
npm i --save-dev prop-types
import PropsTypes from "prop-types"class Suggest extends React.Component { //组件static defaultProps ={color: 'blue',text: 'Confirm',};
}Suggest.props = { //参数列表color: PropsTypes.string.isRequired,
}export default Suggest
以下是一些常见的用法:
Suggest.propTypes = {type: PropTypes.oneOf(['year', 'suggest', 'rating', 'text', 'input']),id: PropTypes.string,options: PropTypes.array,defaultValue: PropTypes.any,children: React.PropTypes.oneOfType([React.PropTypes.arrayOf(React.PropTypes.node),React.PropTypes.node,]),
};
ref
如果需要访问底层DOM节点来执行一些命令式操作时,可以使用ref属性,这个属性值一般要求全局唯一,有两个术语需要先分清:
- 组件:指React组件;
- DOM节点:指组件渲染后的html的Dom节点,通过组件可以拿到DOM节点;
class Focus extends React.Component {constructor(props) {super(props)this.handleClick = this.handleClick.bind(this)}handleClick() {this.element.focus()}render() {return (<div>{/*这里的ref是一个回调函数,组件加载时就会运行*/}<input type="text" ref={element => (this.element = element)} /><button onClick={this.handleClick}>Focus</button></div>)}
}
需要特别注意
this.element = element中的element指向的组件,而非DOM节点元素,比如上面例子中this.element = <input type="text" />,这样如果是个复杂组件,还可以访问组件内部的方法。
核心方法
render()
React在组件更新并非每次整个区域全部重新渲染,React会在内部维护一个称为Virual DOM的虚拟树,每次有DOM更新时就会维护此虚拟树结构,然后在需要UI重绘区域采用DOM DIFF算法计算出最小改变,然后选择最佳性能方法,比如append还是insert等方法重绘。
render() { //UI渲染return (<><div> 我是显示内容 </div></>);
}
render() 在实现上一般只返回组件,即使只是一段文本,也建议要用JSX的形式进行包装。
添加样式
内部样式
在组件内编写样式代码,React的style不能用字面量,需要封装成一个对象。然后需要用驼峰式代替原来的-连接符。
render() { //UI渲染const styleClass = {color:`red',background:`url({imgUrl})`,height:10 //默认是px};return (<><div style={styleClass}>css</div></>);
}
外部样式
正常使用时可以定义一个.css外部样式文件,然后在.js中引入。就可以正常使用了。
import './index.css'
使用classnames插件实现动态样式
npm i --save-dev classnames,这个插件主要用于当需要动态给组件添加样式,减少if语句数量用的,比如,下面代码就实现了按键颜色的切换。
import React from 'react'
import classnames from 'classnames';
import "./all.css"class ClassNameDemo extends React.Component {constructor(props) {super(props);this.state ={isPressed: false,};this.handleClick = this.handleClick.bind(this);}handleClick() {this.setState({isPressed: true})}render() {//使用方式const btnClass = classnames({'btn':true,'btn-pressed': this.state.isPressed,})return (<div><input type="text"/><button className={btnClass} onClick={this.handleClick}>Focus</button></div>)}}export default ClassNameDemo
all.css文件容
.btn{}
.btn-pressed{color: #f3f;
}
事件交互
React把所有事件绑定到结构的最外层,使用一个统一的事件监听器来处理(事件委派机制)。
React基于Virtual DOM实现了一个SyntheticEvent(合成事件层),所有自定义的事件都会接收到一个兼容的SyntheticEvent对象实例,它与原生的Event完全兼容,同样也可以使用stopPropagation()和preventDefault()来中断。
如果需要使用原生Event,可以调用SyntheticEvent.nativeEvent属性。
绑定事件
- 构造器内绑定:这种不能传递参数,好处是性能好,只bind一次即可**(推荐)**
class Suggest extends React.Component {static defaultProps ={ };constructor(props) {super(props);//绑定this到事件中,以实现在自定义事件中的this指向组件,而非事件this.handleClick = this.handleClick.bind(this);}handleClick(e){/*一般在此处会调用this.setState({})方法重绘UI界面有时为了防止冒泡,会调用 e.preventDefault() 方法*/console.log(e.target); //target = <button>Click me!!!</button>}render() { //UI渲染return (<><button onClick={this.handleClick}>Click me!!!</button></>);}}
- 自动绑定:这种可以传递参数,但每次渲染都要重新绑定一次
<script type="text/babel">class App extends React.Component {constructor(props) {super(props);this.state = {inputVal: 'male',};}handleInputChange(args, e) {console.log(e);console.log(args);}render() {const { inputVal} = this.state;return (<div><input type="radio" value="male" checked={inputVal === 'male'} onClick= {this.handleInputChange.bind(this,"dd")}/></div>);}}const container = document.getElementById('app');const root = ReactDOM.createRoot(container);root.render(<App text="我是参数值"/>);
</script>
原生事件
一些特殊的事件React并没有实现,所以在必要时还会需要使用js的原生的事件机制,通过ref定义通过refs取得组件DOM,然后在组件加载后绑定原生的侦听事件,代码如下:
class Suggest extends React.Component { static defaultProps ={ };constructor(props) {super(props); this.handListener = this.handListener.bind(this);}componentDidMount(){//refs在新版本中已经不建议再用了,而且本身也不建议再使用了this.refs.buttonDom.addEventListener('click', this.handListener);}handListener(e){console.log(e.target);}render() { //UI渲染return (<><button ref="buttonDom">Click buttonDom!!!</button></>);}}
事件处理技巧
主要是为了防止绑定的事件太多,在一个地方绑定,然后用swith来分发,示例如下:
class Button extends React.Component {constructor(props) {super(props)this.handleEvent = this.handleEvent.bind(this) //绑定一个事件}handleEvent(event) {switch (event.type) { //根据事件类型分发事件case 'click':console.log('clicked')breakcase 'dblclick':console.log('double clicked')breakdefault:console.log('unhandled', event.type)}}render() {return (<button onClick={this.handleEvent} onDoubleClick={this.handleEvent}>Click me!</button>)}
}
远程获取数据
从远程URL获取数据,下例展示了一个从远程获取组件state初始化数据的过程。
componentDidMount() {const _this = this; //指向组件 this,否则在fetch函数中无法引用组件fetch('https://api.github.com/users/grearon/gists', {method: 'POST',mode: 'no-cors',headers: {'Content-Type': 'application/x-www-form-urlencoded'},// body: JSON.stringify(response)}).then(function(response) {_this.setState({response}); //重置state}).catch( error => console.log(error));}
导出和导入
可以直接写成下面这样的代码,因为我们的宗旨是构建小而美的组件,所以下列的代码完全合理:
//Gallery.js
export default function Gallery(){ }
export function Profile(){ }
| 语法 | 导出语句 | 导入语句 |
|---|---|---|
| 默认 | export default function Button() {} | import Button from ‘./Button.js’; |
| 具名 | export function Button() {} | import { Button } from ‘./Button.js’; |
- 最后的.js可以省略
- 同一文件中,有且仅有一个默认导出,但可以有多个具名导出!
组件调用
添加子元素
除了像下面代码这样调用组件:
const container = document.getElementById('app');const root = ReactDOM.createRoot(container);root.render(<Suggest text="我是参数值"/>); //组件调用
还可以在调用时传入子组件,比如组件这样来定义:
return (<><div style={styleClass}>{this.props.children}</div></>
);
调用
const container = document.getElementById('app');
const root = ReactDOM.createRoot(container);
root.render(<Suggest text="我是参数值"><div>ddd</div></Suggest>
);
注意看上例中{this.props.children}这个声明,它表示组件调用时可传递任意数量的子节点到组件中,上例中与<div>ddd</div>对应。
组件间通信
主要就是用到了props和state功能,希望两个组件的状态始终同步更改。要实现这一点,可以将相关 state 从这两个组件上移除,并把 state 放到它们的公共父级,再通过 props 将 state 传递给这两个组件。
父向子
父向子通过this.props属性,注意看下面的代码实现
<script type="text/babel">//子组件,定义了一个名为name的属性class Child extends React.Component{static defaultProps = {name:"button"}render(){console.log(this.props);return (<button>{this.props.name}</button>);}}//父组件class App extends React.Component{constructor(props){super(props);}render(){return (<>{/* 采用props传值给子组件,这时子组件其实会有两个属性值 */}<Child {...this.props}/> </>);}}const container = document.getElementById('app');const root = ReactDOM.createRoot(container);root.render(<App name="我是参数值" color="red"/>);
</script>
子向父
子组件控制父组件主要是通过回调函数实现,在父组件中定义回调方法,在子组件中注册事件,然后父组件把回调方法以参数的方式传递给子组件。
<script type="text/babel">class Child extends React.Component{static defaultProps = {name:"button",}render(){return (<button onClick={this.props.btnClick}>{this.props.name}</button>);}}//父组件class App extends React.Component{constructor(props){super(props);//定义一个数据,供子组件来修改this.state={count:0}this.handleClick = this.handleClick.bind(this);}//定义回调函数handleClick(e) {this.setState({count: this.state.count+1})console.log(e.target + this.state.count); //~~out: <button>我是参数值</button>0}render() {return (<>  {/*回调函数以参数的形式传给子组件*/}<Child btnClick={this.handleClick} {...this.props}/></>);}}const container = document.getElementById('app');const root = ReactDOM.createRoot(container);root.render(<App name="我是参数值" color="red"/>);
</script>
同级间
一般会采用公有父组件的方式,说白了就是向上组装,由父组件统一控制state数据,以实现数据共享的目的,或是再向上包装或封装成一个单独的类对象。
<script type="text/babel">//子组件,定义了一个名为name的属性class Child extends React.Component{static defaultProps = {name:"button",}render(){return (<button onClick={this.props.btnClick}>{this.props.name}</button>);}}//子组件Displayconst Display = ({counter}) => {return <h1>{counter}</h1>}//父组件class App extends React.Component{constructor(props){super(props);//定义一个数据,供子组件来修改this.state={count:0}this.handleClick = this.handleClick.bind(this);}handleClick(e) {this.setState({count: this.state.count+1})console.log(e.target + this.state.count);}render() {return (<><Child btnClick={this.handleClick} {...this.props}/><Display counter={this.state.count}/>{/*共享state数据*/}</>);}}const container = document.getElementById('app');const root = ReactDOM.createRoot(container);root.render(<App name="我是参数值" color="red"/>);
</script>
-------- 以上组件的基本用法全介绍完了,下面是一个常用的实例---------
例子:处理表单数据
表单封装
<script type="text/babel">class UserForm extends React.Component {constructor(props) {super(props);this.state = {userName:"",userAge:0,};this.handleSubmit = this.handleSubmit.bind(this);this.handleContentChange = this.handleContentChange.bind(this);}handleSubmit(event){console.log("提交操作");console.log(this.state);}/*注意这种绑定方法的实现*/handleContentChange(event){//用这种方法可减少change函数的个数this.setState({[event.target.name]: event.target.value,})}render() {const {color, text} = this.props;return (<><form onSubmit={this.handleSubmit}>{/*注意这种绑定方法*/}<label>用户名:</label><input name="userName" type="text"  value={this.state.name} onChange={this.handleContentChange}/><button  className={`btn btn-${color}`} >提交</button></form></>);}}const container = document.getElementById('app');const root = ReactDOM.createRoot(container);root.render(<UserForm />);
</script>
使用schema插件自动创建表单
下面的例子只是列出了如何格式化表单,至于jsonschema的详细用法可查看其官网,https://react-jsonschema-form.readthedocs.io/en/v1.8.1/。
安装 npm install --save react-jsonschema-form
class JSONSchemaForm extends React.Component {constructor() {super();this.handleSubmit = this.handleSubmit.bind(this);}handleSubmit = (values) => {console.log(values);}render() {//构建form表单const schemaForm = {type:"object",properties: {firstName: {type:"string", default:"Dan"},lastName: {type:"string", default:"Abramov"},}}return (<Form schema={schemaForm} onSubmit={this.handleSubmit}><button type="submit">Sub2mit</button></Form>)}
}
例子:组件优化
剥离操作和展现
就是把UI定义成一个方法、变量、参数或是单独组件,举例如下:
const ui = [<><div> 我是显示内容 </div><div className="Suggest" ref="div01">{this.props.text}</div><div style={styleClass}>css</div></>
]return (ui
);
展开属性…的用法
...用法其实就是一种语法糖,比如:
render() { //UI渲染const attr = {href:"www.baidu.com",alt:"_blank"}return (<>  {/* 这种写法其实就是herf={attr.href} alt={attr.alt}*/}<a {...attr}>click</a></>);
}
删除属性
 // 浅复制
var attribs = Object.assign({}, this.props);
//这段代码等价于: delete attribs.size;
var {size, ...attribs} = this.props;
Immutable不可变数据集
这个库定义了多个类型工具类,如List, Stack, Map等,其主要是为了函数编程使用
cnpm insatll --save-dev immutable
import {List} from 'immutable';
//因为immutable中的对象和原生js比较相像,所以尽量用命名区分开,以免混淆
let $$list = List([1, 2]);
$$list.push(3, 4);let $$map = Immutable.Map({a:1, b:2, c:3})
Pure-render处理shouldComponentUpdate
这一节内容可以和Immutable不可变数据集一同应用,因为state变化会自动render(),所以在操作state前最好使用Immutable把一些数据变成不可变的,由人为来判断是否需要改变数据。
也就是在某此时刻最好把state看成是一个不可变对象。
cnpm i --save-dev react-addons-pure-render-mixin
import PureRenderMixin from 'react-addons-pure-render-mixin'class App extends  React.Component{constructor(props) {super(props);//一个浅复制的应现,代替原来的should实现this.shouldComponentUpdate = PureRenderMixin.shouldComponentUpdate.bind(this);}render(){return <div>aaa</div>}
}