备考ICA----Istio实验4---使用 Istio 进行金丝雀部署
备考ICA----Istio实验4—使用 Istio 进行金丝雀部署
上一个实验已经通过DestinationRule实现了部分金丝雀部署的功能,这个实验会更完整的模拟展示一个环境由v1慢慢过渡到v2版本的金丝雀发布.
1. 环境清理
kubectl delete gw/helloworld-gateway vs/helloworld dr/helloworld-destination
测试
kubectl get svc,pods
for i in {1..10};do curl $(kubectl get svc helloworld|grep helloworld|awk '{print $3":"$5}'|awk -F"/" '{print $1"/hello"}');sleep .5 ;done
kubectl get gw,vs,dr
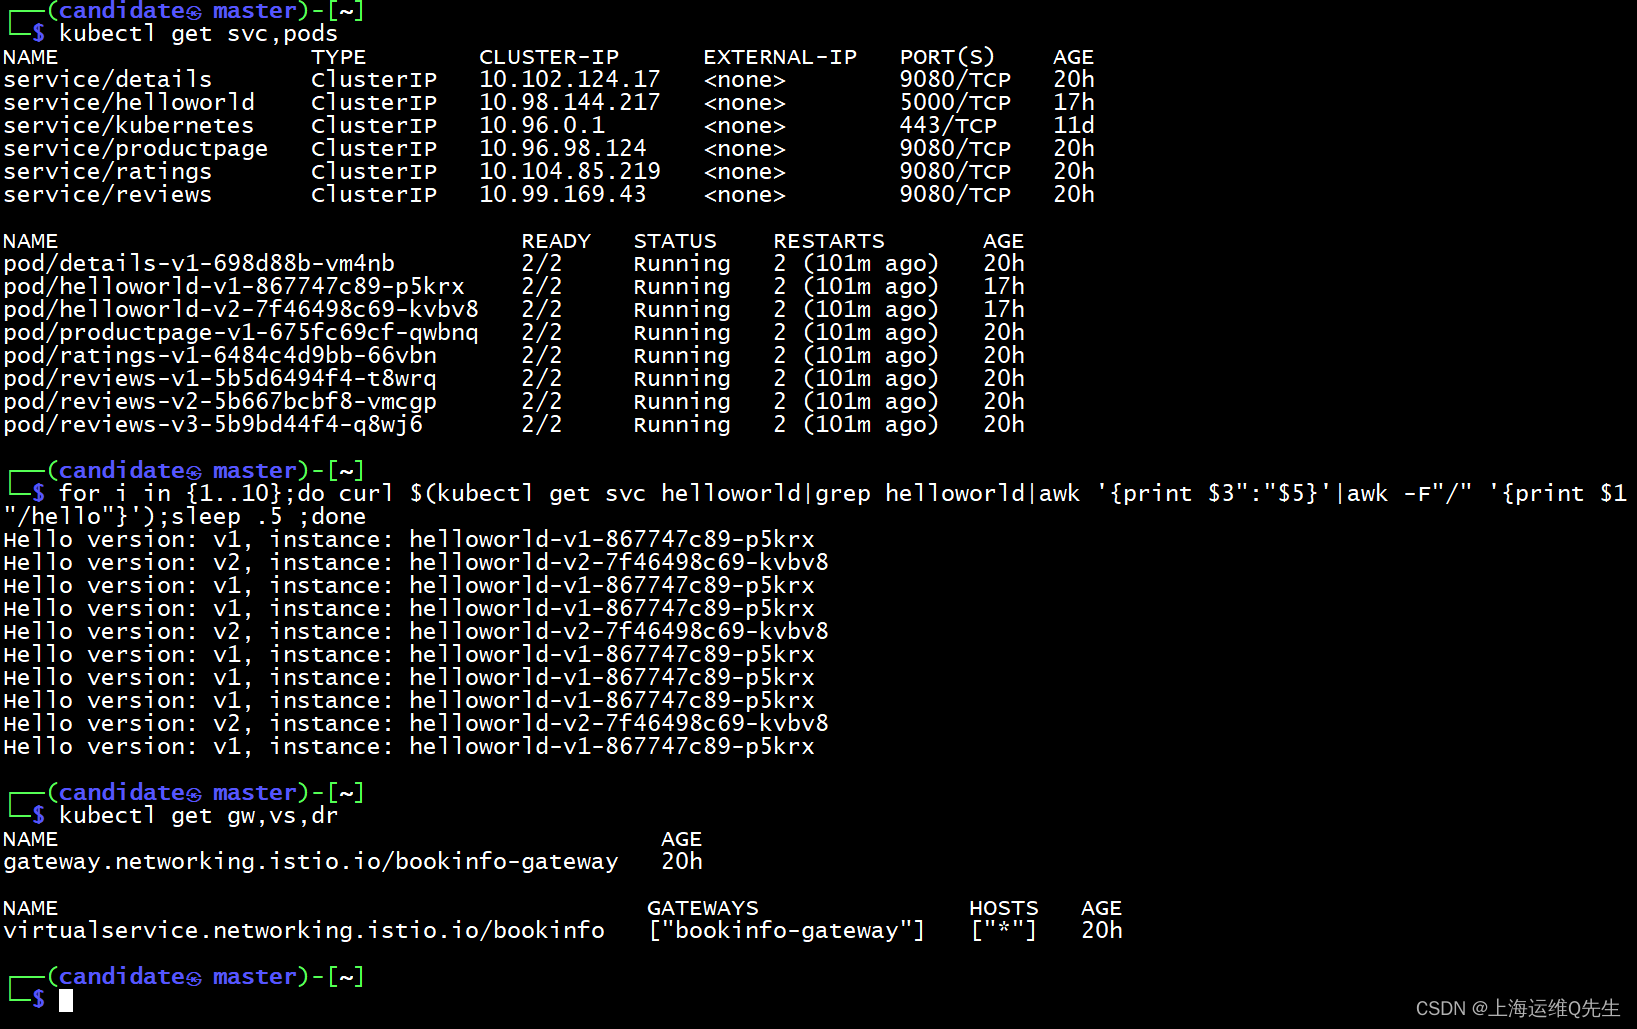
恢复到这样就可以通过helloworld的svc将流量随机分配到v1和v2上
如果实验环境有问题,就重新部署hello
kubectl delete -f istio/samples/helloworld/helloworld.yaml
kubectl apple -f istio/samples/helloworld/helloworld.yaml
2. 所有流量转发到v1
这步就模拟只存在1个版本的环境
canary/helloworld-canary-all-v1.yaml
apiVersion: networking.istio.io/v1beta1
kind: Gateway
metadata:name: helloworld-gateway
spec:selector:istio: ingressgateway # use istio default controllerservers:- port:number: 80name: httpprotocol: HTTPhosts:- "*"
---
apiVersion: networking.istio.io/v1beta1
kind: DestinationRule
metadata:name: helloworld-destination
spec:host: helloworldsubsets:- name: v1labels:version: v1- name: v2labels:version: v2
---
apiVersion: networking.istio.io/v1beta1
kind: VirtualService
metadata:name: helloworld
spec:hosts:- "*"gateways:- helloworld-gatewayhttp:- match:- uri:exact: /helloroute:- destination:host: helloworldport:number: 5000subset: v1weight: 100
部署gw,vs,dr
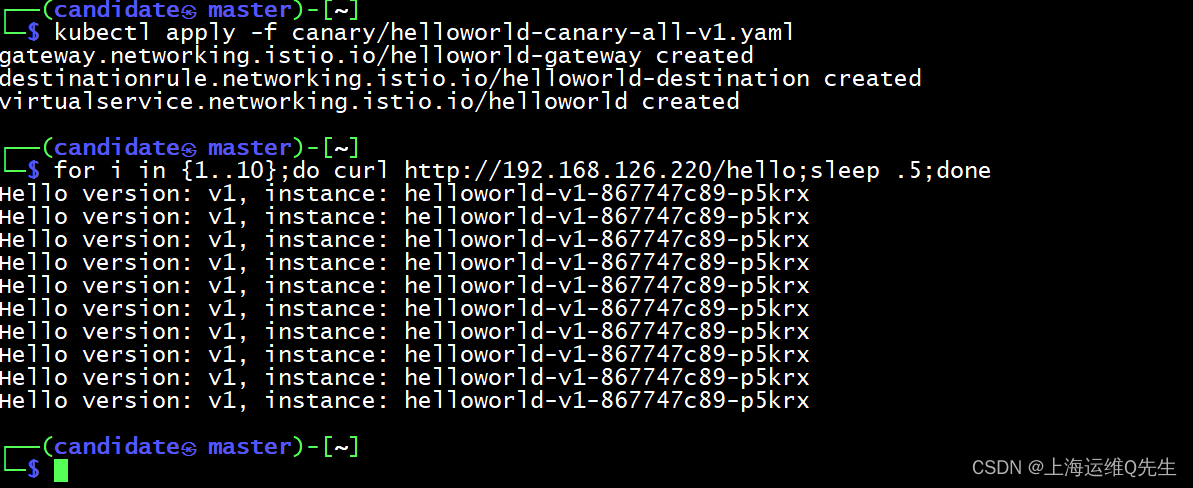
kubectl apply -f canary/helloworld-canary-all-v1.yaml
测试效果
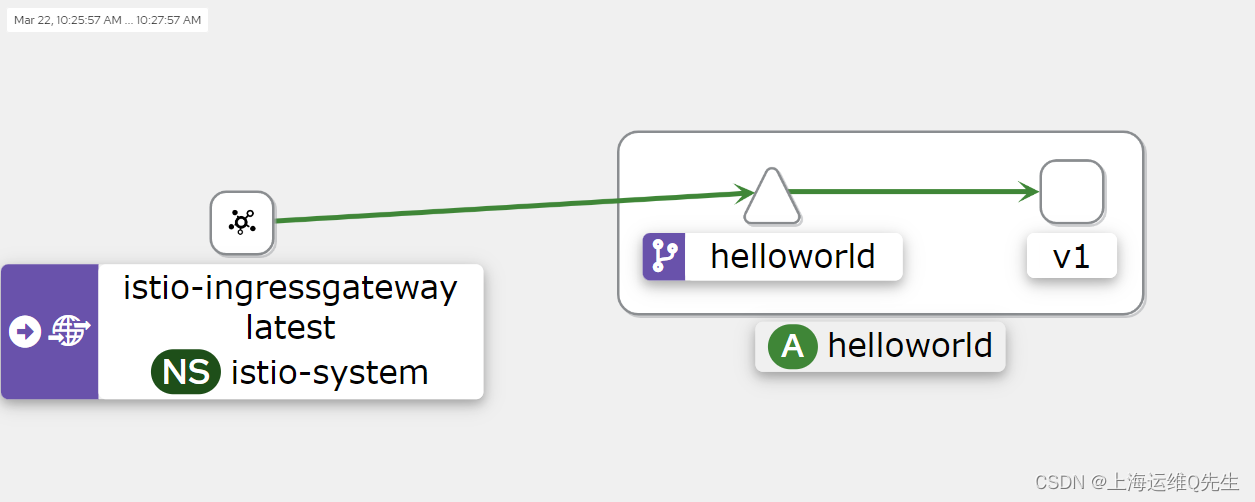
此时所有流量都交由v1进行响应
for i in {1..10};do curl http://192.168.126.220/hello;sleep .5;done
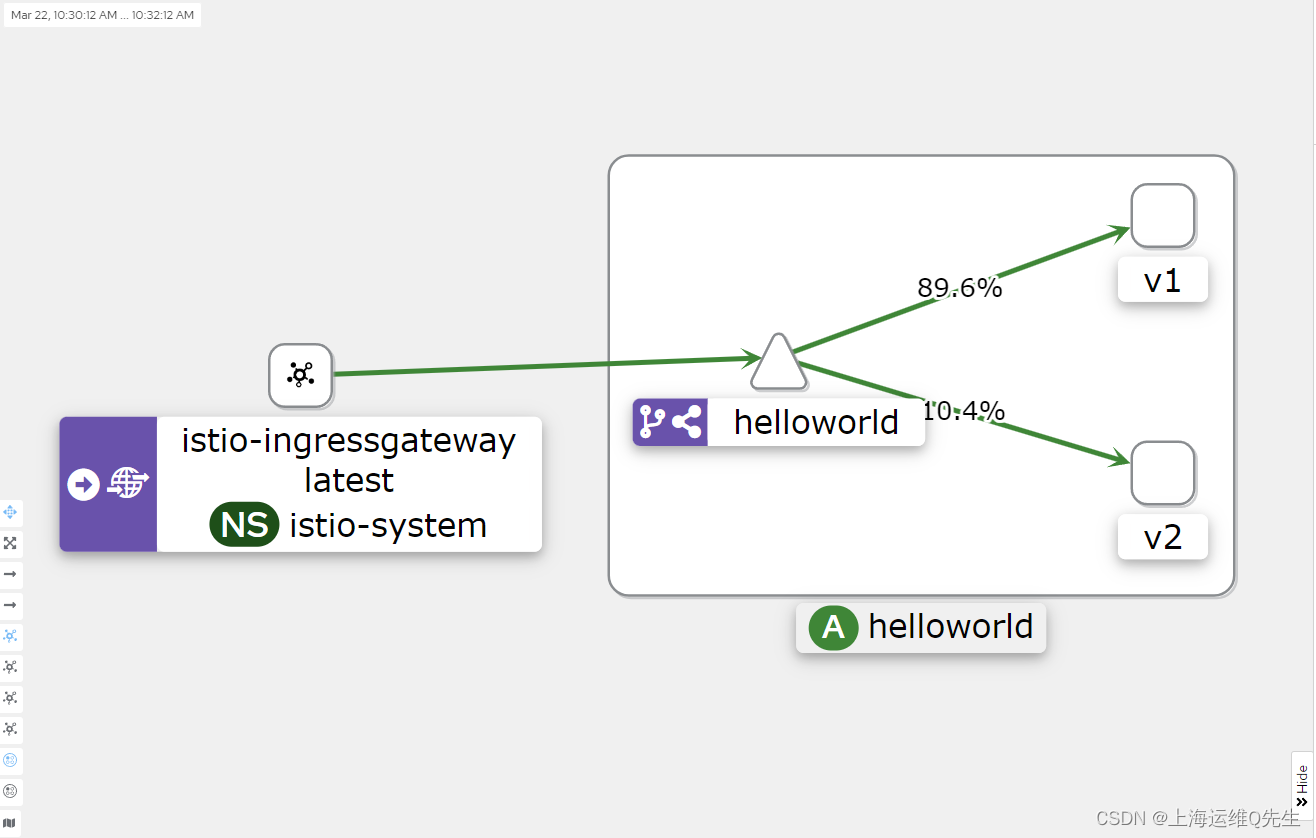
3. 90%流量v1,10%流量v2
此时v2版本应用已经上线,将10%流量给v2,其余流量仍由v1进行应答
3.1 配置流量分发比例
canary/helloworld-canary-allin1-10v2.yaml
apiVersion: networking.istio.io/v1beta1
kind: Gateway
metadata:name: helloworld-gateway
spec:selector:istio: ingressgateway # use istio default controllerservers:- port:number: 80name: httpprotocol: HTTPhosts:- "*"
---
apiVersion: networking.istio.io/v1beta1
kind: DestinationRule
metadata:name: helloworld-destination
spec:host: helloworldsubsets:- name: v1labels:version: v1- name: v2labels:version: v2
---
apiVersion: networking.istio.io/v1beta1
kind: VirtualService
metadata:name: helloworld
spec:hosts:- "*"gateways:- helloworld-gatewayhttp:- match:- uri:exact: /helloroute:- destination:host: helloworldport:number: 5000subset: v1weight: 90- destination:host: helloworldport:number: 5000subset: v2weight: 10
部署gw,vs,dr
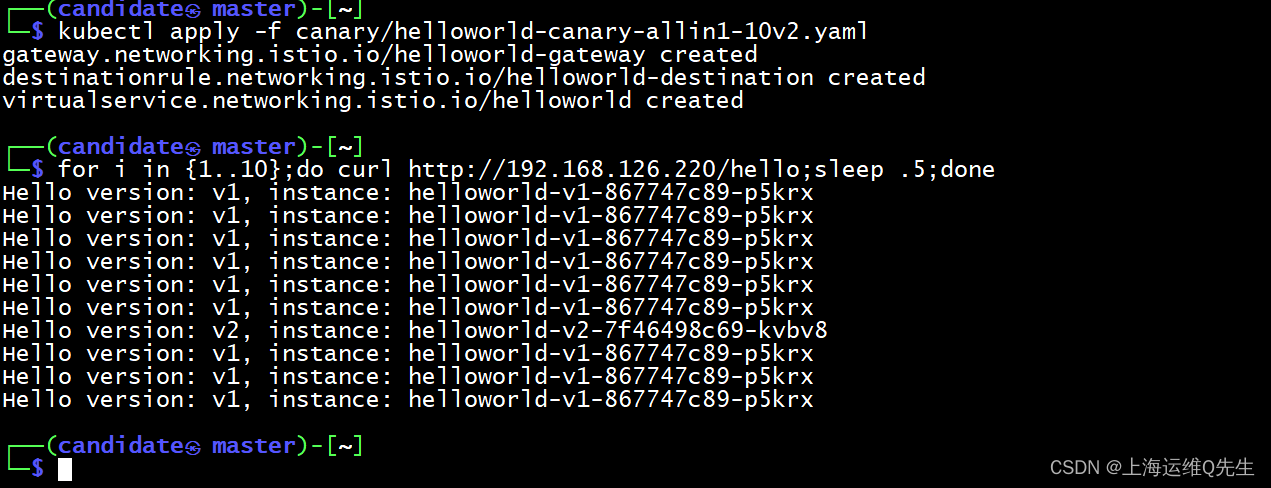
kubectl apply -f canary/helloworld-canary-allin1-10v2.yaml
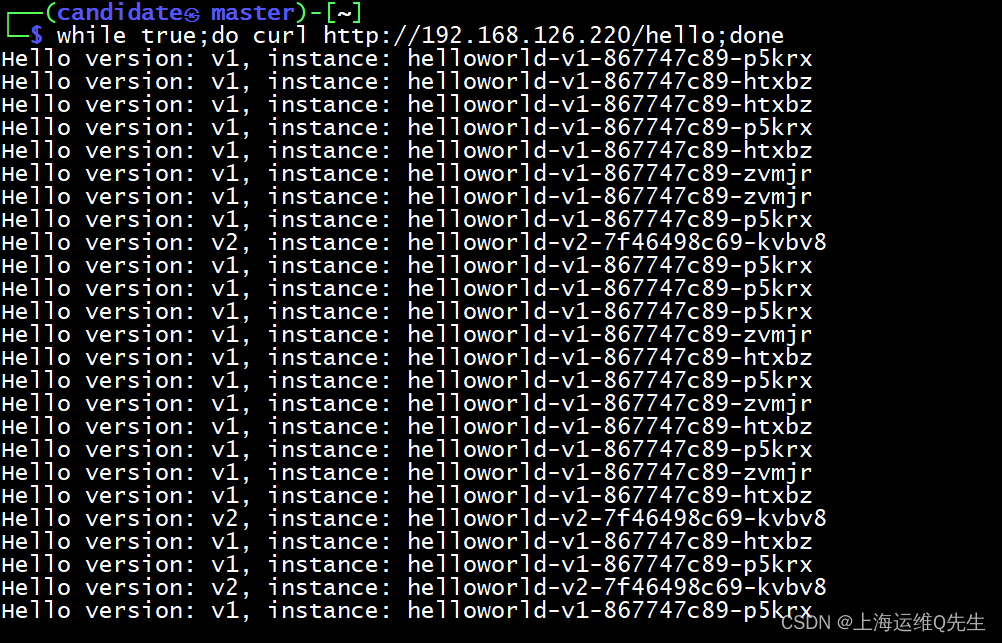
测试效果
可以看到10个请求中有1个由v2应答,其他仍由v1进行响应
3.2 加入Hpa
---
apiVersion: autoscaling/v1
kind: HorizontalPodAutoscaler
metadata:name: hpa-helloworld-v1
spec:maxReplicas: 20minReplicas: 1scaleTargetRef:apiVersion: apps/v1kind: Deploymentname: helloworld-v1targetCPUUtilizationPercentage: 50
---
apiVersion: autoscaling/v1
kind: HorizontalPodAutoscaler
metadata:name: hpa-helloworld-v2
spec:maxReplicas: 20minReplicas: 1scaleTargetRef:apiVersion: apps/v1kind: Deploymentname: helloworld-v2targetCPUUtilizationPercentage: 50
部署hpa
kubectl apply -f canary/hpa.yaml
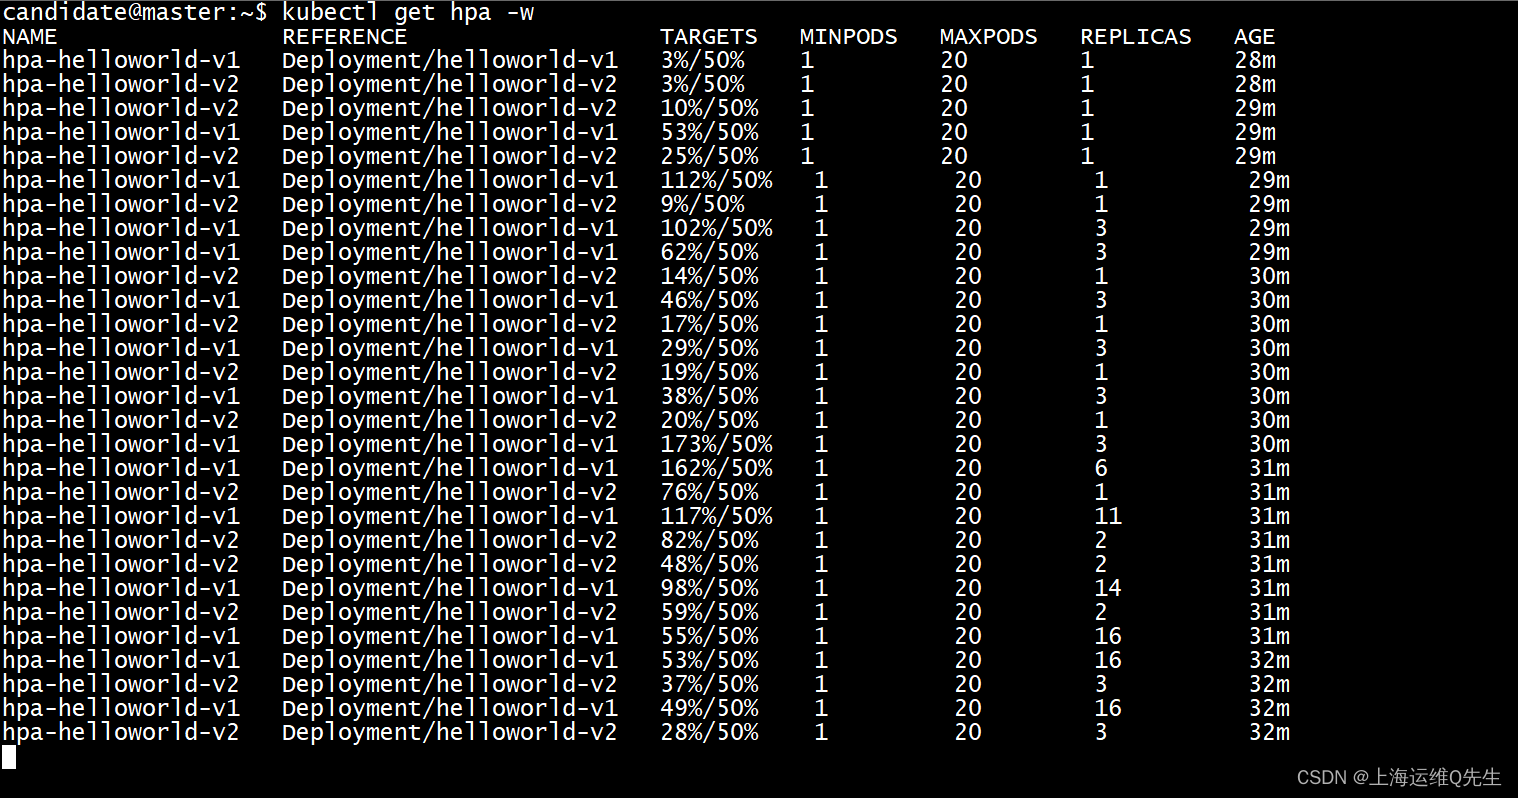
3.3 压测
while true;do curl http://192.168.126.220/hello;done
产生大量请求
此时v1,v2因访问量大触发hpa扩容,直到v1到达上线16个pod,v2到达3个
4. 50%流量v1,50%流量v2
4.1 配置流量分发比例
dr和gw部分就不用动了.只要修改vs的weight部分就可以
canary/helloworld-canary-vs-50v2.yaml
---
apiVersion: networking.istio.io/v1beta1
kind: VirtualService
metadata:name: helloworld
spec:hosts:- "*"gateways:- helloworld-gatewayhttp:- match:- uri:exact: /helloroute:- destination:host: helloworldport:number: 5000subset: v1weight: 50- destination:host: helloworldport:number: 5000subset: v2weight: 50
部署
kubectl apply -f canary/helloworld-canary-vs-50v2.yaml
4.2 压测
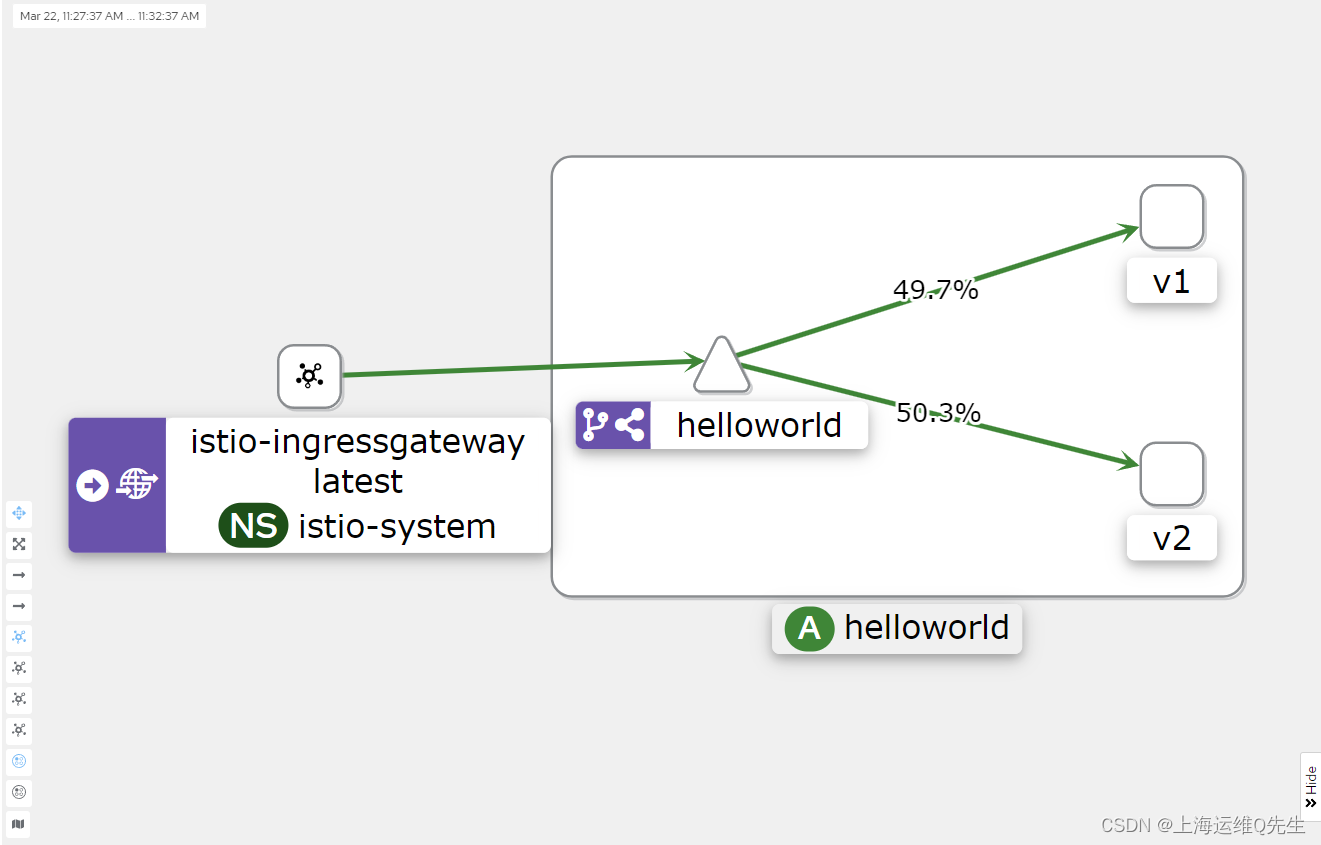
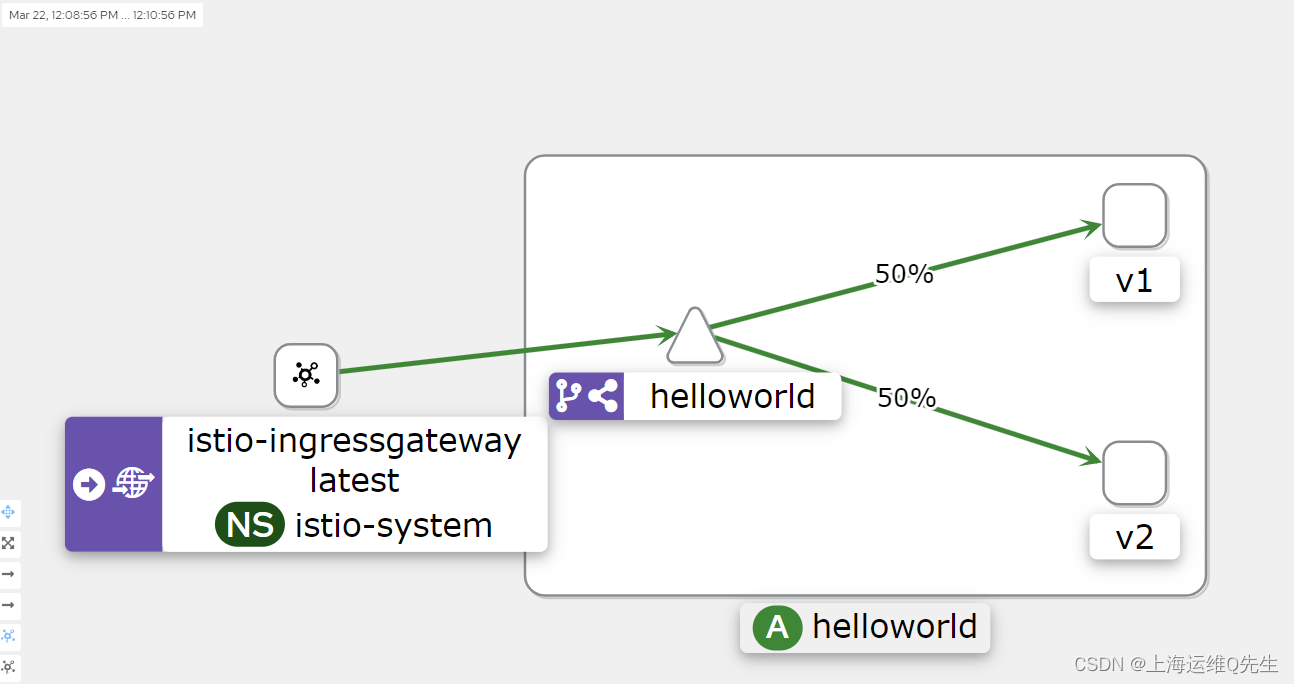
此时流量以1:1分发给v1和v2
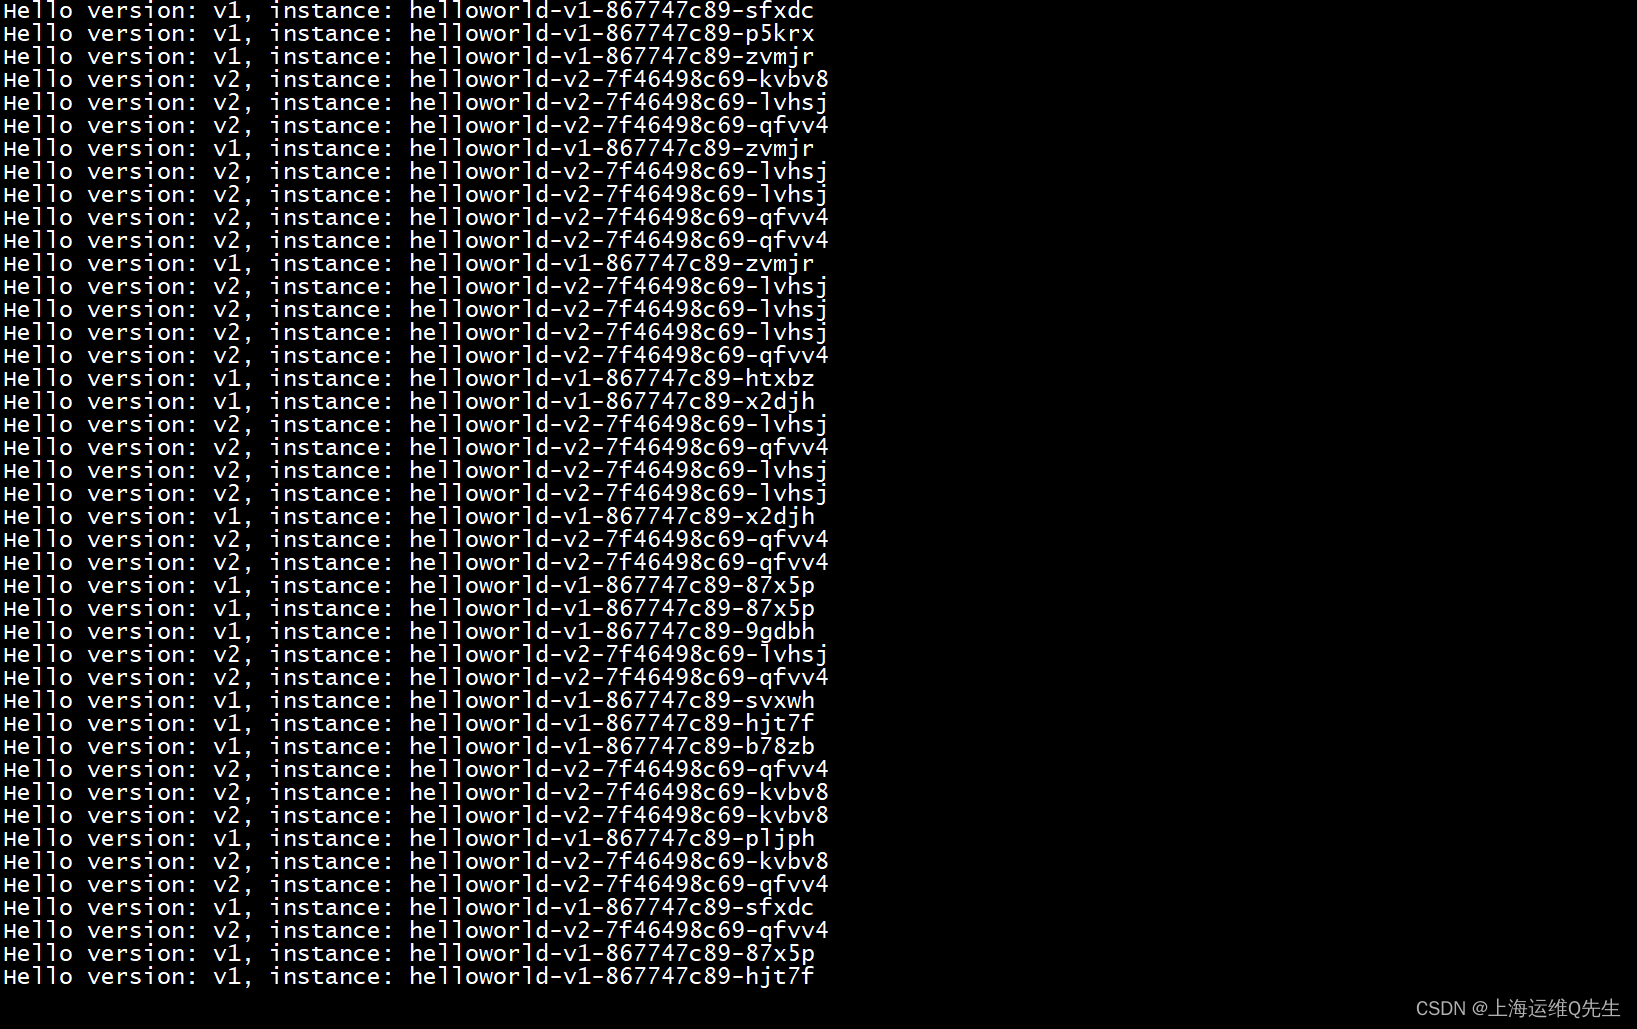
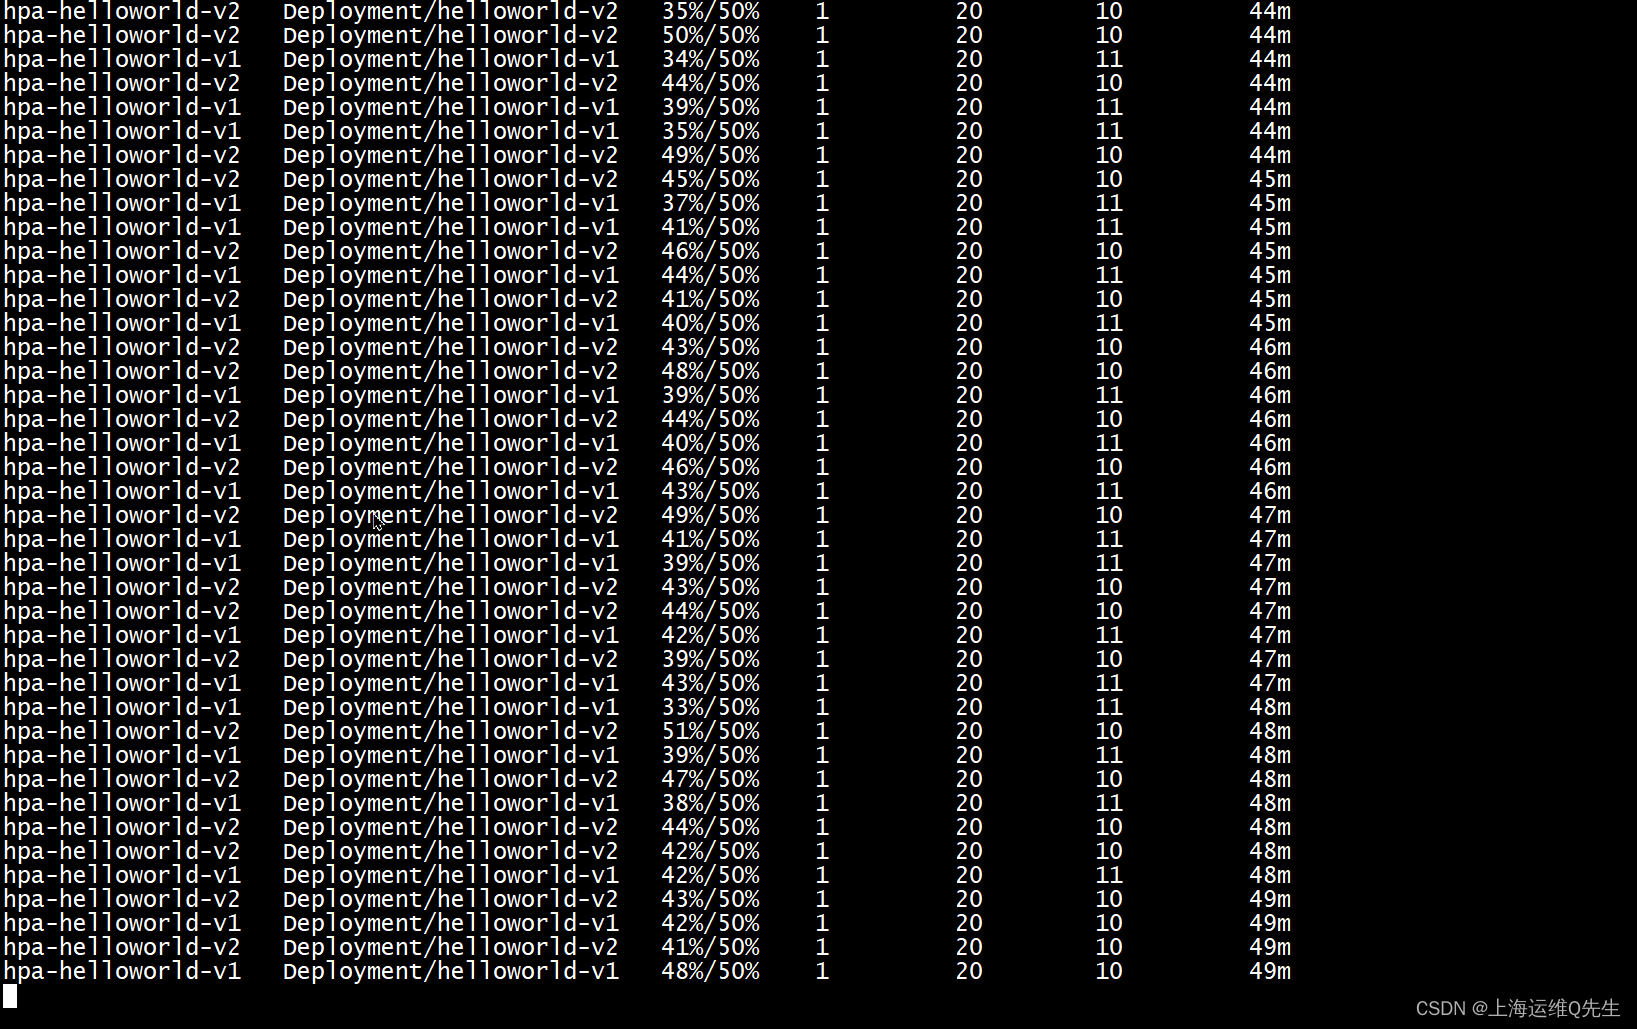
再观测hpa的情况会发现v2的cpu逐渐升高,v1的cpu逐渐降低,v2开始扩容,v1开始缩容,逐渐扩缩容到10:10
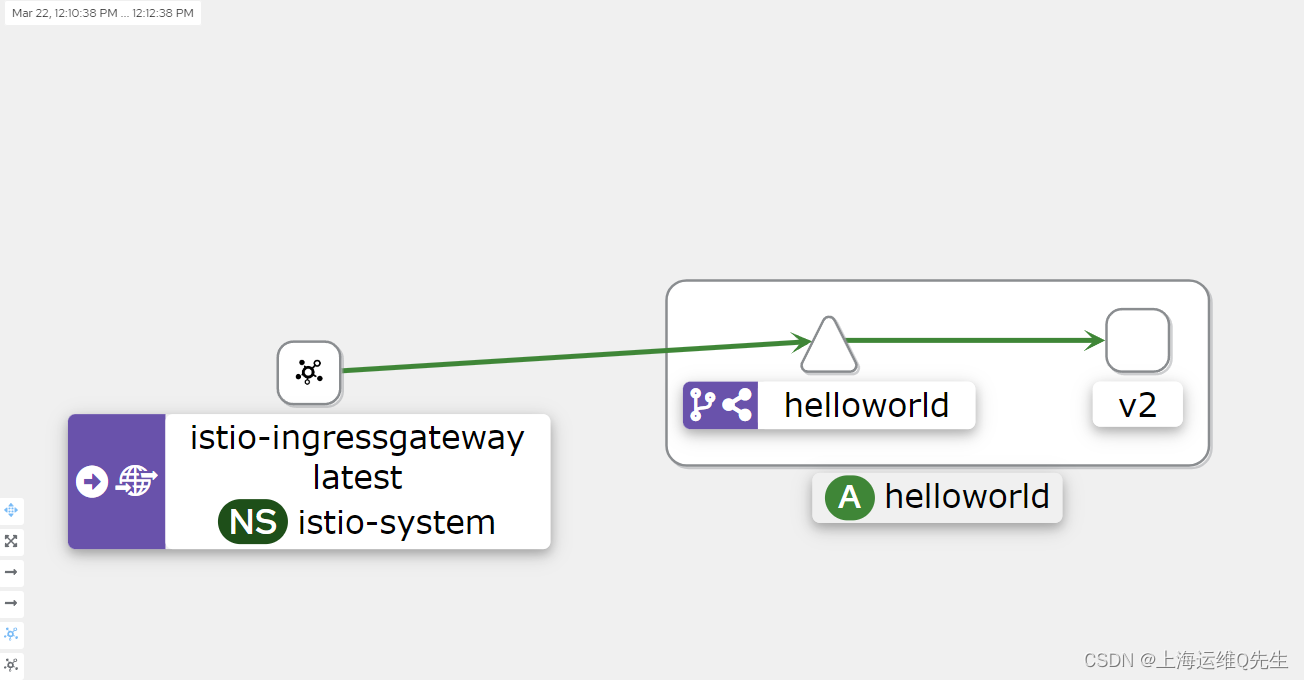
5. 所有流量转发v2
51. 配置流量分发比例
中间的10%,90%其实和前2个版本差不多,直接修改下数值就可以了.我们这里就忽略了,有兴趣的老哥可以进一步的修改模拟.
这里就模拟经过测试v2版本已经没有问题,我们将所有流量打到v2上
canary/helloworld-canary-all-v2.yaml
---
apiVersion: networking.istio.io/v1beta1
kind: VirtualService
metadata:name: helloworld
spec:hosts:- "*"gateways:- helloworld-gatewayhttp:- match:- uri:exact: /helloroute:- destination:host: helloworldport:number: 5000subset: v2weight: 100
部署
kubectl apply -f canary/helloworld-canary-all-v2.yaml
5.2 压测
while true;do curl http://192.168.126.220/hello;done
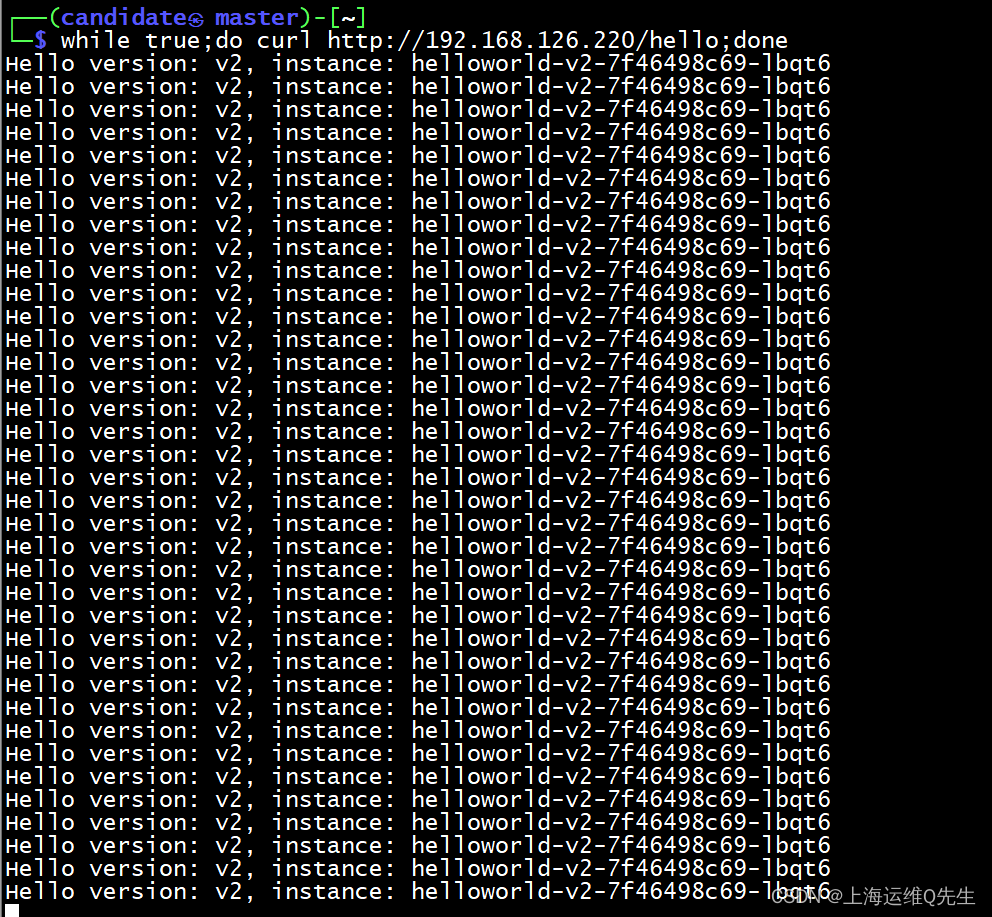
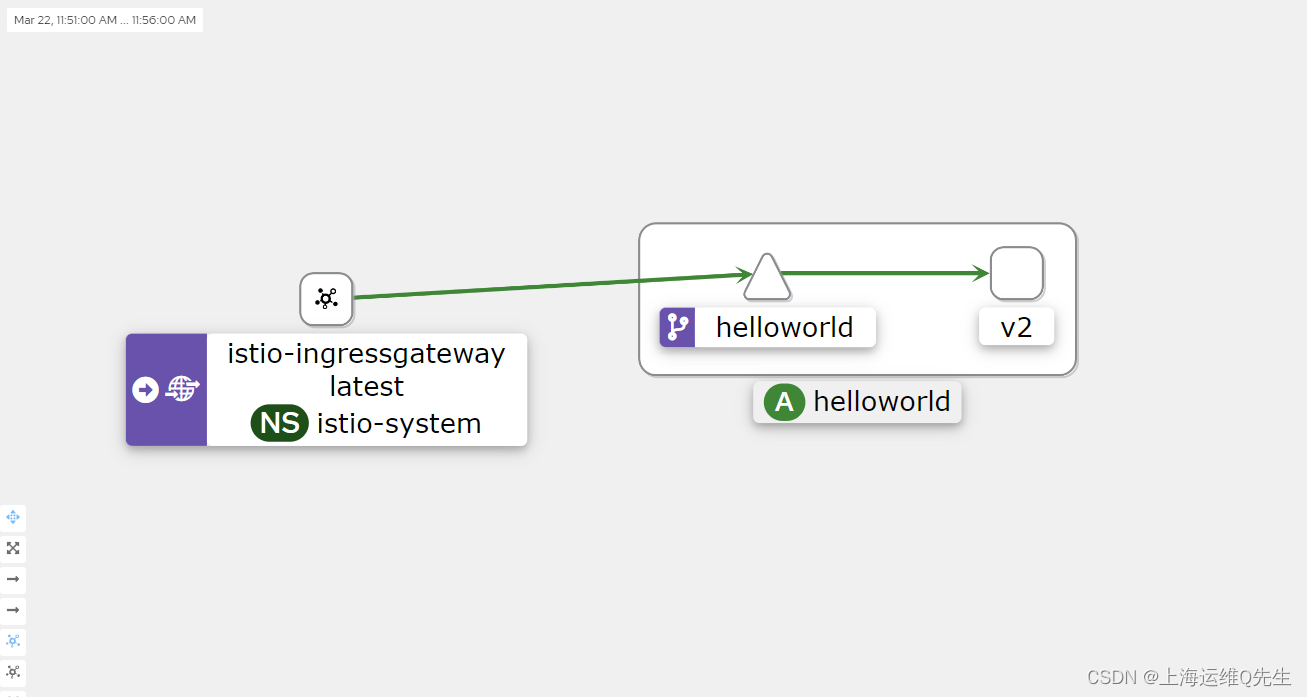
至此canary的一个模拟从v1到v2的版本切换就已经完成了
6. 拓展Canary+AB测试
6.1 canary+ab配置
当我们进行canary测试的时候,普通用户是以50%:50%的流量分发到2个版本上,但我们希望测试人员trump同学,每次都是访问到新上线的v2版本上.
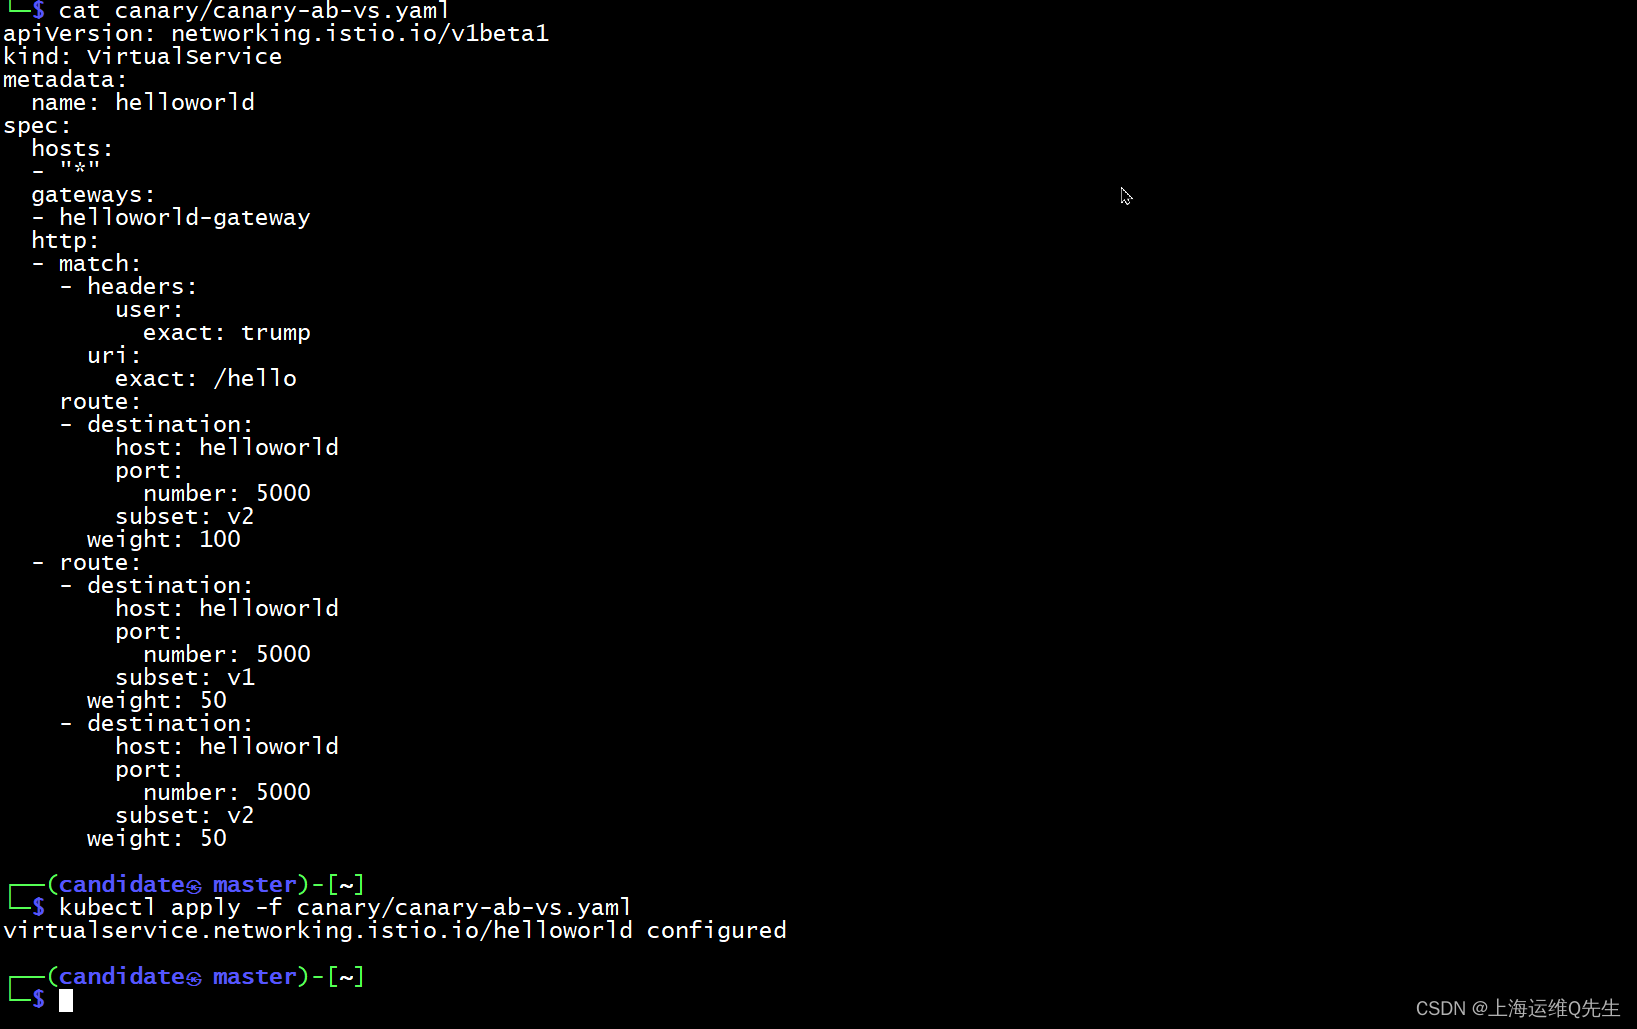
canary/canary-ab-vs.yaml
apiVersion: networking.istio.io/v1beta1
kind: VirtualService
metadata:name: helloworld
spec:hosts:- "*"gateways:- helloworld-gatewayhttp:- match:- headers:user:exact: trumpuri:exact: /helloroute:- destination:host: helloworldport:number: 5000subset: v2weight: 100- route:- destination:host: helloworldport:number: 5000subset: v1weight: 50- destination:host: helloworldport:number: 5000subset: v2weight: 50
部署应用
kubectl apply -f canary/canary-ab-vs.yaml
6.2 测试
6.2.1 普通用户测试
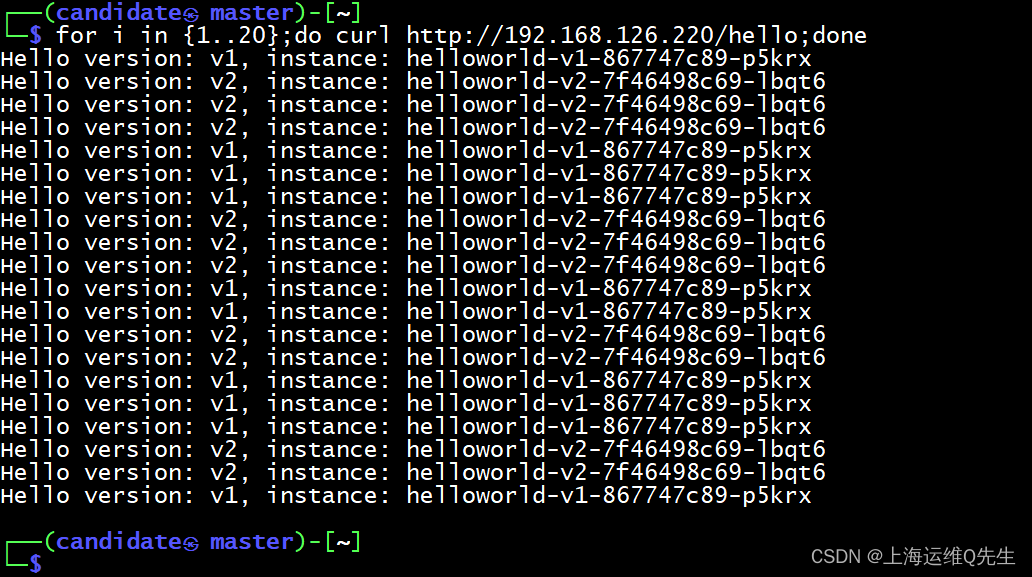
这部分用户进准的按1:1流量访问v1和v2
for i in {1..20};do curl http://192.168.126.220/hello;done
6.2.2 测试人员访问
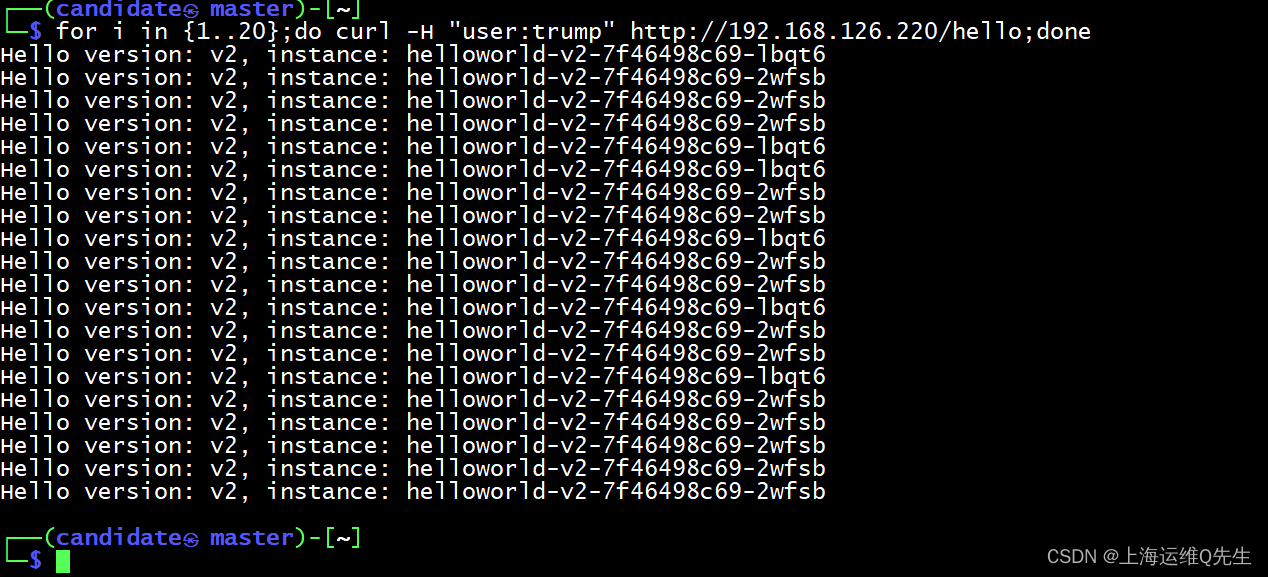
当测试人员trump访问时,匹配header中的用户名为trump,流量就被100%的打到v2版本上
for i in {1..20};do curl -H "user:trump" http://192.168.126.220/hello;done
至此整个金丝雀部署完成