PySide6+VSCode Python可视化环境搭建
pip install pyside6下载本期源码
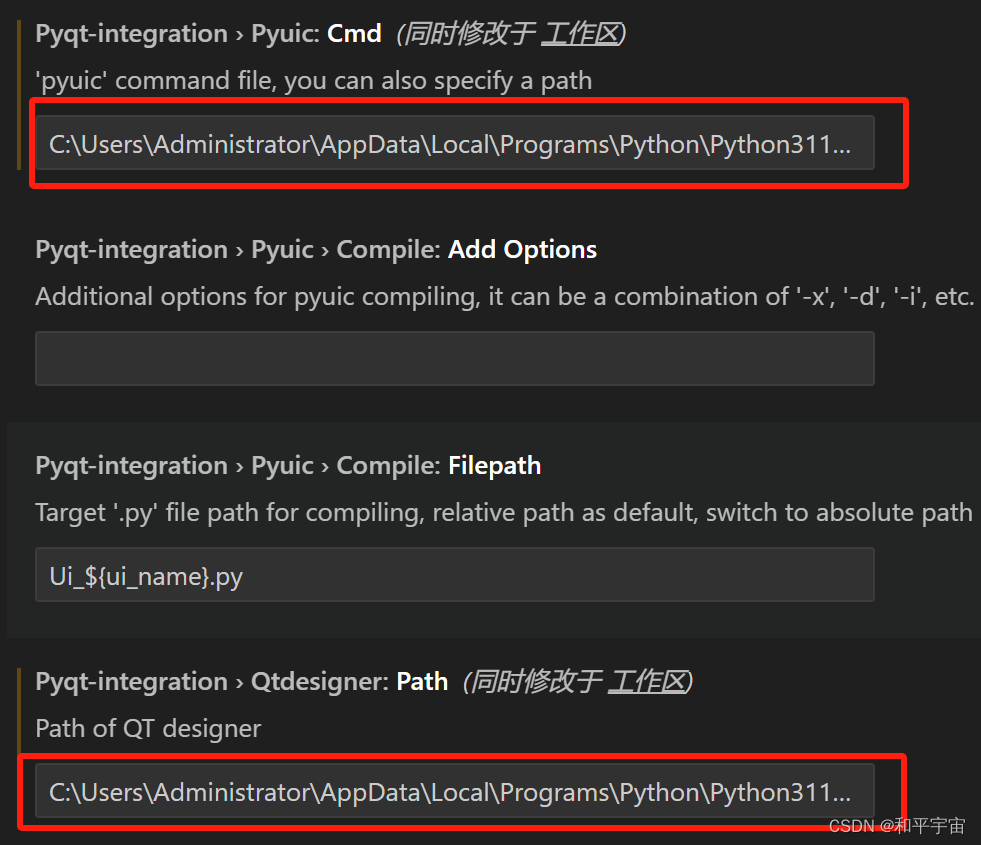
vscode装一个PYQT Integration插件,设置好两个路径(下面有个脚本用于获取路径)
用everything的童鞋注意了:工具/选项/索引/强制重建
重启vscode可以看到,右击.ui文件时出现可以操作的菜单
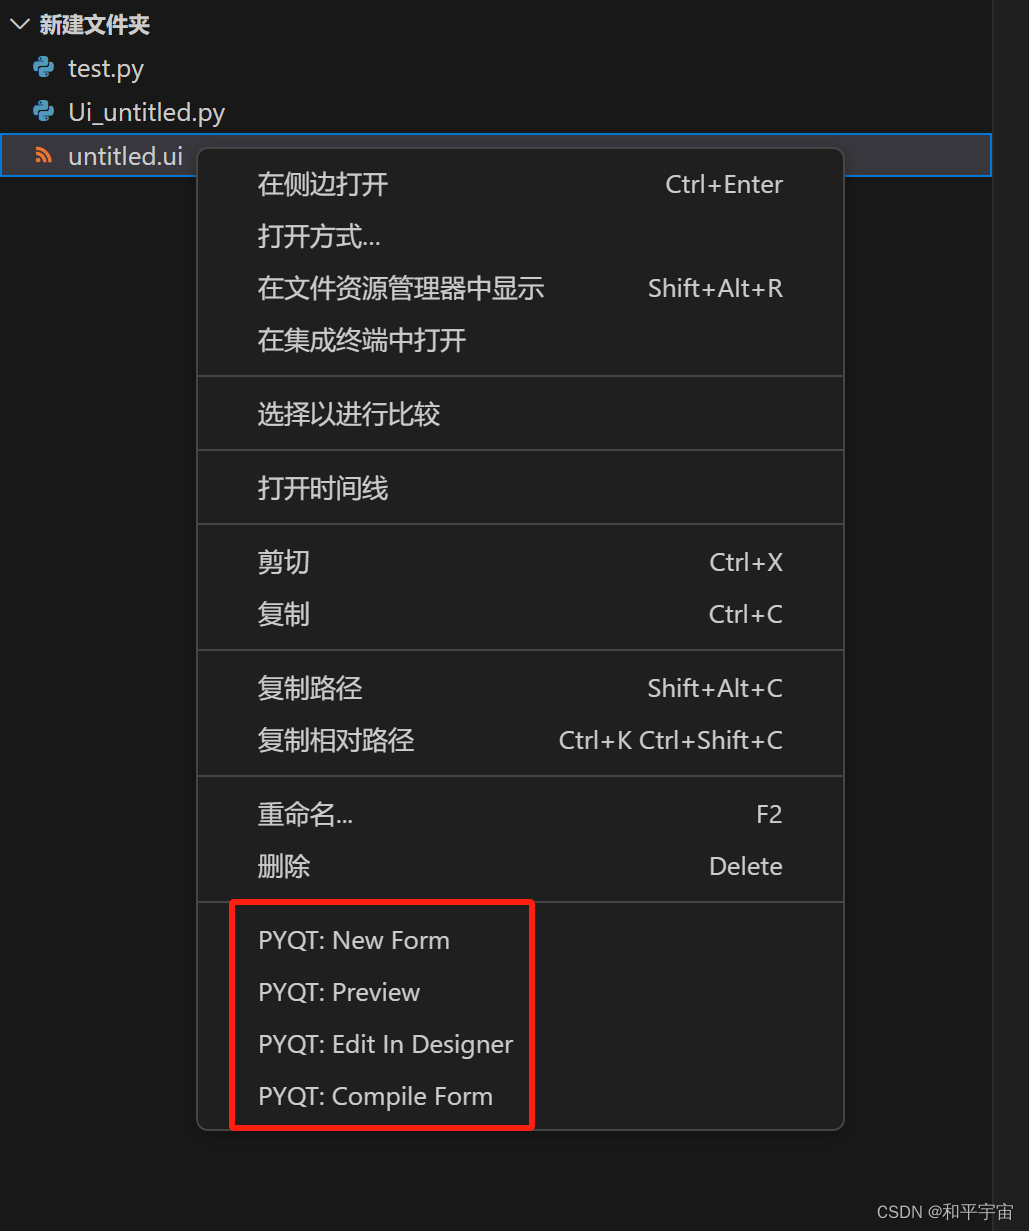
我们New一个Form默认生成一个.ui文件,然后点击编译,就会出现我们需要的Ui_untitled.py,这就是编译出来的文件。在test.py中输入以下代码F5运行,对话框就出现了
import sys
from Ui_untitled import Ui_Dialog
from PySide6.QtWidgets import QApplication, QDialog  # 假设您使用的是 PyQt5class MyDialog(QDialog):def __init__(self):super(MyDialog, self).__init__()self.ui = Ui_Dialog()  # 假设 Ui_Dialog 是您的 UI 文件生成的类self.ui.setupUi(self)  # 将当前对话框实例传递给 setupUi 方法if __name__ == "__main__":app = QApplication([])win = MyDialog()win.show()app.exec_()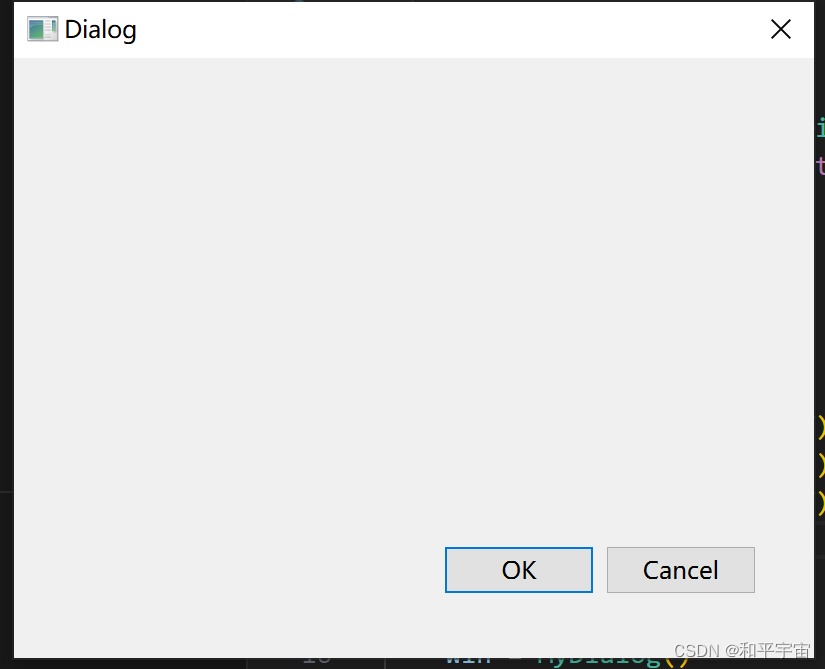
最后附上一段获取exe文件路径的脚本,方便路径的复制粘贴:(注意不要重复运行,里面有添加环境变量操作,重复运行会添加重复的环境变量)
import os
import sys
import subprocess
from pathlib import Path
from win32com.client import Dispatch    #要安装依赖:python -m pip install pypiwin32# 1. 搜索Python目录并设置pkgDir变量
def find_python_directory():for root, dirs, files in os.walk('C:/Users/Administrator/AppData/Local/Programs'):if 'python.exe' in files:return Path(root)return Nonepython_dir = find_python_directory()
if python_dir is None:print("Python not found.")sys.exit(1)pkg_dir = python_dir / 'Lib' / 'site-packages'
print(f"Found Python at: {python_dir}")
print(f"Package directory: {pkg_dir}")# 2. 在pkgDir中搜索Designer.exe并创建桌面快捷方式
def create_shortcut(target, shortcut_path, name):shell = Dispatch('WScript.Shell')shortcut = shell.CreateShortCut(str(shortcut_path))shortcut.Targetpath = targetshortcut.WorkingDirectory = str(Path(target).parent)shortcut.save()desktop_path = Path.home() / 'Desktop'
designer_exe = None
for file in pkg_dir.rglob('Designer.exe'):designer_exe = filebreakif designer_exe:shortcut_name = 'Designer.lnk'create_shortcut(str(designer_exe), desktop_path / shortcut_name, 'Designer')print(f"Shortcut created for Designer.exe on the desktop.")
else:print("Designer.exe not found.")# 3. 在pkgDir中搜索pyuic6.exe并添加到系统环境变量
pyside6_uic_exe_path = None
for file in python_dir.rglob('pyside6-uic.exe'):pyside6_uic_exe_path = file.parentbreak
if pyside6_uic_exe_path:current_path = os.environ['PATH']new_path = f"{current_path};{str(pyside6_uic_exe_path)}"subprocess.run(['setx', 'PATH', new_path, '/M'], check=True)print(f"pyside6-uic.exe directory added to system PATH.")
else:print("pyside6-uic.exe not found.")pyside6_uic_exe = str(pyside6_uic_exe_path) + '\\pyside6-uic.exe'
print('-----------------------------------------------------------------------------')
print(pyside6_uic_exe)
print(designer_exe)
print('-----------------------------------------------------------------------------')