[JavaWeb玩耍日记]HTML+CSS+JS快速使用
目录
一.标签
二.指定css
三.css选择器
四.超链接
五.视频与排版
六.布局测试
七.布局居中
八.表格
九.表单
十.表单项
十一.JS引入与输出
十二.JS变量,循环,函数
十三.Array与字符串方法
十四.自定义对象与JSON
十五.BOM对象
十六.获取DOM对象
十七.使用DOM对象
十八.监听事件绑定方法
十九.常见监听事件
二十. 表单处理案例
实验项目目录:
必要文件new.css:
h1 {color:black;
}
span{color: #968D92;;
}
a {color: #000;text-decoration: none;
}
p {text-indent: 50px;line-height: 40px;
}
#pLast {text-align: right;
}
一.标签
该文件中的标签/元素:
标题:h1~6
图片:img
分割线:hr
换行:br
空格:
有序列表:ol+li
无序列表:ul+li
1.如何设置图片的相对路径?
./ 代表当前目录,平级可省略
../ 代表上一级目录。。
2.width与height常用单位有哪些?分别表示什么意思?
px:像素
%:相对于父元素的百分比
3.图片的width与height,如果只设置一个会发生什么?
图片将会根据其中一个将会等比例缩放
<!DOCTYPE html>
<html lang="en">
<head><meta charset="UTF-8"><meta name="viewport" content="width=device-width, initial-scale=1.0"><title>标题内容</title>
</head>
<body><img src='img/news_logo.png' width="150px"> 新浪政务 > 正文<h1>焦点访谈:中国底气 新思想夯实大国粮仓</h1><hr>2023年03月02日 21:50 央视网<br><ol type="1"><li>妙蛙种子</li><li>小火龙</li><li>杰尼龟</li></ol><ul><li>妙蛙种子</li><li>小火龙</li><li>杰尼龟</li></ul>
</body>
</html>
二.指定css
1.没有任何语义的标签:span
2.指定css的有哪三种方式?
1.写在.css文件当中,使用link标签导入
2.写在head标签的style标签中,格式与.css文件中的一样
3.在标签中用style属性指定
3.指定颜色的三种方式:
1.#968D92
2.rgb(99, 255, 255)
3.black
<!DOCTYPE html>
<html lang="en">
<head><meta charset="UTF-8"><meta name="viewport" content="width=device-width, initial-scale=1.0"><title>Document</title><link rel="stylesheet" href="css/new.css">
</head>
<body><h1>焦点访谈:中国底气 新思想夯实大国粮仓</h1><hr><span style="color:#968D92;">2023年03月02日 21:50 央视网</span>
</body>
</html> 
三.css选择器
1.css属性设置
字体颜色:color: black;
字体大小:font-size 14px;
2.css的三个选择器是哪些?优先级如何?
元素选择器:指定某标签使用某样式
class选择器: 使用.xxx作为标识,在标签中使用class属性引用,多个标签可以有相同的class
id选择器: 使用#id作为标识,id属性不要重复
css生效优先级:id>class>标签
<!DOCTYPE html>
<html lang="en">
<head><meta charset="UTF-8"><meta name="viewport" content="width=device-width, initial-scale=1.0"><title>Document</title><style>h1 {color: rgb(80, 80, 80);}.cls{color: #968D92;font-size: 14px;}#id{color: black;}</style>
</head>
<body><img src='img/news_logo.png' width="150px"> 新浪政务 > 正文<h1>焦点访谈:中国底气 新思想夯实大国粮仓</h1><hr><span class="cls">2023年03月02日 21:50</span><span id="id"> 央视网 </span>
</body>
</html>
四.超链接
1.超链接标签:a
2.css属性-去掉超链接的下划线::text-decoration: none
3.超链接标签属性:
指定链接网址:href="https://www.baidu.com/"
设置新建页面打开:target="_blank"
<!DOCTYPE html>
<html lang="en">
<head><meta charset="UTF-8"><meta name="viewport" content="width=device-width, initial-scale=1.0"><title>Document</title><style>a{color: #000;text-decoration: none;}</style><link rel="stylesheet" href="css/new.css">
</head><body><img src='img/news_logo.png' width="150px"> <a href="https://www.baidu.com/"> 新浪政务 </a> <h1>焦点访谈:中国底气 新思想夯实大国粮仓</h1><hr><span>2023年03月02日 21:50</span><a href="https://www.baidu.com/" target="_blank"> 百度一下 </a>
</body>
</html> 
五.视频与排版
1.html标签:
定义段落:p
文本加粗:b
视频标签:video
音频:audio
2.css属性:
首行缩进:text-indent: 50px;
设置行高:line-height: 40px;
设置对齐方式靠右:text-align: right;
3.video标签属性:
点击可播放控件:controls(如果标签属性名和属性值一样,可以只写一个)
<!DOCTYPE html>
<html lang="en">
<head><meta charset="UTF-8"><meta name="viewport" content="width=device-width, initial-scale=1.0"><title>HoneyWorks</title><style>a {color: #000;text-decoration: none;}p{text-indent: 50px;line-height: 40px;}#right{text-align: right;}</style><link type="stylesheet" rel="css/new.css">
</head>
<body><h1>新歌发布:いつだって戦ってる</h1><p><b>HoneyWorks</b>(日語:ハニーワークス),簡稱Haniwa(ハニワ)或HW,是日本音樂組織及動畫、漫畫和小說社團。</p><h2>可憐なアイボリー</h2><p>徵選活動的10位合格者,分別為土屋玲実、寺本理绘、高泽百合爱、小坂ねね、永尾梨央、福田阳菜、柴笑あかり、名切翠杏、波左间美晴、ななさ,所屬於TWINPLANET旗下,組成「突破偶像常識」般的偶像團體。由HoneyWorks擔任音樂製作。</p><video src="video/haniwa.mp4" controls width="500px"></video><br><p id="right">信息来源于萌娘百科</p>
</body>
</html>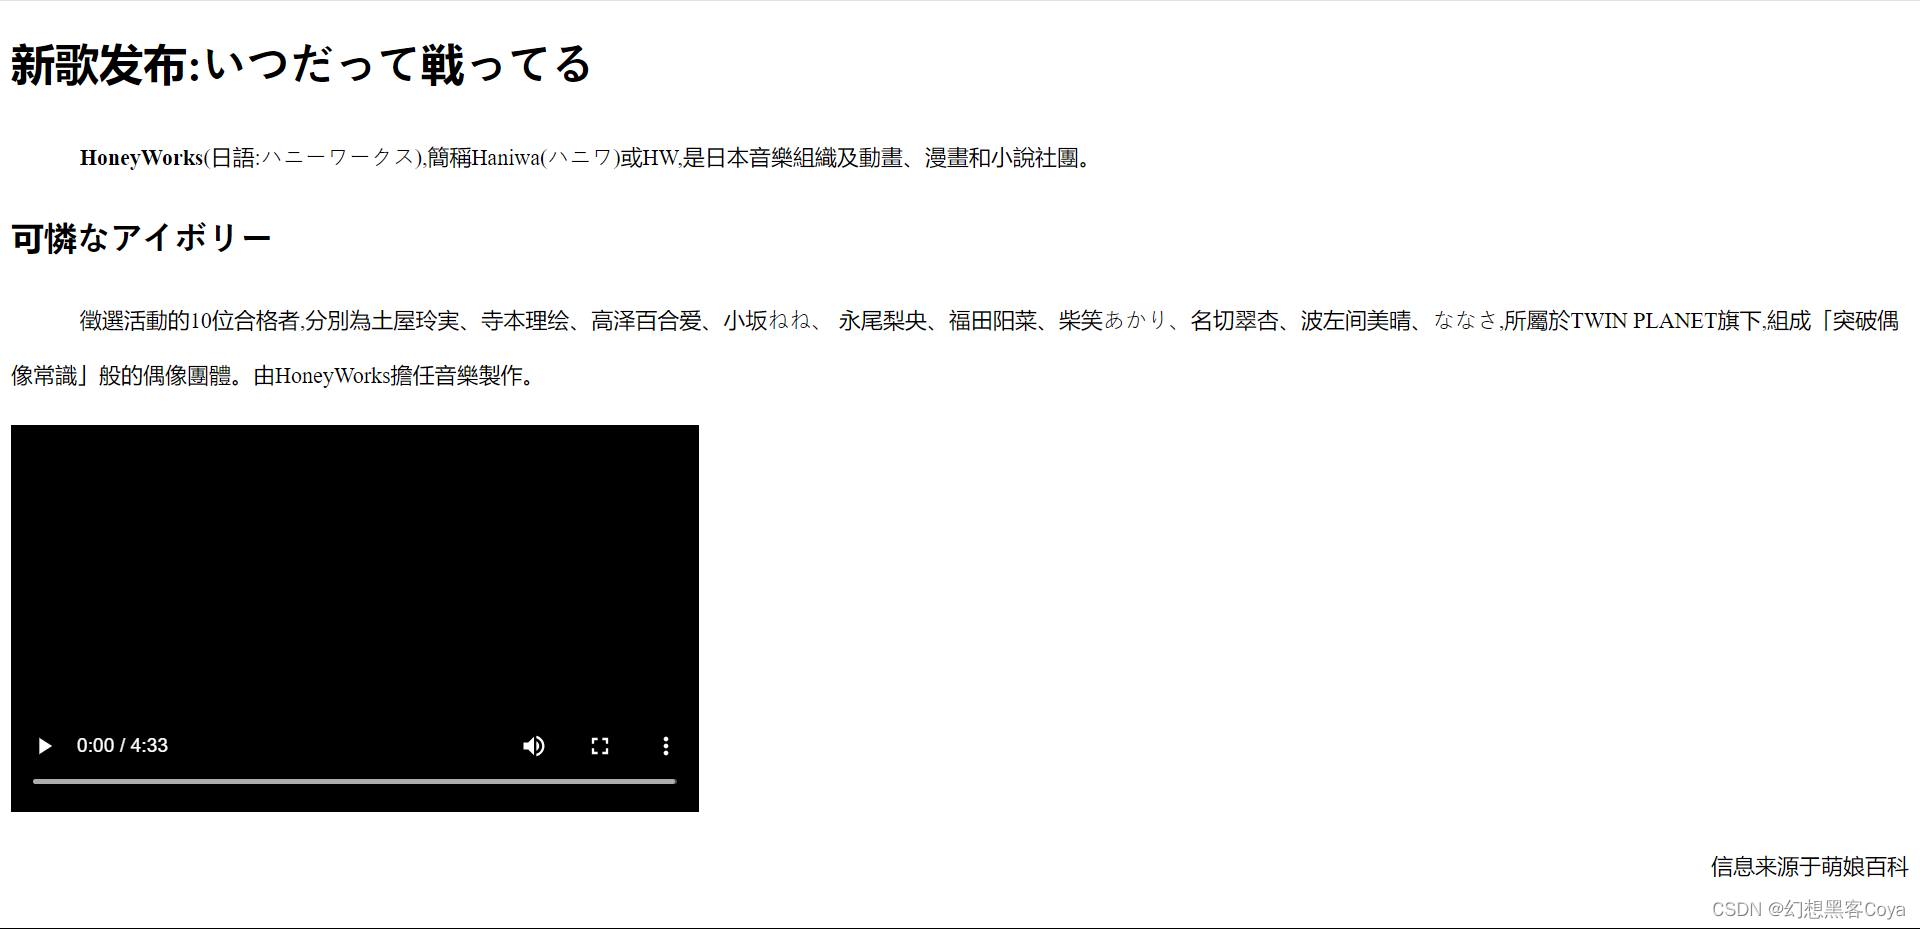
六.布局测试
1.css属性:
背景颜色:background-color: rgb(151, 109, 235);
内边距:padding: 20px;
边框:border: 10px solid skyblue;
外边距:margin: 30px;
2.布局标签对比:
div(独占一行,宽度为父内容元素,可以设置宽高)
span(宽高完全由内容撑开)
<!DOCTYPE html>
<html lang="en"><head><meta charset="UTF-8"><meta name="viewport" content="width=device-width, initial-scale=1.0"><title>HoneyWorks</title><style>.cls{width: 120px;height: 120px;background-color: rgb(151, 109, 235);padding: 20px;border: 20px solid skyblue;margin: 20px;}</style>
</head>
<body><div class="cls">AAAAAAAAAAAAAAAA</div><div class="cls">AAAAAAAAAAAAAAAA</div><span class="cls">AAAAAAAAAAAAAAAA</span><span class="cls">AAAAAAAAAAAAAAAA</span>
</body>
</html> 
七.布局居中
css属性:margin: 0 auto;
相当于设置值为:0 15% 0 15%;(上右下左)
设置两个即为同时设置上下和左右,一个则代表四周
auto代表自动计算(居中)
<!DOCTYPE html>
<html lang="en"><head><meta charset="UTF-8"><meta name="viewport" content="width=device-width, initial-scale=1.0"><title>HoneyWorks</title><style>#center {width: 70%;margin: 0 auto;}</style><link rel="stylesheet" href="css/new.css">
</head>
<body><div id="center"><h1>新歌发布:いつだって戦ってる</h1><hr><span>2023年10月29日 21:50</span><a href="https://www.baidu.com/"> Gom </a><br><br><video src="video/haniwa.mp4" controls width="50%"></video><br><p><b>HoneyWorks</b>(日語:ハニーワークス),簡稱Haniwa(ハニワ)或HW,是日本音樂組織及動畫、漫畫和小說社團。</p><h2>可憐なアイボリー</h2><p>徵選活動的10位合格者,分別為土屋玲実、寺本理绘、高泽百合爱、小坂ねね、永尾梨央、福田阳菜、柴笑あかり、名切翠杏、波左间美晴、ななさ,所屬於TWINPLANET旗下,組成「突破偶像常識」般的偶像團體。由HoneyWorks擔任音樂製作。</p><p id="pLast">信息来源于萌娘百科</p></div>
</body>
</html>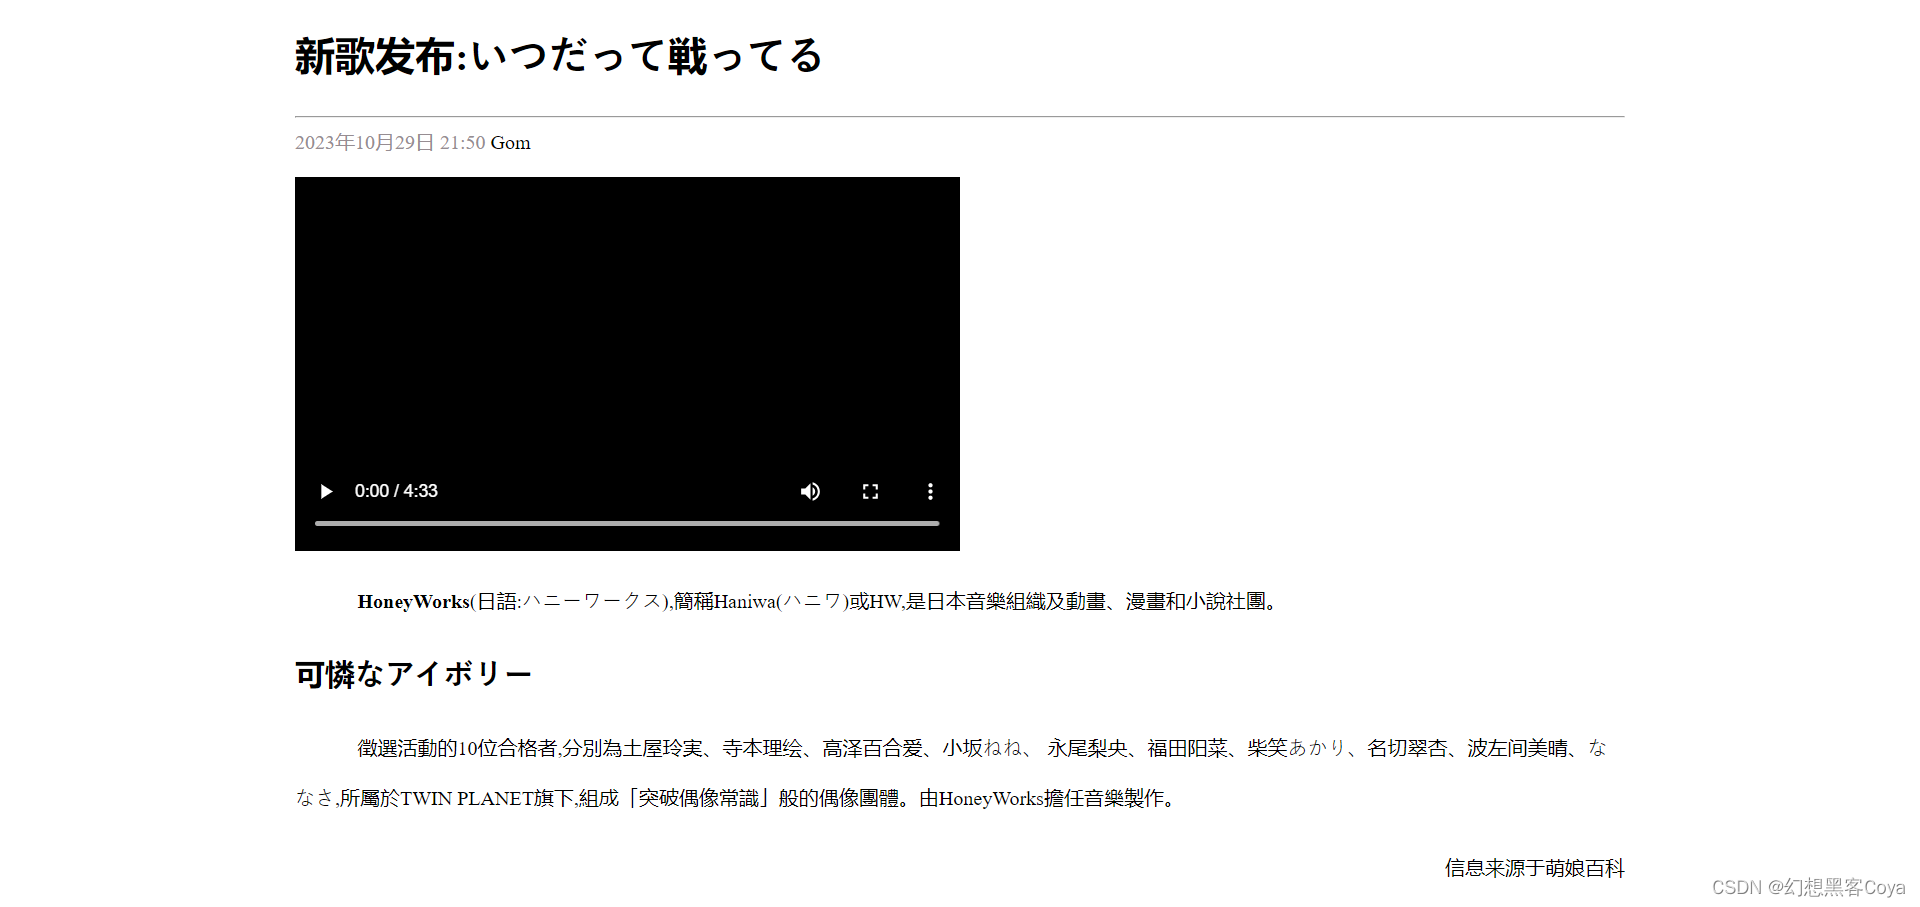
八.表格
1.html标签:
表格标签:table
表格行标签:tr
表格第一行单元标签:th(表头单元格,字体加粗与居中)
表格普通行单元标签:td
2.table属性:
表格宽度与表格边框宽度:width,border
表格单元间隔:cellspacing="0"(默认有间隔,设置为0表示表格之间无间隙)
3.th/td属性:
规定占有的行数与列数:colspan="2",rowspan="2"
<!DOCTYPE html>
<html lang="en"><head><meta charset="UTF-8"><meta name="viewport" content="width=device-width, initial-scale=1.0"><title>Document</title><style>img {width: 100px;}td {text-align: center;}</style>
</head>
<body><table border="1" cellspacing="0" width="500"><tr><th>序号</th><th>LOGO</th><th>品牌名称</th></tr><tr><td>010</td><td><img src="三只松鼠.png" width="60" height="50"></td><td>三只</td></tr><tr><td>009</td><td><img src="优衣库.png" width="60" height="50"></td><td>优衣库</td></tr><tr><td>008</td><td><img src="小米.png" width="60" height="50"></td><td>小米</td></tr></table><br><table border="1" cellspacing="0" width="500"><tr><th colspan="2">LOGO</th><th>品牌名称</th></tr><tr><td>010</td><td><img src="三只松鼠.png" width="60" height="50"></td><td>三只</td></tr><tr><td rowspan="2">009</td><td><img src="优衣库.png" width="60" height="50"></td><td>优衣库</td></tr><tr align="center"><td><img src="小米.png" width="60" height="50"></td><td>小米</td></tr></table>
</body>
</html>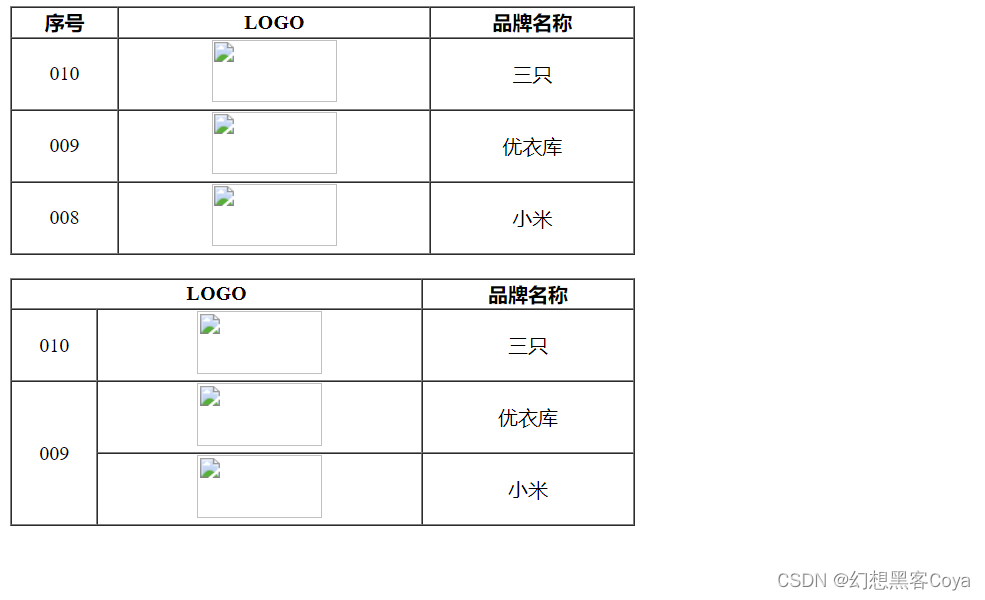
九.表单
1.表单标签:form(负责输入数据)
表单属性:
提交数据方向:action=""(默认提交到当前页面)
发送表单数据的方式:method="post"
get(默认值,在url后面新接表单数据)
post(浏览器检查network,Headers里面显示传输方式,payload显示传输数据)
2.表单项目标签:input
决定输入类型:type="submit"(是输入框/选择框/提交按钮/重置按钮)
指定提交数据的键:name="username"
在该input标签的按钮标签上显示数据:value="提交"
<!DOCTYPE html>
<html lang="en">
<head><title>Document</title>
</head>
<body><form action="" method="post">用户名:<input type="text" name="username">年龄:<input type="text" name="age"><input type="submit" value="提交"></form>
</body>
</html>
十.表单项
1.表单项input的type属性的值:
普通输入框:text
密码输入框:password
单选框:radio(input标签中的name需要保持一致 )
数字|邮箱:number,email
文件夹 :file
日期|时间|日期时间:date|time|datetime-local
隐藏:hidden
提交|重置|按钮:submit|reset|button
2.表单中的下拉列表:select标签+option标签
下拉列表项:select标签中使用option标签
设置下拉列表的键:
select标签的属性:name="degree"
设置下拉列表的列表项的值:
option标签的属性:value="1"(没有设置value就提交标签中的文字数据数据)
3.表单中的文本域:textarea
表单项text area标签的属性:
设置宽高:cols="30" rows="3"
4.绑定文字与输入选项的标签:label(label包含input标签)
<!DOCTYPE html>
<html lang="en"><head><title>Document</title>
</head>
<body><form action="" method="post">姓名:<input type="text" name="username"><br><br>密码:<input type="password" name="password"><br><br>性别:<label><input type="radio" name="gender" value="1"> 男 </label><label><input type="radio" name="gender" value="2"> 女 </label><br><br>爱好: <label><input type="checkbox" name="hobby" value="java"> java </label><label><input type="checkbox" name="hobby" value="c++"> c++ </label><label><input type="checkbox" name="hobby" value="python"> python </label><br><br>手机号:<input type="number" name="phoneNumber">邮箱: <input type="email" name="email"><br><br>文件上传:<input type="file" name="image"><br><br>日期: <input type="date" name="date">时间: <input type="time" name="time">日期时间: <input type="datetime-local" name="datetime-local"><br><br>隐藏:<input type="hidden" name="id" value="1"><br><br>学历:<select name="degree"><option value="">请选择</option><option value="1">高中</option><option value="2">本科</option><option value="3">硕士</option><option value="4">博士</option></select><br><br>自我介绍:<textarea name="textarea" cols="30" rows="3"></textarea><br><br><input type="submit" value="提交"><input type="reset" value="重置"><input type="button" value="按钮"></form>
</body>
</html> 
十一.JS引入与输出
JS直接由浏览器解释,可控制网页动态行为。
1.引用js的位置
可以用script标签放在任意html页面的位置、
一般放在body下面,改善显示速度。
2.js写在哪里
可以写在标签中
也能写在外部.js文件。
3.js的分号与字符串
js可不写分号
字符串也可使用单引号
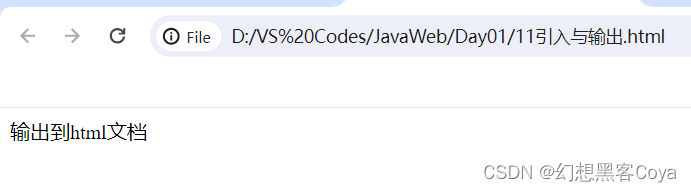
4.js输出的三种方式
a.js:
alert('js文件的输出')<!DOCTYPE html>
<html lang="en">
<head><title></title>
</head>
<body>
</body><script src="js/a.js"></script><script>console.log("输出到浏览器控制台")window.alert('警告框(window可省略)')document.write("输出到html文档")</script>
</html> 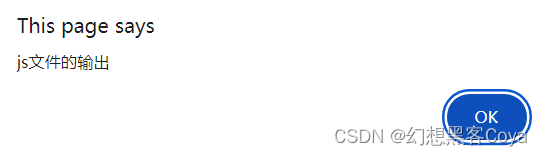


十二.JS变量,循环,函数
定义变量的三种方式
1.获取变量类型的方法:通过typeof
2.==与===对比:前者类型转换,后者不做类型转换
3.类型转换成数字:使用parseInt,不能转就变成NAN
4.if语句中也能使用其他类型,数字类型0和NAN为false,空字符串为false,对象undefined为false
5.定义函数
<!DOCTYPE html>
<html lang="en">
<head><title></title>
</head>
<body>
</body>
<script>var a = '全局变量'let b = '局部变量'const c = '常量'console.log("1.获取变量类型的方法")console.log(typeof(true))console.log("2.==与===对比")console.log((true=='1')+' '+(true==='1'))console.log('3.类型转换成数字')console.log(parseInt("1")+' '+parseInt("A"))if("0")console.log("4.if语句输出")var myFunction = function(a,b){console.log('5.定义函数并传参:'+a+' '+b+' '+c)}myFunction(a,b)
</script>
</html> 
十三.Array与字符串方法
1.Array对象
定义使用:[]
长度:length可变
内部元素类型:任意
2.遍历array:foreach
3.添加数据到array:push
4.根据下标删除某范围内的元素:splice
5.获取字符串下标:indexOf
6.截取字符串:substring
7.去除字符串前后空格:trim
<!DOCTYPE html>
<html lang="en">
<head><title></title>
</head>
<body>
</body>
<script>console.log("")array = [false,"1",2]array[4] = 4console.log(array)console.log("长度为:"+array.length)console.log("2.遍历非空元素,可lambda")array.forEach(e=>console.log(e))console.log("3.添加多个元素")array.push(5,6);console.log(array)console.log("4.根据下标删除多个元素")array.splice(2,6);console.log(array)str = " 石头人 "console.log("5.获取字符串下标:"+str.indexOf("石头人"))console.log('6.截取字符串:'+str.substring(1,4))console.log('7.去除字符串前后空格:'+str.trim())
</script>
</html> 
十四.自定义对象与JSON
1.自定义对象的特点
1.最外围包裹:大括号
2.属性与值之间:用冒号隔开
3.属性之间:用逗号隔开
4.方法可以简写
2.JSON:JS Object Notation(对象标记法)
json与自定义对象的不同:
所有的key必须用双引号包裹
3.json字符串与js对象的相互转换
<!DOCTYPE html>
<html lang="en">
<head><title></title>
</head>
<body>
</body>
<script>person = {id:1 ,name:"Jack",eat(){console.log("吃")}}console.log("3.把字符串转换成对象:利用JSON.parse")user = JSON.parse('{"id":1,"name":"Jack","addr":["Beijing","Shanghai"]}')console.log(user)console.log("4.把对象转换成字符串:利用JSON.stringify")console.log(JSON.stringify(user))
</script>
</html>
十五.BOM对象
BOM:Browser Object Model 浏览器对象模型,允许JS操作浏览器
window:浏览器窗口对象,window.可以省略
Location:地址栏对象,只需掌握href属性
1.弹出确认框:confirm("内容")
2.周期性执行函数:setInterval(函数,时间)
3.一次性执行函数,setTimeout(函数,时间)
4.跳转地址:location.href = "https://www.baidu.com"
<!DOCTYPE html>
<html lang="en">
<head><title></title>
</head>
<body>
</body>
<script>alert(confirm("1.弹出确认框 确认返回true 取消返回false"))i = 1setInterval(function () {console.log("2.周期性执行" + i)i++;}, 2000)setTimeout(function () {console.log("3.延迟时间执行")}, 4000)document.write("4.设置跳转地址,十秒后跳转到百度")setTimeout(function () {location.href = "https://www.baidu.com"}, 10000)
</script></html>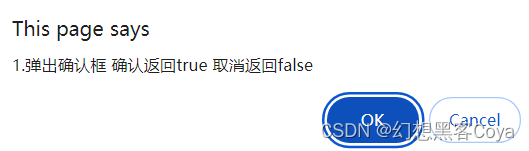


十六.获取DOM对象
DOM:Document Object Model:文档对象模型:将标记语言的各个组成部分封装成对应的对象
获取文档对象的方法:
1.通过id返回单个对象
2.class,属性名,标签名获取返回对象集合
<!DOCTYPE html>
<html lang="en">
<head><title></title>
</head>
<body><h1 id="h1">Hello BOM</h1><input class="radio" type="radio" name="sex">男<input class="radio" type="radio" name="sex">女
</body>
<script>h1 = document.getElementById("h1")sex = document.getElementsByName("sex")radio = document.getElementsByClassName("radio")input = document.getElementsByTagName("input")
</script>
</html>
十七.使用DOM对象
1.改变标签属性:文档对象.属性=
2.增加加标签内的内容:文档对象.innerHTML+=
3.改变对象样式:文档对象.style属性=
<!DOCTYPE html>
<html lang="en">
<head><title></title>
</head>
<body><img id="img" src="img/off.gif"></body><br><br><div class="cls">伊莉莎贝斯</div><br><div class="cls">吉太</div><br>
</body>
<script>document.getElementById("img").src = "img/on.gif"myDiv = document.getElementsByTagName("div")for (let index = 0; index < myDiv.length; index++) {myDiv[index].innerHTML+='<font color="red"> very good!</font>'myDiv[index].style.color='red'}
</script>
</html> 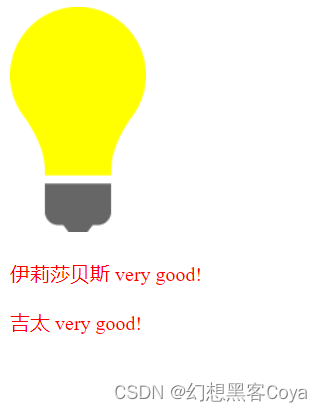
十八.监听事件绑定方法
监听事件绑定的两种方式
1.在标签设置属性onclick为一个函数,再到script里面写函数
2.直接在script里面获取对象,然后设置对象的onclick属性为一个函数(推荐)
<!DOCTYPE html>
<html lang="en">
<head><title></title>
</head><body><input type="button" onclick="on()" value="按钮1"><input type="button" id="but2" value="按钮2">
</body>
<script>function on(){alert("按钮一被点击了!")}document.getElementById("but2").onclick = function(){alert("按纽二被点击了!")}
</script>
</html>
十九.常见监听事件
常见事件(可以作为标签的属性):
加载完成 onload
表单 onsubmit
焦点 onfocus,onblur
鼠标 onmouseover,onmouseout
键盘 onkeydown
<!DOCTYPE html>
<html lang="en"><head><title></title>
</head>
<body id="body"><form action="" id="form"><input type="text" id="text"><br><input type="submit" id="submit"></form>
</body>
<script>document.getElementById("body").onload = function () {console.log("页面加载完成")}document.getElementById("form").onsubmit = function () {alert("已提交表单")}document.getElementById("text").onblur = function () {console.log("失去了焦点...")}document.getElementById("text").onfocus = function () {console.log("成为了焦点...")}document.getElementById("text").onkeydown = function () {console.log("按下键盘...")}document.getElementById("submit").onmouseover = function () {console.log("鼠标移入...")}document.getElementById("submit").onmouseout = function () {console.log("鼠标移出...")}document.getElementById("submit").onmouseout = function () {console.log("鼠标移出...")}
</script>
</html>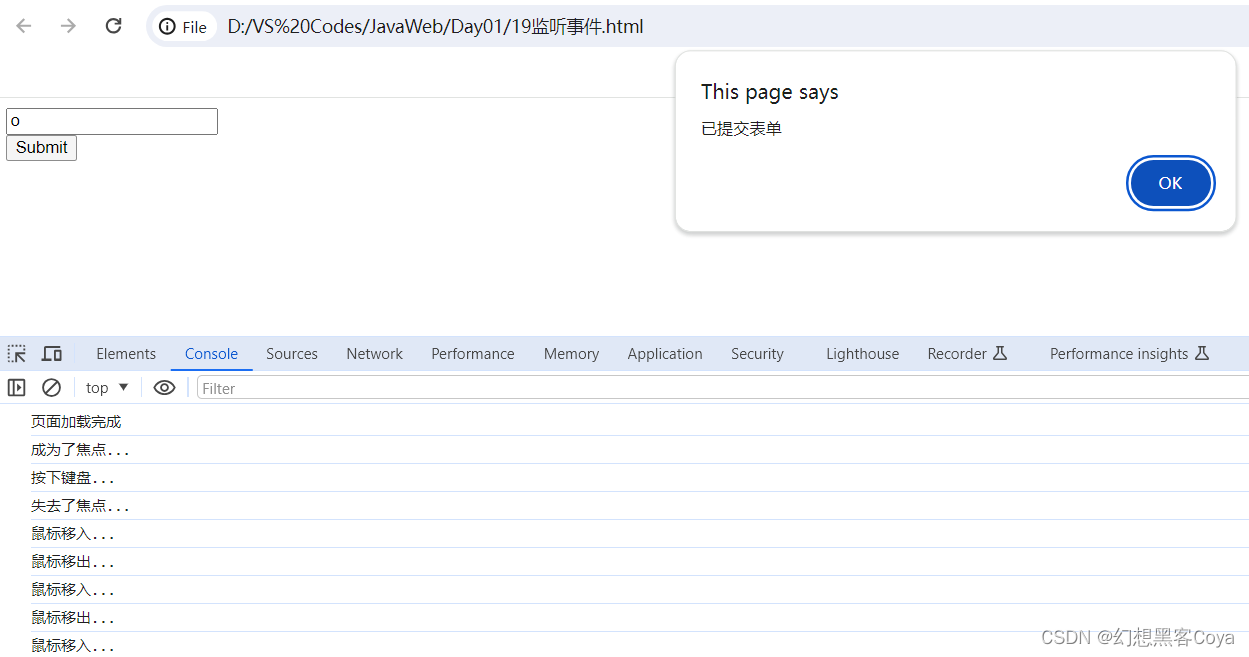
二十. 表单处理案例
案例内容:未填写规范则:
1.出现提示
2.提交表单失败
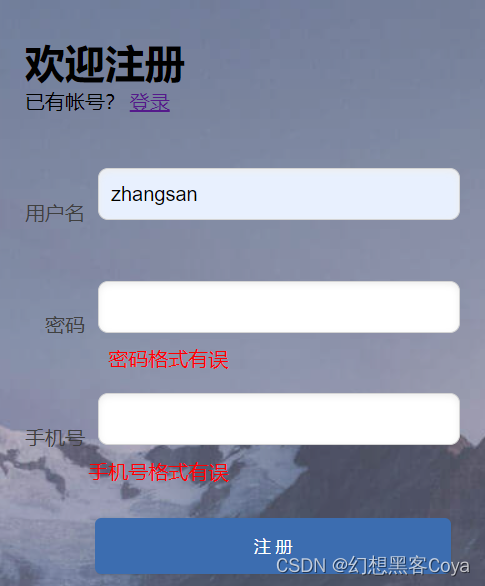
1.正则表达式对象的创建与方法:/^正则表达式$/.test(字符串),返回真假
2.引用函数,不加括号表示拷贝地址,加括号表示使用函数
3.对于onsubmit:返回false则提交失败
<!DOCTYPE html>
<html lang="en"><head><meta charset="UTF-8"><title>欢迎注册</title><link href="css/register.css" rel="stylesheet">
</head><body><div class="form-div"><div class="reg-content"><h1>欢迎注册</h1><span>已有帐号?</span> <a href="#">登录</a></div><form id="reg-form" action="#" method="get"><table><tr><td>用户名</td><td class="inputs"><input name="username" type="text" id="username"><br><span id="username_err" class="err_msg" style="display: none">用户名不太受欢迎</span></td></tr><tr><td>密码</td><td class="inputs"><input name="password" type="password" id="password"><br><span id="password_err" class="err_msg" style="display: none">密码格式有误</span></td></tr><tr><td>手机号</td><td class="inputs"><input name="tel" type="text" id="tel"><br><span id="tel_err" class="err_msg" style="display: none">手机号格式有误</span></td></tr></table><div class="buttons"><input value="注 册" type="submit" id="reg_btn"></div><br class="clear"></form></div><script>var usernameInput = document.getElementById("username")usernameInput.onblur = checkUsername;function checkUsername() {var flag = /^[a-zA-Z]{6,12}$/.test(usernameInput.value.trim())if (flag) document.getElementById("username_err").style.display = 'none'else document.getElementById("username_err").style.display = ''return flag}var passwordInput = document.getElementById("password")passwordInput.onblur = checkPasswordfunction checkPassword() {var flag = /^\w{6,12}$/.test(passwordInput.value.trim())if (flag) document.getElementById("password_err").style.display = 'none'else document.getElementById("password_err").style.display = ''return flag}var telInput = document.getElementById("tel")telInput.onblur = checkTelfunction checkTel() {var flag = /^[1]\d{10}$/.test(telInput.value.trim())if (flag)document.getElementById("tel_err").style.display = 'none'else document.getElementById("tel_err").style.display = ''return flag}document.getElementById("reg-form").onsubmit = function () {var flag = checkUsername() && checkPassword() && checkTel()return flag}</script>
</body>
</html>
register.css
* {margin: 0;padding: 0;list-style-type: none;
}
.reg-content{padding: 30px;margin: 3px;
}
a, img {border: 0;
}body {background-image: url("../img/reg_bg_min.jpg") ;text-align: center;
}table {border-collapse: collapse;border-spacing: 0;
}td, th {padding: 0;height: 90px;}
.inputs{vertical-align: top;
}.clear {clear: both;
}.clear:before, .clear:after {content: "";display: table;
}.clear:after {clear: both;
}.form-div {background-color: rgba(255, 255, 255, 0.27);border-radius: 10px;border: 1px solid #aaa;width: 424px;margin-top: 150px;margin-left:1050px;padding: 30px 0 20px 0px;font-size: 16px;box-shadow: inset 0px 0px 10px rgba(255, 255, 255, 0.5), 0px 0px 15px rgba(75, 75, 75, 0.3);text-align: left;
}.form-div input[type="text"], .form-div input[type="password"], .form-div input[type="email"] {width: 268px;margin: 10px;line-height: 20px;font-size: 16px;
}.form-div input[type="checkbox"] {margin: 20px 0 20px 10px;
}.form-div input[type="button"], .form-div input[type="submit"] {margin: 10px 20px 0 0;
}.form-div table {margin: 0 auto;text-align: right;color: rgba(64, 64, 64, 1.00);
}.form-div table img {vertical-align: middle;margin: 0 0 5px 0;
}.footer {color: rgba(64, 64, 64, 1.00);font-size: 12px;margin-top: 30px;
}.form-div .buttons {float: right;
}input[type="text"], input[type="password"], input[type="email"] {border-radius: 8px;box-shadow: inset 0 2px 5px #eee;padding: 10px;border: 1px solid #D4D4D4;color: #333333;margin-top: 5px;
}input[type="text"]:focus, input[type="password"]:focus, input[type="email"]:focus {border: 1px solid #50afeb;outline: none;
}input[type="button"], input[type="submit"] {padding: 7px 15px;background-color: #3c6db0;text-align: center;border-radius: 5px;overflow: hidden;min-width: 80px;border: none;color: #FFF;box-shadow: 1px 1px 1px rgba(75, 75, 75, 0.3);
}input[type="button"]:hover, input[type="submit"]:hover {background-color: #5a88c8;
}input[type="button"]:active, input[type="submit"]:active {background-color: #5a88c8;
}
.err_msg{color: red;padding-right: 170px;
}
#password_err,#tel_err{padding-right: 195px;
}#reg_btn{margin-right:50px; width: 285px; height: 45px; margin-top:20px;
}