vue3的插槽slots
文章目录
- 普通插槽
- Test.vue
- FancyButton.vue
- 具名插槽
- Test.vue
- BaseLayout.vue
- 作用域插槽
- 默认插槽
- Test.vue
- BaseLayout.vue
- 具名作用域插槽
- Test.vue
- BaseLayout.vue
普通插槽
父组件使用子组件时,在子组件闭合标签中提供内容模板,插入到子组件定义的出口的地方
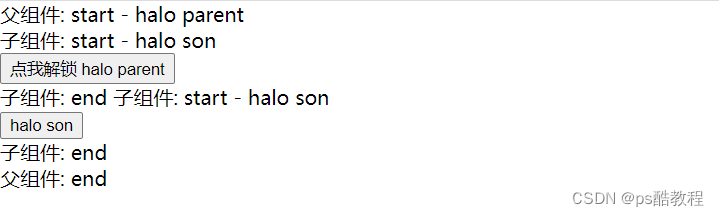
Test.vue
<template>父组件: start - {{ parentMsg }}<br/><fancy-button><!-- 注意点: 这里是默认插槽内容,如果使用template标签来包裹的话, 就必须加上#default,否则不会渲染出来 -->点我解锁 {{ parentMsg }} <!-- 插槽内容 --><!-- 插槽内容是可以使用父模板中定义的数据 --><!-- 插槽内容无法访问子组件的数据 --><!-- 父组件模板中的表达式只能访问父组件的作用域;子组件模板中的表达式只能访问子组件的作用域。 --></fancy-button><fancy-button><!-- 未提供插槽内容给插槽, 子组件中的插槽将使用插槽中的默认内容 --></fancy-button><br/>父组件: end
</template><script lang="ts" setup>
import FancyButton from './FancyButton.vue';
const parentMsg = 'halo parent'</script>
<style lang="scss"></style>
FancyButton.vue
<template>子组件: start - {{ sonMsg }}<br/><button><slot>默认内容: {{ sonMsg }}</slot> <!-- 插槽出口 --><!-- 当没有提供插槽内容的情况下, 就展示“默认内容” --></button><br/>子组件: end
</template><script lang="ts" setup>const sonMsg = 'halo son'</script><style lang="scss"></style>
具名插槽
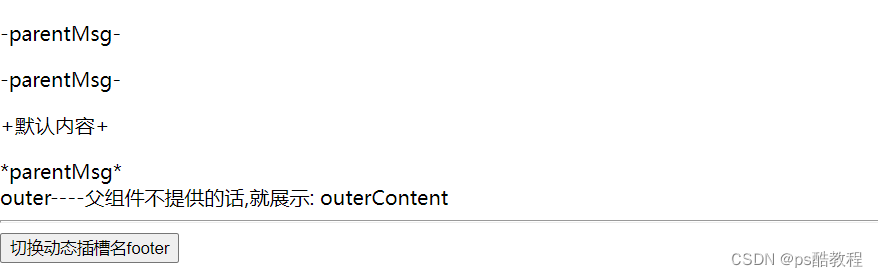
在一个组件中可以定义多个插槽出口slot,每个插槽出口slot可以使用name属性标识插槽名,称为具名插槽(没有提供 name 的 <slot> 出口会隐式地命名为“default”)
Test.vue
<template><BaseLayout><template v-slot:header>    <!-- 将会把这块插入到BaseLayout组件中定义的名为header的插槽中 --><p>-{{ parentMsg }}-</p><!-- 如果BaseLayout组件中定义了多个名为header的插槽, 则每个都会插入 --></template>                 <!-- 可以将v-slot:header简写为 #header --><template #default>          <!-- 将 v-slot:default 简写为 #default --><p>+默认内容+</p>         <!-- 默认插槽可以不使用template包裹, 直接写即可,这是因为当一个组件同时接收默认插槽和具名插槽时,所有位于顶级的非 <template> 节点都被隐式地视为默认插槽的内容--></template><template v-slot:[pos]>       <!-- 动态插槽名, 当通过下面changePos修改pos值时, 插槽内容会切换到不同地方 --><span>*{{ parentMsg }}*</span></template></BaseLayout><hr/><button @click="changePos">切换动态插槽名{{pos}}</button></template><script lang="ts" setup>import { ref, reactive } from 'vue'import BaseLayout from '@/views/test/BaseLayout.vue'const parentMsg = ref('parentMsg')const pos = ref('footer')const changePos = ()=>{if(pos.value === 'footer'){pos.value = 'outer'} else {pos.value = 'footer'}}
</script>
<style lang="scss"></style>
BaseLayout.vue
<template><div class="container"><header><slot name="header"></slot> <!-- 这里会插入 --><slot name="header"></slot> <!-- 这里同样会插入 --></header><main><slot></slot></main><footer><slot name="footer">{{ '父组件不提供的话,就展示: ' + footerContent }}</slot></footer></div>outer----<slot name="outer">{{ '父组件不提供的话,就展示: ' + outerContent }}</slot>
</template><script lang="ts" setup>import { ref,reactive } from 'vue'const footerContent = ref('footerContent')const outerContent = ref('outerContent')
</script><style lang="scss"></style>
作用域插槽
父组件中定义的插槽的内容无法访问到子组件的数据,但是我们需要一种方法来让子组件在渲染时将一部分数据提供给插槽。
默认插槽

Test.vue
<template><!-- 因为这里只使用了一个默认插槽,所以可以把v-slot=slotProps写在组件的位置 --><BaseLayout v-slot="slotProps"> <!-- 拿到子组件提供给插槽的数据, ,默认省略了default, 即:本来是v-slot:default="slotProps",可以直接在这里解构 --><!-- 注意: 这里使用默认插槽的情况下,不能使用template标签将下面内容包裹 -->{{ parentMsg }}  <!-- 本身就可以访问到父组件自身的数据 -->{{ slotProps }}  {{ slotProps.count }}</BaseLayout>
</template><script lang="ts" setup>
import { ref, reactive } from 'vue'
import BaseLayout from './BaseLayout.vue';
const parentMsg = ref('parentMsg')</script>
<style lang="scss"></style>
或如下
<template><BaseLayout><template v-slot:default="slotProps"> <!-- 这里可省略为#default="slotProps" -->{{ parentMsg }}  <!-- 本身就可以访问到父组件自身的数据 -->{{ slotProps }}  {{ slotProps.count }}</template></BaseLayout>
</template><script lang="ts" setup>
import { ref, reactive } from 'vue'
import BaseLayout from './BaseLayout.vue';
const parentMsg = ref('parentMsg')</script>
<style lang="scss"></style>
BaseLayout.vue
<template><div><!-- 向插槽的出口上传递 属性及值--><slot :text="greetMsg" :count="1"></slot></div>
</template><script lang="ts" setup>import { ref,reactive } from 'vue'const greetMsg = ref('打招呼')
</script><style lang="scss"></style>
具名作用域插槽

Test.vue
<template><BaseLayout><template #default="defaultProps">{{ parentMsg }}  <!-- 本身就可以访问到父组件自身的数据 -->{{ defaultProps }}  {{ defaultProps.count }}</template><template #title="{name,age}">title - {{ parentMsg }}title - {{ name }} - {{ age }}</template></BaseLayout>
</template><script lang="ts" setup>import { ref, reactive } from 'vue'import BaseLayout from './BaseLayout.vue';const parentMsg = ref('parentMsg')</script>
<style lang="scss"></style>
BaseLayout.vue
<template><div><slot :text="greetMsg" :count="1"></slot><br/><slot name="title" v-bind="person" v-for="person in persons"></slot></div>
</template><script lang="ts" setup>import { ref,reactive } from 'vue'const greetMsg = ref('打招呼')const persons = [{name:'zzhua',age:18},{name:'zj',age:22}]
</script><style lang="scss"></style>