python Matplotlib Tkinter--pack 框架案例
环境
python:python-3.12.0-amd64
包:
matplotlib 3.8.2
pillow 10.1.0
版本一
import matplotlib.pyplot as plt
from matplotlib.backends.backend_tkagg import FigureCanvasTkAgg, NavigationToolbar2Tk
import tkinter as tk
import tkinter.messagebox as messagebox
import tkinter.ttk as ttk# 创建自定义工具栏类
class MyNavigationToolbar(NavigationToolbar2Tk):toolitems = [('Home','回到初始状态','home','home'),('Back', '后退', 'back', 'back'),('Home', '前进', 'forward', 'forward'),('Pan', '平移', 'move', 'pan'),('Zoom', '缩放', 'zoom_to_rect', 'zoom'),('Save', '保存', 'filesave', 'save_figure')]def __init__(self, *args, **kwargs):super().__init__(*args, **kwargs)def __init__(self, canvas_, window_):NavigationToolbar2Tk.__init__(self, canvas_, window_)self.custom_button_img1 = tk.PhotoImage(file='figure_pic1.png') # 创建第一个图片按钮self.custom_button = ttk.Button(self, image=self.custom_button_img1, command=lambda: self.toggle_figure2())self.custom_button.pack(side=tk.LEFT) # 添加按钮到工具栏上self.custom_button_img2 = tk.PhotoImage(file='figure_pic2.png') # 创建第二个图片按钮self.custom_button2 = ttk.Button(self, image=self.custom_button_img2, command=lambda: print('111.'))self.custom_button2.pack(side=tk.LEFT) # 添加按钮到工具栏上self.fig2_visible = False # 记录figure2的可见性def toggle_figure2(self):if self.fig2_visible:canvas2.get_tk_widget().pack_forget() # 隐藏figure2self.fig2_visible = Falseelse:canvas2.get_tk_widget().pack() # 显示figure2self.fig2_visible = True# 创建 Tkinter 窗口
window = tk.Tk()
window.title("Matplotlib in Tkinter")# 禁用窗口最大化功能
window.resizable(False, False)# 设置窗口大小和位置
#window.geometry('800x600')top_frame = tk.Frame(window)
top_frame.pack(fill=tk.BOTH, expand=True)
bottom_frame = tk.Frame(window)
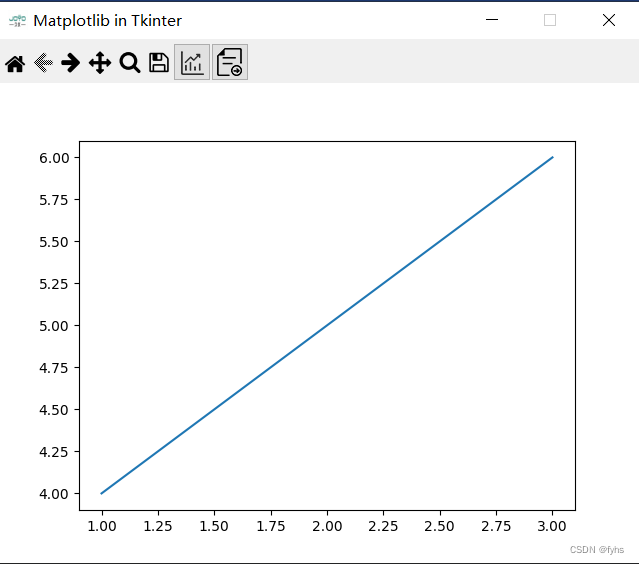
bottom_frame.pack(fill=tk.BOTH, expand=True)fig1 = plt.figure()
plt.plot([1, 2, 3], [4, 5, 6])
fig2 = plt.figure()
plt.plot([3, 2, 1], [6, 5, 4])canvas1 = FigureCanvasTkAgg(fig1)
canvas1.draw()
canvas2 = FigureCanvasTkAgg(fig2)
canvas2.draw()window.iconbitmap('./icon.ico')toolbar_frame = ttk.Frame(top_frame) # 创建放置自定义工具栏的frame
toolbar1 = MyNavigationToolbar(canvas1, window)
toolbar1.update()
toolbar1.pack(side=tk.TOP, fill=tk.X, expand=True) # 将自定义工具栏放置在toolbar_frame中,并确保其占据可用空间
toolbar_frame.pack(side=tk.TOP, fill=tk.X) # 将toolbar_frame放置在top_frame中,确保其占据可用空间canvas1.get_tk_widget().pack(fill=tk.BOTH, expand=True) # 将figure1的canvas放在top_frame中
canvas2.get_tk_widget().pack(fill=tk.BOTH, expand=True) # 将figure2的canvas放在bottom_frame中
canvas2.get_tk_widget().pack_forget() # 隐藏figure2window.mainloop()
版本二
import matplotlib.pyplot as plt
from matplotlib.backends.backend_tkagg import FigureCanvasTkAgg, NavigationToolbar2Tk
import tkinter as tk
import tkinter.messagebox as messagebox
import tkinter.ttk as ttk# 创建自定义工具栏类
class MyNavigationToolbar(NavigationToolbar2Tk):toolitems = [('Home','回到初始状态','home','home'),('Back', '后退', 'back', 'back'),('Home', '前进', 'forward', 'forward'),('Pan', '平移', 'move', 'pan'),('Zoom', '缩放', 'zoom_to_rect', 'zoom'),('Save', '保存', 'filesave', 'save_figure')]def __init__(self, canvas_, window_):super().__init__(canvas_, window_)self.custom_button_img1 = tk.PhotoImage(file=r'E:\pythonProject\合并/figure_pic1.png')  # 创建第一个图片按钮self.custom_button = ttk.Button(self, image=self.custom_button_img1, command=lambda: self.toggle_figure2())self.custom_button.pack(side=tk.LEFT)  # 添加按钮到工具栏上self.custom_button_img2 = tk.PhotoImage(file=r'E:\pythonProject\合并/figure_pic2.png')self.custom_button2 = ttk.Button(self, image=self.custom_button_img2, command=lambda: print('111.'))self.custom_button2.pack(side=tk.LEFT)  # 添加按钮到工具栏上self.fig2_visible = False  # 记录figure2的可见性def toggle_figure2(self):if self.fig2_visible:canvas2.get_tk_widget().pack_forget()  # 隐藏figure2self.fig2_visible = Falseelse:canvas2.get_tk_widget().pack()  # 显示figure2self.fig2_visible = True# 创建 Tkinter 窗口
window = tk.Tk()
window.title("Matplotlib in Tkinter")# 禁用窗口最大化功能
window.resizable(False, False)# 设置窗口大小和位置
#window.geometry('800x600')top_frame = tk.Frame(window)
top_frame.pack(fill=tk.BOTH, expand=True)
bottom_frame = tk.Frame(window)
bottom_frame.pack(fill=tk.BOTH, expand=True)fig1 = plt.figure()
plt.plot([1, 2, 3], [4, 5, 6])
fig2 = plt.figure()
plt.plot([3, 2, 1], [6, 5, 4])canvas1 = FigureCanvasTkAgg(fig1)
canvas1.draw()
canvas2 = FigureCanvasTkAgg(fig2)
canvas2.draw()window.iconbitmap(r'E:\pythonProject\合并/icon.ico')toolbar_frame = ttk.Frame(top_frame)  # 创建放置自定义工具栏的frame
toolbar1 = MyNavigationToolbar(canvas1, window)
toolbar1.update()
toolbar1.pack(side=tk.TOP, fill=tk.X, expand=True)  # 将自定义工具栏放置在toolbar_frame中,并确保其占据可用空间
toolbar_frame.pack(side=tk.TOP, fill=tk.X)  # 将toolbar_frame放置在top_frame中,确保其占据可用空间canvas1.get_tk_widget().pack(fill=tk.BOTH, expand=True)  # 将figure1的canvas放在top_frame中
canvas2.get_tk_widget().pack(fill=tk.BOTH, expand=True)  # 将figure2的canvas放在bottom_frame中
canvas2.get_tk_widget().pack_forget()  # 隐藏figure2window.mainloop()
图片资源下载(分享-->python Matplotlib Tkinter图片):
链接:https://pan.baidu.com/s/1vFOU52gG0bgK8RYuj-dzOg
提取码:2oy0