【Vue3】插槽使用和animate使用
插槽使用
- 插槽slot
- 匿名插槽
- 具名插槽
- 插槽作用域
- 简写
- 动态插槽
- transition动画组件
- 自定义过渡class类名
- 如何使用animate动画库组件
- 动画生命周期
- appear
- transition- group过渡列表
插槽slot
- 插槽就是子组件中提供给父组件使用的一个占位符
- 父组件可以在这个占位符智能填充任何模板代码,填充的内容会在替换子组件的slot标签
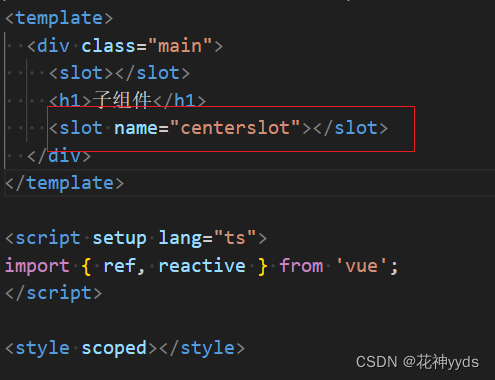
匿名插槽
- 子组件
<template><div class="main"><h1>子组件</h1><slot></slot></div>
</template><script setup lang="ts">
import { ref, reactive } from 'vue';
</script><style scoped></style>
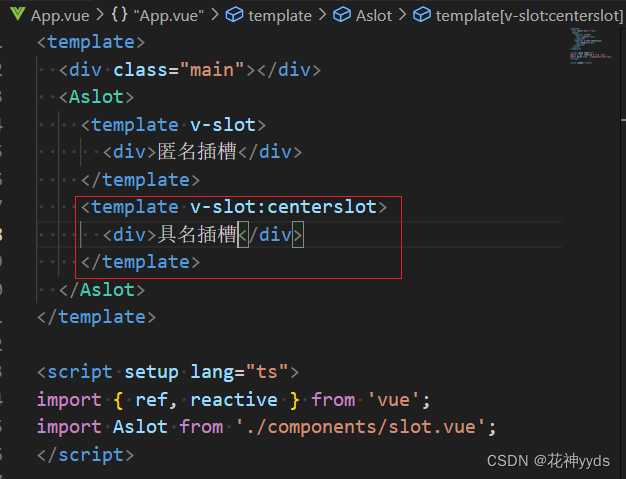
- 父组件
<template><div class="main"></div><Aslot><template v-slot><div>匿名插槽</div></template></Aslot>
</template><script setup lang="ts">
import { ref, reactive } from 'vue';
import Aslot from './components/slot.vue';
</script><style scoped></style>
具名插槽
- 子组件
- 父组件
插槽作用域
- 作用域插槽其实就是带数据的插槽,即带参数的插槽,
- 简单的来说就是子组件提供给父组件的参数,该参数仅限于插槽中使用
- 父组件可根据子组件传过来的插槽数据来进行不同的方式展现和填充插槽内容。
- 子组件
<template><div class="main"><slot></slot><h1>子组件</h1><div v-for="(item, index) in data" :key="index">//父组件需要什么值,就传递什么值<slot :data="item" :index="index"></slot></div></div>
</template><script setup lang="ts">
import { ref, reactive } from 'vue';
//定义要给父组件的内容
const data = reactive([{ name: '1', age: 1 },{ name: '2', age: 2 },
]);
</script><style scoped></style>- 父组件
<template><div class="main"></div><Aslot><template v-slot="{ data, index }"><div>{{ data }}--{{ index }}</div></template></Aslot>
</template><script setup lang="ts">
import { ref, reactive } from 'vue';
import Aslot from './components/slot.vue';
</script><style scoped></style>
简写
<template><div class="main"></div><Aslot>//v-slot变成# <template #centerslot><div>具名插槽</div></template><template #default="{ data }"><div>{{ data.name }}--{{ data }}</div></template></Aslot>
</template>
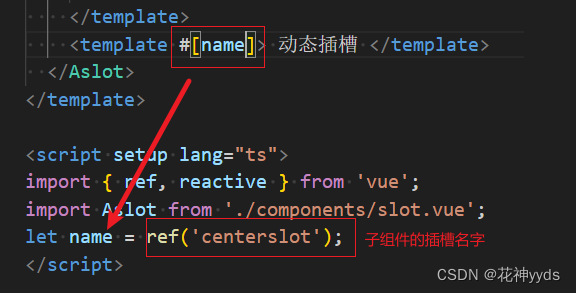
动态插槽
transition动画组件
- vue提供transition的封装组件,在下列情形下,可以给任何元素和组件添加进入/离开过渡
- 条件渲染(v-if)
- 条件展示(v-show)
- 动态组件
- 组件根节点
-
在进入和离开的过渡中,会有6个class的切换
-
name提供类名
<template><div class="main"><!-- transition,动画组件 --><transition name="box"><div v-if="isblooen" class="box-bg">动画盒子</div></transition><button @click="change">切换1</button></div>
</template><script setup lang="ts">
import { ref, reactive } from 'vue';
let isblooen = ref('true');
const change = () => {isblooen.value = !isblooen.value;
};
</script>
//在进入和离开的过渡中,会有6个class的切换
<style scoped lang="less">
.box-bg {width: 200px;height: 200px;border: 1px solid #00f;
}
//显示之前,第一个字母和上面name一致
.box-enter-from {width: 0px;height: 0px;background: #777;
}
//动画开始
.box-enter-active {background: #777;transition: all 10s ease;
}
//动画结束
.box-enter-to {width: 200px;height: 200px;background: #777;
}
//隐藏之前
.box-leave-from {
}
//隐藏中
.box-leave-active {
}
//隐藏后
.box-leave-to {
}
</style>
自定义过渡class类名
<template><div class="main"><!-- transition,动画组件 --><transition name="box"><div v-if="isblooen" class="box-bg">动画盒子</div></transition><!-- 写法2 自定义过渡class类名--><transitionname="box"enter-form-class="e-form"enter-active-class="e-active"enter-to-class="e-to"><div v-if="isblooen" class="box-bg">动画盒子</div></transition><button @click="change">切换1</button></div>
</template><script setup lang="ts">
import { ref, reactive } from 'vue';
let isblooen = ref('true');
const change = () => {isblooen.value = !isblooen.value;
};
</script><style scoped lang="less">
.box-bg {width: 200px;height: 200px;border: 1px solid #00f;
}
//显示之前
.box-enter-from {width: 0px;height: 0px;background: #777;
}
//写法2,自定义类名
.e-form {width: 0px;height: 0px;background: #777;
}
//动画开始
.box-enter-active {background: #777;transition: all 10s ease;
}
.e-active {background: #755577;transition: all 10s ease;
}
//动画结束
.box-enter-to {width: 200px;height: 200px;background: #777;
}
.e-to {width: 200px;height: 200px;background: #766677;
}
//隐藏之前
.box-leave-from {
}
//隐藏中
.box-leave-active {
}
//隐藏后
.box-leave-to {
}
</style>
如何使用animate动画库组件
- 安装: npm install animate.css
- 官方文档地址
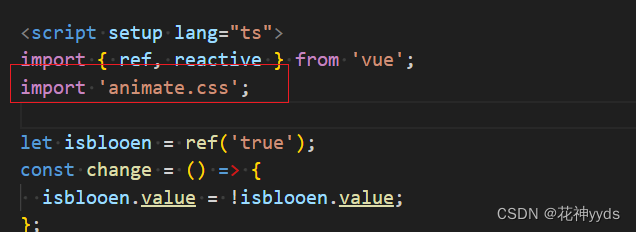
- 步骤2,导入动画库
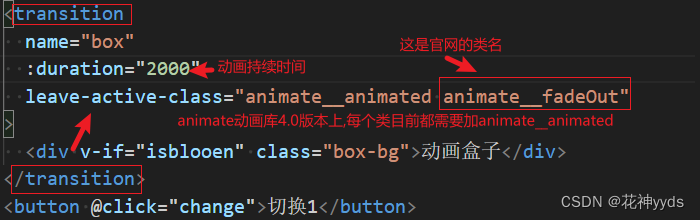
- 步骤三,使用
- leave-active-class是6个class的动画类名

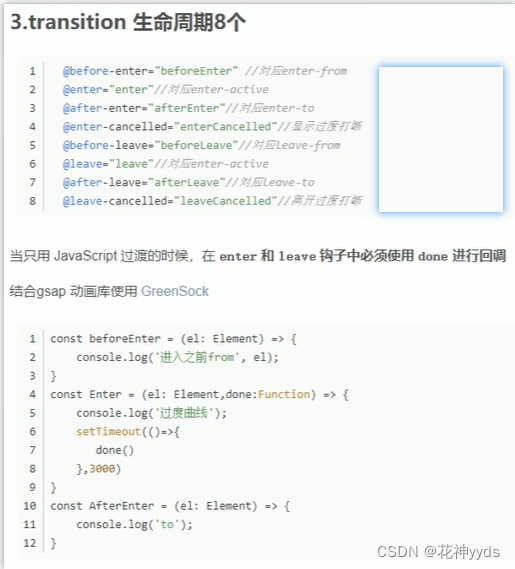
动画生命周期
appear
- 通过这个属性可以设置初始节点,就是页面加载完成就开始动画对应的三个状态
- 相当于一进来,动画就开始执行
<template><div class="main"><transitionappearappear-class="animate__animated animate__backInLeft"appear-active-class="animate__animated animate__backInRight"appear-to-class="animate__animated animate__backOutUp"><div v-if="isblooen" class="box-bg">动画盒子</div></transition><button @click="change">切换1</button></div>
</template><script setup lang="ts">
import { ref, reactive } from 'vue';
import 'animate.css';let isblooen = ref('true');
const change = () => {isblooen.value = !isblooen.value;
};
</script><style scoped lang="less">
.box-bg {width: 200px;height: 200px;border: 1px solid #00f;
}
//显示之前
.box-enter-from {width: 0px;height: 0px;background: #777;
}
.e-form {width: 0px;height: 0px;background: #777;
}
//动画开始
.box-enter-active {background: #777;transition: all 10s ease;
}
.e-active {background: #755577;transition: all 10s ease;
}
//动画结束
.box-enter-to {width: 200px;height: 200px;background: #777;
}
.e-to {width: 200px;height: 200px;background: #766677;
}
//隐藏之前
.box-leave-from {
}
//隐藏中
.box-leave-active {
}
//隐藏后
.box-leave-to {
}
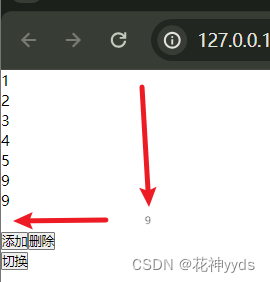
</style>transition- group过渡列表
- 相当于transition-group包裹的内容,可以给他们添加,删除,初始化增加动画效果
<template><div class="main"><!-- appear-active-class是初始化动画enter-active-class是添加是动画leave-active-class是删除时动画--><transition-groupappearappear-active-class="animate__animated animate__backInDown"enter-active-class="animate__animated animate__backInDown"leave-active-class="animate__animated animate__lightSpeedInRight"><div v-for="(item, index) in list" :key="index">{{ item }}</div></transition-group><button @click="add">添加</button><button @click="del">删除</button></div>
</template><script setup lang="ts">
import { ref, reactive } from 'vue';
import 'animate.css';
const list = reactive<number>([1, 2, 3, 4, 5, 6]);
//增加
const add = () => {list.push(9);
};
//删除
const del = () => {list.pop();
};
</script><style scoped></style>