五、使用脚手架
五、使用脚手架
5.1 简单的实现
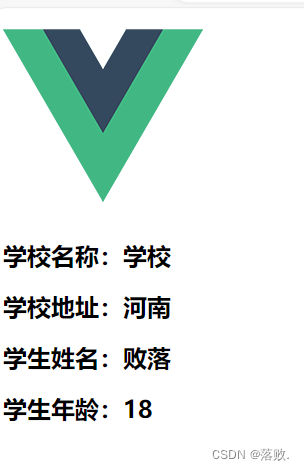
创建一个 School 组件
<template>
<div><h2>学校名称:{{name}}</h2><h2>学校地址:{{address}}</h2>
</div>
</template><script>
export default {name: "School",data(){return{name:'学校',address:'河南'}}
}
</script><style scoped></style>
创建一个Student组件
<template>
<div><h2>学生姓名:{{name}}</h2><h2>学生年龄:{{age}}</h2>
</div>
</template><script>
export default {name: "Student",data(){return{name:'败落',age:18}}
}
</script><style scoped></style>
将创建的两个组件注册入 App 父组件中
<template><div id="app"><img alt="Vue logo" src="./assets/logo.png"><School/><Student/></div>
</template><script>
import School from "@/components/School.vue";
import Student from "@/components/Student.vue";
export default {name: 'App',components: {School:School,Student:Student}
}
</script><style></style>-
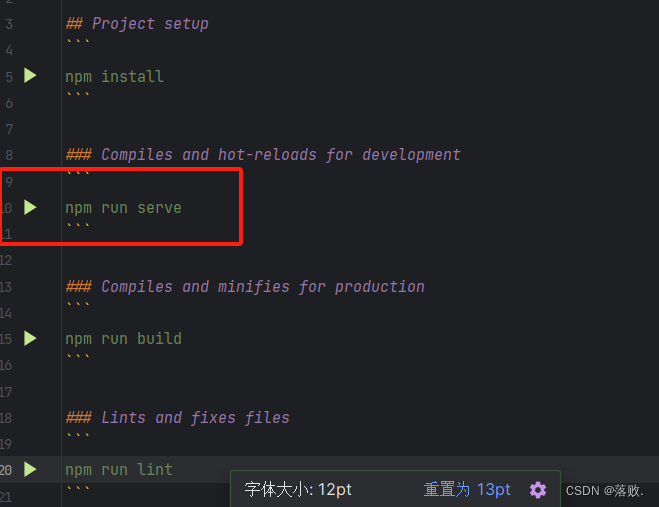
启动的两个方式
- 终端运行
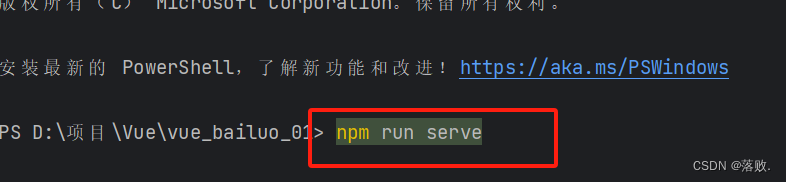
- 在 README.md 文件中运行
5.2 ref属性
- 被用来给元素或子组件注册引用信息(id的代替)
- 应用在 html 标签上获取的是真实DOM元素,应用在组件标签上是组件实例对象(VueComponent)
- 使用方式
- 打标识:
<h1 ref="xxx"> .....</h1> 或 <School ref="xxx"></School> - 获取:
this.$refs.xxx
- 打标识:
<template><div id="app"><img alt="Vue logo" src="./assets/logo.png"><h1 ref="title">欢迎学习Vue</h1><School ref="school"/><button ref="btn" @click="showDOM">点击我输出上方DOM元素</button><Student/></div>
</template>
<script>
import School from "@/components/School.vue";
import Student from "@/components/Student.vue";
export default {name: 'App',components: {School:School,Student:Student},methods:{showDOM(){console.log('title',this.$refs.title);console.log('school',this.$refs.school);console.log('btn',this.$refs.btn);}}
}
</script>
<style></style>

5.3 props 配置
5.3.1 父传子
Student.Vue 组件
<template>
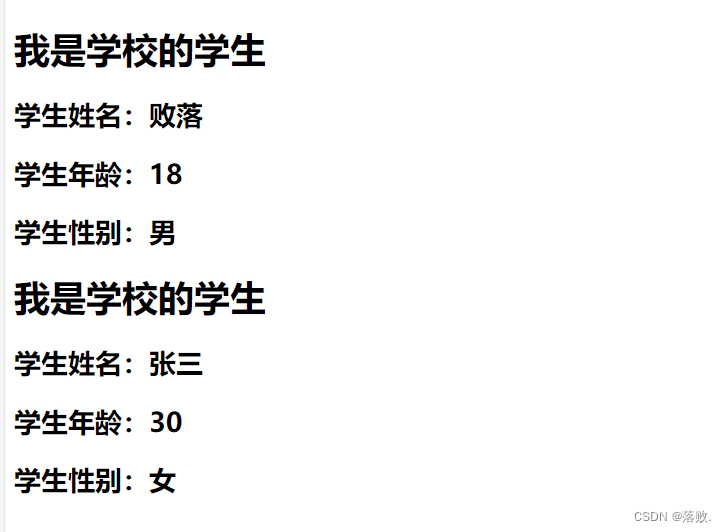
<div><h1>{{msg}}</h1><h2>学生姓名:{{name}}</h2><h2>学生年龄:{{age}}</h2><h2>学生性别:{{sex}}</h2>
</div>
</template><script>
export default {name: "Student",data(){return{msg:'我是学校的学生',}},props:["name","sex","age"]
}
</script><style scoped></style>
App 父组件
<template><div id="app"><img alt="Vue logo" src="./assets/logo.png"><Student name="败落" :age="18" sex="男"/><Student name="张三" :age="30" sex="女"/></div>
</template><script>
import Student from "@/components/Student.vue";
export default {name: 'App',components: {Student:Student},methods:{showDOM(){console.log(this);console.log('title',this.$refs.title);console.log('school',this.$refs.school);console.log('btn',this.$refs.btn);}}
}
</script><style></style>
如果
age前面不加上:传过去的数据就是字符串类型,:表示v-bind,从而无法对数据进行操作
5.3.2 限制数据类型
用于对接收的同时对数据类型限制
<script>
export default {name: "Student",data(){return{msg:'我是学校的学生',}},// props:["name","sex","age"] 简单的接收props:{name:String,age:Number,sex:String}
}
</script>
用于对接收的同时对数据类型限制、默认值的指定、必要性的限制
<script>
export default {name: "Student",data(){return{msg:'我是学校的学生',}},//用于对接收的同时对数据类型限制、默认值的指定、必要性的限制props:{name:{type:String,//name的类型是字符串required:true//name参数是必要的必须要传},age:{type:Number,default:88},sex:{type:String,required:true}}
}
</script>
5.4 mixin
-
mixin(混入)
- 功能:可以把多个组件共用的配置提取成一个混入对象
-
使用方式:
- 第一步定义混合,例如
{data(){...},methods:{...},...}- 第二部使用混合,例如
- 全局混合:Vue.mixin(xxx)
- 局部混合:mixins:[‘xxx’]
5.4.1 局部混合
创建一个js文件
export const mixin={methods:{showName(){alert(this.name)}}
}
学生组件
<template>
<div><h1>{{msg}}</h1><h2 @click="showName">学生姓名:{{name}}</h2><h2>学生年龄:{{age}}</h2><h2>学生性别:{{sex}}</h2>
</div>
</template><script>
import {mixin} from "../mixin"
export default {name: "Student",data(){return{msg:'我是学校的学生',name:'败落',age:18,sex:'男'}},mixins:[mixin]
}
</script><style scoped></style>
学校组件
<template>
<div><h2 @click="showName">学校名称:{{name}}</h2><h2>学校地址:{{address}}</h2>
</div>
</template><script>
import {mixin} from "@/mixin";"../mixin"
export default {name: "School",data(){return{name:"学校",address:'河南'}},mixins:[mixin]
}
</script><style scoped></style>
App 父组件
<template><div id="app"><img alt="Vue logo" src="./assets/logo.png"><Student/><hr><School/></div>
</template><script>
import Student from "@/components/Student.vue";
import School from "@/components/School.vue";export default {name: 'App',components: {School: School,Student: Student}
}
</script><style></style>
5.4.2 全局混合
只需要将mixin.js 引入到main.js 里就行了
import Vue from 'vue'
import App from './App.vue'Vue.config.productionTip = false
//全局混合
import {mixin} from "@/mixin";
Vue.mixin(mixin)
new Vue({render: h => h(App),
}).$mount('#app')
5.5 插件
5.5.1 install
- 功能:用于增强
Vue - 本质:包含
install方法的一个对象,install的第一个参数是Vue,第二个以后的参数是插件使用者传递的数据。 - 使用插件:
Vue.use()
定义一个插件
plugins.js文件
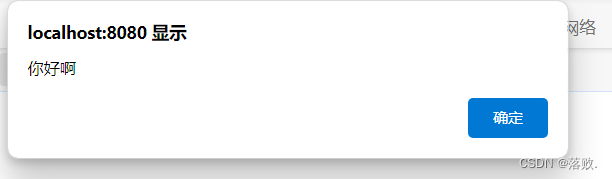
export default {install(Vue) {//全局过滤器Vue.filter('mySlice', (value) => {return value.slice(0, 4);})//全局自定义指令Vue.directive('fbind', {//指令与元素绑定成功时(一上来)bind(element, binding) {element.value = binding.value;},//指令所在的元素被插入页面时inserted(element, binding) {element.focus();},//指令所在的模板被重新解析时update(element, binding) {element.value = binding.value;}})//定义混入Vue.mixin({data() {return {x: 100,y: 100}}})//给Vue原型上定义一个方法(vm和vc都能用了)Vue.prototype.hello = () => {alert("你好啊")}}
}
School 组价n
<template>
<div><h2>学校名称:{{name | mySlice}}</h2><h2>学校地址:{{address}}</h2><button @click="test">点我测试一下hello方法</button>
</div>
</template><script>
export default {name: "School",data(){return{name:"学校aaaaaaaa",address:'河南'}},methods:{test(){this.hello();}}
}
</script><style scoped></style>
Student组件
<template>
<div><h1>{{msg}}</h1><h2>学生姓名:{{name}}</h2><h2>学生年龄:{{age}}</h2><h2>学生性别:{{sex}}</h2><input type="text" v-fbind:value="name">
</div>
</template><script>
export default {name: "Student",data(){return{msg:'我是学校的学生',name:'败落',age:18,sex:'男'}},
}
</script><style scoped></style>
App 父组件
<template><div id="app">
<!--    <img alt="Vue logo" src="./assets/logo.png">--><Student/><hr><School/></div>
</template><script>
import Student from "@/components/Student.vue";
import School from "@/components/School.vue";export default {name: 'App',components: {School: School,Student: Student}
}
</script><style></style>
main.js 文件
import Vue from 'vue'
import App from './App.vue'
Vue.config.productionTip = falseimport plugins from "@/plugins";
Vue.use(plugins,1,2,3)new Vue({render: h => h(App),
}).$mount('#app')
上来聚焦
install Vue参数后边传入的变量
点击测试hello方法
5.6 TodoLsit案例
main.js
import Vue from 'vue'
import App from './App.vue'
Vue.config.productionTip = falsenew Vue({render: h => h(App),
}).$mount('#app')
App.vue 组件
<template><div id="root"><div class="todo-container"><div class="todo-wrap"><MyHeader :addTodo="addTodo"/><MyList :todos="todos" :checkTodo="checkTodo" :deleteTodo="deleteTodo"/><MyFooter :todos="todos" :checkAllTodo="checkAllTodo" :clearAllTodo="clearAllTodo"/></div></div></div>
</template><script>
import MyHeader from "@/components/MyHeader.vue";
import MyList from "@/components/MyList.vue";
import MyFooter from "@/components/MyFooter.vue";export default {name: 'root',components: {MyHeader, MyList, MyFooter},data() {return {todos: [{id: "001", title: '抽烟', done: true},{id: "002", title: '喝酒', done: false},{id: "003", title: '开车', done: true}]}},methods: {//添加一个todoaddTodo(todo) {this.todos.unshift(todo)},//勾选或者取消勾选一个todocheckTodo(id) {this.todos.forEach((todo) => {if (todo.id === id) todo.done = !todo.done;})},//删除一个tododeleteTodo(id) {//过滤出一个新的数组this.todos = this.todos.filter((todo) => {return todo.id !== id;})},//全选或者全不选checkAllTodo(done){this.todos.forEach((todo)=>{todo.done=done;})},//删除所有已完成的clearAllTodo(){this.todos=this.todos.filter((todo)=>{return !todo.done;})}}
}
</script><style>
/*base*/
body {background: #fff;
}.btn {display: inline-block;padding: 4px 12px;margin-bottom: 0;font-size: 14px;line-height: 20px;text-align: center;vertical-align: middle;cursor: pointer;box-shadow: inset 0 1px 0 rgba(255, 255, 255, 0.2), 0 1px 2px rgba(0, 0, 0, 0.05);border-radius: 4px;
}.btn-danger {color: #fff;background-color: #da4f49;border: 1px solid #bd362f;
}.btn-danger:hover {color: #fff;background-color: #bd362f;
}.btn:focus {outline: none;
}.todo-container {width: 600px;margin: 0 auto;
}.todo-container .todo-wrap {padding: 10px;border: 1px solid #ddd;border-radius: 5px;
}</style>
MyList.vue 组件
<template><ul class="todo-main"><MyItem v-for="todo in todos" :key="todo.id" :todo="todo" :checkTodo="checkTodo" :deleteTodo="deleteTodo"/></ul>
</template><script>
import MyItem from "@/components/MyItem.vue";export default {name: "MyList",props:['todos','checkTodo','deleteTodo'],components: {MyItem}
}
</script><style scoped>
/*main*/.todo-main {margin-left: 0px;border: 1px solid #ddd;border-radius: 2px;padding: 0px;}.todo-empty {height: 40px;line-height: 40px;border: 1px solid #ddd;border-radius: 2px;padding-left: 5px;margin-top: 10px;}
</style>
MyItem.vue 组件
<template><li><label><input type="checkbox" :checked="todo.done" @change="handleCheck(todo.id)"/><span>{{todo.title}}</span></label><button class="btn btn-danger" @click="handleDelete(todo.id)">删除</button></li>
</template><script>
export default {name: "MyItem",props:["todo",'checkTodo','deleteTodo'],methods:{handleCheck(id){this.checkTodo(id)},handleDelete(id){if(confirm("确定删除吗")){this.deleteTodo(id);}}}
}
</script><style scoped>
/*item*/
li {list-style: none;height: 36px;line-height: 36px;padding: 0 5px;border-bottom: 1px solid #ddd;
}li label {float: left;cursor: pointer;
}li label li input {vertical-align: middle;margin-right: 6px;position: relative;top: -1px;
}li button {float: right;display: none;margin-top: 3px;
}li:before {content: initial;
}li:last-child {border-bottom: none;
}
li:hover{background-color: beige;
}
li:hover button{display: block;
}
</style>
MyHeader.vue 组件
<template><div class="todo-header"><input type="text" placeholder="请输入你的任务名称,按回车键确认" v-model="title" @keyup.enter="add"/></div>
</template><script>
import {nanoid} from "nanoid";export default {name: "MyHeader",data() {return {title: ''}},props:['addTodo'],methods: {add(event) {//校验数据 trim 是清空两边的空格if (!this.title.trim()) {return alert("输入框不能为空")}//将元素包装成一个 todo 对象const todo = {id: nanoid(), title: this.title, done: false};//通知 App 传过去一个数据this.addTodo(todo);this.title='';}}
}
</script><style scoped>
/*header*/
.todo-header input {width: 560px;height: 28px;font-size: 14px;border: 1px solid #ccc;border-radius: 4px;padding: 4px 7px;
}.todo-header input:focus {outline: none;border-color: rgba(82, 168, 236, 0.8);box-shadow: inset 0 1px 1px rgba(0, 0, 0, 0.075), 0 0 8px rgba(82, 168, 236, 0.6);
}
</style>
MyFooter.vue 组件
<template><div class="todo-footer"v-show="total"><label>
<!--      <input type="checkbox" :checked="isAll" @change="checkAll"/>--><input type="checkbox" v-model="isAll"/></label><span><span>已完成{{doneToral}}</span> / 全部{{total}}</span><button class="btn btn-danger" @click="clearAll">清除已完成任务</button></div>
</template><script>
export default {name: "MyFooter",props:['todos','checkAllTodo','clearAllTodo'],computed:{total(){return this.todos.length},doneToral(){return  this.todos.reduce((pre,tota)=>pre+(tota.done? 1:0),0)},// isAll(){//   return this.doneToral===this.total && this.total>0// }isAll:{get(){return this.doneToral===this.total && this.total>0},set(value){this.checkAllTodo(value)}},},methods:{// checkAll(e){//   this.checkAllTodo(e.target.checked)// }//删除所有完成的todoclearAll(){this.clearAllTodo();}}
}
</script><style scoped>
/*footer*/
.todo-footer {height: 40px;line-height: 40px;padding-left: 6px;margin-top: 5px;
}.todo-footer label {display: inline-block;margin-right: 20px;cursor: pointer;
}.todo-footer label input {position: relative;top: -1px;vertical-align: middle;margin-right: 5px;
}.todo-footer button {float: right;margin-top: 5px;
}</style>
5.6.2 TodoList 案例总结
- 组件化编码流程:
- 拆分静态组件:组件要按照功能点拆分,命名不要与html冲突
- 实现动态组件:考虑好数据的存放位置,数据是一个组件再用,还是一些组件再用。
- 一个组件再用:放在组件自身即可。
- 一些组件再用:放在他们共同的父组件上。
- 实现交互:从绑定事件开始。
- props适用于:
- 父组件==>子组件 通信
- 子组件==>父组件 通信(要求父先给子一个函数)
- 使用 v-model 时要切记:v-model 绑定的值不能是props传过来的值,因为props是只读不可以修改。
- props传过来的若是对象类的值,修改对象中的属性时Vue不会报错,但不推荐这样做。
5.7 自定义事件
5.7.1 绑定
App组件
<template><div id="app">
<!--    <img alt="Vue logo" src="./assets/logo.png">-->
<!--    通过父组件给子组件绑定一个自定义事件实现:子给父传递数据(第一种方式:通过 @或 v-on)-->
<!--    <Student v-on:atBailuo="getStudentName"/>--><!--    通过父组件给子组件绑定一个自定义事件实现:子给父传递数据(第二种方式:通过 ref)--><Student ref="student"/></div>
</template><script>
import Student from "@/components/Student.vue";export default {name: 'App',components: {Student: Student},methods:{getStudentName(name){console.log("App收到了学生名字:",name)}},mounted() {setTimeout(()=>{this.$refs.student.$on('atBailuo',this.getStudentName);},3000)}
}
</script><style></style>
Student事件
<template><div><h1>{{msg}}</h1><h2>学生姓名:{{name}}</h2><h2>学生年龄:{{age}}</h2><h2>学生性别:{{sex}}</h2><input type="text" v-fbind:value="name"></div></template><script>export default {name: "Student",data(){return{msg:'我是学校的学生',name:'败落',age:18,sex:'男'}},}</script><style scoped></style>
5.7.2 解绑$off()
methods:{sendStudentName(){this.$emit('atBailuo',this.name);},unbind(){this.$off('atBailuo');//解绑单个自定义事件this.$off(['atBailuo','demo']);//解绑多个自定义事件this.$off();//解绑所有自定义事件}}
5.7.3 自定义事件总结
-
一种组件间通信的方式,适用于:子组件==>父组件
-
使用场景:A是父组件,B是子组件,B想给A传数据,那么就要在A中给B绑定自定义事件(事件的回调在A中)。
-
绑定自定义事件:
-
第一种方式,在父组件中:
<Demo @atBaiLuo="test"/>或<Demo v-on:atBaiLuo="test"/> -
第二种方式,在父组件中:
<Demo ref="demo"/> ...... mounted(){ this.$refs.xxx.$on('atBaiLuo',this.text); }- 若想让自定义事件只能触发一次,可以使用
once修饰符,或$once方法。
- 若想让自定义事件只能触发一次,可以使用
-
-
触发自定义事件:
this.$emit('atBaiLuo',数据); -
解绑自定义事件:
this.$off('atBaiLuo'); -
组件上也可以绑定原生
DOM事件,需要使用native修饰符。 -
注意:通过
this.$refs.xxx.$on('atBaiLuo',回调)绑定自定义事件,回调要么配置在methos中,要么用箭头函数,否则this指向会出问题。
5.8 配置代理
5.8.1 方式一
<template>
<div><button @click="getStudent">获取学生信息</button>
</div>
</template><script>
import axiox from 'axios'
export default {name: 'root',methods:{getStudent(){axiox.get('http://localhost:8080/students').then(response=>{console.log("获取学生信息成功",response.data)},error=>{console.log("获取学生信息失败",error.message )})}}
}
</script>
在Vue.config.js 里修改Vue配置
devServer:{proxy:'http://localhost:5000',
},
- 优点:配置简单,请求资源时直接发给前端(8080)即可
- 缺点:不能配置多个代理,不能灵活地控制请求是否走代理。
- 工作方式:若按照上述配置代理,当请求了前段不存在的资源时,name该请求会转发给服务器(优先匹配前端资源)
5.8.2 方式二
<template>
<div><button @click="getStudent">获取学生信息</button><button @click="getCars">获取汽车信息</button>
</div>
</template><script>
import axiox from 'axios'
export default {name: 'root',methods:{getStudent(){axiox.get('http://localhost:8080/atBaiLuo/students').then(response=>{console.log("获取学生信息成功",response.data)},error=>{console.log("获取学生信息失败",error.message )})},getCars(){axiox.get('http://localhost:8080/demo/cars').then(response=>{console.log("获取学生信息成功",response.data)},error=>{console.log("获取学生信息失败",error.message )})}}
}
</script>
在Vue.config.js 里修改Vue配置
//配置代理方式二devServer:{proxy:{'/atBaiLuo':{target:'http://localhost:5000',//重新网址 找到匹配 atBaiLuo 将它替换成空字符串pathRewrite:{'^/atBaiLuo':''},wx:true,//用于支持websocketchangeOrigin:true,//用于控制请求头中的host的值},'/demo':{target:'http://localhost:5000',//重新网址 找到匹配 atBaiLuo 将它替换成空字符串pathRewrite:{'^/demo':''},wx:true,//用于支持websocketchangeOrigin:true,//用于控制请求头中的host的值}}}
- 优点:可以配置多个代理,且可以灵活地控制请求是否走代理。
- 缺点:配置略微繁琐,请求资源时必须加前缀
5.9 插槽
5.9.1 默认插槽
Category.vue 组件
<template>
<div class="category"><h3>{{title}}分类</h3>
<slot></slot></div>
</template><script>
export default {name: "Category",props:['listData','title']
}
</script><style scoped>
.category{background-color: #48daec;width: 200px;height: 300px;
}
h3{text-align: center;background-color: orange;
}
img{width: 100%;
}
video{width: 100%;
}
</style>
App.vue 父组件
<template><div class="container"><category title="美食" :listData="foods"><img src="https://img.zcool.cn/community/01d80e5e09f781a801216518695d24.jpg@2o.jpg"></category><category title="游戏" :listData="games"><ul><li v-for="(g,index) in games" :key="index">{{g}}</li></ul></category><category title="电影" :listData="films"><video src="https://www.bilibili.com/video/BV1Hh411K7zk?t=7.8" controls></video></category></div>
</template><script>
import Category from "@/components/Category.vue";
export default {name: 'App',components: {Category},data(){return{foods:['火锅','烧烤','小龙虾','牛排'],games:['红色警戒','英雄联盟','穿越火线','逆战'],films:['《教父》','《你好,李焕英》','《拆弹专家》','《七大队》']}}
}
</script><style>
.container{display: flex;justify-content: space-around;
}</style>
5.9.2 具名卡槽
Category.vue 组件
<template>
<div class="category"><h3>{{title}}分类</h3>
<slot name="center"></slot>
<slot name="footer"></slot></div>
</template><script>
export default {name: "Category",props:['listData','title']
}
</script><style scoped>
.category{background-color: #48daec;width: 200px;height: 300px;
}
h3{text-align: center;background-color: orange;
}
img{width: 100%;
}
video{width: 100%;
}
</style>
App.vue 父组件
<template><div class="container"><Category title="美食" :listData="foods"><img slot="center" src="https://img.zcool.cn/community/01d80e5e09f781a801216518695d24.jpg@2o.jpg"></Category><Category title="游戏" :listData="games"><ul slot="center"><li v-for="(g,index) in games" :key="index">{{g}}</li></ul><div class="foot" slot="footer"><a href="#">单机游戏</a><a href="#">网络游戏</a></div></Category><Category title="电影" :listData="films"><video slot="center" src="https://www.bilibili.com/video/BV1Hh411K7zk?t=7.8" controls></video><template slot="footer"><div class="foot" ><a href="#">经典</a><a href="#">热门</a><a href="#">推荐</a></div><h4>欢迎前来观影</h4></template></Category></div>
</template><script>
import Category from "@/components/Category.vue";
export default {name: 'App',components: {Category},data(){return{foods:['火锅','烧烤','小龙虾','牛排'],games:['红色警戒','英雄联盟','穿越火线','逆战'],films:['《教父》','《你好,李焕英》','《拆弹专家》','《七大队》']}},
}
</script><style>
.container,.foot{display: flex;justify-content: space-around;
}
h4{text-align: center;
}</style>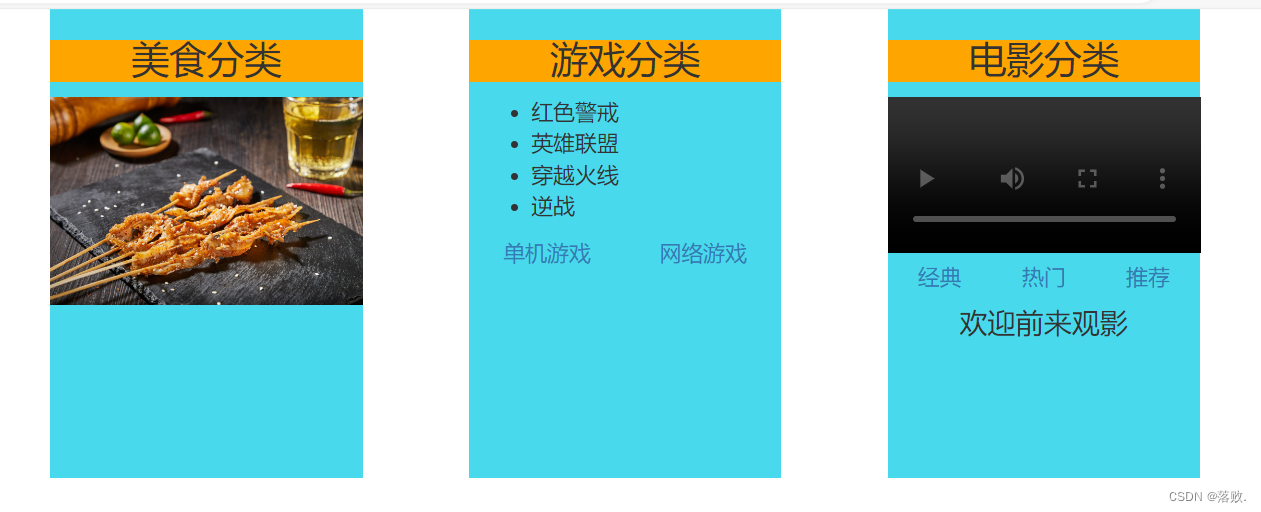
5.9.3 作用域卡槽
App.vue 父组件
<template><div class="container"><Category title="游戏"><template scope="atBaiLuo"><ul><li v-for="g in atBaiLuo.games">{{g}}</li></ul></template></Category><Category title="游戏"><template scope="{games}"><ol><li v-for="g in games">{{g}}</li></ol></template></Category><Category title="游戏"><template slot-scope="{games}"><h4 v-for="g in games">{{g}}</h4></template></Category></div>
</template><script>
import Category from "@/components/Category.vue";
export default {name: 'App',components: {Category},data(){return{games:['红色警戒','英雄联盟','穿越火线','逆战']}},
}
</script><style>
.container,.foot{display: flex;justify-content: space-around;
}
h4{text-align: center;
}</style>
Category.vue 组件
<template>
<div class="category"><h3>{{title}}分类</h3>
<slot :games="games"></slot></div>
</template><script>
export default {name: "Category",props:['listData','title'],data(){return{games:['红色警戒','英雄联盟','穿越火线','逆战']}}
}
</script><style scoped>
.category{background-color: #48daec;width: 200px;height: 300px;
}
h3{text-align: center;background-color: orange;
}
img{width: 100%;
}
video{width: 100%;
}
</style>
5.9.4 卡槽总结
- 作用:让父组件可以向子组件指定位置插入html结构,也是一种组件之间通信的一种方式,适用于 父组件==> 子组件。
- 分类:默认卡槽、具名卡槽、作用域卡槽。
使用方式
-
默认卡槽
父组件中:<Category title="美食" :listData="foods"><div>html结构</div></Category>子组件中:<template><div class="category"><h3>{{title}}分类</h3>定义卡槽<slot>卡槽默认内容</slot></div></template> -
具名卡槽
父组件: <Category title="电影" :listData="films"><template slot="center"><div>html结构1</div></template><template slot="footer"><div>html结构2</div></template></Category>子组件: <template><div class="category"><h3>{{title}}分类</h3><slot name="center">卡槽默认内容</slot><slot name="footer">卡槽默认内容</slot></div> </template> -
作用域卡槽
-
理解:数据在组件的自身,但根据数据生成的结构需要组件的使用者来决定。(games数据在Category组件中,但是使用数据所遍历出来的结构由App组件决定)
-
具体编码:
父组件:
<!--生成的时ul--><Category title="游戏"><template scope="atBaiLuo"><ul><li v-for="g in atBaiLuo.games">{{g}}</li></ul></template>
<!--生成的h4--></Category><Category title="游戏"><template slot-scope="{games}"><h4 v-for="g in games">{{g}}</h4></template></Category>子组件:
<template>
<div class="category"><h3>{{title}}分类</h3>
<slot :games="games"></slot></div>
</template><script>
export default {name: "Category",props:['listData','title'],data(){return{games:['红色警戒','英雄联盟','穿越火线','逆战']}}
}
</script>
-