【OpenGL教程2】 简单案例介绍Python 中的 OpenGL
目录
- 一、介绍
- 二、安装
- 三、编码练习
- 四、结论
一、介绍
在本教程中,我们将学习如何在 Python 中使用PyOpenGL库。OpenGL是一个图形库,受Windows、Linux和MacOS等多个平台支持,也可用于多种其他语言;然而,这篇文章的范围将仅限于它在 Python 编程语言中的使用。
与其他类似的图形库相比,OpenGL 相当简单。我们将从在我们的系统上进行设置开始,然后编写一个简单的示例来演示该库的用法。
二、安装
使用 Python 安装 OpenGL 最简单的方法是通过pip包管理器。如果您的系统中安装了 pip,请运行以下命令来下载并安装 OpenGL:
$ pip install PyOpenGL PyOpenGL_accelerate
注意,此处是个坑,从这样安装未必成功。建议先安装了,然后出错后尝试进行另一种安装。参见文章:https://yamagota.blog.csdn.net/article/details/136131106
该命令执行完成后,如果安装成功,您应该在最后得到以下输出:
Successfully installed PyOpenGL-3.1.0 PyOpenGL-accelerate-3.1.0
现在我们已经在我们的系统上成功安装了 OpenGL,让我们开始动手吧。
三、编码练习
要在代码中使用 OpenGL,我们需要做的第一件事就是导入它。为此,请运行以下命令:
import OpenGL
在我们继续之前,当您打算在程序中使用此库时,您需要导入一些其他库。以下是这些导入的代码:
import OpenGL.GL
import OpenGL.GLUT
import OpenGL.GLU
print("Imports successful!") # If you see this printed to the console then installation was successful
现在我们已经完成了必要的导入,让我们首先创建一个窗口来显示我们的图形。下面给出了代码,以及注释中的解释:
def showScreen():glClear(GL_COLOR_BUFFER_BIT | GL_DEPTH_BUFFER_BIT) # Remove everything from screen (i.e. displays all white)glutInit() # Initialize a glut instance which will allow us to customize our window
glutInitDisplayMode(GLUT_RGBA) # Set the display mode to be colored
glutInitWindowSize(500, 500)   # Set the width and height of your window
glutInitWindowPosition(0, 0)   # Set the position at which this windows should appear
wind = glutCreateWindow("OpenGL Coding Practice") # Give your window a title
glutDisplayFunc(showScreen)  # Tell OpenGL to call the showScreen method continuously
glutIdleFunc(showScreen)     # Draw any graphics or shapes in the showScreen function at all times
glutMainLoop()  # Keeps the window created above displaying/running in a loop
将上面的导入以及此代码复制到单个 python (.py) 文件中,然后执行它。您应该会看到弹出一个白色方形尺寸屏幕。现在,如果我们希望绘制任何形状或制作任何其他类型的图形,我们需要在“showScreen”函数中执行此操作。
现在让我们尝试使用 OpenGL 制作一个正方形,但在此之前我们需要了解 OpenGL 遵循的坐标系。
(0,0) 点是窗口的左上角,如果从那里向上,您将沿着 y 轴移动,如果从那里向右移动,您将沿着 x 轴移动。因此,窗口的左上角为 (0, 500),右上角为 (500, 500),右下角为 (500, 0)。
注意:我们讨论的是上面创建的窗口,在我们的示例中,该窗口的尺寸为 500 x 500,而不是您计算机的全屏。
现在我们已经解决了这个问题,让我们编写一个正方形。代码的解释可以在评论中找到。
from OpenGL.GL import *
from OpenGL.GLUT import *
from OpenGL.GLU import *w, h = 500,500
# ---Section 1---
def square():# We have to declare the points in this sequence: bottom left, bottom right, top right, top leftglBegin(GL_QUADS) # Begin the sketchglVertex2f(100, 100) # Coordinates for the bottom left pointglVertex2f(200, 100) # Coordinates for the bottom right pointglVertex2f(200, 200) # Coordinates for the top right pointglVertex2f(100, 200) # Coordinates for the top left pointglEnd() # Mark the end of drawing
# This alone isn't enough to draw our square
# ---Section 2---def showScreen():glClear(GL_COLOR_BUFFER_BIT | GL_DEPTH_BUFFER_BIT) # Remove everything from screen (i.e. displays all white)glLoadIdentity() # Reset all graphic/shape's positionsquare() # Draw a square using our functionglutSwapBuffers()#---Section 3---glutInit()
glutInitDisplayMode(GLUT_RGBA) # Set the display mode to be colored
glutInitWindowSize(500, 500)   # Set the w and h of your window
glutInitWindowPosition(0, 0)   # Set the position at which this windows should appear
wind = glutCreateWindow("OpenGL Coding Practice") # Set a window title
glutDisplayFunc(showScreen)
glutIdleFunc(showScreen) # Keeps the window open
glutMainLoop()  # Keeps the above created window displaying/running in a loop
运行上面的代码将绘制一个正方形,但该正方形将不可见,因为它的颜色与窗口的颜色相同,因此我们还需要为其分配不同的颜色,为此我们将进行一些更改上面代码的“第2节”即函数showScreen。glLoadIdentity在语句下方和语句上方添加以下行square():
glColor3f(1.0, 0.0, 3.0) # Set the color to pink
然而,我们的代码仍然不完整。它当前所做的就是绘制一次正方形,然后再次清除屏幕。我们不希望这样。实际上,我们甚至无法发现它实际绘制正方形的时刻,因为它会在一瞬间出现和消失。让我们编写另一个函数来避免这种情况。
# Add this function before Section 2 of the code above i.e. the showScreen function
def iterate():glViewport(0, 0, 500,500)glMatrixMode(GL_PROJECTION)glLoadIdentity()glOrtho(0.0, 500, 0.0, 500, 0.0, 1.0)glMatrixMode (GL_MODELVIEW)glLoadIdentity()
在上面代码的“第 2 节”中调用此迭代函数glColor3dshowScreen。将其添加到函数中语句的下方glLoadIdentity和上方。
glColor3dshowScreen现在让我们将所有这些编译到一个代码文件中,这样就不会出现歧义:
from OpenGL.GL import *
from OpenGL.GLUT import *
from OpenGL.GLU import *w,h= 500,500
def square():glBegin(GL_QUADS)glVertex2f(100, 100)glVertex2f(200, 100)glVertex2f(200, 200)glVertex2f(100, 200)glEnd()def iterate():glViewport(0, 0, 500, 500)glMatrixMode(GL_PROJECTION)glLoadIdentity()glOrtho(0.0, 500, 0.0, 500, 0.0, 1.0)glMatrixMode (GL_MODELVIEW)glLoadIdentity()def showScreen():glClear(GL_COLOR_BUFFER_BIT | GL_DEPTH_BUFFER_BIT)glLoadIdentity()iterate()glColor3f(1.0, 0.0, 3.0)square()glutSwapBuffers()glutInit()
glutInitDisplayMode(GLUT_RGBA)
glutInitWindowSize(500, 500)
glutInitWindowPosition(0, 0)
wind = glutCreateWindow("OpenGL Coding Practice")
glutDisplayFunc(showScreen)
glutIdleFunc(showScreen)
glutMainLoop()
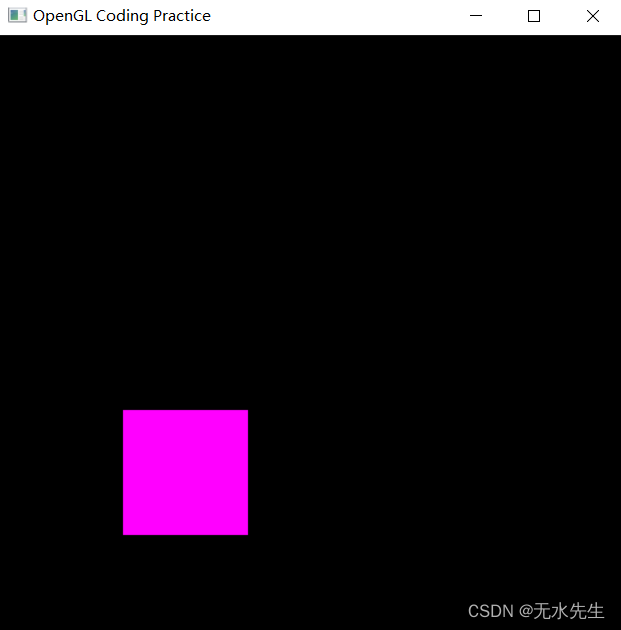
当您运行此命令时,应该会出现一个窗口,其中有一个粉红色的方框。
输出:
四、结论
在本教程中,我们了解了 OpenGL、如何下载和安装它,然后将其用作一个简短的示例程序。在此示例中,我们还练习了使用 OpenGL 制作基本形状,这使我们深入了解了每当需要使用此库绘制某些内容时需要进行的一些复杂函数调用。总而言之,OpenGL 非常丰富,并且随着我们深入研究它,发现它会变得越来越复杂。