Elasticsearch:基本 CRUD 操作 - Python
在我之前的文章 “Elasticsearch:关于在 Python 中使用 Elasticsearch 你需要知道的一切 - 8.x”,我详细讲述了如何建立 Elasticsearch 的客户端连接。我们也详述了如何对数据的写入及一些基本操作。在今天的文章中,我们针对数据的 CRUD (create, read, update 及 delete) 做更进一步的描述。

创建客户端连接接
我们需要安装 Elasticsearch 的依赖包:
pip3 install elasticsearch$ pip3 install elasticsearch
Looking in indexes: http://mirrors.aliyun.com/pypi/simple/
Requirement already satisfied: elasticsearch in /Library/Frameworks/Python.framework/Versions/3.11/lib/python3.11/site-packages (8.12.0)
Requirement already satisfied: elastic-transport<9,>=8 in /Library/Frameworks/Python.framework/Versions/3.11/lib/python3.11/site-packages (from elasticsearch) (8.10.0)
Requirement already satisfied: urllib3<3,>=1.26.2 in /Library/Frameworks/Python.framework/Versions/3.11/lib/python3.11/site-packages (from elastic-transport<9,>=8->elasticsearch) (2.1.0)
Requirement already satisfied: certifi in /Library/Frameworks/Python.framework/Versions/3.11/lib/python3.11/site-packages (from elastic-transport<9,>=8->elasticsearch) (2023.11.17)
$ pip3 list | grep elasticsearch
elasticsearch 8.12.0
rag-elasticsearch 0.0.1 /Users/liuxg/python/rag-elasticsearch/my-app/packages/rag-elasticsearch我们使用如下的代码来建立一个客户端连接:
from elasticsearch import Elasticsearchelastic_user = "elastic"
elastic_password = "xnLj56lTrH98Lf_6n76y"url = f"https://{elastic_user}:{elastic_password}@localhost:9200"
es = Elasticsearch(url, ca_certs = "./http_ca.crt", verify_certs = True)print(es.info())
在上面,我们需要使用自己的 Elasticsearch 集群的用户信息及证书代替上面的值。更多信息,请详细参阅文章 “Elasticsearch:关于在 Python 中使用 Elasticsearch 你需要知道的一切 - 8.x”。
创建文档
要添加新文档,你可以使用索引 API。 如果未指定文档 ID,Elasticsearch 会生成一个。 使用索引 API,你可以一次添加一个文档。
# Data to be indexed
document = {"emp_id": 1,"age": 30,"email": "example@example.com","name": "John Doe","role": "Developer","dob": "1992-01-01","mobile_no": "1234567890","educational": {"10": 87.5,"12": 90.0,"graduation": 8.4,"post_graduation": 9.1},"stack": ["Python", "Elasticsearch", "React"]
}# Indexing the document
response = es.index(index="emp_db", document=document)
我们可以在 Kibana 中进行查看:
GET emp_db/_search响应将有以下内容:

- _index:存储文档的索引的名称。
- _id:分配给文档的唯一标识符。 如果您在为文档建立索引时未指定 ID,Elasticsearch 会自动生成一个 ID,如本例所示。
- _version:文档的版本号。 对于新创建的文档,该值从 1 开始,并随着每次更新而递增。
- result:指示操作完成,在本例中文档已创建。 如果文档已经存在并且已更新,则会显示 “updated”。
要一次添加多个文档,请使用 bulk API。 为了使用 bulk API,数据需要采用特定格式。 示例实际文档应位于 _source 中,每个文档应具有 _op_type 和 _index 。 它应该是这样的:
通过 bulk API 添加数据:
actions = [ {"_index": "emp_db", "_op_type": "create", "_source": {"field1": "value1"}}, {"_index": "emp_db", "_op_type": "create", "_source": {"field2": "value2"}} # Add more actions as needed
]# List of data to be indexed, this could be in thousands.
documents = [{"emp_id": 250349,"age": 26,"email": "abc@xyz.com","name": "abc","role": "Developer","dob": "1997-01-01","mobile_no": "12345678","educational": {"10": 87.5,"12": 90.0,"graduation": 8.4,"post_graduation": 9.1},"stack": ["Python", "PySpark", "AWS"]},{"emp_id": 10789,"name": "abc","age": 27,"email": "abc@xyz.com","role": "linux admin","dob": "1996-12-10","mobile_no": "12345678","educational": {"10": 87.5,"12": 90.0,"graduation": 8.4,"post_graduation": 9.1},"stack": ["Linux", "AWS"]},{"emp_id": 350648,"name": "Sandeep","age": 27,"email": "def@xyz.com","role": "seller support"}
]# Define your actions
actions = [dict(**{'_index':'emp_db'}, **{'_op_type':'create'}, **{'_id':str(item['emp_id'])}, **{'_source':item}) for item in documents]# Import helpers for using bulk API
from elasticsearch import helpers# Use the bulk helper to perform the actions
bulk_response = helpers.bulk(es, actions)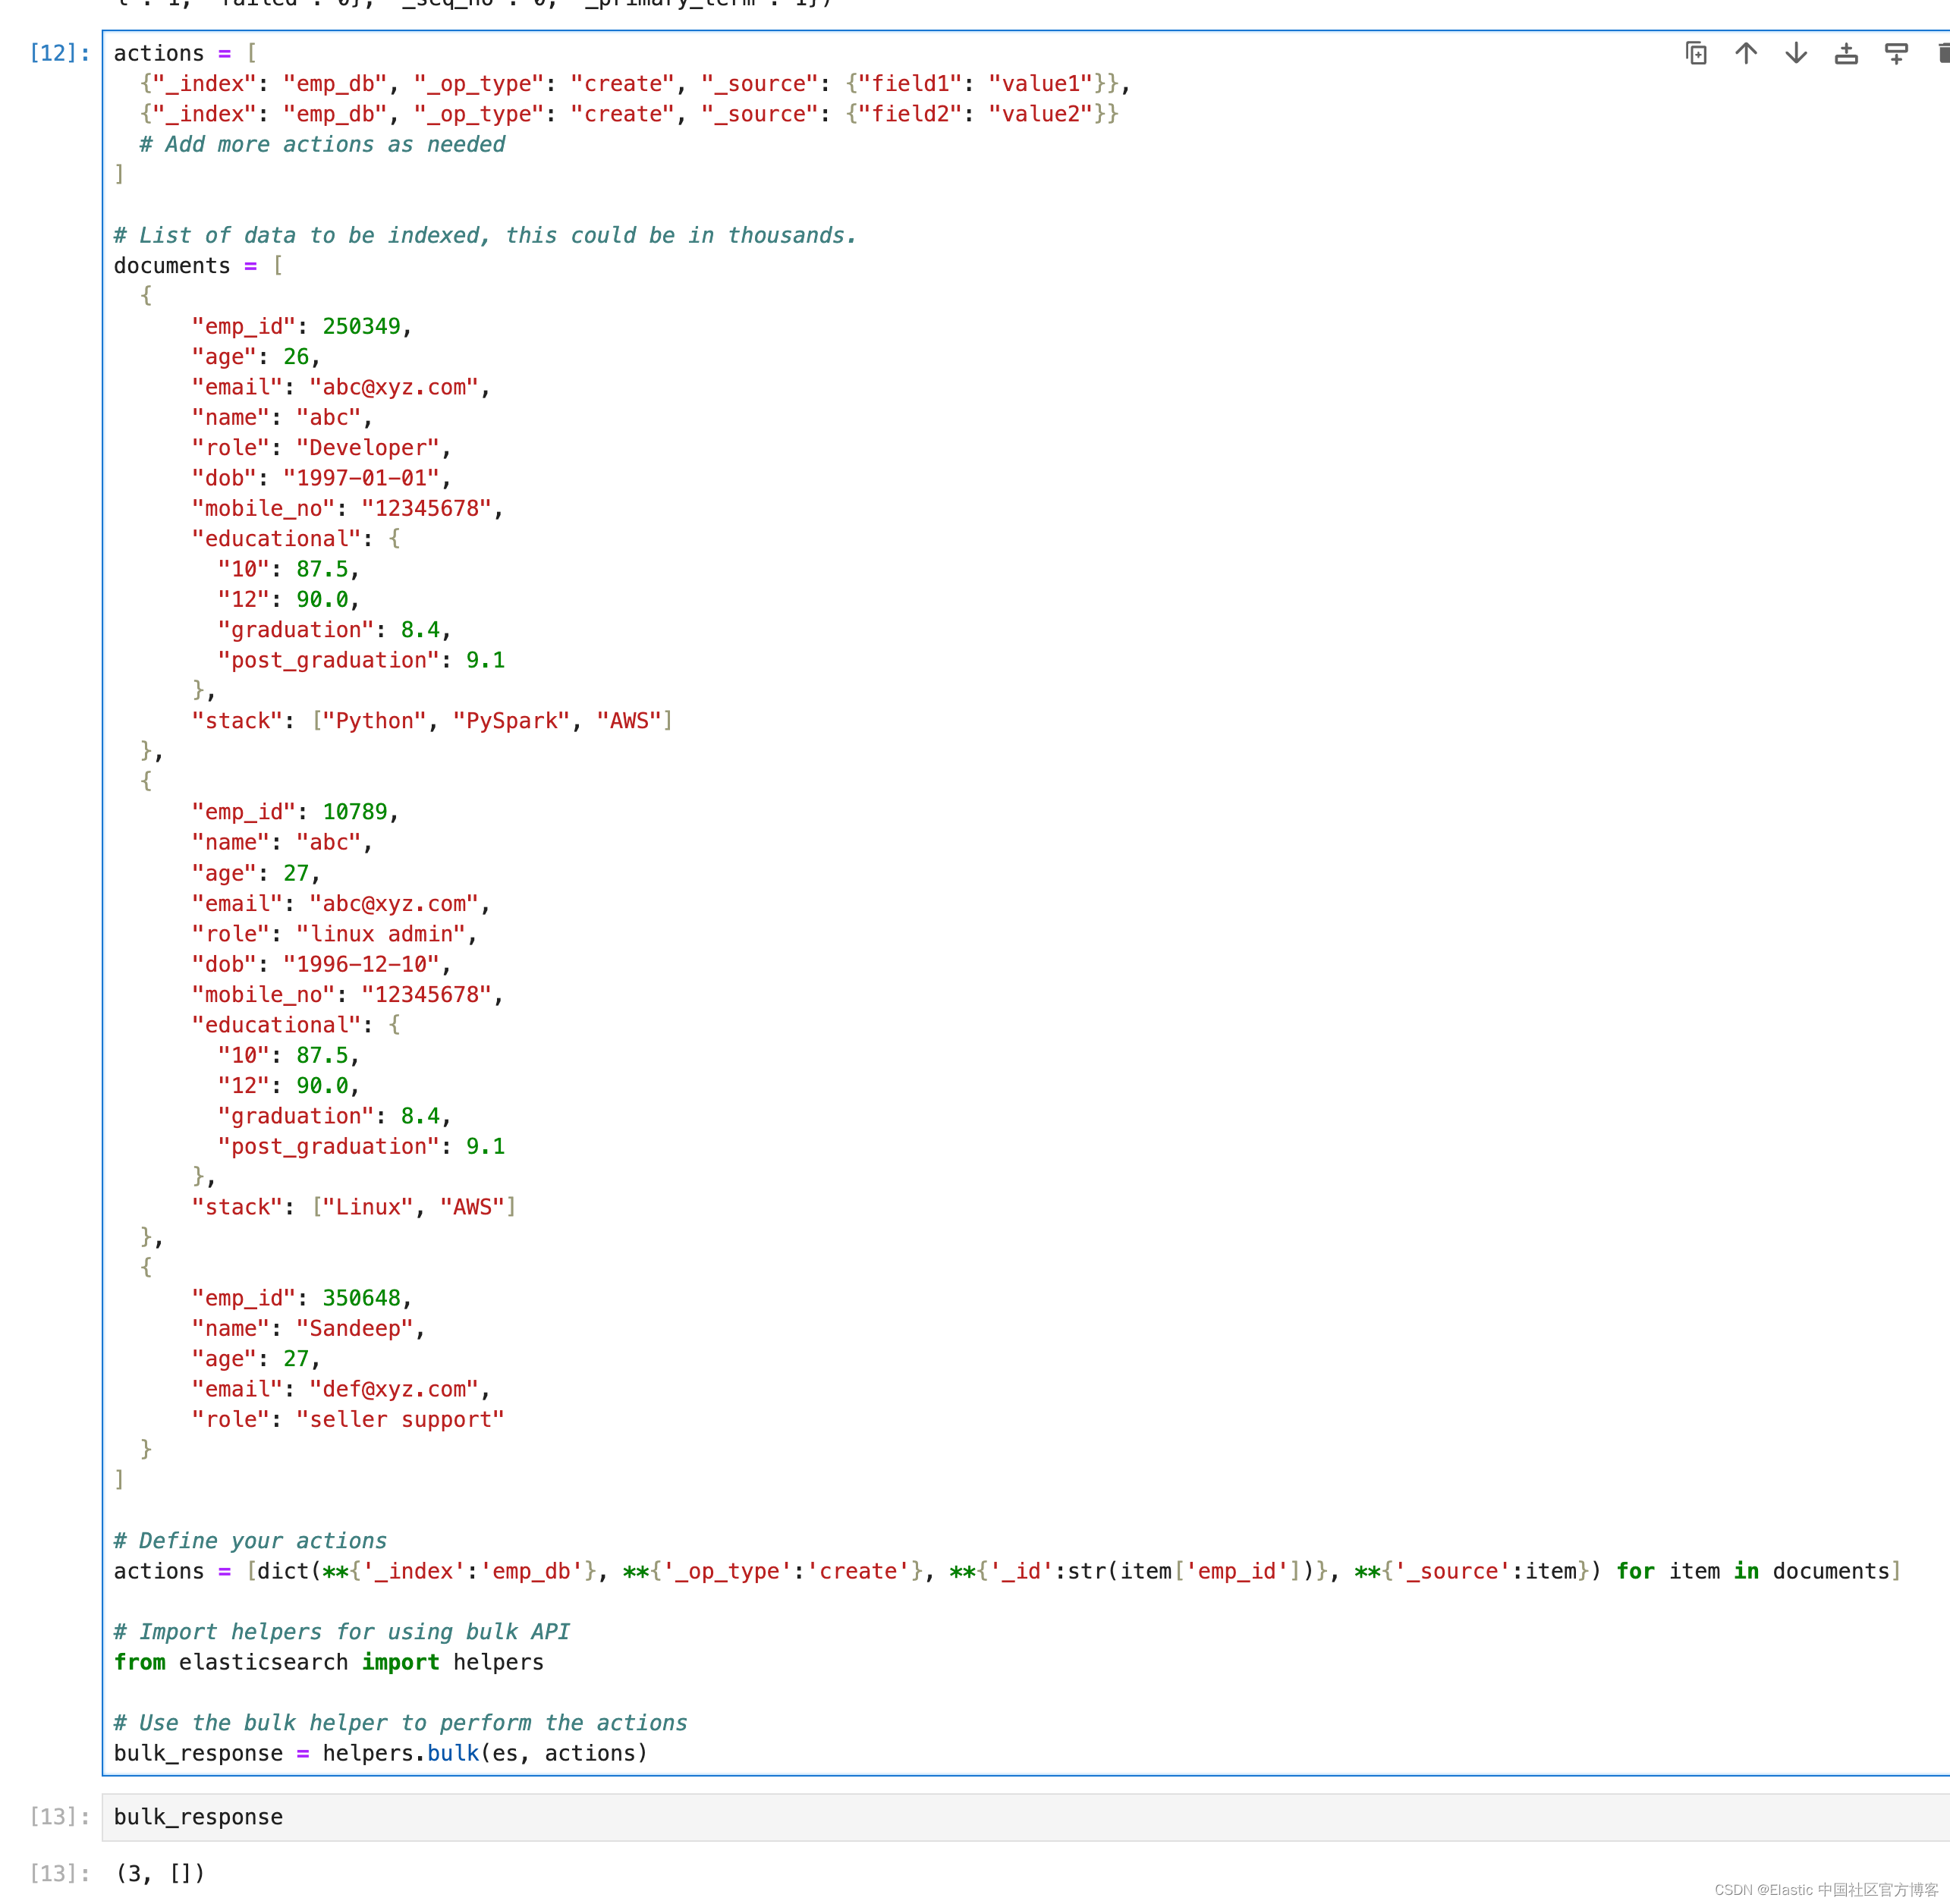
所有批量操作都具有相同的响应结构。
Elasticsearch Python 客户端中 helpers.bulk 方法的输出 (3, []) 表明批量操作已成功执行。 让我们分解一下响应:
3 :这是在批量操作中成功处理的操作(例如索引、更新或删除文档)的数量。
[] :这个空列表表明批量操作期间没有错误。 如果存在任何错误,此列表将包含失败操作的错误详细信息。
- 3 :这是在批量操作中成功处理的操作(例如索引、更新或删除文档)的数量。
- [] :这个空列表表明批量操作期间没有错误。 如果存在任何错误,此列表将包含失败操作的错误详细信息。
读写操作
要检索文档,请使用 get API 和文档 ID。
response = es.get(index="emp_db", id=250349)
除了 _index 、 _id 、 _version 之外
- found :表示在索引中找到了具有给定 id 的文档。
- _source :包含文档的实际数据。
使用 mget API 检索多个文档:
doc_ids = [{"emp_id":250349},{"emp_id":350648}
]# Define your actions
docs = [dict(**{'_index':'emp_db'}, **{'_id':str(item['emp_id'])}) for item in doc_ids]# Retrieve the documents
response = es.mget(body={"docs": docs})
更新文档
要更新现有文档,请使用 update API。 这可以部分更新文档。 通过 update API,你可以一次添加一个文档。
document = {"emp_id": 250349,"role": "sr software engineer"
}response = es.update(index="emp_db", id=document["emp_id"], doc=document)
响应将有 _index 、 _id 、 _version 、 result 。

通过 bulk API 更新数据:

删除文档
要删除文档,请使用 delete API。 使用 delete API,你一次只能删除一个文档。
es.delete(index="emp_db", id=250349)
响应将有 _index 、 _id 、 _version 、 result 。
通过 bulk API 删除数据。
# List of ids to be deleted, this could be in thousands.
documents = [{"emp_id": 10789,},{"emp_id": 350648,}
]# Define your actions
actions = [dict(**{'_index':'emp_db'}, **{'_op_type':'delete'}, **{'_id':str(item['emp_id'])}) for item in documents]# Import helpers for using bulk API
from elasticsearch import helpers# Use the bulk helper to perform the actions
response = helpers.bulk(es, actions)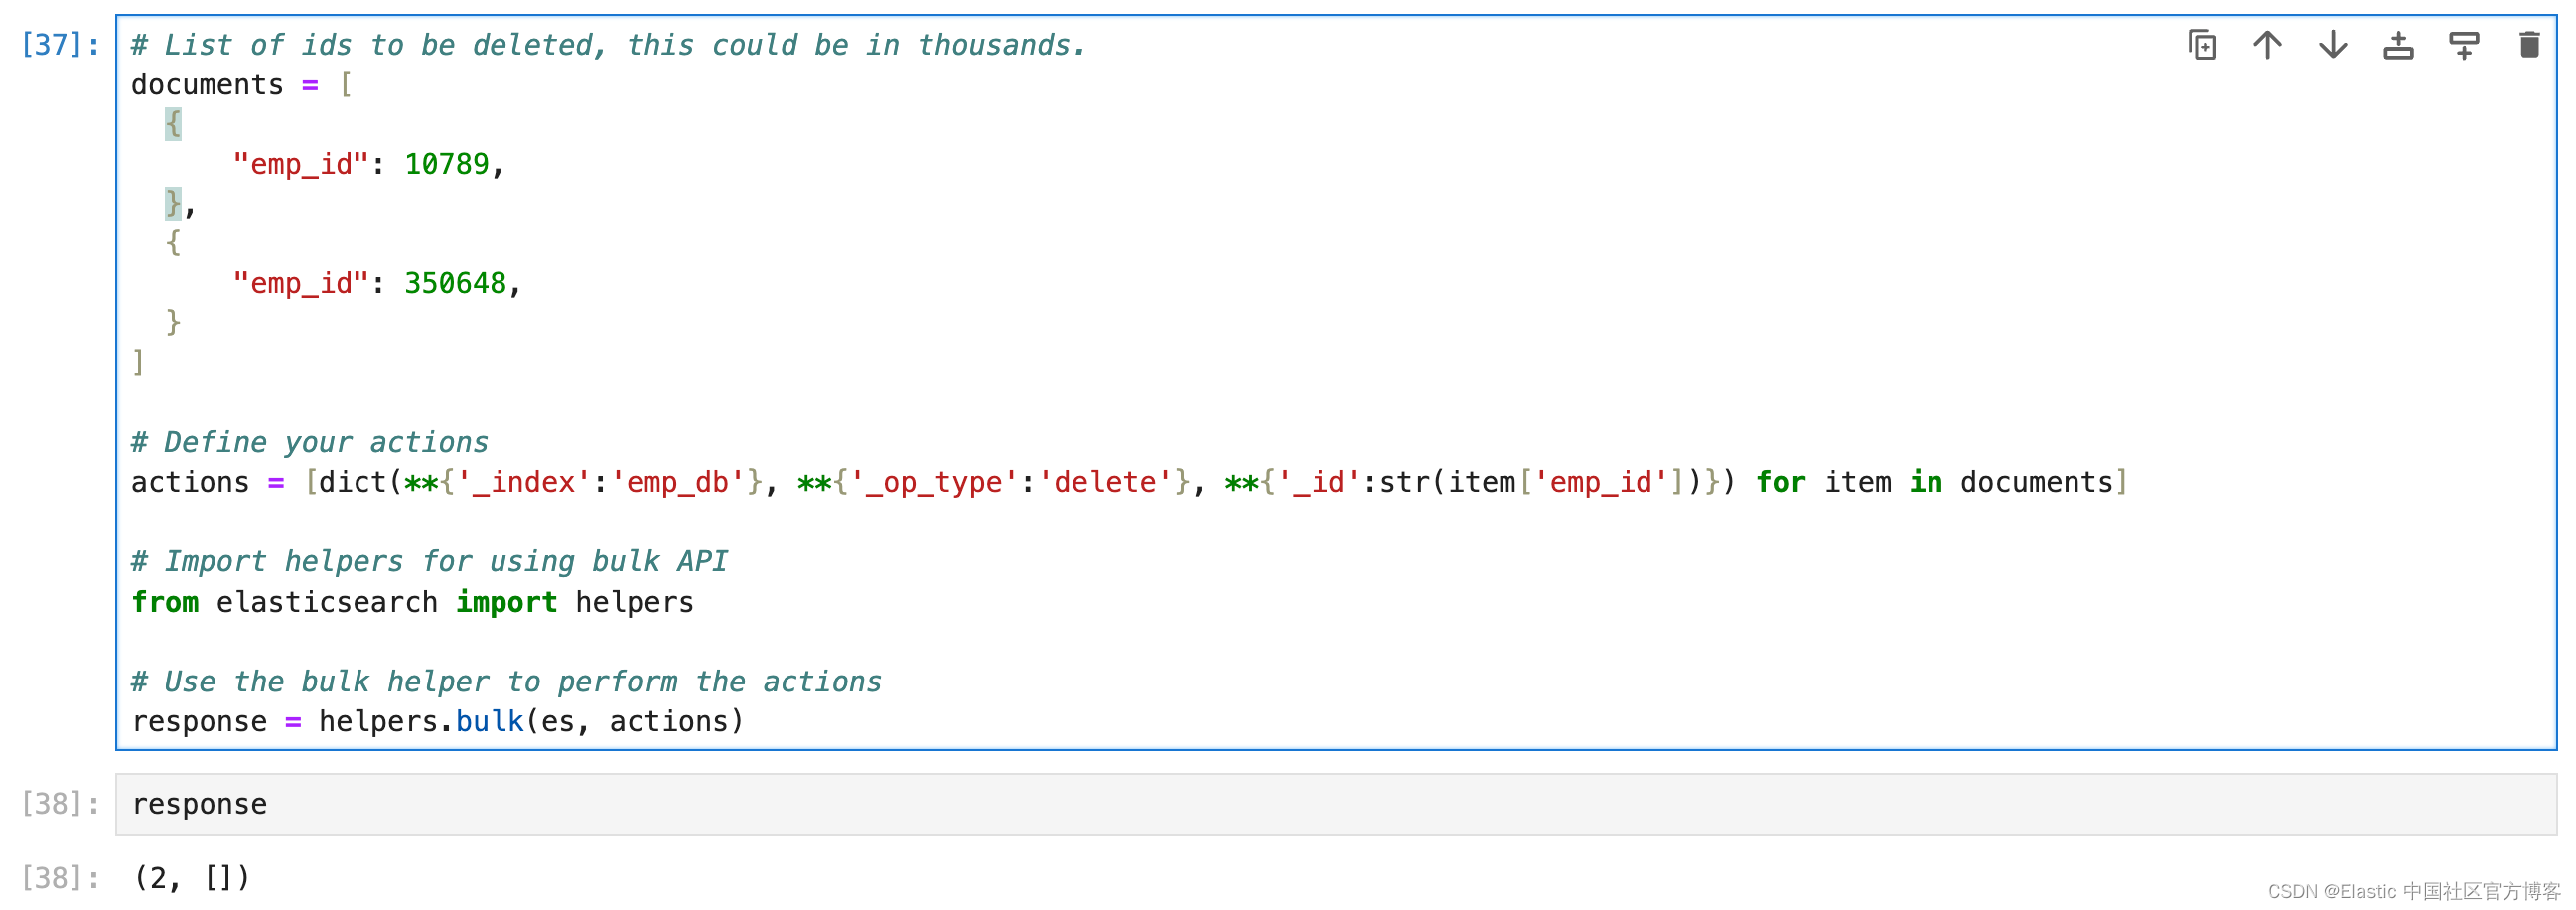
恭喜,你已成功完成 CRUD 操作。 在这篇博客中,你了解了基本的 CRUD 操作。
完整的 jupyter notebook,请在地址下载:https://github.com/liu-xiao-guo/elasticsearch-python-notebooks/blob/main/elasticsearch_crud.ipynb