Springboot集成Camunda并完成一条流程实例

💖专栏简介
✔️本专栏将从Camunda(卡蒙达) 7中的关键概念到实现中国式工作流相关功能。
✔️文章中只包含演示核心代码及测试数据,完整代码可查看作者的开源项目snail-camunda
✔️请给snail-camunda 点颗星吧😘
💖设计流程定义
在Modeler中设计一个简单的流程定义
<?xml version="1.0" encoding="UTF-8"?>
<bpmn:definitions xmlns:bpmn="http://www.omg.org/spec/BPMN/20100524/MODEL" xmlns:bpmndi="http://www.omg.org/spec/BPMN/20100524/DI" xmlns:dc="http://www.omg.org/spec/DD/20100524/DC" xmlns:camunda="http://camunda.org/schema/1.0/bpmn" xmlns:di="http://www.omg.org/spec/DD/20100524/DI" xmlns:modeler="http://camunda.org/schema/modeler/1.0" id="Definitions_0o0413o" targetNamespace="http://bpmn.io/schema/bpmn" exporter="Camunda Modeler" exporterVersion="5.19.0" modeler:executionPlatform="Camunda Platform" modeler:executionPlatformVersion="7.15.0"><bpmn:process id="Process_1pobt6o" isExecutable="true"><bpmn:startEvent id="StartEvent_1"><bpmn:outgoing>Flow_1k7cbz8</bpmn:outgoing></bpmn:startEvent><bpmn:sequenceFlow id="Flow_1k7cbz8" sourceRef="StartEvent_1" targetRef="root" /><bpmn:userTask id="root" name="发起人" camunda:assignee="${initiator}"><bpmn:incoming>Flow_1k7cbz8</bpmn:incoming><bpmn:outgoing>Flow_1qx1hmd</bpmn:outgoing></bpmn:userTask><bpmn:sequenceFlow id="Flow_1qx1hmd" sourceRef="root" targetRef="Activity_1kwa01y" /><bpmn:userTask id="Activity_1kwa01y" name="经理" camunda:assignee="${manager}"><bpmn:incoming>Flow_1qx1hmd</bpmn:incoming><bpmn:outgoing>Flow_1rx0p95</bpmn:outgoing></bpmn:userTask><bpmn:endEvent id="Event_0es4idv"><bpmn:incoming>Flow_1rx0p95</bpmn:incoming></bpmn:endEvent><bpmn:sequenceFlow id="Flow_1rx0p95" sourceRef="Activity_1kwa01y" targetRef="Event_0es4idv" /></bpmn:process><bpmndi:BPMNDiagram id="BPMNDiagram_1"><bpmndi:BPMNPlane id="BPMNPlane_1" bpmnElement="Process_1pobt6o"><bpmndi:BPMNShape id="_BPMNShape_StartEvent_2" bpmnElement="StartEvent_1"><dc:Bounds x="179" y="99" width="36" height="36" /></bpmndi:BPMNShape><bpmndi:BPMNShape id="Activity_1sk7cxf_di" bpmnElement="root"><dc:Bounds x="270" y="77" width="100" height="80" /></bpmndi:BPMNShape><bpmndi:BPMNShape id="Activity_1rko3sb_di" bpmnElement="Activity_1kwa01y"><dc:Bounds x="430" y="77" width="100" height="80" /><bpmndi:BPMNLabel /></bpmndi:BPMNShape><bpmndi:BPMNShape id="Event_0es4idv_di" bpmnElement="Event_0es4idv"><dc:Bounds x="592" y="99" width="36" height="36" /></bpmndi:BPMNShape><bpmndi:BPMNEdge id="Flow_1k7cbz8_di" bpmnElement="Flow_1k7cbz8"><di:waypoint x="215" y="117" /><di:waypoint x="270" y="117" /></bpmndi:BPMNEdge><bpmndi:BPMNEdge id="Flow_1qx1hmd_di" bpmnElement="Flow_1qx1hmd"><di:waypoint x="370" y="117" /><di:waypoint x="430" y="117" /></bpmndi:BPMNEdge><bpmndi:BPMNEdge id="Flow_1rx0p95_di" bpmnElement="Flow_1rx0p95"><di:waypoint x="530" y="117" /><di:waypoint x="592" y="117" /></bpmndi:BPMNEdge></bpmndi:BPMNPlane></bpmndi:BPMNDiagram>
</bpmn:definitions>
这种是最简单的用户任务节点,该节点只允许分配一个任务给用户。

💖版本兼容
以下为版本对应表,本专栏所有案例基于Camunda 7.19.0+Spring Boot 2.7.7
| Spring Boot Starter version | Camunda Platform version | Spring Boot version |
| 7.13.x | 7.13.x | 2.2.x.RELEASE |
| 7.14.x | 7.14.x | 2.3.x.RELEASE |
| 7.15.x | 7.15.x | 2.4.x |
| 7.16.x | 7.16.x | 2.5.x |
| 7.17.x | 7.17.x | 2.6.x |
| 7.18.x | 7.18.x | 2.7.x |
| 7.20.x | 7.20.x | 3.1.x |
💖创建项目
新建SpringBoot项目后引入相关的场景启动器
<dependency><groupId>org.camunda.bpm.springboot</groupId><artifactId>camunda-bpm-spring-boot-starter</artifactId><version>7.19.0</version>
</dependency><dependency><groupId>org.camunda.bpm.springboot</groupId><artifactId>camunda-bpm-spring-boot-starter-webapp</artifactId><version>7.19.0</version>
</dependency><dependency><groupId>mysql</groupId><artifactId>mysql-connector-java</artifactId>
</dependency>
在properties或yml文件中进行相关属性值配置
###数据源相关配置
spring.datasource.type=com.zaxxer.hikari.HikariDataSource
spring.datasource.driver-class-name=com.mysql.cj.jdbc.Driver
spring.datasource.url=jdbc:mysql://localhost:3306/数据库名?useSSL=false&useUnicode=true&characterEncoding=utf-8&serverTimezone=GMT%2B8&nullCatalogMeansCurrent=true&allowPublicKeyRetrieval=true
spring.datasource.username=root
spring.datasource.password=root###Camunda相关配置
#关闭自动部署
camunda.bpm.auto-deployment-enabled=false
camunda.bpm.history-level=full
camunda.bpm.admin-user.id=demo
camunda.bpm.admin-user.password=demo
camunda.bpm.admin-user.first-name=demo
camunda.bpm.filter.create=All tasks
Camunda的自动部署路径是【classpath*:**/*.bpmn20.xml 】,所以我们在resources目录下新建名称为bpmn的文件夹,用于放置设计的流程定义。

之后按照部署流程定义、发起流程实例、完成任务的顺序来完成。为方便演示,这里省略分层,代码在Controller中完成。
/*** 流程定义相关接口* @author lonewalker*/
@RequestMapping("/process/definition")
@AllArgsConstructor
@RestController
public class ProcessDefinitionController {private final RepositoryService repositoryService;/*** 部署流程定义** @return 提示信息*/@PostMapping("/deploy")public String deployProcessDefinition(){repositoryService.createDeployment().addClasspathResource("bpmn/1.bpmn").name("演示").deploy();return "部署成功";}
}
/*** 流程实例相关接口** @author lonewalker*/
@RequestMapping("/process/instance")
@RequiredArgsConstructor
@RestController
public class ProcessInstanceController {private final RuntimeService runtimeService;private final TaskService taskService;/*** 根据流程定义key发起流程实例** @param requestParam 请求参数* @return 流程实例id*/@PostMapping("/startProcessInstanceByKey")public String startProcessInstanceByKey(@RequestBody StartProcessRequest requestParam) {Map<String, Object> paramMap = new HashMap<>(4);paramMap.put("initiator", "10086");paramMap.put("manager", "10087");ProcessInstance processInstance = runtimeService.startProcessInstanceByKey(requestParam.getProcessDefinitionKey(), requestParam.getBusinessKey(), paramMap);return processInstance.getProcessInstanceId();}/*** 完成单个任务** @param requestParam 请求参数* @return 任务所在节点信息*/@PostMapping("/completeSingleTask")public Boolean completeSingleTask(@RequestBody @Validated CompleteTaskRequest requestParam) {taskService.complete(requestParam.getTaskId());return true;}
}发起流程实例的参数类,这里省略了get、set方法,大家可以使用lombok
/*** @author lonewalker*/
@Data
public class StartProcessRequest {/*** 流程定义key*/private String processDefinitionKey;/*** 业务key*/private String businessKey;/*** 发起人*/private String initiator;
}
完成待办任务的参数类
/*** @author lonewalker*/
@Data
public class CompleteTaskRequest {@NotBlank(message = "流程实例id不能为空")private String processInstanceId;@NotBlank(message = "任务id不能为空")private String taskId;}
💖测试接口
启动项目后会自动生成49张表

访问localhost:端口号 可以看到camunda的webapp页面,输入配置的账号、密码

调用部署接口后,来到驾驶舱中可以看到已经部署成功。

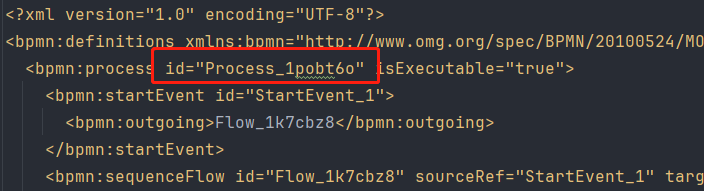
紧接着发起流程实例,所需的processDefinitionKey参数,也就是bpmn文件中的id。当然你从驾驶舱中也可以获取到。
调用接口后,可以从驾驶舱流程实例详情页面获取Task ID

将所有待办任务依次审批即可,流程实例结束后在驾驶舱是无法查看的: