Threejs 展示——obj 格式模型导入
文章目录
- 需求
- 分析
- 1. HTML版本
- 2. Vue 版本
需求
导入obj 格式的模型数据

分析
.obj:Wavefront OBJ 格式,是一种广泛使用的三维模型文件格式。- 预览
.obj格式文件的软件可点此下载 - 需要准备两种格式的数据,如下所示
1. HTML版本
- html
<!DOCTYPE html>
<html lang="en">
<head><meta charset="UTF-8"><title>Three.js OBJ Loader</title><style>body {margin: 0;overflow: hidden;}</style>
</head>
<body><script src="https://cdn.bootcdn.net/ajax/libs/three.js/r130/three.min.js"></script><script src="https://cdn.bootcdn.net/ajax/libs/three.js/r130/loaders/OBJLoader.js"></script><script src="https://cdn.bootcdn.net/ajax/libs/stats.js/r17/Stats.min.js"></script><script src="./main.js"></script>
</body>
</html>
- js
// 创建场景、相机、渲染器等基本组件
const scene = new THREE.Scene();
const camera = new THREE.PerspectiveCamera(75, window.innerWidth / window.innerHeight, 0.1, 1000);
camera.position.z = 5;
const renderer = new THREE.WebGLRenderer({ antialias: true });
renderer.setSize(window.innerWidth, window.innerHeight);
document.body.appendChild(renderer.domElement);// 添加灯光和物体到场景中
const light = new THREE.AmbientLight(0xffffff);
scene.add(light);
const loader = new THREE.OBJLoader();
loader.load(// 模型文件路径'./model.obj',// 加载完成后的回调函数function (object) {scene.add(object);},// 加载过程中的回调函数function (xhr) {console.log((xhr.loaded / xhr.total * 100) + '% loaded');},// 加载失败时的回调函数function (error) {console.error(error);}
);// 添加性能统计器
const stats = new Stats();
document.body.appendChild(stats.dom);// 渲染场景
function render() {requestAnimationFrame(render);renderer.render(scene, camera);stats.update();
}
render();
在该示例中,我们首先创建了基本的场景、相机和渲染器,并将其添加到页面中。接着,我们使用THREE.OBJLoader加载器加载模型文件。加载完成后,我们将其添加到场景中。
需要注意的是,在加载模型文件之前,你需要确保OBJLoader加载器已经被引入。在本示例中,我们使用了CDN方式引入了Three.js和OBJLoader.js文件,你也可以通过其他方式进行引入。当然,也可以将代码放置到同一个文件中,避免多次引入。
2. Vue 版本
<template><div id="three-canvas"></div>
</template>
<script>
// import { Color, MOUSE, PerspectiveCamera, Scene, WebGLRenderer } from "three";
import { OrbitControls } from "three/examples/jsm/controls/OrbitControls.js";
import { AmbientLight, Color, MOUSE, PerspectiveCamera, Scene, Vector3, WebGLRenderer } from "three";
import { MTLLoader } from "three/examples/jsm/loaders/MTLLoader.js";
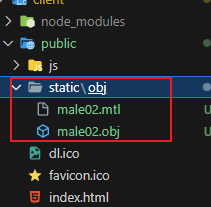
import { OBJLoader } from "three/examples/jsm/loaders/OBJLoader.js";export default {name: "index",data () {return {camera: null, //相机对象scene: null, //场景对象renderer: null, //渲染器对象mesh: null, //网格模型对象Mesh}},mounted () {this.init()this.$nextTick(() => {this.createModel()})},methods: {createModel () {let tht = thisconst onProgress = function (xhr) {if (xhr.lengthComputable) {const percentComplete = xhr.loaded / xhr.total * 100console.log(Math.round(percentComplete, 2) + '% downloaded')}}new MTLLoader().setPath('/static/obj/').load('male02.mtl', function (materials) {console.log("MTLLoader", materials)materials.preload()new OBJLoader().setMaterials(materials).setPath('/static/obj/').load('male02.obj', function (obj) {obj.position.set(5, 5, 5)obj.scale.set(0.1, 0.1, 0.1)tht.scene.add(obj)}, onProgress)})},init () {let container = document.getElementById('three-canvas')this.renderer = new WebGLRenderer({//开启抗锯齿antialias: true})//将渲染器挂载到domcontainer.appendChild(this.renderer.domElement)this.renderer.setSize(container.offsetWidth, container.offsetHeight, true)//实例化场景this.scene = new Scene()this.scene.background = new Color('#88B9DD')//实例化相机this.camera = new PerspectiveCamera(45, container.offsetWidth / container.offsetHeight, 1, 1000)//设置相机位置this.camera.position.set(50, 50, 50)//设置相机看先中心点this.camera.lookAt(new Vector3(0, 0, 0))//设置相机自身方向this.camera.up = new Vector3(0, 1, 0)//初始化轨道控制器let orbitControls = new OrbitControls(this.camera, this.renderer.domElement)//设置鼠标功能键orbitControls.mouseButtons = {//左键无功能LEFT: null,//中键缩放MIDDLE: MOUSE.DOLLY,//右键旋转RIGHT: MOUSE.ROTATE}//添加环境光const ambientLight = new AmbientLight('rgb(255,255,255)', 0.8)this.scene.add(ambientLight)let animate = () => {this.renderer.render(this.scene, this.camera)requestAnimationFrame(animate)}animate()},}
}
</script>
<style scoped>
#three-canvas {/* width: 100%; *//* height: 600px; *//* overflow: hidden; *//* background-color: #88B9DD; */
}
</style>