kubernetes工作负载-DamonSet
一、DemonSet的介绍
1、什么是DemonSet
DaemonSet 控制器是用来保证在所有节点上运行一个 Pod 的副本当有节点加入集群时, 也会为他们新增一个 Pod。 当有节点从集群移除时,这些 Pod 也会被回收。删除 DaemonSet 将会删除它创建的所有 Pod。
简而言之:
pod不会因为node的故障的转移而转移,pod固定在指定的node的work节点中
DemonSet跟Deployment的不同是,Deployment是可以在不同的node进行故障漂移
2、DemonSet的典型用法
- 在每个节点上运行集群存储守护进程,如:Gluster、Ceph在每个节点上运行日志收集守护进程,如:fluentd、FilebeatLogstash
- 在每个节点上运行监控守护进程,如: Prometheus NodeExporter
- 在每个节点上运行网络插件为Pod提供网络服务,如: flannel、calico
3、DemonSet的编写
DaemonSet 是标准的API资源类型,它在spec字段中嵌套字段有selector、tempalte,与Deployment用法基本相同,但DaemonSet 不管理 Replicas,因为 DaemonSet不是基于期望的副本数,而是基于节点数量来控制Pod数量
4、DemonSet的使用示例
apiVersion: apps/v1
kind: DaemonSet
metadata:name: nginx-dsnamespace: default
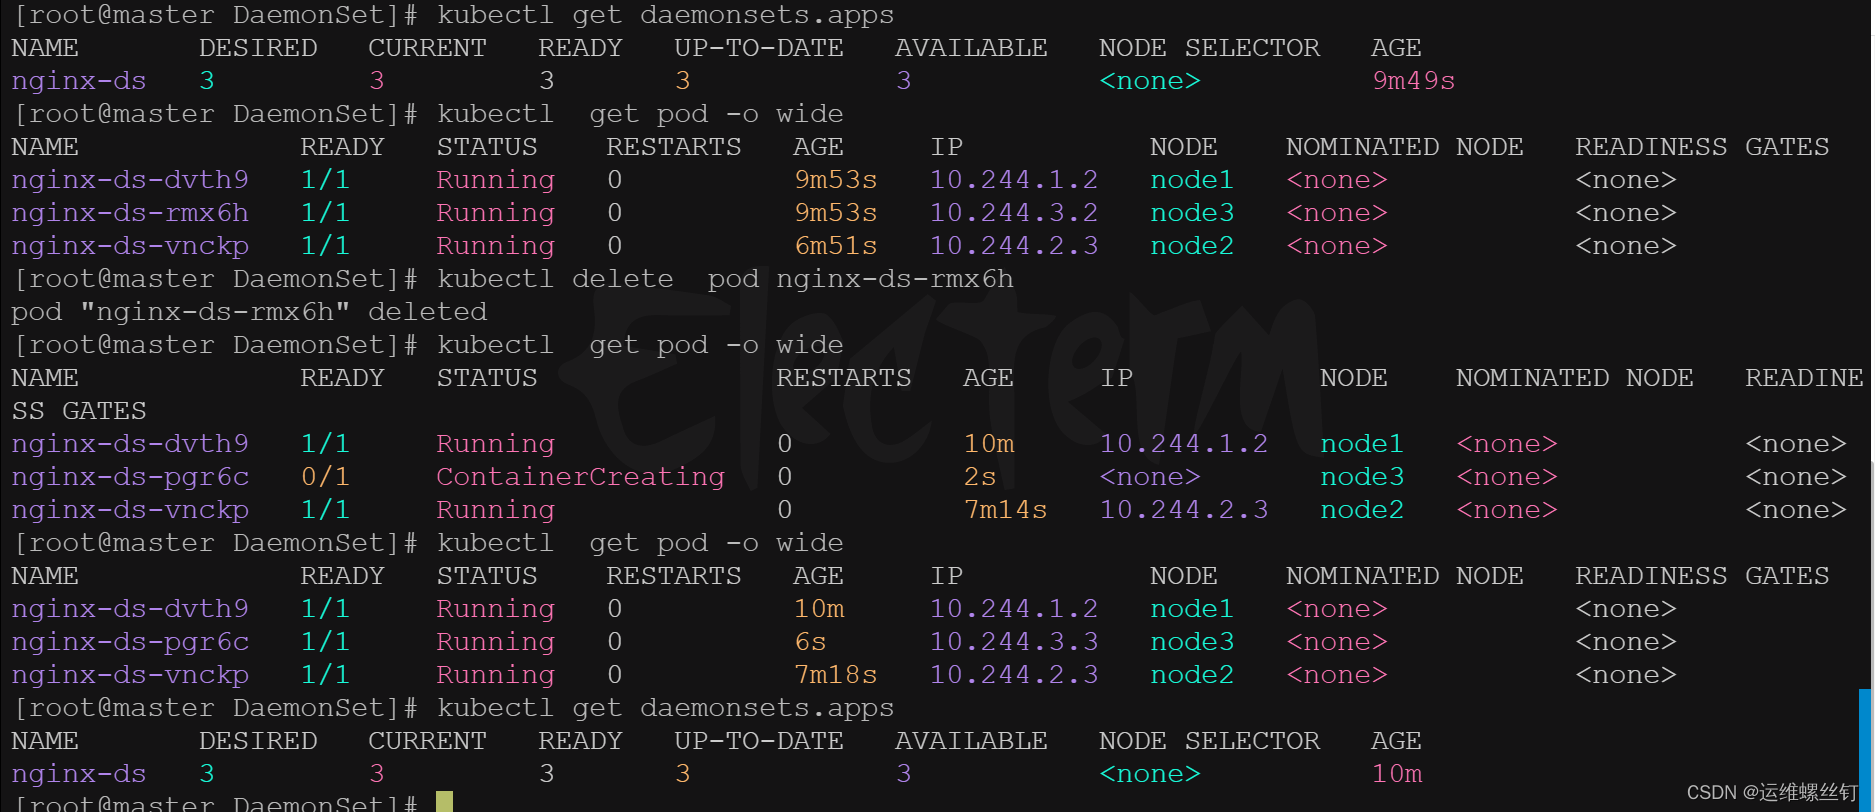
spec:selector:matchLabels:app: nginx-dstemplate:metadata:labels:app: nginx-dsspec:containers:- name: nginx-dsimage: nginx:1.16ports:- name: httpcontainerPort: 80 livenessProbe:tcpSocket:port: 80initialDelaySeconds: 5livenessProbe: # 就绪 监听80端口,如果80不存在则重启httpGet:path: '/'port: 80scheme: HTTPinitialDelaySeconds: 5查看和删除,daemonset还会在现在的node创建pod
5、Daemonset采用节点标签进行部署
- 实验一:
给DamonSet只做节点标签,node打了标签的才会创建pod
apiVersion: apps/v1
kind: DaemonSet
metadata:name: nginx-dsnamespace: default
spec:selector:matchLabels:app: nginx-dstemplate:metadata:labels:app: nginx-dsspec:nodeSelector:    #节点标签选择器type: ssd      #节点标签,在node上打的标签containers:- name: nginx-dsimage: nginx:1.16ports:- name: httpcontainerPort: 80 livenessProbe:tcpSocket:port: 80initialDelaySeconds: 5livenessProbe:          # 就绪  监听80端口,如果80不存在则重启httpGet:path: '/'port: 80scheme: HTTPinitialDelaySeconds: 5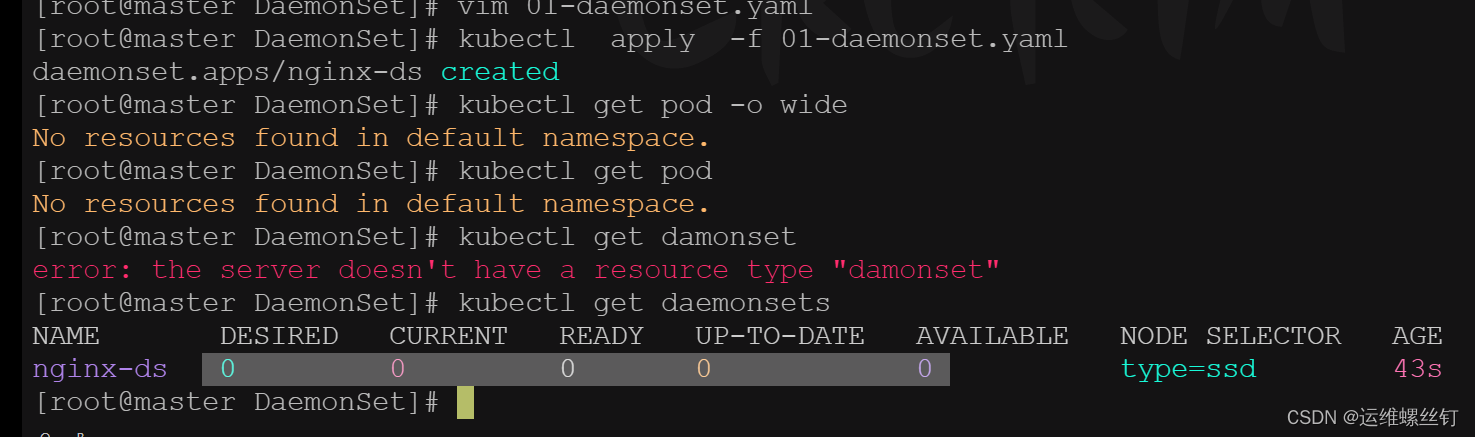
- 从查看结果看,并没有进行创建,因为没有node服务标签选择器的要求
- 查看节点标签
kubectl get node --show-labels

- 给节点打标签
kubectl label nodes node1 type=ssd
- 查看标签
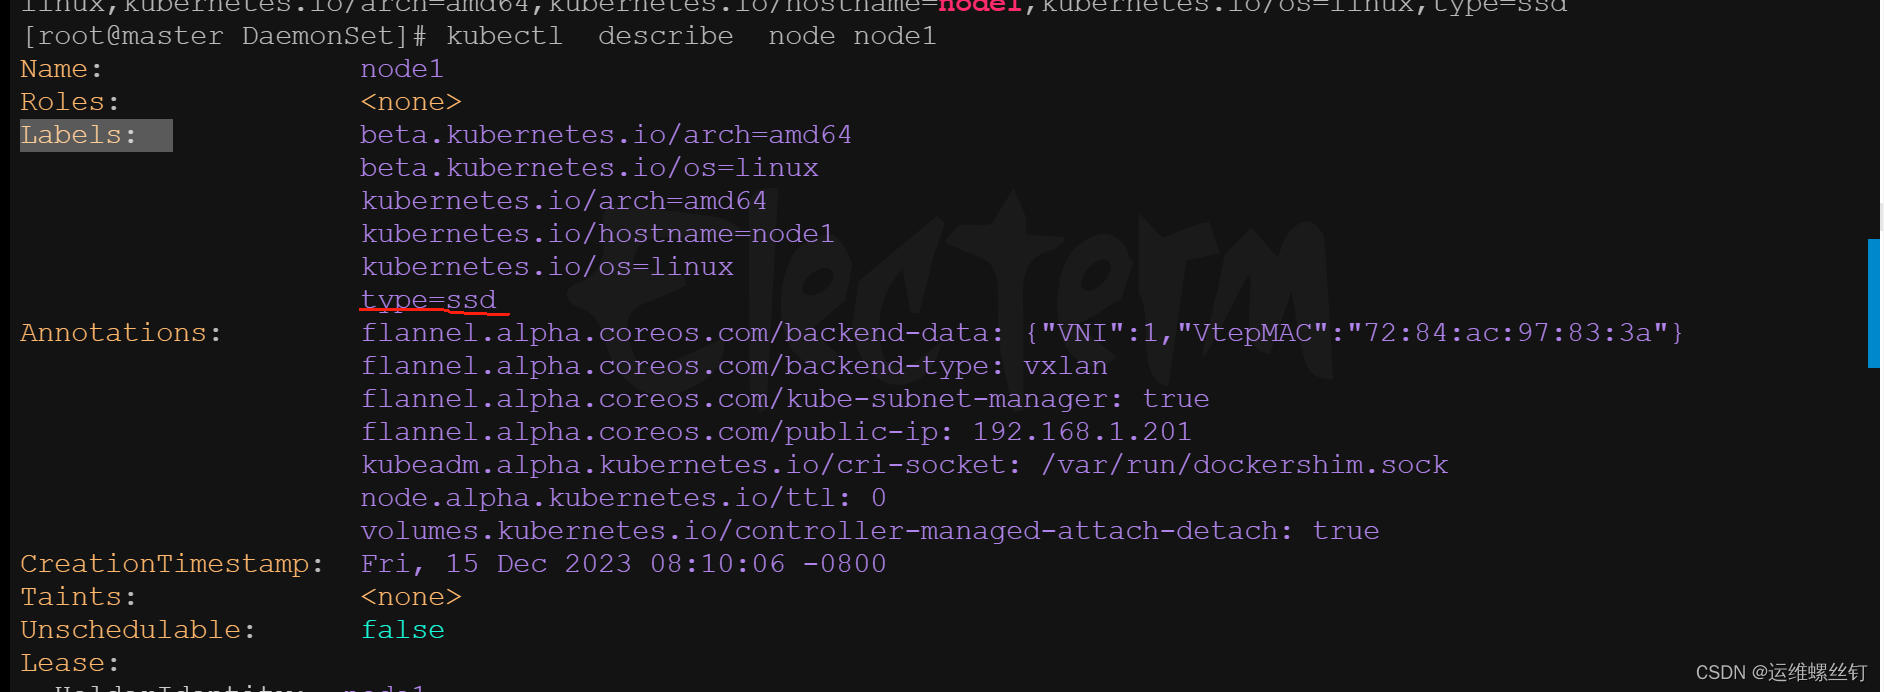
kubectl get node --show-labels | grep node1kubectl describe node node1 ##查看labels字段kubectl describe node node1 | grep -A 5 Labelskubectl label nodes node1 node2 type=ssd ## 连续给两个节点进行打标签


- 查看pod创建结果
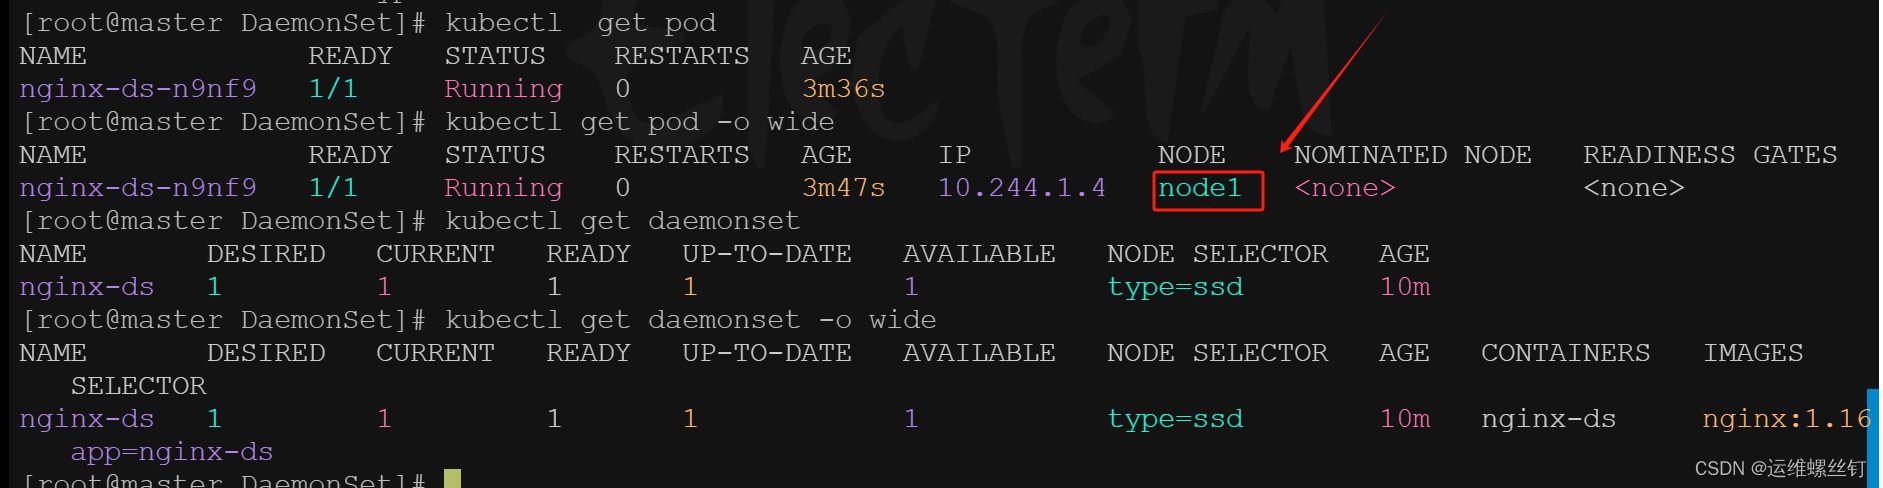
kubectl  get pod -o wide   ## 查看pod创建在node节点中,符合场景要求
kubectl  get daemonset -o wide
- 删除label标签
方法一:
kubectl  label  nodes  node1  type-
6、DaemonSet示例二 DaemonSet部署node_exporter
1.为每个节点都运行一份 Node_exporter,采集当前节点的信息:
apiVersion: apps/v1
kind: DaemonSet
metadata:name: node-exportsnamespace: default
spec:selector:matchLabels:app: node-exportertemplate:metadata:labels:app: node-exporterspec:hostNetwork: true  ##共享主机网络hostPID: true      ##获取主机的PIDcontainers:- name: prometheus-node-exporterimage: prom/node-exporter:v0.18.0ports:- name: node-ex-httpcontainerPort: 9100hostPort: 9100##存活探测和就绪探测livenessProbe:tcpSocket:port: node-ex-http  ##存活探测,探测port的name其实就是探测端口9100initialDelaySeconds: 5 ##存活探测时间为5秒readinessProbe:httpGet:path: '/metrics'  ## 就绪探针,这是一个固定的接口port: node-ex-http  ## 就绪探针探测port的name其实就是探测端口9100initialDelaySeconds: 5  ## 就绪探针时间为5秒
- 查看相关信息
kubectl  get daemonsets  ##查看daemonset创建的响应信息
kubectl  describe  daemonsets.apps  node-exports ## 查看daemonset详情信息
kubectl get pod -o wide
- 测试
curl -s 192.168.1.201:9100/metrics | grep load15  ## 15分钟的负载信息
也可以使用浏览器进行访问,访问默认的9100端口
7、DaemonSet的更新策略
DaemonSet也支持更新策略,它支持 OnDeLete 和 RollingUpdate两种
- 0nDeLete: 是在相应节点的Pod资源被删除后重建为新版本,从而允许用户手动编排更新过程。
- RollingUpdate: 滚动更新,工作逻辑和Deployment滚动更新类似;
1、DaemonSet的更新策略——RollingUpdate
apiVersion: apps/v1
kind: DaemonSet
metadata:name: node-exportsnamespace: default
spec:minReadySeconds: 10      ## 更新时间,默认是0秒revisionHistoryLimit: 20 ## 回滚次数updateStrategy:  ## 更新策略rollingUpdate:type: RollingUpdate  ##更新策略为RollingUpdaterollingUpdate:         ## RollingUpdate的策略maxUnavailable: 1    ## 一次更新的pod数量selector:matchLabels:app: node-exportertemplate:metadata:labels:app: node-exporterspec:hostNetwork: true  ##共享主机网络hostPID: true      ##获取主机的PIDcontainers:- name: prometheus-node-exporterimage: prom/node-exporter:v0.18.1ports:- name: node-ex-httpcontainerPort: 9100hostPort: 9100##存活探测和就绪探测livenessProbe:tcpSocket:port: node-ex-http  ##存活探测,探测port的name其实就是探测端口9100initialDelaySeconds: 5 ##存活探测时间为5秒readinessProbe:httpGet:path: '/metrics'  ## 就绪探针,这是一个固定的接口port: node-ex-http  ## 就绪探针探测port的name其实就是探测端口9100initialDelaySeconds: 5  ## 就绪探针时间为5秒
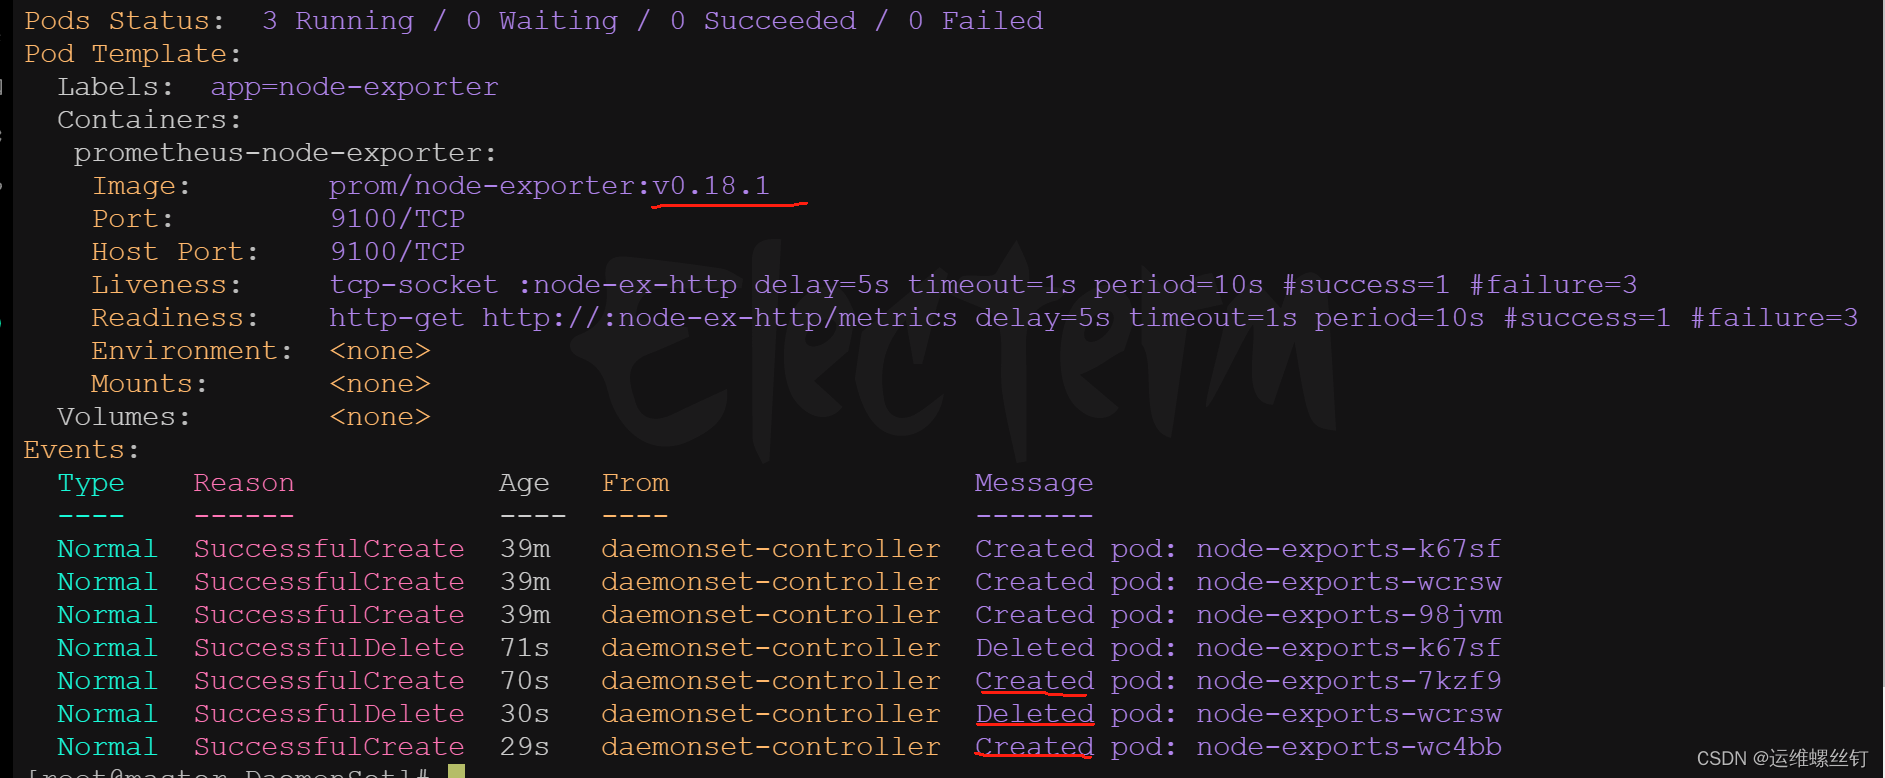

安装默认的 RollingUpdate 策略,node-exports-ds 资源将采用一次更新一个Pod对象,待新建Pod的对象就绪后,在更新下一个Pod对象,直到全部完成。
2、DaemonSet的更新策略——OnDelete
-
1、将此前创建的node-expoter中的pod模板镜像更新为 prom/node-exporter:v1.3.1,由于升级版本跨度过大,无法确保升级过程中的稳定性,我们就不得不使用 0nDeLete 策略来替换默认的RollingUpdate 策略
-
2.由于 0nDelete 并非自动完成升级,它需要管理员手动删除Pod,然后重新拉起新的Pod,才能完成更新。 (对于升级有着先后顺序的软件
这种方法就非常的有用;) -
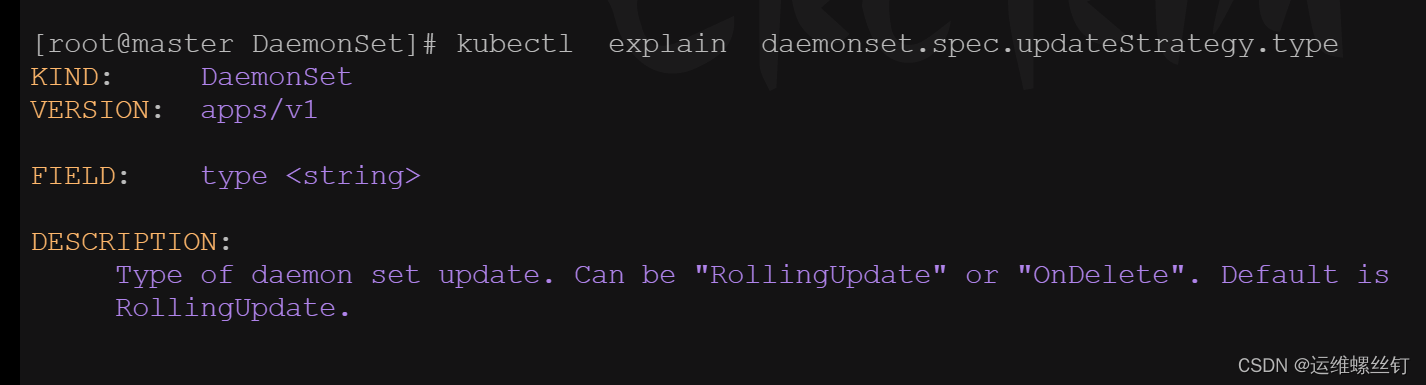
OnDelete的使用类型
kubectl explain daemonset.spec.updateStrategy.type
apiVersion: apps/v1
kind: DaemonSet
metadata:name: node-exportsnamespace: default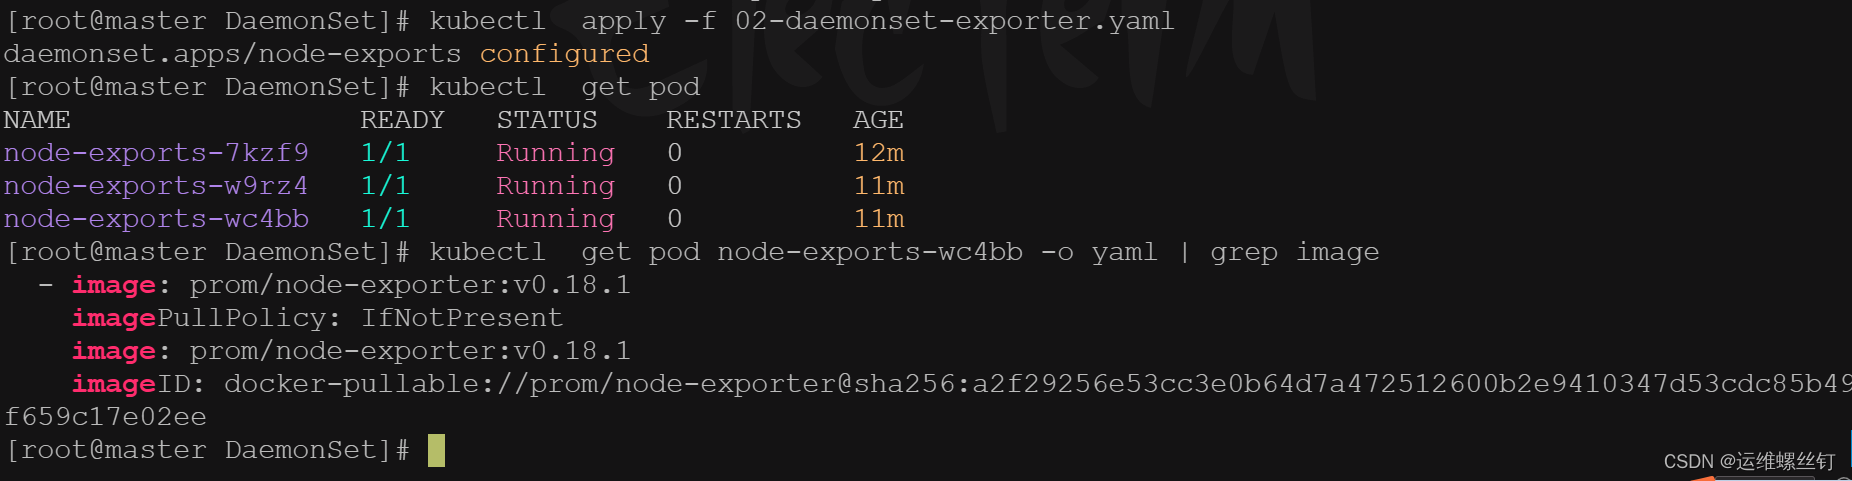
spec:minReadySeconds: 10 ## 更新时间,默认是0秒revisionHistoryLimit: 20 ## 回滚次数updateStrategy: ## 更新策略rollingUpdate:type: OnDelete ##更新策略为OnDeletselector:matchLabels:app: node-exportertemplate:metadata:labels:app: node-exporterspec:hostNetwork: true ##共享主机网络hostPID: true ##获取主机的PIDcontainers:- name: prometheus-node-exporterimage: prom/node-exporter:v1.3.1ports:- name: node-ex-httpcontainerPort: 9100hostPort: 9100##存活探测和就绪探测livenessProbe:tcpSocket:port: node-ex-http ##存活探测,探测port的name其实就是探测端口9100initialDelaySeconds: 5 ##存活探测时间为5秒readinessProbe:httpGet:path: '/metrics' ## 就绪探针,这是一个固定的接口port: node-ex-http ## 就绪探针探测port的name其实就是探测端口9100initialDelaySeconds: 5 ## 就绪探针时间为5秒- 发现应用yaml文件后,image并没有发生变化
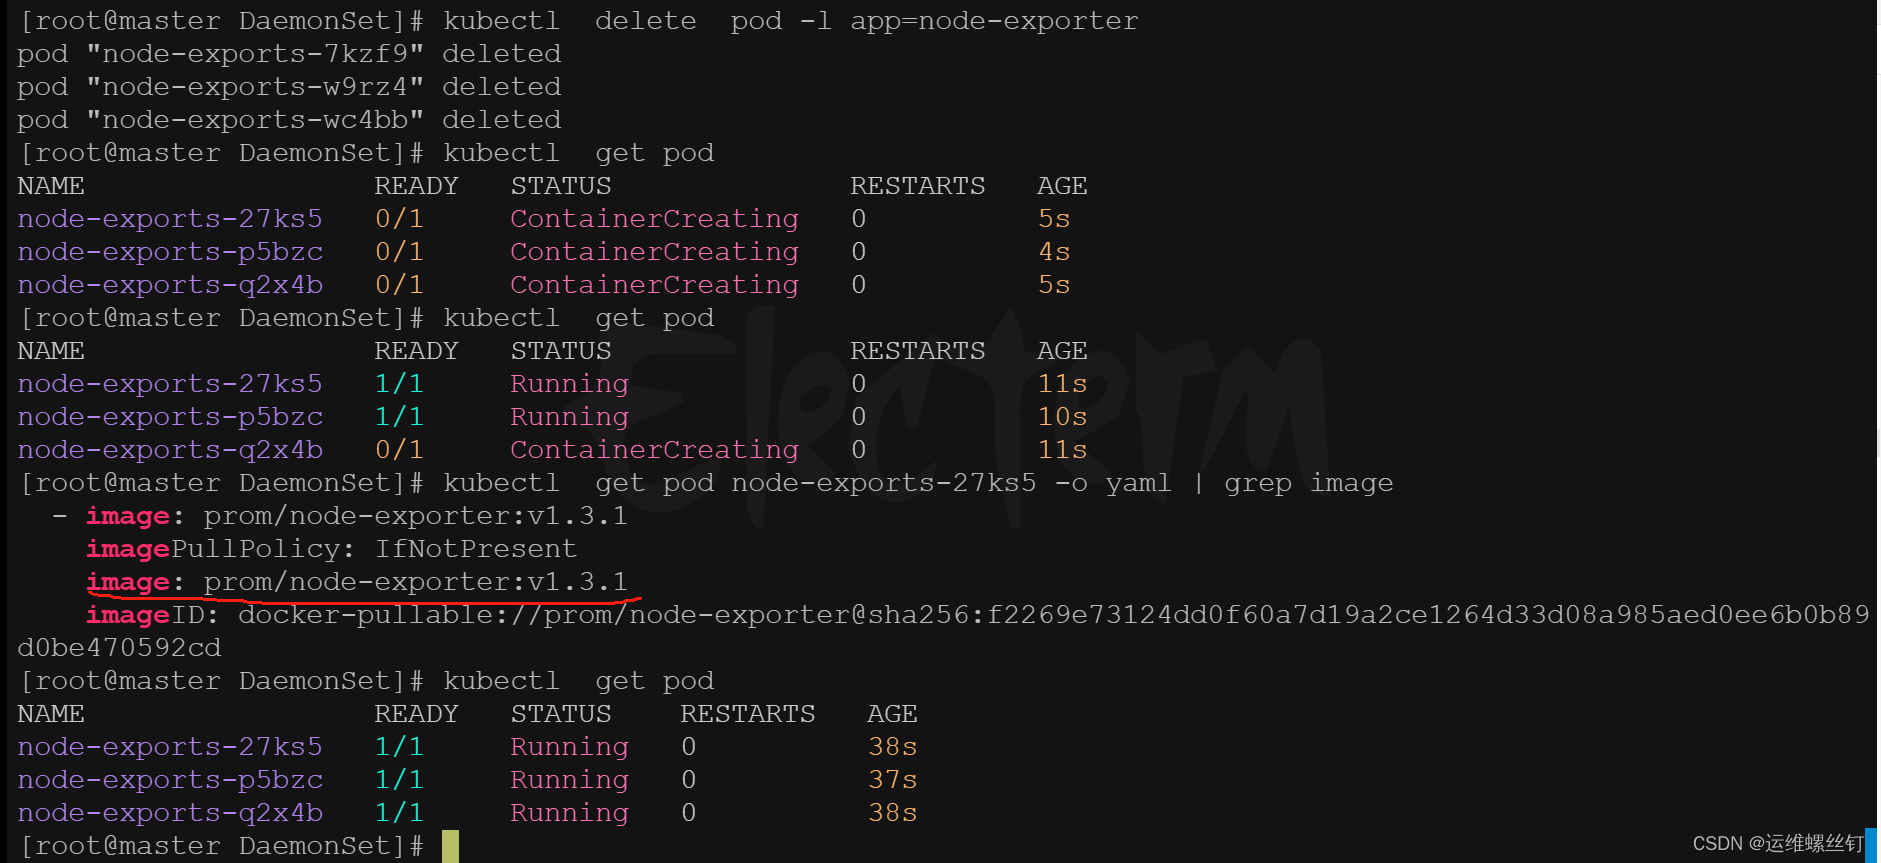
- 通过删除pod 重新创建,会重新自动建立新的镜像的pod
- 相关命令
kubectl get pod  -l app=node-exporter ## 根据标签进行相关pod的查看
kubectl get pod  <pod-ID> -o yaml | grep image ## 查看pod的镜像
kubectl delete daemonset -l app=node-exporter  ##根据标签进行pod删除