查看神经网络中间层特征矩阵及卷积核参数
可视化feature maps以及kernel weights,使用alexnet模型进行演示。
1. 查看中间层特征矩阵
alexnet模型,修改了向前传播
import torch
from torch import nn
from torch.nn import functional as F# 对花图像数据进行分类
class AlexNet(nn.Module):def __init__(self,num_classes=1000,init_weights=False, *args, **kwargs) -> None:super().__init__(*args, **kwargs)self.conv1 = nn.Conv2d(3,48,11,4,2)self.pool1 = nn.MaxPool2d(3,2)self.conv2 = nn.Conv2d(48,128,5,padding=2)self.pool2 = nn.MaxPool2d(3,2)self.conv3 = nn.Conv2d(128,192,3,padding=1)self.conv4 = nn.Conv2d(192,192,3,padding=1)self.conv5 = nn.Conv2d(192,128,3,padding=1)self.pool3 = nn.MaxPool2d(3,2)self.fc1 = nn.Linear(128*6*6,2048)self.fc2 = nn.Linear(2048,2048)self.fc3 = nn.Linear(2048,num_classes)# 是否进行初始化# 其实我们并不需要对其进行初始化,因为在pytorch中,对我们对卷积及全连接层,自动使用了凯明初始化方法进行了初始化if init_weights:self._initialize_weights()def forward(self,x):outputs = []  # 定义一个列表,返回我们要查看的哪一层的输出特征矩阵x = self.conv1(x)outputs.append(x)x = self.pool1(F.relu(x,inplace=True))x = self.conv2(x)outputs.append(x)x = self.pool2(F.relu(x,inplace=True))x = self.conv3(x)outputs.append(x)x = F.relu(x,inplace=True)x = F.relu(self.conv4(x),inplace=True)x = self.pool3(F.relu(self.conv5(x),inplace=True))x = x.view(-1,128*6*6)x = F.dropout(x,p=0.5)x = F.relu(self.fc1(x),inplace=True)x = F.dropout(x,p=0.5)x = F.relu(self.fc2(x),inplace=True)x = self.fc3(x)# for name,module in self.named_children():#     x = module(x)#     if name == ["conv1","conv2","conv3"]:#         outputs.append(x)return outputs# 初始化权重def _initialize_weights(self):for m in self.modules():if isinstance(m,nn.Conv2d):# 凯明初始化 - 何凯明nn.init.kaiming_normal_(m.weight, mode='fan_out', nonlinearity='relu')if m.bias is not None:nn.init.constant_(m.bias, 0)elif isinstance(m,nn.Linear):nn.init.normal_(m.weight, 0,0.01)  # 使用正态分布给权重赋值进行初始化nn.init.constant_(m.bias,0)
拿到向前传播的结果,对特征图进行可视化,这里,我们使用训练好的模型,直接加载模型参数。
注意,要使用与训练时相同的数据预处理。
import matplotlib.pyplot as plt
from torchvision import transforms
import alexnet_model
import torch
from PIL import Image
import numpy as np
from alexnet_model import AlexNet# AlexNet 数据预处理
transform = transforms.Compose([transforms.Resize((224, 224)),transforms.ToTensor(),transforms.Normalize((0.5, 0.5, 0.5), (0.5, 0.5, 0.5))
])device = torch.device("mps" if torch.backends.mps.is_available() else "cpu")
# 实例化模型
model = AlexNet(num_classes=5)
weights = torch.load("./alexnet_weight_20.pth", map_location="cpu")
model.load_state_dict(weights)image = Image.open("./images/yjx.jpg")
image = transform(image)
image = image.unsqueeze(0)with torch.no_grad():output = model(image)for feature_map in output:# (N,C,W,H) -> (C,W,H)im = np.squeeze(feature_map.detach().numpy())# (C,W,H) -> (W,H,C)im = np.transpose(im,[1,2,0])plt.figure()# 展示当前层的前12个通道for i in range(12):ax = plt.subplot(3,4,i+1) # i+1: 每个图的索引plt.imshow(im[:,:,i],cmap='gray')plt.show()
结果:

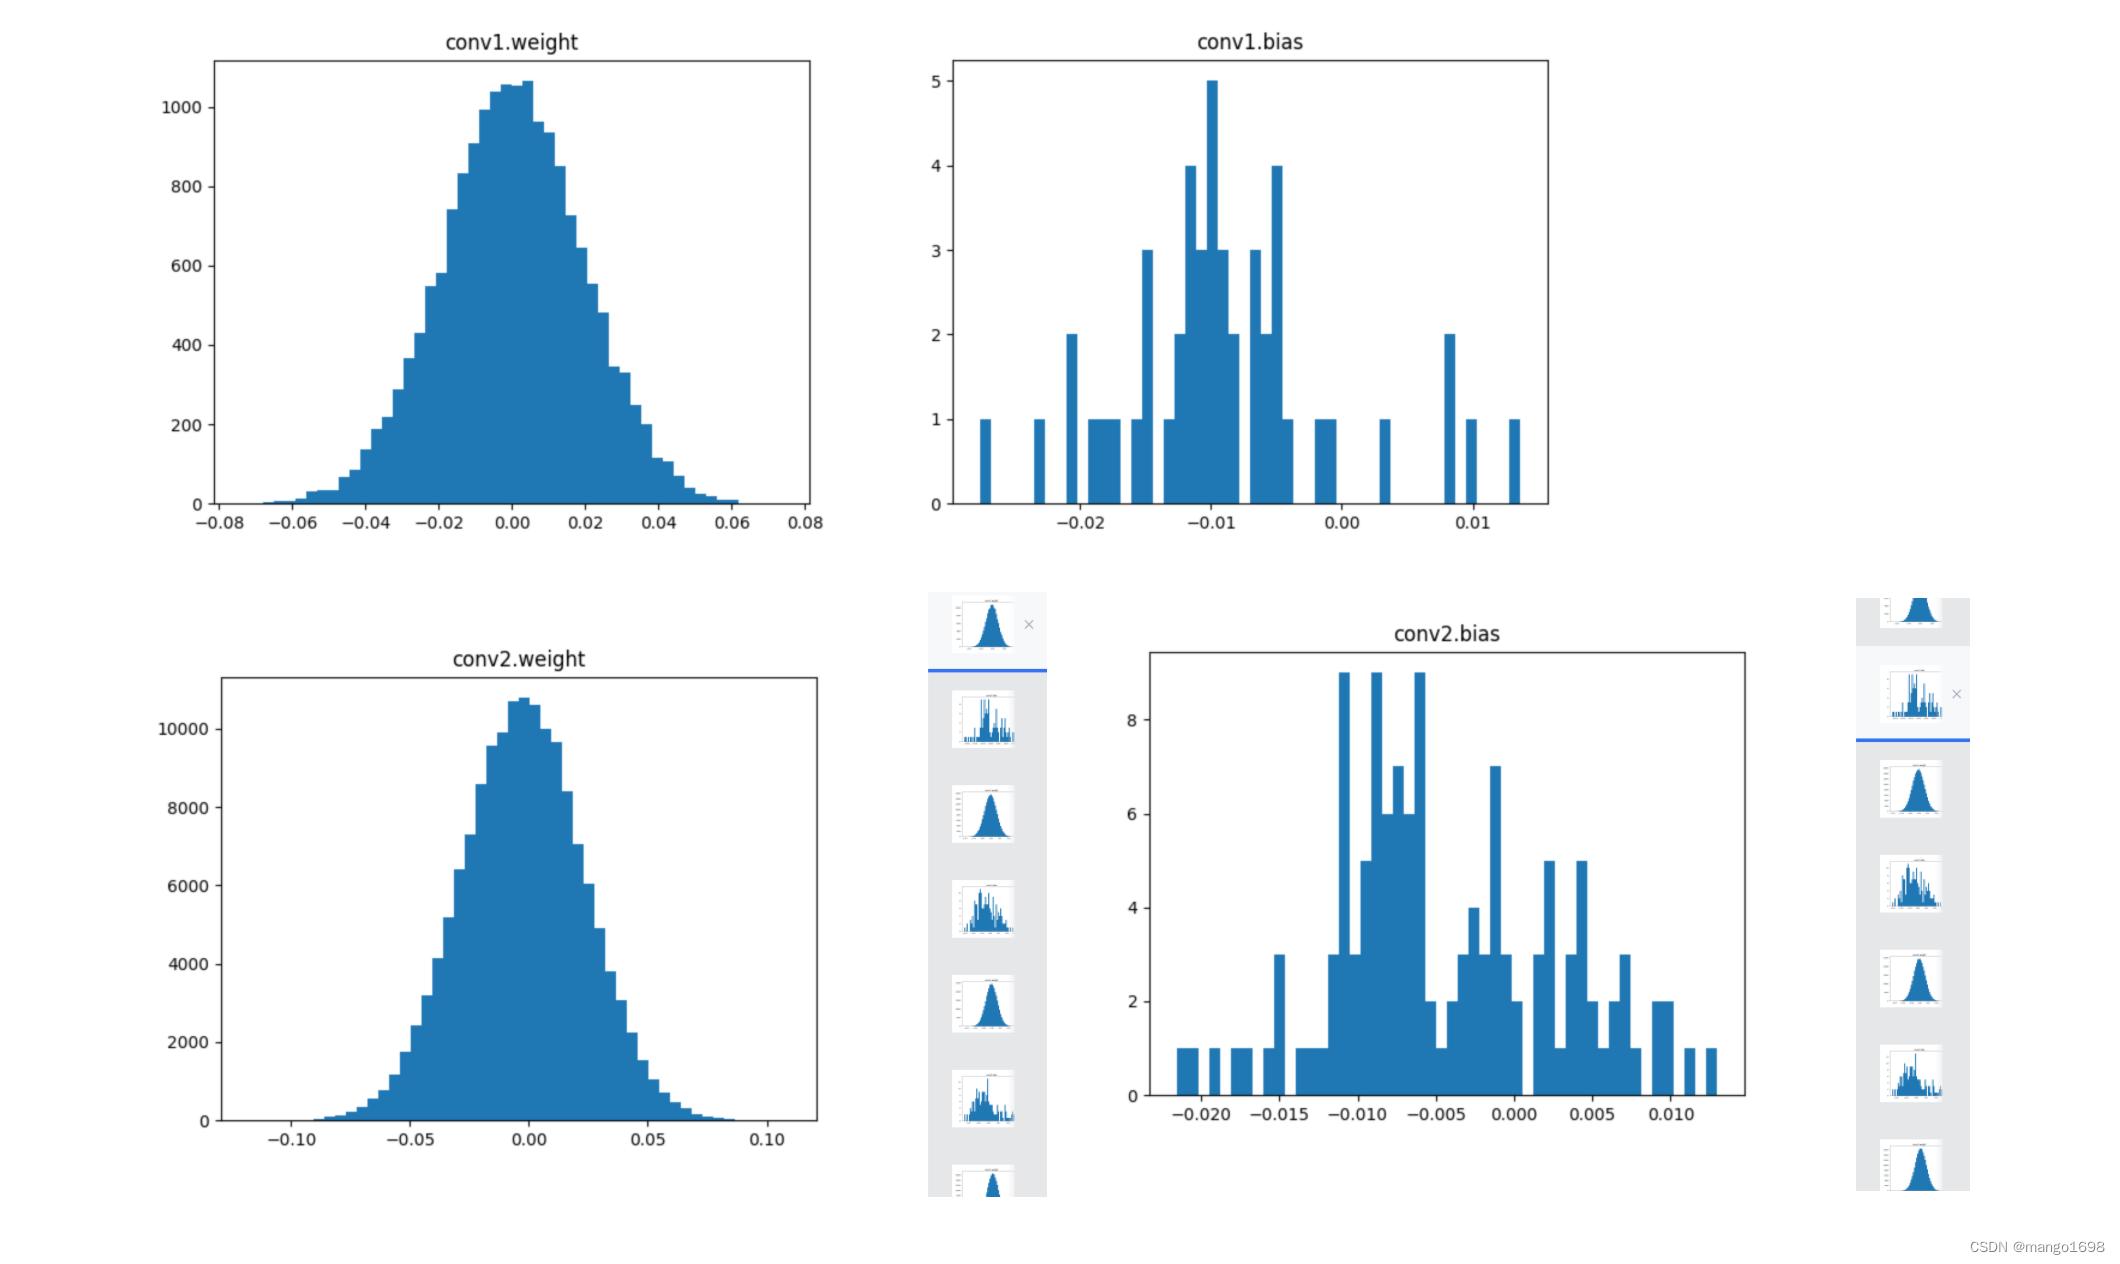
2. 查看卷积核参数
import matplotlib.pyplot as plt
import numpy as np
import torchfrom AlexNet.model import AlexNet# 实例化模型
model = AlexNet(num_classes=5)
weights = torch.load("./alexnet_weight_20.pth", map_location="cpu")
model.load_state_dict(weights)weights_keys = model.state_dict().keys()
for key in weights_keys:if "num_batches_tracked" in key:continueweight_t = model.state_dict()[key].numpy()weight_mean = weight_t.mean()weight_std = weight_t.std(ddof=1)weight_min = weight_t.min()weight_max = weight_t.max()print("mean is {}, std is {}, min is {}, max is {}".format(weight_mean, weight_std, weight_min, weight_max))weight_vec = np.reshape(weight_t,[-1])plt.hist(weight_vec,bins=50)plt.title(key)plt.show()
结果: