ansible 配置jspgou商城上线(MySQL版)
准备环境
准备两台纯净的服务器进行,在实验之前我们关闭防火墙和selinux
systemctl stop firewalld    #关闭防火墙
setenforce 0        #临时关闭selinux
hosts解析(两台服务器都要去做)
[root@ansible-server ~]# vim /etc/hosts
10.31.162.24    ansible-server
10.31.162.25    ansible-web
安装ansible
10.31.162.24
安装:控制节点1. 配置EPEL网络yum源[root@ansible-server ~]# yum install -y epel*2. 安装ansible[root@ansible-server ~]# yum install -y ansible3.查看版本[root@ansiable-server ~]# ansible --version4.查看配置文件:
[root@ansible-server ~]# rpm  -qc ansible
---1.主配置文件:/etc/ansible/ansible.cfg  #主要设置一些ansible初始化的信息,比如日志存放路径、模块、插件等配置信息
---2.主机清单文件:默认位置/etc/ansible/hosts
安装nginx
# 配置nginx源
[root@ansible-server ~]# vim /etc/yum.repos.d/nginx.repo
[nginx-stable]
name=nginx stable repo
baseurl=http://nginx.org/packages/centos/$releasever/$basearch/
gpgcheck=0
enabled=1
gpgkey=https://nginx.org/keys/nginx_signing.key
module_hotfixes=true
# 下载nginx
[root@ansible-server ~]# yum install -y nginx
[root@ansible-server ~]# systemctl start nginx
[root@ansible-server ~]# systemctl enable nginx
上传压缩包
将下载好的jdk、tomcat、jspgou,上传到server机器上
# 也可以直接官网下载
apache-tomcat-9.0.83.tar.gz
jdk-8u321-linux-x64.tar.gz
jspgouV6.1-ROOT.zip# jspgou包是gz的包,需要解压重新压缩才可以用,只能用tar包
[root@ansible-server ~]# yum -y install unzip
[root@ansible-server ~]# unzip jspgouV6.1-ROOT.zip
[root@ansible-server ~]# tar zcvf jspgou.tar.gz DB ROOT
[root@ansible-server ~]# ls
DB ROOT
[root@ansible-server ~]# tar zcvf jspgouv6.1.tar.gz DB ROOT
jspgouv6.1.tar.gz
添加主机
# 添加主机清单
[root@ansible-server ~]# vim /etc/ansible/hosts
[jspgou]
ansible-web# 其他语法
1.添加主机或者主机组:
[root@ansible-server ~]# vim /etc/ansible/hosts  #在最后追加被管理端的机器
ansible-web1                      #单独指定主机,可以使用主机名称或IP地址
2.添加主机组:
[webservers]        #使用[]标签指定主机组 ----标签自定义
192.168.10.11        #如果未解析添加ip
ansible-web2      #解析添加主机名
3.组可以包含其他组:
[webservers1]     #组一
ansible-web1
[webservers2]     #组二
ansible-web2
[weball:children]      #caildren-照写 #weball包括两个子组
webservers1        #组一
webservers2        #组二
4.为一个组指定变量,组内每个主机都可以使用该变量:
[weball:vars]         #设置变量,vars--照写
ansible_ssh_port=22
ansible_ssh_user=root
ansible_ssh_private_key_file=/root/.ssh/id_rsa
#ansible_ssh_pass=1      #也可以定义密码,如果没有互传秘钥可以使用密码。
配置ssh密钥
配置ssh公钥认证:控制节点需要发送ssh公钥给所有非被控制节点
[root@ansible-server ~]# ssh-keygen
[root@ansible-server ~]# ssh-copy-id -i 10.31.126.25  #所有机器
配置剧本
# 在vars目录里配置file.yml配置文件
[root@ansible-server ~]# vim /etc/ansible/vars/file.yml
src_gou_path: /root/jspgouv6.1.tar.gz
src_jdk_path: /root/jdk-8u321-linux-x64.tar.gz
src_tomcat_path: /root/apache-tomcat-9.0.83.tar.gz
dest_gou_path: /root
dest_jdk_path: /root
dest_tomcat_path: /root#配置安装MySQL脚本
[root@ansible-server ~]# vim /etc/ansible/jsp.sh
#!/bin/bash
PASS_WORD="Qianfeng@123"
#配置源
cat >> /etc/yum.repos.d/mysql.repo <<EOF
[mysql]
name=mysql
baseurl=https://mirrors.tuna.tsinghua.edu.cn/mysql/yum/mysql-5.7-community-el7-x86_64/
gpgcheck=0
enabled=1
gpgkey=https://mirrors.ustc.edu.cn/mysql-repo/RPM-GPG-KEY-mysql
EOF
#下载mysql
yum repolist enabled | grep mysql
yum -y install mysql-community-server &> /dev/null
#启动
systemctl start mysqld && systemctl enable mysqld
#获取密码
TEMP_PASSWORD=$(sudo grep 'temporary password' /var/log/mysqld.log | awk '{print $NF}')
#修改密码
mysql -u root -p"${TEMP_PASSWORD}" --connect-expired-password <<EOF
ALTER USER 'root'@'localhost' IDENTIFIED BY "$PASS_WORD";
GRANT ALL PRIVILEGES ON *.* TO 'root'@'localhost' WITH GRANT OPTION;
FLUSH PRIVILEGES;
EOF
#重启mysql
systemctl restart mysqld#赋予jsp.sh权限
[root@ansible-server ~]# cd /etc/ansible/
[root@ansible-server ansible]# chmod o+x jsp.sh# 在ansible目录里配置jspgou.yml配置文件
[root@ansible-server ~]# vim /etc/ansible/jspgou.yml
- hosts: jspgouuser: rootbecome: yesvars_files:- /etc/ansible/vars/file.ymltasks:- name: configure jdk1copy: src={{ src_jdk_path }} dest={{ dest_jdk_path }}- name: unzip jdkunarchive: src={{ dest_jdk_path }}/jdk-8u321-linux-x64.tar.gz dest=/usr/local/ copy=no- name: rename javashell: mv /usr/local/jdk1.8.0_321 /usr/local/java- name: configure jdk envirement1shell: echo "JAVA_HOME=/usr/local/java" >> /etc/profile- name: configure jdk envirement2shell: echo 'PATH=$JAVA_HOME/bin:$PATH' >> /etc/profile- name: copy tomcatcopy: src={{ src_tomcat_path }} dest={{ dest_tomcat_path }}- name: unzip tomcatunarchive: src={{ dest_tomcat_path }}/apache-tomcat-9.0.83.tar.gz dest=/usr/local/ copy=no- name: rename tomcatshell: mv /usr/local/apache-tomcat-9.0.83 /usr/local/tomcat- name: rm -rf webappsshell: rm -rf /usr/local/tomcat/webapps/*- name: add /etc/profileshell: sed -i "2i source /etc/profile" /usr/local/tomcat/bin/startup.sh- name: add /etc/profile to shutdown.shshell: sed -i "2i source /etc/profile" /usr/local/tomcat/bin/shutdown.sh- name: copy jspgoucopy: src={{ src_gou_path }} dest={{ dest_gou_path }}- name: unzip jspgouunarchive: src={{ dest_gou_path }}/jspgouv6.1.tar.gz dest=/usr/local/tomcat/webapps copy=no- name: Modify MySQL user initial passwordscript: /etc/ansible/jsp.sh removes=/etc/passwd- name: enter MySQLshell: mysql -uroot -p'Qianfeng@123' -e "create database jspgou default charset=utf8;"- name: edit mysqldshell: sed -i 's/jdbc.password=/jdbc.password=Qianfeng@123/' /usr/local/tomcat/webapps/ROOT/WEB-INF/config/jdbc.properties- name: append mysqlshell: echo "max_allowed_packet= 64m" >> /etc/my.cnf- name: append mysql1shell: echo "sql_mode=STRICT_TRANS_TABLES,ERROR_FOR_DIVISION_BY_ZERO,NO_AUTO_CREATE_USER,NO_ENGINE_SUB" >> /etc/my.cnf- name: append mysql2shell: echo "explicit_defaults_for_timestamp=1" >> /etc/my.cnf- name: restart mysqld1shell: systemctl restart mysqld- name: Import datashell: mysql -uroot -p"Qianfeng@123" -D jspgou < /usr/local/tomcat/webapps/DB/jspgou.sql- name: restart mysql11shell: systemctl restart mysqldnotify: start jspgouhandlers:- name: start jspgoushell: nohup /usr/local/tomcat/bin/startup.sh &
配置nginx代理
# 备份原有配置文件
[root@ansible-server ~]#  cp default.conf default.conf.bak
# 添加jspgou.conf配置文件
[root@ansible-server ~]#  vim /etc/nginx/conf.d/jspgou.conf
server {listen       80;server_name  localhost;location / {proxy_pass http://10.31.162.25:8080;proxy_set_header Host $host:$server_port;proxy_set_header X-Real-IP $remote_addr;proxy_set_header X-Forwarded-For $proxy_add_x_forwarded_for;}}
# 重启nginx
[root@ansible-server ~]#  systemctl restart nginx
测试
直接访问代理服务器即可
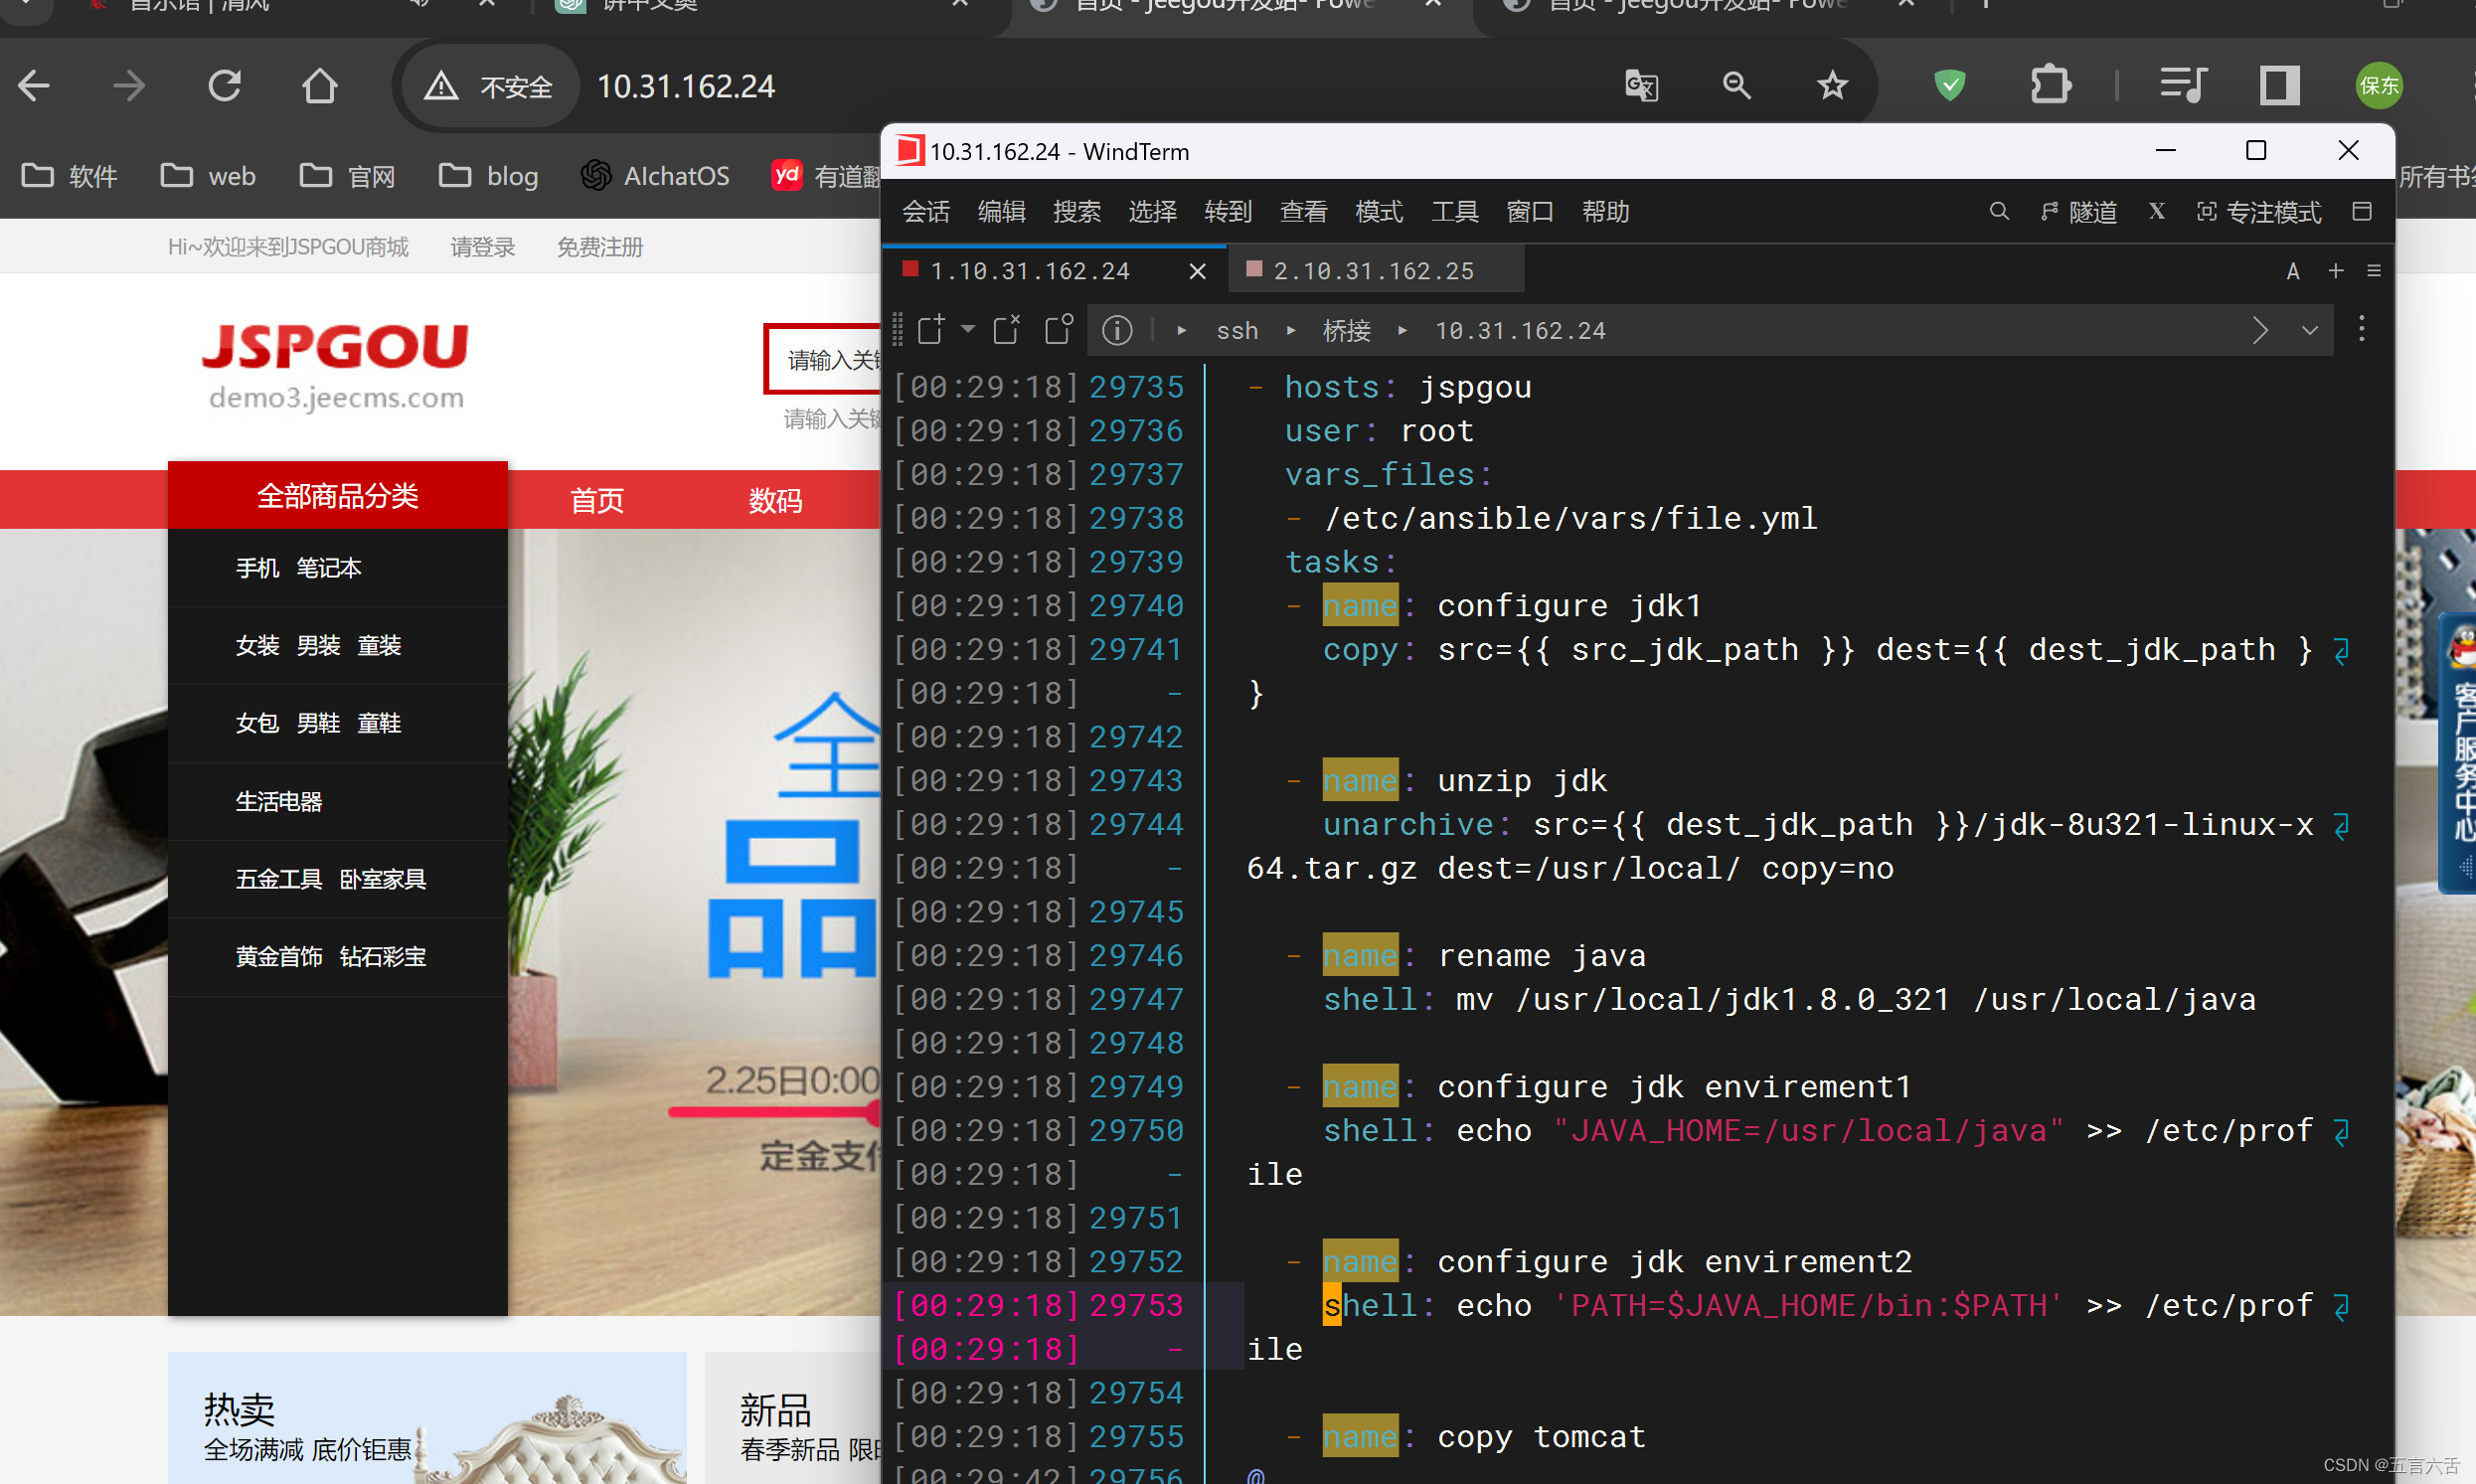
看到该界面,我们的操作就成功了