【音视频 ffmpeg 学习】 RTMP推流 mp4文件
1.RTMP(实时消息传输协议)是Adobe 公司开发的一个基于TCP的应用层协议。
2.RTMP协议中基本的数据单元称为消息(Message)。
3.当RTMP协议在互联网中传输数据的时候,消息会被拆分成更小的单元,称为消息块(Chunk)。
(1). linux 环境准备
安装nginx 和 rtmp模块
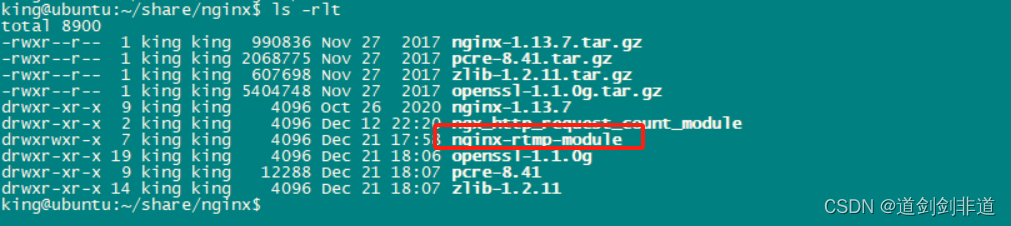
下载nginx安装包
下载地址:http://nginx.org/download
下载 rtmp模块 到nginx 模块下
wget https://github.com/arut/nginx-rtmp-module/archive/master.zip
(2)编译
到这个目录下
执行命令
./configure --prefix=/usr/local/nginx --with-http_realip_module --with-http_addition_module --with-http_ssl_module --with-http_gzip_static_module --with-http_secure_link_module --with-http_stub_status_module --with-stream --with-pcre=/home/king/share/nginx/pcre-8.41 --with-zlib=/home/king/share/nginx/zlib-1.2.11 --with-openssl=/home/king/share/nginx/openssl-1.1.0g --add-module=/home/king/share/nginx/ngx_http_request_count_modulemake && sudo make install修改 配置文件
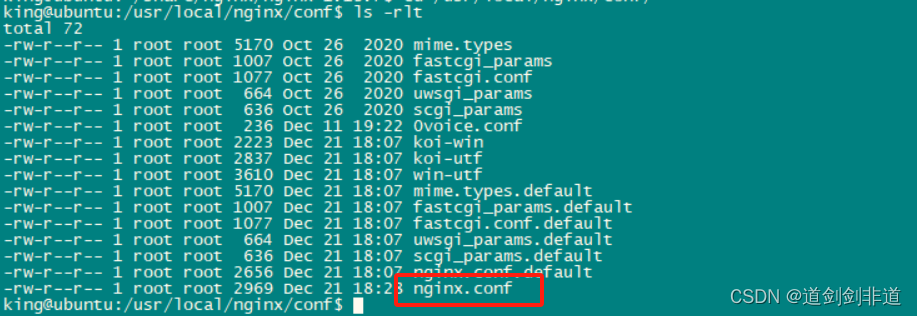
vim /usr/local/nginx/conf/nginx.conf增加以下 rtmp {          server {            listen 1935;         # 端口  chunk_size 4000;application live { # 请求路径     live on;        }}
}
配置完成启动服务
sudo ./sbin/nginx -c conf/nginx.confnetstat -anop |grep 1935
push.h
#ifndef PUSHSTREAMTHREAD_H
#define PUSHSTREAMTHREAD_H#include <QObject>
#include <QThread>
#include <QDebug>extern "C" {#include "libavdevice/avdevice.h"    // 调用输入设备需要的头文件#include "libavcodec/avcodec.h"#include "libavformat/avformat.h"#include "libavutil/avutil.h"#include "libswscale/swscale.h"#include "libavutil/imgutils.h"#include "libavutil/pixfmt.h"#include "libavutil/error.h"#include "libswresample/swresample.h"#include "libavfilter/avfilter.h"#include "libavutil/time.h"
}class PushStreamThread : public QThread
{Q_OBJECT
public:PushStreamThread(QThread *parent =nullptr);~PushStreamThread();void run() override;void set_stop_flag(bool stop);private:bool stop_flag = false;const AVOutputFormat *ofmt;AVFormatContext *ifmt_ctx = nullptr;  //输入上下文AVFormatContext *ofmt_ctx = nullptr;  //输出上下文const char *in_filename;const char *outUrl;int ret;uint32_t i = 0;int videoIndex = -1;int frame_index = 0;int64_t start_time = 0;};#endif // PUSHSTREAMTHREAD_H
push.cpp
#include "pushstreamthread.h"PushStreamThread::PushStreamThread(QThread *parent):QThread(parent)
{avdevice_register_all();avformat_network_init();
}PushStreamThread::~PushStreamThread()
{if(ifmt_ctx){avformat_close_input(&ifmt_ctx);}if (ifmt_ctx && ofmt_ctx->pb && !(ofmt_ctx->flags & AVFMT_NOFILE))avio_close(ofmt_ctx->pb);if (ifmt_ctx) {avformat_free_context(ofmt_ctx);}
}void PushStreamThread::run()
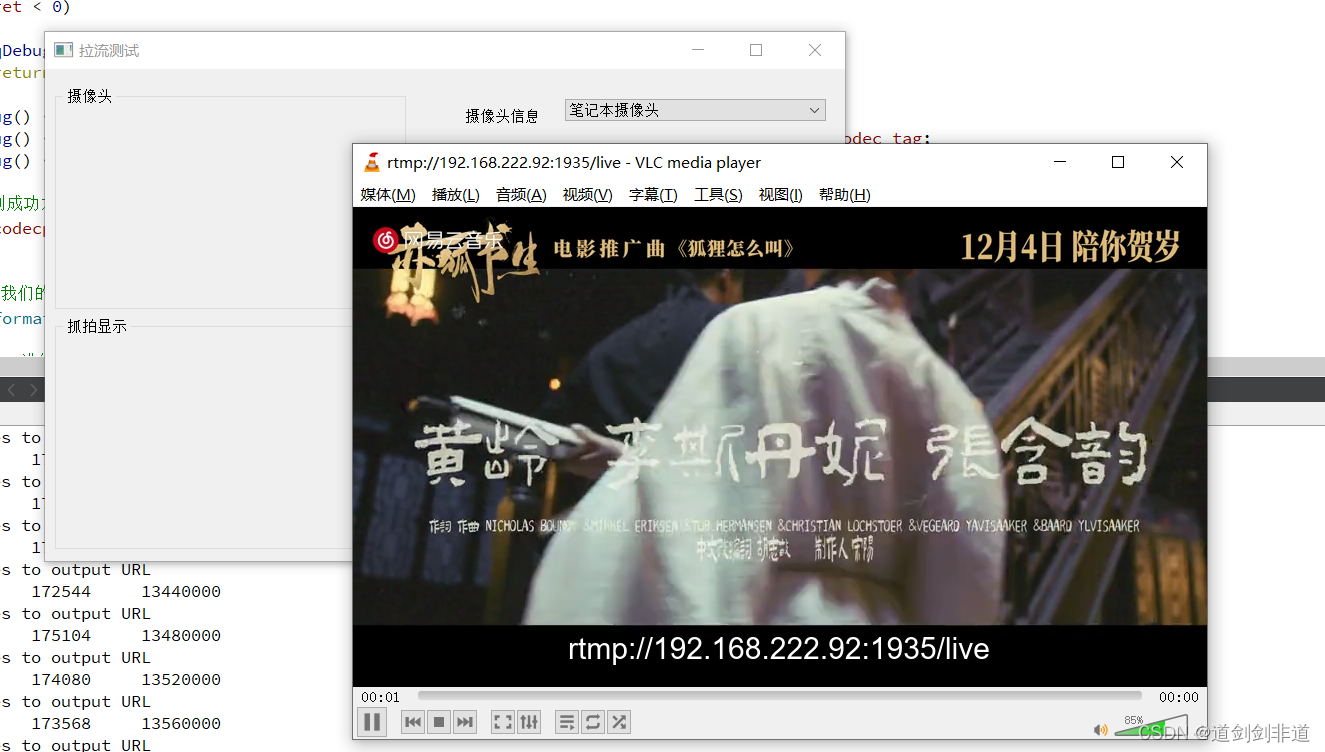
{qDebug() << "run:" << QThread::currentThreadId();//in_filename = "cuc_ieschool.mov";//in_filename = "cuc_ieschool.mkv";//in_filename = "cuc_ieschool.ts";//in_filename = "cuc_ieschool.mp4";//in_filename = "cuc_ieschool.h264";in_filename = "hlzmj.mp4";//输入URL(Input file URL) video=ov9734_azurewave_camera test.mp4//in_filename = "shanghai03_p.h264";outUrl = "rtmp://192.168.222.92:1935/live";//输出 URL(Output URL)[RTMP] rtmp://localhost/publishlive/livestream//out_filename = "rtp://233.233.233.233:6666";//输出 URL(Output URL)[UDP]//const AVInputFormat *ifmt = av_find_input_format("dshow");//AVDictionary *options = nullptr;// av_dict_set(&options, "video_size", "640*480", 0);
// av_dict_set(&options, "framerate", "30", 0);//输入(Input)ret = avformat_open_input(&ifmt_ctx, in_filename, 0, 0);if (ret < 0) {qDebug() << "ifmt_ctx avformat_open_input failed:" << ret;return;}ret = avformat_find_stream_info(ifmt_ctx, 0);if (ret < 0) {qDebug()<< "ifmt_ctx avformat_find_stream_info failed:"<< ret;return;}ret = avformat_alloc_output_context2(&ofmt_ctx, NULL, "flv", outUrl);if (ret < 0){qDebug() << "ofmt_ctx avformat_alloc_output_context2 failed";return;}ofmt = ofmt_ctx->oformat;for (i = 0; i < ifmt_ctx->nb_streams; i++){//这里开始要创建一个新的AVStreamAVStream *stream = ifmt_ctx->streams[i];//判断是否是videoIndex。这里先记录下视频流。后面会对这个流进行操作if (stream->codecpar->codec_type == AVMEDIA_TYPE_VIDEO){videoIndex = i;}//创建输出流const AVCodec *c = avcodec_find_decoder(stream->codecpar->codec_id);AVStream *os = avformat_new_stream(ofmt_ctx, c);//应该将编解码器的参数从input中复制过来// 这里要注意的是,因为 os->codec这样的取法,已经过时了。所以使用codecparret = avcodec_parameters_copy(os->codecpar, stream->codecpar);if (ret < 0){qDebug() << "ofmt_ctx os->codecpar avcodec_parameters_copy failed";return;}qDebug() << "avcodec_parameters_copy success!" ;qDebug() << "avcodec_parameters_copy success! in stream codec tag" << stream->codecpar->codec_tag;qDebug() << "avcodec_parameters_copy success! out stream codec tag" << os->codecpar->codec_tag ;//复制成功之后。还需要设置 codec_tag(编码器的信息?)os->codecpar->codec_tag = 0;}//检查一遍我们的输出av_dump_format(ofmt_ctx, 0, outUrl, 1);//开始使用io进行推流//通过AVIO_FLAG_WRITE这个标记位,打开输出的AVFormatContext->AVIOContextret = avio_open(&ofmt_ctx->pb, outUrl, AVIO_FLAG_WRITE);if (ret < 0){qDebug() << "ofmt_ctx->pb avio_open failed" << ret;return;}qDebug() << "avio_open success!";//先写头ret = avformat_write_header(ofmt_ctx, 0);if (ret < 0){qDebug() << "ofmt_ctx avformat_write_header failed" << ret;return;}//取得到每一帧的数据,写入AVPacket pkt;//为了让我们的代码发送流的速度,相当于整个视频播放的数据。需要记录程序开始的时间//后面再根据,每一帧的时间。做适当的延迟,防止我们的代码发送的太快了long long start_time = av_gettime();//记录视频帧的index,用来计算ptslong long frame_index = 0;while (!stop_flag){//输入输出视频流AVStream *in_stream, *out_stream;//从输入流中读取数据 frame到AVPacket当中ret = av_read_frame(ifmt_ctx, &pkt);if (ret < 0){qDebug() << "ifmt_ctx av_read_frame break";break;}//没有显示时间的时候,才会进入计算和校验//没有封装格式的裸流(例如H.264裸流)是不包含PTS、DTS这些参数的。在发送这种数据的时候,需要自己计算并写入AVPacket的PTS,DTS,duration等参数。如果没有pts,则进行计算if (pkt.pts == AV_NOPTS_VALUE){//AVRational time_base:时基。通过该值可以把PTS,DTS转化为真正的时间。//先得到流中的time_baseAVRational time_base = ifmt_ctx->streams[videoIndex]->time_base;//开始校对pts和 dts.通过time_base和dts转成真正的时间//得到的是每一帧的时间/*r_frame_rate 基流帧速率 。取得是时间戳内最小的帧的速率 。每一帧的时间就是等于 time_base/r_frame_rateav_q2d 转化为double类型*/int64_t calc_duration = (double)AV_TIME_BASE / av_q2d(ifmt_ctx->streams[videoIndex]->r_frame_rate);//配置参数 这些时间,都是通过 av_q2d(time_base) * AV_TIME_BASE 来转成实际的参数pkt.pts = (double)(frame_index * calc_duration) / (double)av_q2d(time_base) * AV_TIME_BASE;//一个GOP中,如果存在B帧的话,只有I帧的dts就不等于ptspkt.dts = pkt.pts;pkt.duration = (double)calc_duration / (double)av_q2d(time_base) * AV_TIME_BASE;}//开始处理延迟.只有等于视频的帧,才会处理if (pkt.stream_index == videoIndex){//需要计算当前处理的时间和开始处理时间之间的间隔??//0.先取时间基数AVRational time_base = ifmt_ctx->streams[videoIndex]->time_base;//AV_TIME_BASE_Q 用小数表示的时间基数。等于时间基数的倒数AVRational time_base_r = { 1, AV_TIME_BASE };//计算视频播放的时间. 公式等于 pkt.dts * time_base / time_base_r`//.其实就是 stream中的time_base和定义的time_base直接的比例int64_t pts_time = av_rescale_q(pkt.dts, time_base, time_base_r);//计算实际视频的播放时间。 视频实际播放的时间=代码处理的时间??int64_t now_time = av_gettime() - start_time;qDebug() << time_base.num << " " << time_base.den << " " << pkt.dts << " " << pkt.pts << " " << pts_time;//如果显示的pts time 比当前的时间迟,就需要手动让程序睡一会,再发送出去,保持当前的发送时间和pts相同if (pts_time > now_time){//睡眠一段时间(目的是让当前视频记录的播放时间与实际时间同步)av_usleep((unsigned int)(pts_time - now_time));}}//重新计算一次pts和dts.主要是通过 in_s的time_base 和 out_s的time_base进行计算和校对//先取得streamin_stream = ifmt_ctx->streams[pkt.stream_index];out_stream = ofmt_ctx->streams[pkt.stream_index];//重新开始指定时间戳//计算延时后,重新指定时间戳。 这次是根据 in_stream 和 output_stream之间的比例//计算dts时,不再直接用pts,因为如有有B帧,就会不同//pts,dts,duration都也相同pkt.pts = av_rescale_q_rnd(pkt.pts, in_stream->time_base, out_stream->time_base, (AVRounding)(AV_ROUND_NEAR_INF | AV_ROUND_PASS_MINMAX));pkt.dts = av_rescale_q_rnd(pkt.dts, in_stream->time_base, out_stream->time_base, (AVRounding)(AV_ROUND_NEAR_INF | AV_ROUND_PASS_MINMAX));pkt.duration = (int)av_rescale_q(pkt.duration, in_stream->time_base, out_stream->time_base);//再次标记字节流的位置,-1表示不知道字节流的位置pkt.pos = -1;//如果当前的帧是视频帧,则将我们定义的frame_index往后推if (pkt.stream_index == videoIndex){qDebug() << "Send" << frame_index << "video frames to output URL" ;frame_index++;}//发送!!!ret = av_interleaved_write_frame(ofmt_ctx, &pkt);if (ret < 0){qDebug() << "发送数据包出错";break;}//使用完了,记得释放av_packet_unref(&pkt);}//写文件尾(Write file trailer)av_write_trailer(ofmt_ctx);if(ifmt_ctx){avformat_close_input(&ifmt_ctx);}if (ofmt_ctx && ofmt_ctx->pb && !(ofmt_ctx->flags & AVFMT_NOFILE))avio_close(ofmt_ctx->pb);if (ifmt_ctx) {avformat_free_context(ofmt_ctx);}
}void PushStreamThread::set_stop_flag(bool stop)
{stop_flag = stop;
}使用 vcl 播放流