python 通过opencv及face_recognition识别人脸
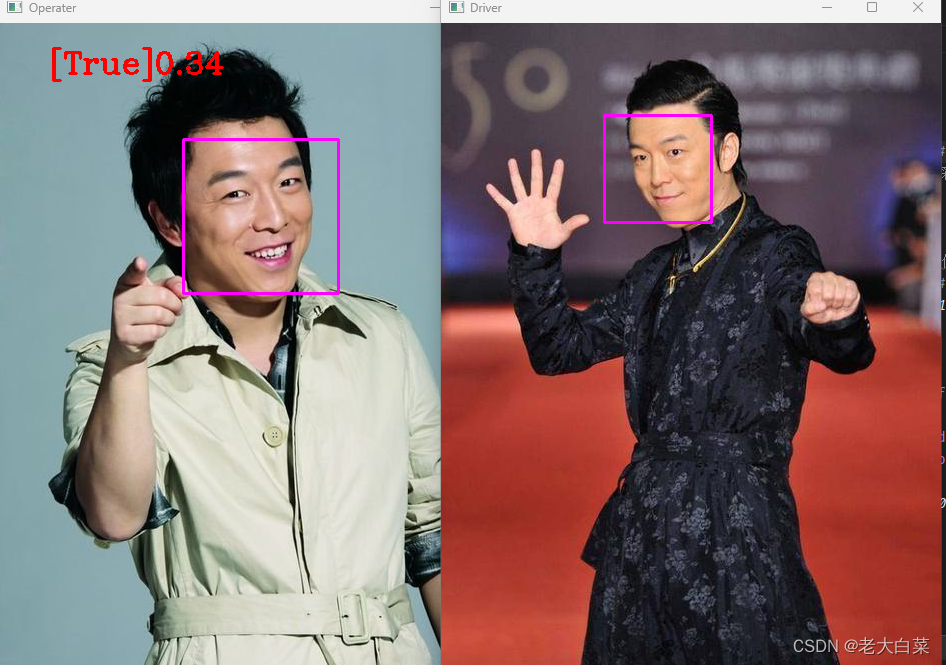
效果:
使用Python的cv2库和face_recognition库来进行人脸检测和比对的
0是代表一样
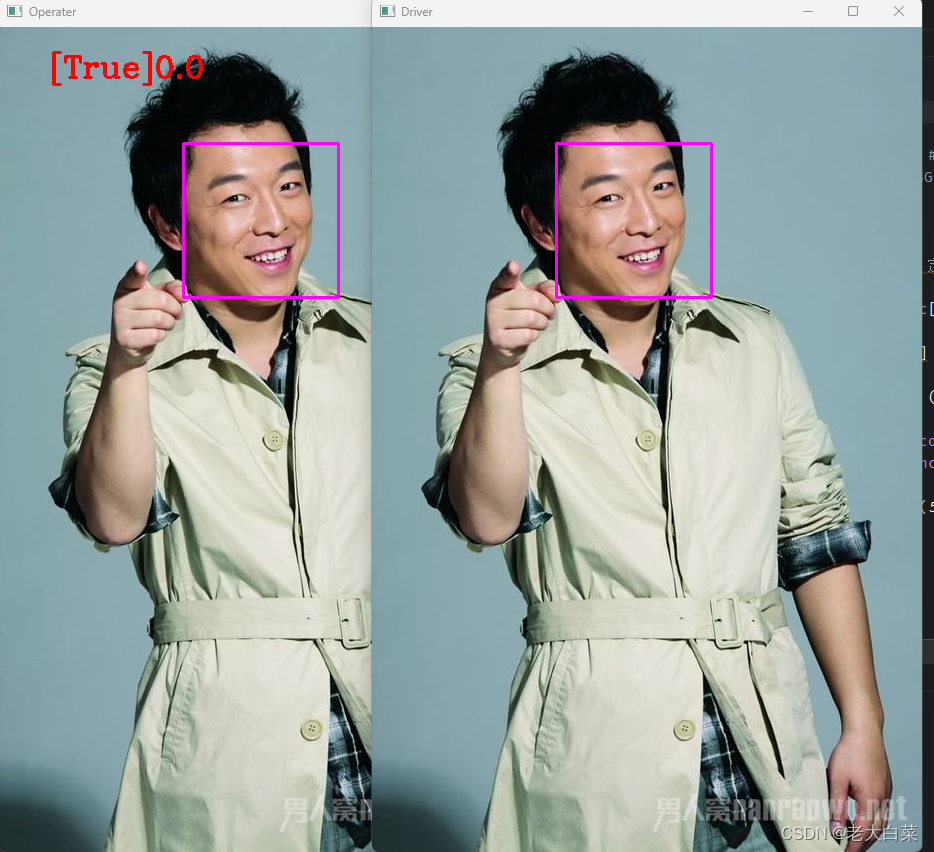 认为是同一人。
代码:
pip install opencv-python
pip install face_recognition
# 导入cv2库,用于图像处理
import cv2
# 导入face_recognition库,用于人脸识别
import face_recognition# 使用face_recognition库加载名为'face1.jpeg'的图片,并存储在reference_image变量中
reference_image = face_recognition.load_image_file('face1.jpeg')
# 使用cv2库将BGR彩色图像转化为RGB彩色图像,因为face_recognition库需要RGB格式的图像
reference_image = cv2.cvtColor(reference_image, cv2.COLOR_BGR2RGB)# 同样地,加载另一张名为'face3.jpg'的图片,并存储在test_image变量中
test_image = face_recognition.load_image_file('face3.jpg')
# 也将其从BGR格式转化为RGB格式
test_image = cv2.cvtColor(test_image, cv2.COLOR_BGR2RGB)# 使用face_recognition库定位reference_image图片中的人脸位置,返回的是一个列表,其中每个元素代表一个人脸的位置
# 这里我们假设只有一个人脸,所以直接取第一个元素
reference_face_location = face_recognition.face_locations(reference_image)[0]
# 提取reference_image图片中人脸的面部特征,返回一个列表,每个元素代表一个人脸的特征编码
# 同样地,我们假设只有一个人脸,所以直接取第一个元素
reference_face_encoding = face_recognition.face_encodings(reference_image)[0]# 在reference_image图片上框出人脸位置,使用紫色矩形框表示
cv2.rectangle(reference_image, (reference_face_location[3], reference_face_location[0]),(reference_face_location[1], reference_face_location[2]), (255, 0, 255), 2)# 对另一张图片test_image也做同样的人脸定位和特征提取操作
test_face_location = face_recognition.face_locations(test_image)[0]
test_face_encoding = face_recognition.face_encodings(test_image)[0]
# 在test_image图片上也框出人脸位置
cv2.rectangle(test_image, (test_face_location[3], test_face_location[0]),(test_face_location[1], test_face_location[2]), (255, 0, 255), 2)# 使用face_recognition库比较两个人脸的相似度,返回一个布尔值列表,表示每张测试图片是否与已知人脸匹配
# 这里我们只有一个测试人脸和一个已知人脸,所以直接取列表的第一个元素作为结果
is_same_person = face_recognition.compare_faces([reference_face_encoding], test_face_encoding)[0]
# 计算两个人脸的欧氏距离,返回一个浮点数列表,表示每张测试图片与已知人脸的距离
# 同样地,我们直接取第一个元素作为结果
euclidean_distance = face_recognition.face_distance([reference_face_encoding], test_face_encoding)[0]# 打印相似度结果和欧氏距离
print(is_same_person, euclidean_distance)
# 在test_image图片上显示比对结果,包括相似度(True或False)和欧氏距离(保留两位小数)
cv2.putText(test_image, f'{is_same_person}{round(euclidean_distance, 2)}', (50, 50), cv2.FONT_HERSHEY_COMPLEX, 1,(0, 0, 255), 2)# 使用cv2库的imshow函数显示两张图片,分别命名为'Driver'和'Operator'
cv2.imshow('Driver', reference_image)
cv2.imshow('Operator', test_image)# 等待用户按键操作,参数0表示无限等待,直到用户按下一个键
key = cv2.waitKey(0)
# 如果用户按下的是ESC键(ASCII码为27),则关闭所有打开的窗口
if key == 27:cv2.destroyAllWindows()