源码安装mysql
使用源码安装mysql,这里选择的版本是mysql5.7.35 ,系统是Centos7.6
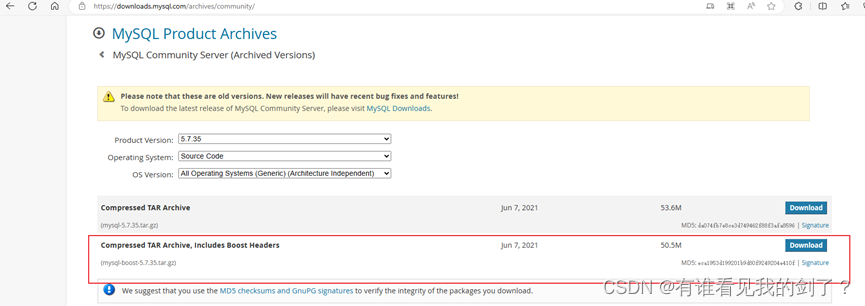
官网下载地址:https://downloads.mysql.com/archives/community/
-
下载源码压缩包
[root@localhost ~]# cd /opt[root@localhost opt]# wget https://downloads.mysql.com/archives/get/p/23/file/mysql-boost-5.7.35.tar.gz[root@localhost opt]# tar -xf mysql-boost-5.7.35.tar.gz -
下载依赖软件
[root@localhost ~]# yum install -y cmake gcc gcc-c++ ncurses-devel perl-Data-Dumper boost boost-doc boost-devel bzip2 openssl-devel libtirpc-devel.x86_64 -
编译安装
[root@localhost opt]# cd mysql-5.7.35/## 新建目录,存放编译产生的中间文件。因为不允许在源码目录下进行编译
[root@localhost mysql-5.7.35]# mkdir builder[root@localhost mysql-5.7.35]# cd builder/## 编辑源码
cmake ../ -DCMAKE_INSTALL_PREFIX=/usr/local/mysql -DMYSQL_DATADIR=/data/mysql -DSYSCONFDIR=/etc -DMYSQL_USER=mysql -DWITH_MYISAM_STORAGE_ENGINE=1 -DWITH_INNOBASE_STORAGE_ENGINE=1 -DMYSQL_UNIX_ADDR=/tmp/mysql.sock -DMYSQL_TCP_PORT=3306 -DEXTRA_CHARSETS=all -DDEFAULT_CHARSET=utf8mb4 -DDEFAULT_COLLATION=utf8mb4_general_ci -DWITH_DEBUG=0 -DMYSQL_MAINTAINER_MODE=0 -DWITH_SYSTEMD=1 -DDOWNLOAD_BOOST=1 -DWITH_BOOST=../boost
-
-DCMAKE_INSTALL_PREFIX=/usr/local/mysql指定安装目录 -
-DMYSQL_DATADIR=/data/mysql数据存放目录 -
-DSYSCONFDIR=/etc配置文件存放目录 -
-DMYSQL_USER=mysql启动用户 -
-DWITH_MYISAM_STORAGE_ENGINE=1安装MyISAM引擎 -
-DWITH_INNOBASE_STORAGE_ENGINE=1安装InnoDB引擎 -
-DWITH_ARCHIVE_STORAGE_ENGINE=1安装Archive引擎 -
-DWITH_MEMORY_STORAGE_ENGINE=1安装Memory引擎 -
-DWITH_FEDERATED_STORAGE_ENGINE=1安装Federated引擎 -
-DWITH_PARTITION_STORAGE_ENGINE=1安装Partition引擎 -
-DWITH_READLINE=1MySQL的readline library -
-DMYSQL_UNIX_ADDR=/tmp/mysql.socksock文件的路径 -
-DMYSQL_TCP_PORT=3306MySQL的监听端口 -
-DENABLED_LOCAL_INFILE=1启用加载本地数据 -
-DENABLE_DOWNLOADS=1编译时允许自主下载相关文件 -
-DEXTRA_CHARSETS=all使MySQL支持所有的扩展字符 -
-DDEFAULT_CHARSET=utf8mb4设置默认字符集为utf8mb4 -
-DDEFAULT_COLLATION=utf8mb4_general_ci设置默认字符校对 -
-DWITH_DEBUG=0禁用调试模式 -
-DMYSQL_MAINTAINER_MODE=0是否启用mysql维护器特定的开发环境 -
-DDOWNLOAD_BOOST=1允许在线更新boost库 -
-DWITH_BOOST=…/boost指定boost安装路径## 生成二进制安装程序
[root@localhost builder]# make## 安装
[root@localhost builder]# make install
-
创建用户,创建目录,并授权
## 创建数据存放目录,编译的时候有指定目录,这里创建指定的目录即可[root@localhost builder]# mkdir -p /data/mysql## 创建日志存放目录,pid存放目录
[root@localhost builder]# mkdir -p /var/log/mysqld /var/run/mysqld[root@localhost builder]# touch /var/run/mysqld/mysql.pid [root@localhost builder]# touch /var/log/mysqld/mysqld.log## 创建用户
useradd --system -s /sbin/nologin mysql# 授权目录权限给用户
[root@localhost ~]# chown -R mysql:mysql /var/log/mysqld # 日志目录[root@localhost ~]# chown -R mysql:mysql /var/run/mysqld # 存放目录[root@localhost ~]# chown -R mysql:mysql /usr/local/mysql/ # 安装目录[root@localhost ~]# chown -R mysql:mysql /data/mysql/ # 数据存放目录 -
修改配置文件
[root@localhost ~]# vim /etc/my.cnf[mysqld] basedir=/usr/local/mysql datadir=/data/mysql socket=/tmp/mysql.sock[mysqld_safe] log-error=/var/log/mysqld/mysqld.log pid-file=/var/run/mysqld/mysql.pid -
设置环境变量
[root@localhost ~]# vim /etc/profile# mysql export MYSQL_HOME=/usr/local/mysql export PATH=$PATH:$MYSQL_HOME/bin## 加载环境变量,并测试
source /etc/profilemysql --versionmysql Ver 14.14 Distrib 5.7.35, for Linux (x86_64) using EditLine wrapper -
初始化数据库
## 初始化数据库,并生成临时密码
[root@localhost ~]# mysqld --initialize --user=mysql --basedir=/usr/local/mysql/ --datadir=/data/mysql2023-11-30T02:02:22.576131Z 0 [Warning] TIMESTAMP with implicit DEFAULT value is deprecated. Please use --explicit_defaults_for_timestamp server option (see documentation for more details). 2023-11-30T02:02:23.167149Z 0 [Warning] InnoDB: New log files created, LSN=45790 2023-11-30T02:02:23.259734Z 0 [Warning] InnoDB: Creating foreign key constraint system tables. 2023-11-30T02:02:23.324006Z 0 [Warning] No existing UUID has been found, so we assume that this is the first time that this server has been started. Generating a new UUID: 808acff3-8f24-11ee-a4dd-000c29b3fe28. 2023-11-30T02:02:23.325188Z 0 [Warning] Gtid table is not ready to be used. Table 'mysql.gtid_executed' cannot be opened. 2023-11-30T02:02:23.765959Z 0 [Warning] A deprecated TLS version TLSv1 is enabled. Please use TLSv1.2 or higher. 2023-11-30T02:02:23.766008Z 0 [Warning] A deprecated TLS version TLSv1.1 is enabled. Please use TLSv1.2 or higher. 2023-11-30T02:02:23.766902Z 0 [Warning] CA certificate ca.pem is self signed. 2023-11-30T02:02:24.007794Z 1 [Note] A temporary password is generated for root@localhost: Vm;n/i<44P(P -
将mysql加入到systemd进程中
[root@localhost ~]# cd /opt/mysql-5.7.35/builder[root@localhost builder]# cp scripts/mysqld.service /usr/lib/systemd/system/ -
启动mysql并修改密码
## 启动mysql并加入到开启自启
[root@localhost ~]# systemctl start mysqld [root@localhost ~]# systemctl enable mysqld## 修改mysql密码
在mysql初始化的时候会生成临时密码[root@localhost log]# mysql -uroot -p'Vm;n/i<44P(P'mysql: [Warning] Using a password on the command line interface can be insecure. Welcome to the MySQL monitor. Commands end with ; or \g. Your MySQL connection id is 2 Server version: 5.7.35Copyright (c) 2000, 2021, Oracle and/or its affiliates.Oracle is a registered trademark of Oracle Corporation and/or its affiliates. Other names may be trademarks of their respective owners.Type 'help;' or '\h' for help. Type '\c' to clear the current input statement.mysql>mysql> ALTER USER 'root'@'localhost' IDENTIFIED WITH mysql_native_password BY 'your_password'; # your_password 设置为你的密码mysql> use mysql; mysql> update user set host ='%' where user='root'; # 设置root可远程访问,如不需要可忽略mysql> FLUSH PRIVILEGES; # 刷新权限表## 登录测试
[root@localhost log]# mysql -uroot -p'your_password'mysql: [Warning] Using a password on the command line interface can be insecure. Welcome to the MySQL monitor. Commands end with ; or \g. Your MySQL connection id is 3 Server version: 5.7.35 Source distributionCopyright (c) 2000, 2021, Oracle and/or its affiliates.Oracle is a registered trademark of Oracle Corporation and/or its affiliates. Other names may be trademarks of their respective owners.Type 'help;' or '\h' for help. Type '\c' to clear the current input statement.mysql>