Maven项目下详细的SSM整合流程
文章目录
- 🎉SSM整合流程
- 一、两个容器整合✨
- 1、先准备好数据库config.properties连接、mybatis-config.xml🎊
- 2、容器一:优先配置spring.xml文件🎊
- 3、容器二:配置springMVC.xml文件🎊
- 4、Tomcat整合spring容器、springMVC容器,webapp文件下的web.xml文件🎊
- 二、一个容器整合
- 1、 现在去掉了spring.xml文件,将spring.xml文件的内容放到springMVC🎊
- 2、Tomcat整合springMVC容器,webapp文件下的web.xml文件🎊
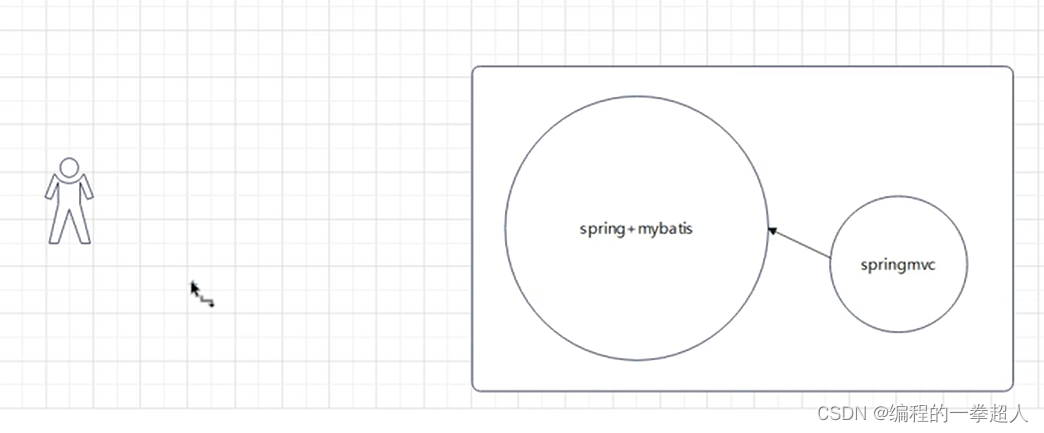
🎉SSM整合流程
分为两种:两个容器整合
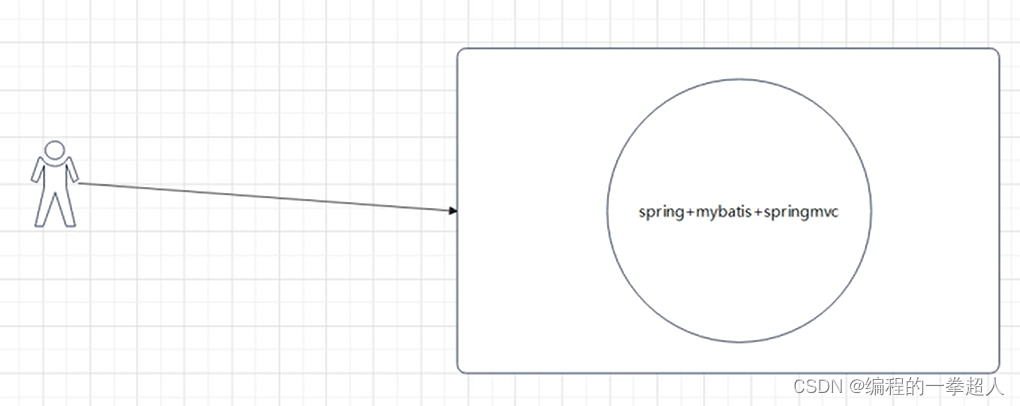
一个容器整合
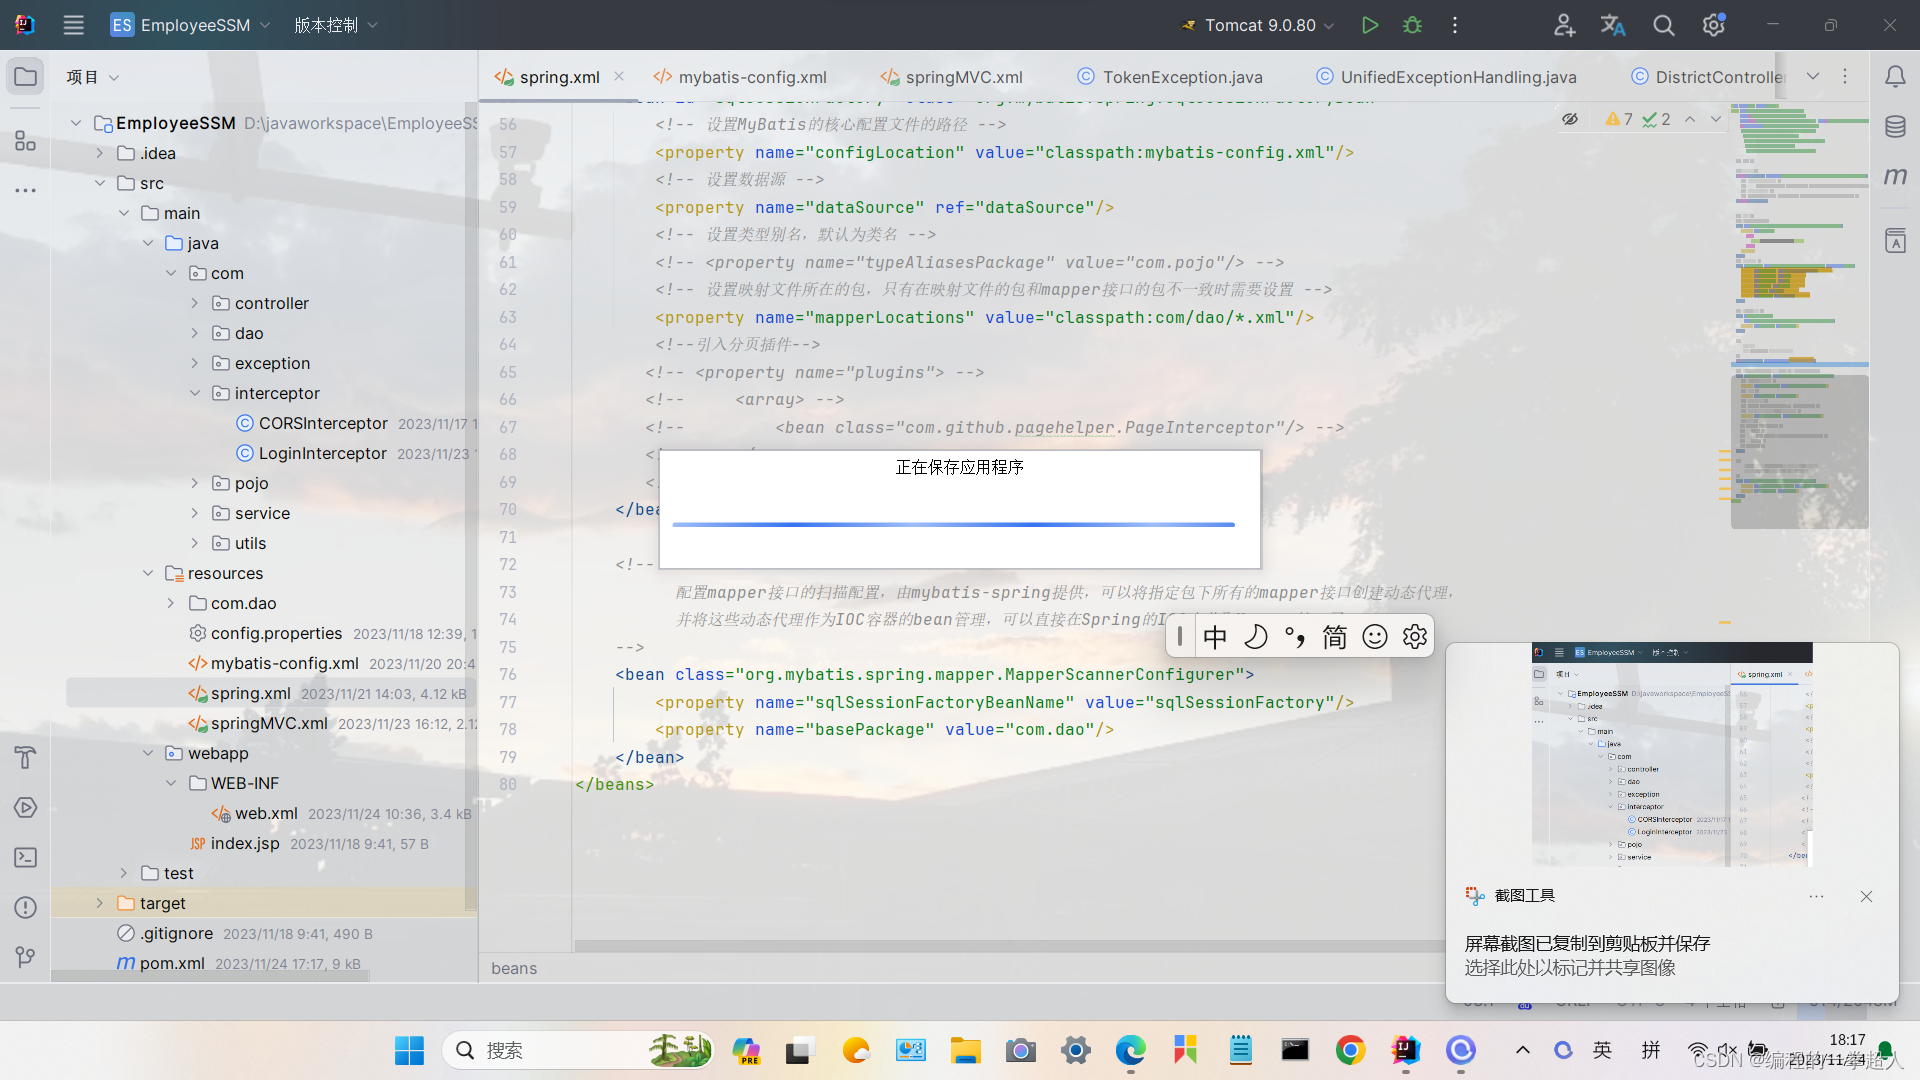
本项目的路径参考:
注意:优先maven项目的pom.xml文件里导入jar包依赖:
<properties><maven.compiler.source>8</maven.compiler.source><maven.compiler.target>8</maven.compiler.target><project.build.sourceEncoding>UTF-8</project.build.sourceEncoding><aaa>4.3.8.RELEASE</aaa></properties><dependencies><dependency><groupId>com.auth0</groupId><artifactId>java-jwt</artifactId><exclusions><exclusion><groupId>com.fasterxml.jackson.core</groupId><artifactId>jackson-databind</artifactId></exclusion></exclusions><version>3.19.2</version></dependency><dependency><groupId>org.dom4j</groupId><artifactId>dom4j</artifactId><version>2.0.0</version><type>pom</type><!--依赖的类型,声明引入的依赖的类型,值一般有jar、war、pom--></dependency><dependency><groupId>junit</groupId><artifactId>junit</artifactId><version>4.11</version><scope>test</scope></dependency><!-- spring的webmvc的依赖 --><dependency><groupId>org.springframework</groupId><artifactId>spring-webmvc</artifactId><version>${aaa}</version></dependency><dependency><groupId>org.springframework</groupId><artifactId>spring-web</artifactId><version>${aaa}</version></dependency><dependency><groupId>org.springframework</groupId><artifactId>spring-tx</artifactId><version>${aaa}</version></dependency><dependency><groupId>org.springframework</groupId><artifactId>spring-core</artifactId><version>4.3.8.RELEASE</version></dependency><dependency><groupId>org.springframework</groupId><artifactId>spring-beans</artifactId><version>4.3.8.RELEASE</version></dependency><!-- Mysql的依赖 --><dependency><groupId>mysql</groupId><artifactId>mysql-connector-java</artifactId><version>8.0.28</version></dependency><!-- mybatis的依赖 --><dependency><groupId>org.mybatis</groupId><artifactId>mybatis</artifactId><version>3.5.6</version></dependency><!--数据库连接池的依赖 --><dependency><groupId>commons-dbcp</groupId><artifactId>commons-dbcp</artifactId><version>1.4</version></dependency><!-- spring-mybatis的依赖 --><dependency><groupId>org.mybatis</groupId><artifactId>mybatis-spring</artifactId><version>1.3.2</version></dependency><!-- springjdbc的依赖 --><dependency><groupId>org.springframework</groupId><artifactId>spring-jdbc</artifactId><version>4.3.8.RELEASE</version></dependency><!-- aspectj的依赖 --><dependency><groupId>org.aspectj</groupId><artifactId>aspectjweaver</artifactId><version>1.9.4</version></dependency><!-- 添加日志log4j的依赖 --><dependency><groupId>log4j</groupId><artifactId>log4j</artifactId><version>1.2.17</version></dependency><!-- jackson的依赖 --><!-- <dependency>--><!-- <groupId>com.fasterxml.jackson.core</groupId>--><!-- <artifactId>jackson-databind</artifactId>--><!-- <version>2.9.7</version>--><!-- </dependency>--><!-- 依赖 --><dependency><groupId>aopalliance</groupId><artifactId>aopalliance</artifactId><version>1.0</version></dependency><dependency><groupId>org.apache.tomcat</groupId><artifactId>tomcat-servlet-api</artifactId><version>8.0.28</version><scope>provided</scope><!-- 生命周期:test --></dependency><dependency><groupId>javax.servlet</groupId><artifactId>javax.servlet-api</artifactId><version>3.0.1</version><scope>provided</scope></dependency><dependency><groupId>javax.servlet.jsp</groupId><artifactId>jsp-api</artifactId><version>2.1</version><scope>provided</scope></dependency><!-- json依赖 --><dependency><groupId>com.alibaba</groupId><artifactId>fastjson</artifactId><version>1.2.71</version></dependency><!--导入lombok依赖 --><dependency><groupId>org.projectlombok</groupId><artifactId>lombok</artifactId><version>1.18.8</version></dependency><dependency><groupId>javax.servlet</groupId><artifactId>jstl</artifactId><version>1.2</version></dependency><dependency><groupId>taglibs</groupId><artifactId>standard</artifactId><version>1.1.2</version></dependency><dependency><groupId>org.apache.commons</groupId><artifactId>commons-lang3</artifactId><version>3.3.2</version></dependency><dependency><groupId>org.apache.httpcomponents</groupId><artifactId>httpclient</artifactId><version>4.5.5</version></dependency><!-- https://mvnrepository.com/artifact/com.mchange/c3p0 --><dependency><groupId>com.mchange</groupId><artifactId>c3p0</artifactId><version>0.9.5.2</version></dependency><!-- https://mvnrepository.com/artifact/com.google.code.gson/gson --><dependency><groupId>com.google.code.gson</groupId><artifactId>gson</artifactId><version>2.8.5</version></dependency><!-- https://mvnrepository.com/artifact/org.jdom/jdom2 --><dependency><groupId>org.jdom</groupId><artifactId>jdom2</artifactId><version>2.0.6</version></dependency><!-- https://mvnrepository.com/artifact/com.alibaba/fastjson --><dependency><groupId>com.alibaba</groupId><artifactId>fastjson</artifactId><version>1.2.71</version></dependency><dependency><groupId>org.testng</groupId><artifactId>testng</artifactId><version>RELEASE</version><scope>compile</scope></dependency><dependency><groupId>commons-fileupload</groupId><artifactId>commons-fileupload</artifactId><version>1.4</version></dependency><!-- redis客户端jar --><dependency><groupId>redis.clients</groupId><artifactId>jedis</artifactId><version>2.7.3</version></dependency><!-- spring-redis实现 --><dependency><groupId>org.springframework.data</groupId><artifactId>spring-data-redis</artifactId><version>1.7.2.RELEASE</version></dependency><dependency><groupId>io.jsonwebtoken</groupId><artifactId>jjwt-api</artifactId><version>0.11.2</version></dependency><dependency><groupId>io.jsonwebtoken</groupId><artifactId>jjwt-impl</artifactId><version>0.11.2</version></dependency><dependency><groupId>io.jsonwebtoken</groupId><artifactId>jjwt-jackson</artifactId><version>0.11.2</version></dependency></dependencies>
一、两个容器整合✨
1、先准备好数据库config.properties连接、mybatis-config.xml🎊
(1)数据库config.properties连接
driver=com.mysql.cj.jdbc.Driver
url=jdbc:mysql://localhost:3306/emp?serverTimeZone=Asia/ShangHai&useUnicode=true&characterEncoding=utf8&useSSL=false
username=root
password=nigx=0128
(2)mybatis-config.xml
<?xml version="1.0" encoding="UTF-8" ?>
<!DOCTYPE configurationPUBLIC "-//mybatis.org//DTD Config 3.0//EN""http://mybatis.org/dtd/mybatis-3-config.dtd"><configuration><!-- <properties resource="config.properties"> --><!-- </properties> --><settings><!--将表中字段的下划线自动转换为驼峰--><setting name="mapUnderscoreToCamelCase" value="true"/><setting name="logImpl" value="STDOUT_LOGGING"/><!-- 如果需要更改一级缓存的范围,可以在Mybatis的配置文件中,在下通过localCacheScope指定。 --><!-- <setting name="localCacheScope" value="STATEMENT"/> --></settings><!-- 类型别名配置各个标签时,需要遵守前后顺序--><typeAliases><package name="com.pojo"/></typeAliases><!-- <typeAliases>--><!-- <typeAlias alias="user" type="com.pojo.User"></typeAlias>--><!-- <typeAlias type="com.pojo.Employee"></typeAlias>--><!-- <typeAlias type="com.pojo.Log"></typeAlias>--><!-- <typeAlias type="com.pojo.Dept"></typeAlias>--><!-- </typeAliases>--><!-- environments:配置数据库的连接环境信息,可以配置多个environment,通过default属性切换不同的environment --><!-- <environments default="development"> --><!-- <environment id="development"> --><!-- <transactionManager type="JDBC"/> --><!-- <!–数据库连接池–> --><!-- <dataSource type="POOLED"> --><!-- <!–数据库的连接信息–> --><!-- <property name="driver" value="${driver}"/> --><!-- <property name="url" value="${url}"/> --><!-- <property name="username" value="${username}"/> --><!-- <property name="password" value="${password}"/> --><!-- </dataSource> --><!-- </environment> --><!-- </environments> --><mappers><!--加载SQL映射文件--><!--<mapper resource="nigaoxian\mapper\UserMapper.xml"/>--><!-- Mapper 代理方式,在spring容器映射过就不需要配置了--><!-- <package name="com.dao"/> --></mappers>
</configuration>
2、容器一:优先配置spring.xml文件🎊
<?xml version="1.0" encoding="UTF-8"?>
<beans xmlns="http://www.springframework.org/schema/beans"xmlns:xsi="http://www.w3.org/2001/XMLSchema-instance"xmlns:context="http://www.springframework.org/schema/context" xmlns:tx="http://www.springframework.org/schema/tx"xsi:schemaLocation="http://www.springframework.org/schema/beanshttp://www.springframework.org/schema/beans/spring-beans.xsdhttp://www.springframework.org/schema/contexthttps://www.springframework.org/schema/context/spring-context.xsdhttp://www.springframework.org/schema/txhttp://www.springframework.org/schema/tx/spring-tx.xsd"><!-- 2*3+1 --><!--扫描组件(除控制层)--><context:component-scan base-package="com.service,com.service.serviceImpl,com.interceptor,com.exception"><!-- 按照注解进行排除,标注了指定注解的组件不要扫描 --><!--        <context:exclude-filter type="annotation" expression="org.springframework.stereotype.Controller"/>--><!-- 指定排除某个具体的类,按照类排除  --><!-- <context:exclude-filter type="assignable" expression="com.controller.EmpController"/> --></context:component-scan><!-- 配置数据源 --><!--引入config.properties--><bean class="org.springframework.beans.factory.config.PropertyPlaceholderConfigurer"><property name="locations"><list><value>classpath:config.properties</value></list></property></bean><!-- 配置数据参数与连接属性 --><bean id="dataSource" class="com.mchange.v2.c3p0.ComboPooledDataSource" destroy-method="close"><property name="driverClass" value="${driver}"></property><property name="maxPoolSize" value="100"></property><property name="minPoolSize" value="30"></property><property name="jdbcUrl" value="${url}"></property><property name="user" value="${username}"></property><property name="password" value="${password}"></property></bean><!-- 配置spring事务管理器 --><bean id="transactionManager"class="org.springframework.jdbc.datasource.DataSourceTransactionManager"><property name="dataSource" ref="dataSource"/></bean><!--开启事务的注解驱动,将使用注解 @Transactional 标识的方法或类中所有的方法进行事务关联--><tx:annotation-driven transaction-manager="transactionManager"/><!-- 配置SqlSessionFactoryBean,可以直接在Spring的IOC中获取SqlSessionFactory--><bean id="sqlSessionFactory" class="org.mybatis.spring.SqlSessionFactoryBean"><!-- 设置MyBatis的核心配置文件的路径 --><property name="configLocation" value="classpath:mybatis-config.xml"/><!-- 设置数据源 --><property name="dataSource" ref="dataSource"/><!-- 设置类型别名,默认为类名 --><!-- <property name="typeAliasesPackage" value="com.pojo"/> --><!-- 设置映射文件所在的包,只有在映射文件的包和mapper接口的包不一致时需要设置 --><property name="mapperLocations" value="classpath:com/dao/*.xml"/><!--引入分页插件--><!-- <property name="plugins"> --><!--     <array> --><!--         <bean class="com.github.pagehelper.PageInterceptor"/> --><!--     </array> --><!-- </property> --></bean><!--配置mapper接口的扫描配置,由mybatis-spring提供,可以将指定包下所有的mapper接口创建动态代理,并将这些动态代理作为IOC容器的bean管理,可以直接在Spring的IOC中获取Mapper接口了。--><bean class="org.mybatis.spring.mapper.MapperScannerConfigurer"><property name="sqlSessionFactoryBeanName" value="sqlSessionFactory"/><property name="basePackage" value="com.dao"/></bean>
</beans>
3、容器二:配置springMVC.xml文件🎊
<beans xmlns="http://www.springframework.org/schema/beans"xmlns:xsi="http://www.w3.org/2001/XMLSchema-instance"xmlns:context="http://www.springframework.org/schema/context"xmlns:aop="http://www.springframework.org/schema/aop"xmlns:tx="http://www.springframework.org/schema/tx"xmlns:mvc="http://www.springframework.org/schema/mvc"xsi:schemaLocation="http://www.springframework.org/schema/beanshttp://www.springframework.org/schema/beans/spring-beans.xsdhttp://www.springframework.org/schema/contexthttp://www.springframework.org/schema/context/spring-context.xsdhttp://www.springframework.org/schema/aophttp://www.springframework.org/schema/aop/spring-aop.xsdhttp://www.springframework.org/schema/txhttp://www.springframework.org/schema/tx/spring-tx.xsdhttp://www.springframework.org/schema/mvchttp://www.springframework.org/schema/mvc/spring-mvc.xsd"><!-- 启动mvc注解驱动 --><mvc:annotation-driven/><!-- 配置扫描的包 --><context:component-scan base-package="com.controller"/><!-- 配置视图解析器 --><bean class="org.springframework.web.servlet.view.InternalResourceViewResolver"><property name="prefix" value="/"></property><property name="suffix" value=".jsp"></property></bean><mvc:cors><mvc:mapping path="/**" allowed-origins="*" allowed-headers="*" allowed-methods="*" allow-credentials="false"max-age="3600"/></mvc:cors><mvc:interceptors><mvc:interceptor><mvc:mapping path="/**"/><bean id="corsInterceptor" class="com.interceptor.CORSInterceptor"/></mvc:interceptor><mvc:interceptor><mvc:mapping path="/**"/><mvc:exclude-mapping path="/login"/><mvc:exclude-mapping path="/register"/><bean id="loginInterceptor" class="com.interceptor.LoginInterceptor"/></mvc:interceptor></mvc:interceptors>
</beans>
4、Tomcat整合spring容器、springMVC容器,webapp文件下的web.xml文件🎊
<!DOCTYPE web-app PUBLIC"-//Sun Microsystems, Inc.//DTD Web Application 2.3//EN""http://java.sun.com/dtd/web-app_2_3.dtd" ><web-app xmlns="http://xmlns.jcp.org/xml/ns/javaee"xmlns:xsi="http://www.w3.org/2001/XMLSchema-instance"xsi:schemaLocation="http://xmlns.jcp.org/xml/ns/javaee http://xmlns.jcp.org/xml/ns/javaee/web-app_4_0.xsd"version="4.0"><!-- tomcat整合spring --><!--配置Spring的编码过滤器--><!--配置Spring的监听器,在服务器启动的时候加载Spring的配置文件 --><listener><listener-class>org.springframework.web.context.ContextLoaderListener</listener-class></listener><!--设置spring配置文件自定义的位置和名称--><context-param><param-name>contextConfigLocation</param-name><param-value>classpath:spring.xml</param-value></context-param><!-- <filter> --><!-- <filter-name>CharacterEncodingFilter</filter-name> --><!-- <filter-class>org.springframework.web.filter.CharacterEncodingFilter</filter-class> --><!-- <!–只设置这个只会处理请求的编码,两个都设置请求响应都会处理–> --><!-- <init-param> --><!-- <param-name>encoding</param-name> --><!-- <param-value>UTF-8</param-value> --><!-- </init-param> --><!-- <init-param> --><!-- <param-name>forceEncoding</param-name> --><!-- <param-value>true</param-value> --><!-- </init-param> --><!-- </filter> --><!-- <filter-mapping> --><!-- <filter-name>CharacterEncodingFilter</filter-name> --><!-- <url-pattern>/*</url-pattern> --><!-- </filter-mapping> --><!-- <!– 配置处理请求方式PUT和DELETE的过滤器–> --><!-- <filter> --><!-- <filter-name>HiddenHttpMethodFilter</filter-name> --><!-- <filter-class>org.springframework.web.filter.HiddenHttpMethodFilter</filter-class> --><!-- </filter> --><!-- <filter-mapping> --><!-- <filter-name>HiddenHttpMethodFilter</filter-name> --><!-- <url-pattern>/*</url-pattern> --><!-- </filter-mapping> --><!-- tomcat整合spring --><!-- 配置SpringMVC的前端控制器 --><servlet><servlet-name>DispatcherServlet</servlet-name><servlet-class>org.springframework.web.servlet.DispatcherServlet</servlet-class><!-- 设置SpringMVC的配置文件的位置和名称 --><init-param><param-name>contextConfigLocation</param-name><param-value>classpath:springMVC.xml</param-value></init-param><!-- 将DispatcherServlet的初始化时间提前到服务器启动时--><load-on-startup>1</load-on-startup></servlet><!-- 为什么使用/,并且这里为什么会默认放行jsp?设置/是为了兜底的,因为只有一个servlet,就是默认为DispatcherServlet的servlet,需要使用这个servlet拦截请求。因为jsp底层本身就是servlet,设置多个servlet此时只映射的是DispatcherServlet--><servlet-mapping><servlet-name>DispatcherServlet</servlet-name><url-pattern>/</url-pattern></servlet-mapping></web-app>
二、一个容器整合
1、 现在去掉了spring.xml文件,将spring.xml文件的内容放到springMVC🎊
springMVC.xml文件如下:
<beans xmlns="http://www.springframework.org/schema/beans"xmlns:xsi="http://www.w3.org/2001/XMLSchema-instance"xmlns:context="http://www.springframework.org/schema/context"xmlns:aop="http://www.springframework.org/schema/aop"xmlns:tx="http://www.springframework.org/schema/tx"xmlns:mvc="http://www.springframework.org/schema/mvc"xsi:schemaLocation="http://www.springframework.org/schema/beanshttp://www.springframework.org/schema/beans/spring-beans.xsdhttp://www.springframework.org/schema/contexthttp://www.springframework.org/schema/context/spring-context.xsdhttp://www.springframework.org/schema/aophttp://www.springframework.org/schema/aop/spring-aop.xsdhttp://www.springframework.org/schema/txhttp://www.springframework.org/schema/tx/spring-tx.xsdhttp://www.springframework.org/schema/mvchttp://www.springframework.org/schema/mvc/spring-mvc.xsd"><!-- 2*3+1 --><!--扫描组件(除控制层)--><context:component-scan base-package="com.service,com.service.serviceImpl,com.interceptor,com.exception"><!-- 按照注解进行排除,标注了指定注解的组件不要扫描 --><!--        <context:exclude-filter type="annotation" expression="org.springframework.stereotype.Controller"/>--><!-- 指定排除某个具体的类,按照类排除  --><!-- <context:exclude-filter type="assignable" expression="com.controller.EmpController"/> --></context:component-scan><!-- 配置数据源 --><!--引入config.properties--><bean class="org.springframework.beans.factory.config.PropertyPlaceholderConfigurer"><property name="locations"><list><value>classpath:config.properties</value></list></property></bean><!-- 配置数据参数与连接属性 --><bean id="dataSource" class="com.mchange.v2.c3p0.ComboPooledDataSource" destroy-method="close"><property name="driverClass" value="${driver}"></property><property name="maxPoolSize" value="100"></property><property name="minPoolSize" value="30"></property><property name="jdbcUrl" value="${url}"></property><property name="user" value="${username}"></property><property name="password" value="${password}"></property></bean><!-- 配置spring事务管理器 --><bean id="transactionManager"class="org.springframework.jdbc.datasource.DataSourceTransactionManager"><property name="dataSource" ref="dataSource"/></bean><!--开启事务的注解驱动,将使用注解 @Transactional 标识的方法或类中所有的方法进行事务关联--><tx:annotation-driven transaction-manager="transactionManager"/><!-- 配置SqlSessionFactoryBean,可以直接在Spring的IOC中获取SqlSessionFactory--><bean id="sqlSessionFactory" class="org.mybatis.spring.SqlSessionFactoryBean"><!-- 设置MyBatis的核心配置文件的路径 --><property name="configLocation" value="classpath:mybatis-config.xml"/><!-- 设置数据源 --><property name="dataSource" ref="dataSource"/><!-- 设置类型别名,默认为类名 --><!-- <property name="typeAliasesPackage" value="com.pojo"/> --><!-- 设置映射文件所在的包,只有在映射文件的包和mapper接口的包不一致时需要设置 --><property name="mapperLocations" value="classpath:com/dao/*.xml"/><!--引入分页插件--><!-- <property name="plugins"> --><!--     <array> --><!--         <bean class="com.github.pagehelper.PageInterceptor"/> --><!--     </array> --><!-- </property> --></bean><!--配置mapper接口的扫描配置,由mybatis-spring提供,可以将指定包下所有的mapper接口创建动态代理,并将这些动态代理作为IOC容器的bean管理,可以直接在Spring的IOC中获取Mapper接口了。--><bean class="org.mybatis.spring.mapper.MapperScannerConfigurer"><property name="sqlSessionFactoryBeanName" value="sqlSessionFactory"/><property name="basePackage" value="com.dao"/></bean><!-- 启动mvc注解驱动 --><mvc:annotation-driven/><!-- 配置扫描的包 --><context:component-scan base-package="com.controller"/><!-- 配置视图解析器 --><bean class="org.springframework.web.servlet.view.InternalResourceViewResolver"><property name="prefix" value="/"></property><property name="suffix" value=".jsp"></property></bean><mvc:cors><mvc:mapping path="/**" allowed-origins="*" allowed-headers="*" allowed-methods="*" allow-credentials="false"max-age="3600"/></mvc:cors><mvc:interceptors><mvc:interceptor><mvc:mapping path="/**"/><bean id="corsInterceptor" class="com.interceptor.CORSInterceptor"/></mvc:interceptor><mvc:interceptor><mvc:mapping path="/**"/><mvc:exclude-mapping path="/login"/><mvc:exclude-mapping path="/register"/><bean id="loginInterceptor" class="com.interceptor.LoginInterceptor"/></mvc:interceptor></mvc:interceptors>
</beans>
2、Tomcat整合springMVC容器,webapp文件下的web.xml文件🎊
<!DOCTYPE web-app PUBLIC"-//Sun Microsystems, Inc.//DTD Web Application 2.3//EN""http://java.sun.com/dtd/web-app_2_3.dtd" ><web-app xmlns="http://xmlns.jcp.org/xml/ns/javaee"xmlns:xsi="http://www.w3.org/2001/XMLSchema-instance"xsi:schemaLocation="http://xmlns.jcp.org/xml/ns/javaee http://xmlns.jcp.org/xml/ns/javaee/web-app_4_0.xsd"version="4.0"><!-- tomcat整合springMVC --><!-- 配置SpringMVC的前端控制器 --><servlet><servlet-name>DispatcherServlet</servlet-name><servlet-class>org.springframework.web.servlet.DispatcherServlet</servlet-class><!-- 设置SpringMVC的配置文件的位置和名称 --><init-param><param-name>contextConfigLocation</param-name><param-value>classpath:springMVC.xml</param-value></init-param><!-- 将DispatcherServlet的初始化时间提前到服务器启动时--><load-on-startup>1</load-on-startup></servlet><!-- 为什么使用/,并且这里为什么会默认放行jsp?设置/是为了兜底的,因为只有一个servlet,就是默认为DispatcherServlet的servlet,需要使用这个servlet拦截请求。因为jsp底层本身就是servlet,设置多个servlet此时只映射的是DispatcherServlet--><servlet-mapping><servlet-name>DispatcherServlet</servlet-name><url-pattern>/</url-pattern></servlet-mapping></web-app>