【Qt开发流程之】布局管理
介绍
一个界面呈现,如果要让用户有更好的观感,布局必不可少。
【Qt之布局】QVBoxLayout、QHBoxLayout、QGridLayout、QFormLayout介绍及使用
链接: https://blog.csdn.net/MrHHHHHH/article/details/133915208
qt布局类图:
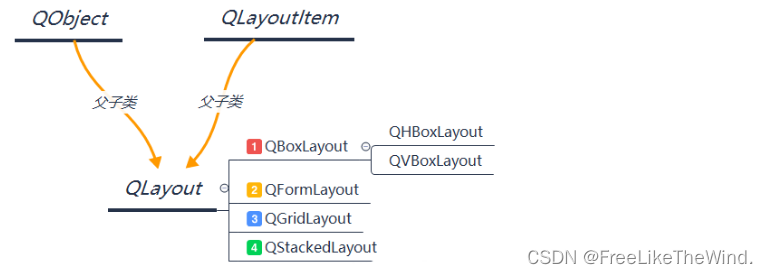
Qt布局是Qt图形用户界面框架中的一种自动布局机制,它可以根据窗口大小和内容自动调整控件位置和大小。Qt提供了多种布局,如水平布局、垂直布局、网格布局等。开发者可以使用布局来快速构建自适应的界面。
使用布局有以下步骤:
- 创建一个QWidget或QMainWindow。
- 创建需要放入布局中的控件。
- 创建布局,例如QHBoxLayout、QVBoxLayout或QGridLayout。
- 将控件添加到布局中。
- 将布局应用到QWidget或QMainWindow上。
QBoxLayout
QBoxLayout类水平或垂直排列子部件。
QBoxLayout获取它(从父布局或parentWidget())获得的空间,将其划分为一排框,并使每个托管小部件填充一个框。
水平布局:

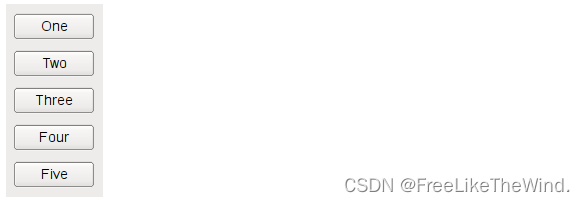
垂直布局:
示例:
水平布局
horizontalGroupBox = new QGroupBox(tr("Horizontal layout"));QHBoxLayout *layout = new QHBoxLayout;for (int i = 0; i < NumButtons; ++i) {buttons[i] = new QPushButton(tr("Button %1").arg(i + 1));layout->addWidget(buttons[i]);}horizontalGroupBox->setLayout(layout);
垂直布局
QWidget *widget = new QWidget;QPushButton *btn1 = new QPushButton("Button 1", widget);QPushButton *btn2 = new QPushButton("Button 2", widget);QPushButton *btn3 = new QPushButton("Button 3", widget);QVBoxLayout *layout = new QVBoxLayout(widget);layout->addWidget(btn1);layout->addWidget(btn2);layout->addWidget(btn3);widget->setLayout(layout);widget->setGeometry(300, 300, 300, 200);widget->show();
QFormLayout
QFormLayout类管理输入小部件的表单及其相关标签。
QFormLayout是一个方便的布局类,它以两列的形式布局它的子类。左列由标签组成,右列由“字段”小部件(行编辑器、旋转框等)组成。

示例:
QFormLayout *formLayout = new QFormLayout;formLayout->addRow(tr("&Name:"), nameLineEdit);formLayout->addRow(tr("&Email:"), emailLineEdit);formLayout->addRow(tr("&Age:"), ageSpinBox);setLayout(formLayout);
QGridLayout
QGridLayout类在网格中布局小部件。
QGridLayout占用它可用的空间(通过其父布局或parentWidget()),将其划分为行和列,并将它管理的每个小部件放入正确的单元格中。
列和行行为相同;我们将讨论列,但是行也有等价的函数。
每个列都有一个最小宽度和一个拉伸系数。最小宽度是使用setColumnMinimumWidth()设置的最大宽度,以及该列中每个小部件的最小宽度。拉伸因子是使用setColumnStretch()设置的,它决定了列的可用空间将超过其必要的最小值。
通常,使用addWidget()将每个托管小部件或布局放入自己的单元格中。使用addItem()和addWidget()的行和列跨越重载,小部件也可能占用多个单元格。如果这样做,QGridLayout将猜测如何在列/行上分配大小(基于拉伸因子)。
要从布局中删除小部件,请调用removeWidget()。在小部件上调用QWidget::hide()还可以有效地从布局中删除小部件,直到调用QWidget::show()。

示例:
nameLabel = new QLabel(tr("&Name:"));nameLabel->setBuddy(nameLineEdit);emailLabel = new QLabel(tr("&Name:"));emailLabel->setBuddy(emailLineEdit);ageLabel = new QLabel(tr("&Name:"));ageLabel->setBuddy(ageSpinBox);QGridLayout *gridLayout = new QGridLayout;gridLayout->addWidget(nameLabel, 0, 0);gridLayout->addWidget(nameLineEdit, 0, 1);gridLayout->addWidget(emailLabel, 1, 0);gridLayout->addWidget(emailLineEdit, 1, 1);gridLayout->addWidget(ageLabel, 2, 0);gridLayout->addWidget(ageSpinBox, 2, 1);setLayout(gridLayout);
QStackedLayout
QStackedLayout类提供了一个窗口小部件堆栈,其中一次只有一个窗口小部件可见。
QStackedLayout可用于创建类似于QTabWidget提供的用户界面。在qstackkedlayout之上还有一个方便的qstackkedwidget类。
QStackedLayout可以用许多子部件(“页面”)填充。例如:
QWidget *firstPageWidget =新QWidget;
QWidget *secondPageWidget = new QWidget;
QWidget *thirdPageWidget = new QWidget;qstackkedlayout * stackkedlayout = new qstackkedlayout;
stackedLayout - > addWidget (firstPageWidget);
stackedLayout - > addWidget (secondPageWidget);
stackedLayout - > addWidget (thirdPageWidget);QVBoxLayout *mainLayout = new QVBoxLayout;
mainLayout - > addLayout (stackedLayout);
setLayout (mainLayout);
QStackedLayout没有为用户提供切换页面的内在方法。这通常是通过QComboBox或QListWidget来完成的,它们存储QStackedLayout页面的标题。例如:
QComboBox *pageComboBox = new QComboBox;
pageComboBox - > addItem (tr(“第1页”));
pageComboBox - > addItem (tr(第2页));
pageComboBox - > addItem (tr(第3页));
连接(pageComboBox信号(激活(int)),
stackedLayout槽(setCurrentIndex (int)));
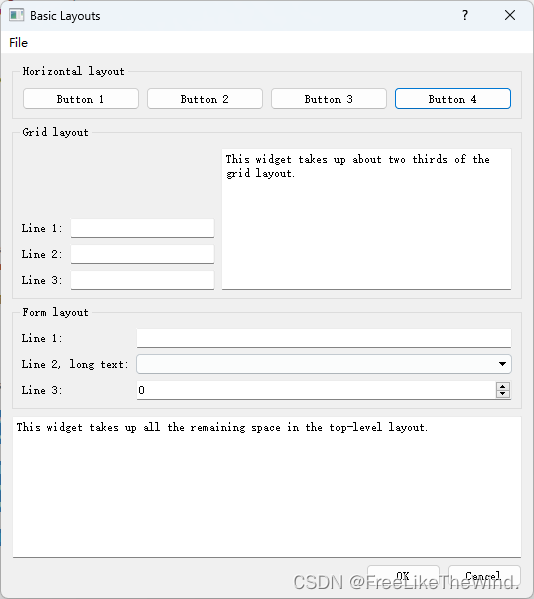
综合使用布局示例
真正使用时,一定是将他们结合起来使用。
先上UI:
sizeHint()和minimunSizeHint():这两个方法是继承QWidget类的虚函数。
sizeHint():大小提示,不同部件默认拥有不同的大小
minimunSizeHint():最小大小提示,建议最小大小提示
sizePolicy策略:
| Constant | Value | Description | |
|---|---|---|---|
| QSizePolicy::Fixed | 0 | The QWidget::sizeHint() is the only acceptable alternative, so the widget can never grow or shrink (e.g. the vertical direction of a push button). | QWidget::sizeHint()是唯一可接受的替代方法,因此小部件永远不能增长或缩小(例如,按钮的垂直方向)。 |
| QSizePolicy::Minimum | GrowFlag | The sizeHint() is minimal, and sufficient. The widget can be expanded, but there is no advantage to it being larger (e.g. the horizontal direction of a push button). It cannot be smaller than the size provided by sizeHint(). | sizeHint()是最小的,也是足够的。小部件可以扩展,但它变大没有好处(例如,按钮的水平方向)。它不能小于sizeHint()提供的大小。 |
| QSizePolicy::Maximum | ShrinkFlag | The sizeHint() is a maximum. The widget can be shrunk any amount without detriment if other widgets need the space (e.g. a separator line). It cannot be larger than the size provided by sizeHint(). | sizeHint()是一个最大值。如果其他部件需要空间(例如分隔线),则小部件可以任意缩小而不会损害。它不能大于sizeHint()提供的大小。 |
| QSizePolicy::Preferred | GrowFlag ShrinkFlag | The sizeHint() is best, but the widget can be shrunk and still be useful. The widget can be expanded, but there is no advantage to it being larger than sizeHint() (the default QWidget policy). | sizeHint()是最好的,但是小部件可以缩小,但仍然有用。小部件可以展开,但是它比sizeHint()(默认的QWidget策略)大没有好处。 |
| QSizePolicy::Expanding | GrowFlag ShrinkFlag ExpandFlag | The sizeHint() is a sensible size, but the widget can be shrunk and still be useful. The widget can make use of extra space, so it should get as much space as possible (e.g. the horizontal direction of a horizontal slider). | sizeHint()是一个合理的大小,但是小部件可以缩小并且仍然有用。小部件可以利用额外的空间,所以它应该得到尽可能多的空间(例如,水平滑块的水平方向)。 |
| QSizePolicy::MinimumExpanding | GrowFlag ExpandFlag | The sizeHint() is minimal, and sufficient. The widget can make use of extra space, so it should get as much space as possible (e.g. the horizontal direction of a horizontal slider). | sizeHint()是最小的,也是足够的。小部件可以利用额外的空间,所以它应该得到尽可能多的空间(例如,水平滑块的水平方向)。 |
| QSizePolicy::Ignored | ShrinkFlag GrowFlag IgnoreFlag | The sizeHint() is ignored. The widget will get as much space as possible. | sizeHint()被忽略。小部件将获得尽可能多的空间。 |
.h
#ifndef DIALOG_H
#define DIALOG_H#include <QDialog>QT_BEGIN_NAMESPACE
class QAction;
class QDialogButtonBox;
class QGroupBox;
class QLabel;
class QLineEdit;
class QMenu;
class QMenuBar;
class QPushButton;
class QTextEdit;
QT_END_NAMESPACEclass Dialog : public QDialog
{Q_OBJECTpublic:Dialog();private:void createMenu();void createHorizontalGroupBox();void createGridGroupBox();void createFormGroupBox();enum { NumGridRows = 3, NumButtons = 4 };QMenuBar *menuBar;QGroupBox *horizontalGroupBox;QGroupBox *gridGroupBox;QGroupBox *formGroupBox;QTextEdit *smallEditor;QTextEdit *bigEditor;QLabel *labels[NumGridRows];QLineEdit *lineEdits[NumGridRows];QPushButton *buttons[NumButtons];QDialogButtonBox *buttonBox;QMenu *fileMenu;QAction *exitAction;
};#endif // DIALOG_H
.cpp
#include <QtWidgets>#include "dialog.h"Dialog::Dialog()
{createMenu();createHorizontalGroupBox();createGridGroupBox();createFormGroupBox();bigEditor = new QTextEdit;bigEditor->setPlainText(tr("This widget takes up all the remaining space ""in the top-level layout."));buttonBox = new QDialogButtonBox(QDialogButtonBox::Ok| QDialogButtonBox::Cancel);connect(buttonBox, SIGNAL(accepted()), this, SLOT(accept()));connect(buttonBox, SIGNAL(rejected()), this, SLOT(reject()));QVBoxLayout *mainLayout = new QVBoxLayout;mainLayout->setMenuBar(menuBar);mainLayout->addWidget(horizontalGroupBox);mainLayout->addWidget(gridGroupBox);mainLayout->addWidget(formGroupBox);mainLayout->addWidget(bigEditor);mainLayout->addWidget(buttonBox);setLayout(mainLayout);setWindowTitle(tr("Basic Layouts"));
}void Dialog::createMenu()
{menuBar = new QMenuBar;fileMenu = new QMenu(tr("&File"), this);exitAction = fileMenu->addAction(tr("E&xit"));menuBar->addMenu(fileMenu);connect(exitAction, SIGNAL(triggered()), this, SLOT(accept()));
}void Dialog::createHorizontalGroupBox()
{horizontalGroupBox = new QGroupBox(tr("Horizontal layout"));QHBoxLayout *layout = new QHBoxLayout;for (int i = 0; i < NumButtons; ++i) {buttons[i] = new QPushButton(tr("Button %1").arg(i + 1));layout->addWidget(buttons[i]);}horizontalGroupBox->setLayout(layout);
}void Dialog::createGridGroupBox()
{gridGroupBox = new QGroupBox(tr("Grid layout"));QGridLayout *layout = new QGridLayout;for (int i = 0; i < NumGridRows; ++i) {labels[i] = new QLabel(tr("Line %1:").arg(i + 1));lineEdits[i] = new QLineEdit;layout->addWidget(labels[i], i + 1, 0);layout->addWidget(lineEdits[i], i + 1, 1);}smallEditor = new QTextEdit;smallEditor->setPlainText(tr("This widget takes up about two thirds of the ""grid layout."));layout->addWidget(smallEditor, 0, 2, 4, 1);layout->setColumnStretch(1, 10);layout->setColumnStretch(2, 20);gridGroupBox->setLayout(layout);
}void Dialog::createFormGroupBox()
{formGroupBox = new QGroupBox(tr("Form layout"));QFormLayout *layout = new QFormLayout;layout->addRow(new QLabel(tr("Line 1:")), new QLineEdit);layout->addRow(new QLabel(tr("Line 2, long text:")), new QComboBox);layout->addRow(new QLabel(tr("Line 3:")), new QSpinBox);formGroupBox->setLayout(layout);
}
main.cpp
#include <QApplication>#include "dialog.h"int main(int argc, char *argv[])
{QApplication app(argc, argv);Dialog dialog;dialog.show();return app.exec();
}
分裂器
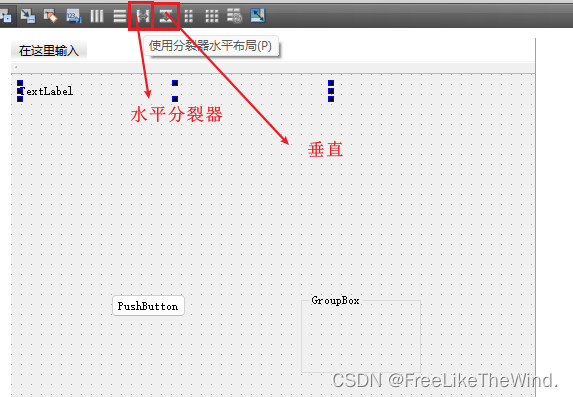
选择控件后,上方工具栏会亮
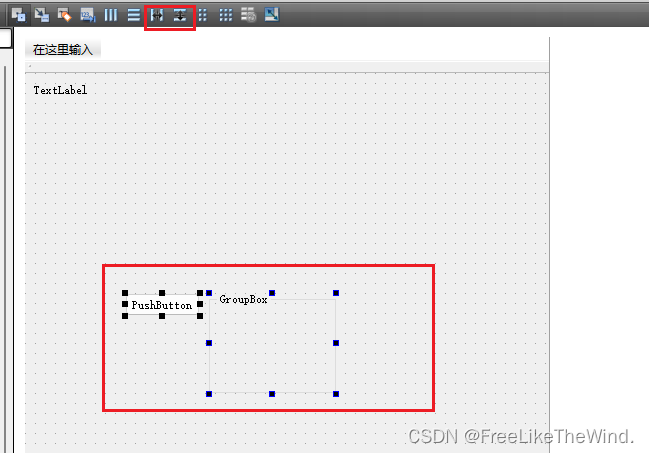
使用分裂器,可以设置伸缩因子,界面显示更加美观,合理,更符合人体工程学。
设置伙伴
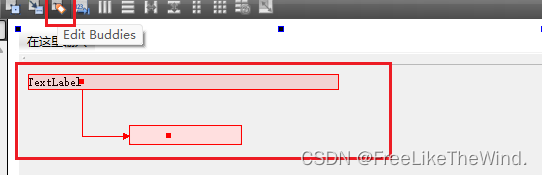
设置伙伴后,可以将文本名称中添加&符号,这样按Alt+&后面的字符就可以对设置的伙伴就行操作。
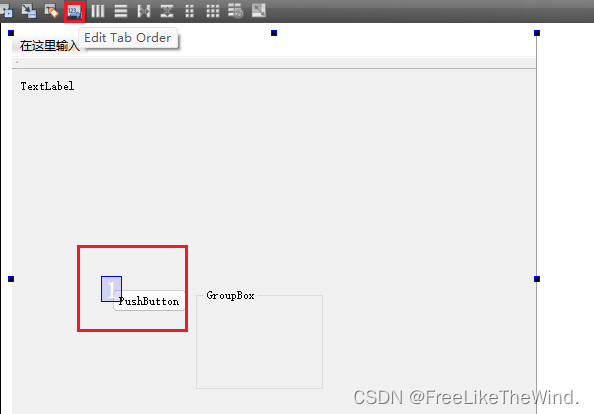
设置Tab键顺序
设置Tab键顺序,这样启动程序后,使用tab键可以按照指定顺序就行控件焦点选择
定位器
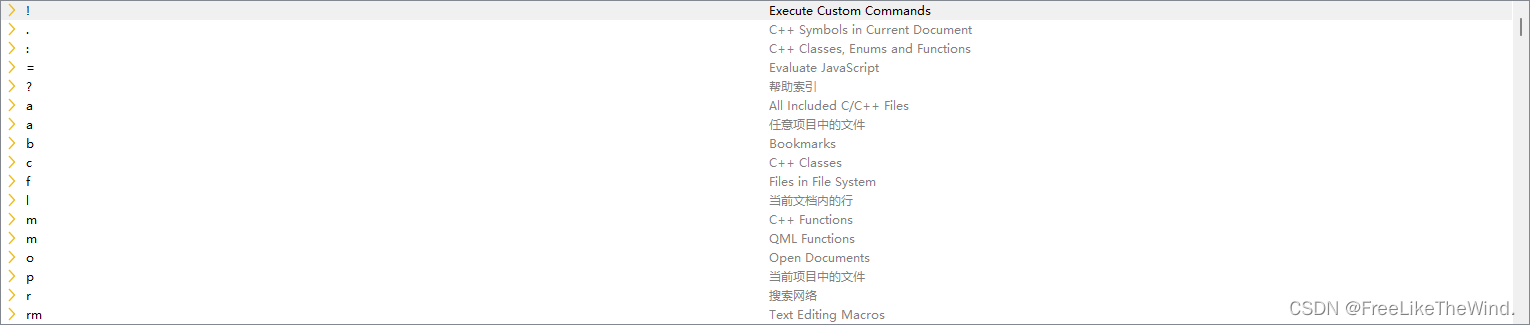
如:
输入l 9,就会定位当当前文件的第九行。
结论
对于一个成熟的软件,合理的布局是必要的。